Saturday, September 24, 2022

Truck Bed Pumpkin Theme Hanging


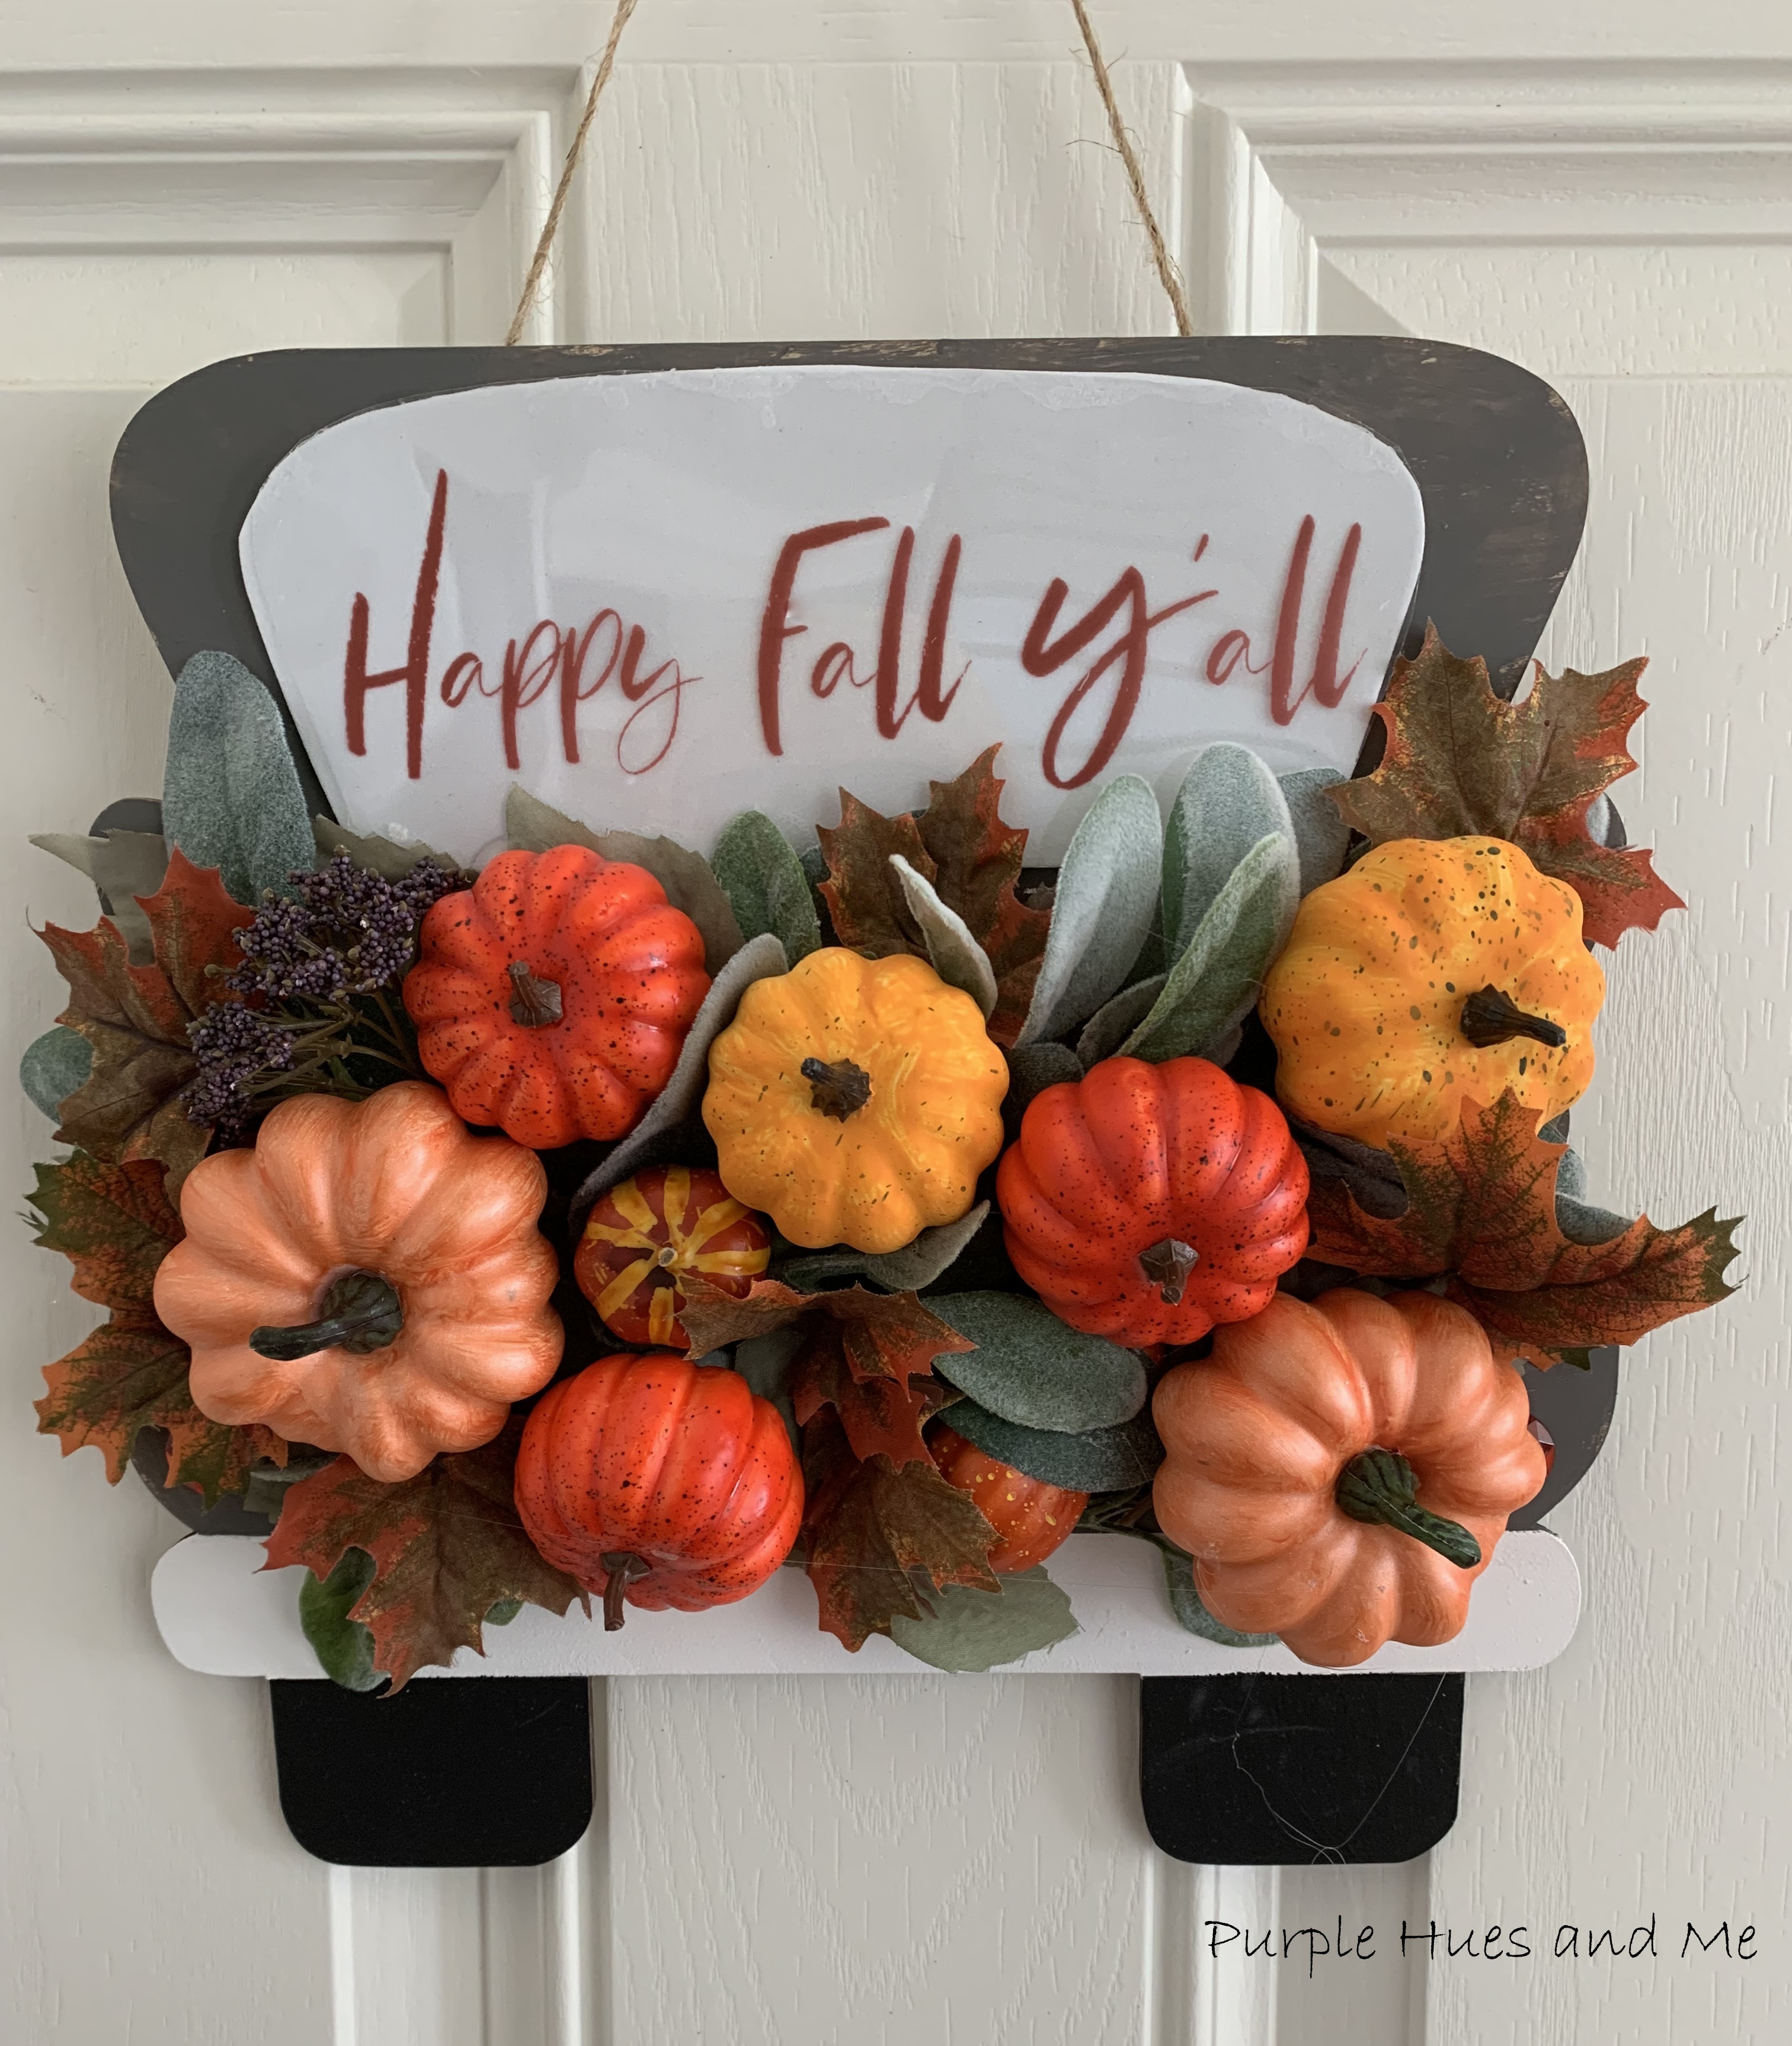
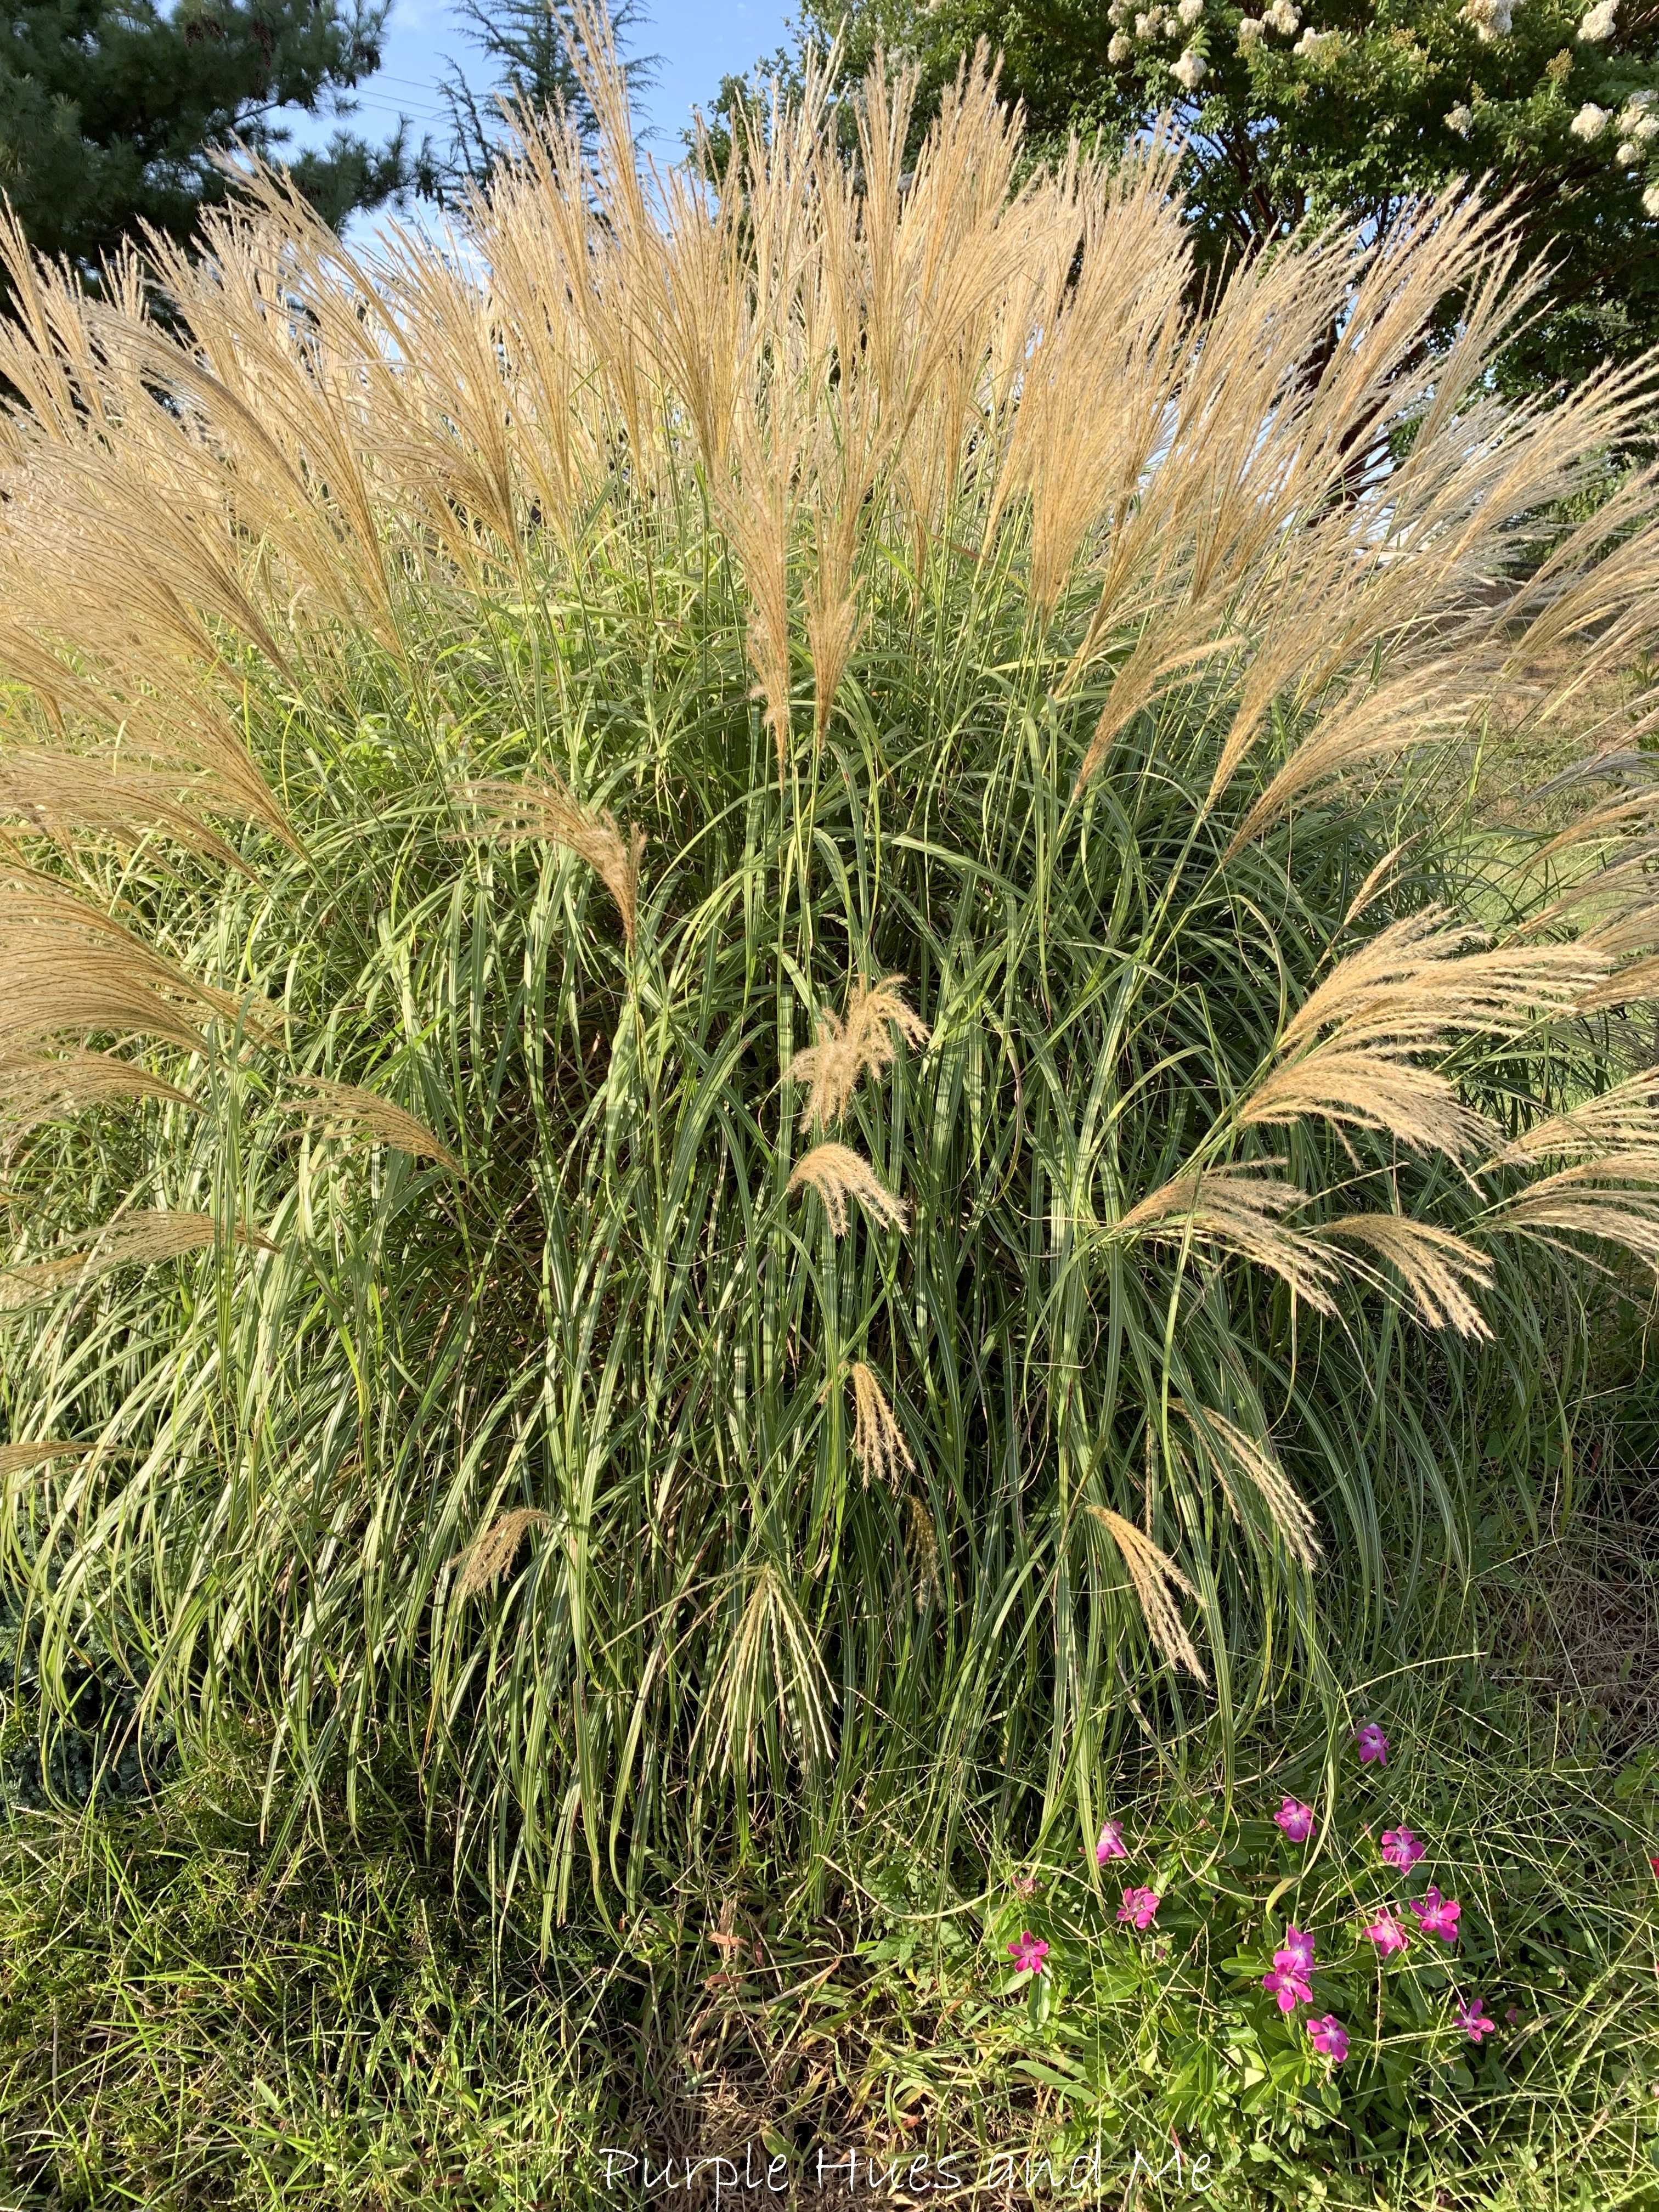
 Welcome Fall with a pumpkin theme truck bed wall or door hanging! I found the unfinish wood truck bed plaque among my craft stash items. I don't remember where I got it. I'm thinking I might have gotten it from  AC Moore during it's going out of business sale. In any event, once finished, it's a fun way to greet family and guest with this charming alternative to a fall wreath! 

It's also a perfect project for this month's Do It Over Designers - 'Do Over' project. In case you don't know, the Do It Over Designers is a group of talented bloggers who love to recycle/upcycle/DIY, hosted by Anne @The Apple Street Cottage. It happens the 4th Saturday of every other month and it's all about taking something old and/or unused and 'doing it over' into something new. Anything from fabric, old dishes, and decor to dressers and hutches. Items found in closets, cabinets, barns, garages, yard sales, thrift stores, you name it! I hope you'll visit all the super creative bloggers to see their amazing "do over" projects.  The list of participants are at the end of this post.


Materials Used:

  • Unfinish wood truck bed
  • Acrylic paint/brush
  • Masking tape
  • Foam Sheet
  • Red Flat Round Jewels
  • Clear Transparent Sheet/Sign
  • Florals/Fall Leaves
  • Small Pumpkins
  • Hot Glue
  • Command Hooks/jute twine
How to:
First, remove any dirt and grime from the truck by wiping it down with a combination of dish soap mixed with lukewarm water.  This is a mild cleaner that works for untreated, unfinished wood. Let dry.

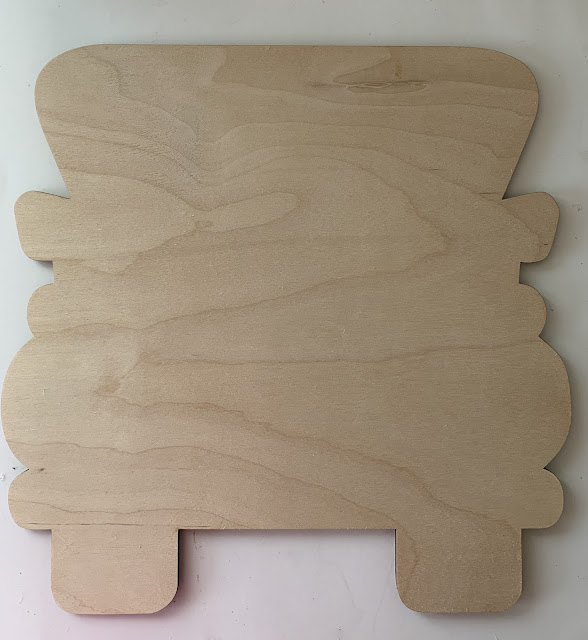
Then, simply paint a few layers of acrylic paint onto the unfinish wood truck bed and .  .  .

let dry.
Once the paint is completely dry, lay masking tape across bottom and wheels to outline the bumper and .  .  .
paint the bumper.

Next, cut out a window shape using white foam sheet and glue in place. Then glue on red flat round jewels for the back lights and begin gluing on greenery along the truck bed. 
Oops, I was so eager to see how the florals would look, I forgot to paint the wheels black after painting the bumper! (not pictured)
Then start gluing on small colorful pumpkins, randomly .  .  .
The 'Happy Fall Y'all' saying was printed on  clear transparent film (to give a glass effect) and cut out the same size as the foam sheet. Then applied fabric glue along the edges to attach - drying clear.
To hang, command strip clips were applied to the back and jute twine wrapped around the clips.
                 
Colorful faux pumpkins displayed in the bed of the truck adds a dramatic look to fall decor, rounding out the design with vibrant fall leaves and a welcoming sign to create a warm Fall greeting!


I hope you enjoyed my tutorial on making a Truck Bed Pumpkin Theme Hanging!  Be sure to pin for inspiration to make one as an alternative to a fall wreath! Now check out the other creative 'Do Over' Designers' projects listed below!

Sum of Their Stories

Tea and Forget-Me-Nots

The Apple Street Cottage

Birdz of a Feather

Exquisitely Unremarkable

Southern Sunflowers

Purple Hues & Me


Thursday, September 15, 2022

DIY Clay Fall Leaf Dish

Air dry clay is becoming one of my favorite mediums to craft with. I've been playing with clay a lot - something I didn't like doing as a child. I could never make anything fun with it. But now there seems to be some amazing things you can do with air dry clay. I've made an MC design scalloped edge dish, a clay and raffia bowl, a pumpkin stem, clay angels, and decorative flowers! I've even made a few items using oven dry clay, too! 

Every month I look forward to participating in the Creative Craft Hop, hosted by Sara @Birdz of a Feather. And since I already had air dry clay left over from  previous projects, I decided to make a simple maple leaf dish! Something to put trinkets or decorative pieces on during the fall season! But this time instead of air drying the dish, I put it in the oven since time was running out to complete this post and couldn't wait two days or more for it to dry. 

Wednesday, September 14, 2022

Gold Hot Glue Leaves on Pumpkin


For fall, have I got a fun way to glam up your pumpkins with hot glue leaves coated with a sparkling gold finish! Why not take your fall decor to the next level with this "hot" idea! 

Materials Used:

  • Pumpkin
  • Acrylic paint/Mod Podge Gloss/brushes
  • Leaf silicone mold
  • Hot glue gun/glue sticks
  • DecoArt Extreme Sheen 24K gold metallic paint

For this project, I started with an old pumpkin I had in my stash. It had a silver finish which I easily peeled off to reveal a white foam pumpkin. Next, I started painting the pumpkin with FolkArt's Multi-Surface acrylic paint called Berry Wine. 

I applied three coats .  .  .
letting the pumpkin dry between coats. Then sealed with Mod Podge Gloss
Next, painted the stem with DecoArt Extreme Sheen in 24K gold.
While the stem was drying, began making the hot glue leaves using a silicone mold with eight small leaf molds.  Just to fill two molds half way, I used one regular 4" glue stick.
So I went through lots of glue sticks. - about 15, I think. After the last leaves set, I put them in a box and .  .  .
spray painted them with Rust-oleum gold metallic spray paint outside. And let them dry overnight.

Once the leaves were dry, started gluing them on .  .  .
randomly around the stem.

I love how this pumpkin turned out.  It's simply beautiful!
And goes with my decor, perfectly!   Welcome Fall!

Welcome to this month's Fall Blog Hop hosted by Shae @ Sweet Southern Grace 
Be sure to check out all of the wonderful Fall projects from the participants in this month DIY Fall Challenge:
                                            Hannah @ Baggott Farmhouse

Monday, September 12, 2022

Loopy Yarn Wrapped Pumpkin

I was in Hobby Lobby recently, trying to take advantage of their fifty percent off on Fall and Christmas items. So naturally I'm going aisle by aisle looking for goodies when I came across loopy yarn in maroon, pink and white! Wow, I was loving the color combination! Now, I don't crochet or knit so I immediately thought of wrapping it around a pumpkin! There are so many ways to use loopy yarn! You should see the fabulous wreath my blogging friend, Michelle @Our Crafty Mom, made with loopy yarn.

But how hard would that be to wrap a pumpkin? At first, all of five minutes - from start to finish! Here's the yarn and pumpkin!

 After putting a few strips of double sided tape around the pumpkin, began laying the loopy yarn on top and around the pumpkin!
               

Going around and around .  .  .
until the pumpkin was completely covered. I think this might be the quickest craft I've ever done!
But wait! Look at that stem! Mercy me! It didn't look good - at all!!! But what was I going to do?

Tuesday, September 6, 2022

Nature Inspired Pinecone Fall Swag


Fall is here and what fun it is to look in your outdoor surroundings for goodies to make nature-inspired craft projects! Welcome to our Sustainable Pinterest Challenge Blog Hop hosted by Julie @Sum of Their StoriesThe purpose of this Pinterest Challenge is to motivate all of us to create a project that a) is inspired by a pin on one of our Pinterest boards and b) have some sort of a sustainable element to it. This could be an upcycling or recycling element, or something that reduces waste, uses leftovers, etc. September's blog hop theme is Nature - which makes it very open to interpretation for creating a project! I was inspired by this pin for this challenge.


Amazing natural treasures can be found outdoor for crafts of all kinds. In my neighborhood, those of us (me) living on the north side of my street have an open hilly berm surrounding our backyards and it's filled with lots of pine trees and ornamental grasses among other pretty garden foliage. 

For my project, I just walked up the berm and picked a few pinecones off the tree limbs.
And this ornamental grass happens to be in my yard, so I snipped off a few plumes here and there!  They're great for pretty fall vases, too!

How to make a Nature Inspired Pinecone Fall Swag:

Materials:

  • Pinecones 
  • Plumes from ornamental grasses
  • Ribbon (1.5") and Bowdabra bow wire
  • Beacon Quick Grip adhesive
  • Faux leaves and berries
  • Scissors
  • Clamps


Since I picked the pine cones off the tree, I didn't think there were any bugs in them. They looked clean so I didn't put them in water and detergent first - as some recommended. I do know there was lots of sap since the cones were very sticky. I don't think water and or detergent would have helped removing the sap, though. It was very hard to remove the sap from my hands by scrubbing with soap and a paper towel so I know it would have been harder to try removing the sap from the pine cones. Anyway .  .  .

I began by spreading nine pinecones out on a large baking sheet covered with parchment paper and baking at 225 degrees for about 30 minutes. 
Baking them helped to remove some of the sap (by dripping onto the parchment paper) and the remaining sap on the pinecones spread out along the scales making them quite shiny. Once the pinecones cool off, the sap dries to a nice shiny finish. 

Next, cut strips of ribbon, starting at 22 inches - and gluing each ribbon on with  Quick Hold adhesive by the makers of E6000 instead of hot glue which is not good to use if you plan on hanging the swag outside. And .  .  .
cutting the next 19 strips down by approximately 2 inches each. The last strip being 6" long - for a nice cluster look when placed together.
   
Decorate the top of each pine cone by gluing on stems of ornamental grass, faux leaves (since the real leaves haven't start to turn yet)and berries.
Dovetail all the ribbon ends including the end hanging on top of the pine cone by folding each ribbon together at the end and cutting at an angle from the fold to the opposite end creating a "v" shape.

And finally, make a six loops bow ribbon secured with bow wire and .  .  .

wrapping the wire around the ends of the pinecone ribbon and knotting together, creating a loop in the back for hanging.
Now, it's time to meet the other Sustainable Pinterest Challenge participants and their "Nature" projects!