Are you annoyed when you want to dry laundry and have to place one of those single-use dryer sheets in the dryer to help make the fabrics softer and to prevent static cling? I know I am! In fact, I really dislike the fragrance of those dryer sheets, too! And thanks to this month's Zero Waste Pinterest Challenge, I've discovered a way to eliminate all of that by creating my very own wool dryer balls! There's no need to buy dryer sheets or fabric softeners again! While perusing through Pinterest, I discovered a pin about how to use wool dryer balls for a zero waste laundry routine! Once I read that article, I found a great tutorial on making wool dryer balls on Pinterest, too! Welcome to our Sustainable Pinterest Challenge Blog Hop hosted by Julie @Sum of Their Stories. The purpose of this Pinterest Challenge is to motivate all of us to create a project that a) is inspired by a pin on one of our Pinterest boards and b) have some sort of a sustainable element to it. This could be an upcycling or recycling element, or something that reduces waste, uses leftovers, etc.

There are many zero waste reasons why we should be making our own dryer balls. First off, store bought dryer sheets and fabric softeners are filled with harmful chemicals and perfumes that get in your clothing and on your skin and can be harsh on sensitive skin. Wood dryer balls contain no harsh chemicals. Second, dryer sheets are used only once whereas wool dryer balls can be re-used for months and or years, saving lots of money! Third, wool dryer balls helps to pull moisture out of our clothes so we won't have to run the dryer as long - which saves energy costs. Plus, the more wool dryer balls there are in a load, the shorter the drying time will be. Wool dryer balls also helps to reduce static cling, too! A win, win all around!
Making your own wool dryer balls is quite easy and a great way to use up leftover wool yarn! So let's get started with the . . .
Materials:
- 100% wool yarn
- Old pantyhose or knee-high stockings
- Scissors
- Large eye needle
- Washing machine/dryer
How to:- My mil loved to knit and crochet and was always giving me leftover yarn to go along with some of the wonderful creations she gifted me! She tried teaching me how to do both, but I could never really pick up the techniques. Luckily, I still have yarn in my stash that I can use for other projects. And for making wool dryer balls, the yarn must be 100% wool. If you use yarn that's not 100% wool, the balls will not felt correctly. They will unravel in the dryer and create a stringy mess. You certainly don't want that to happen.
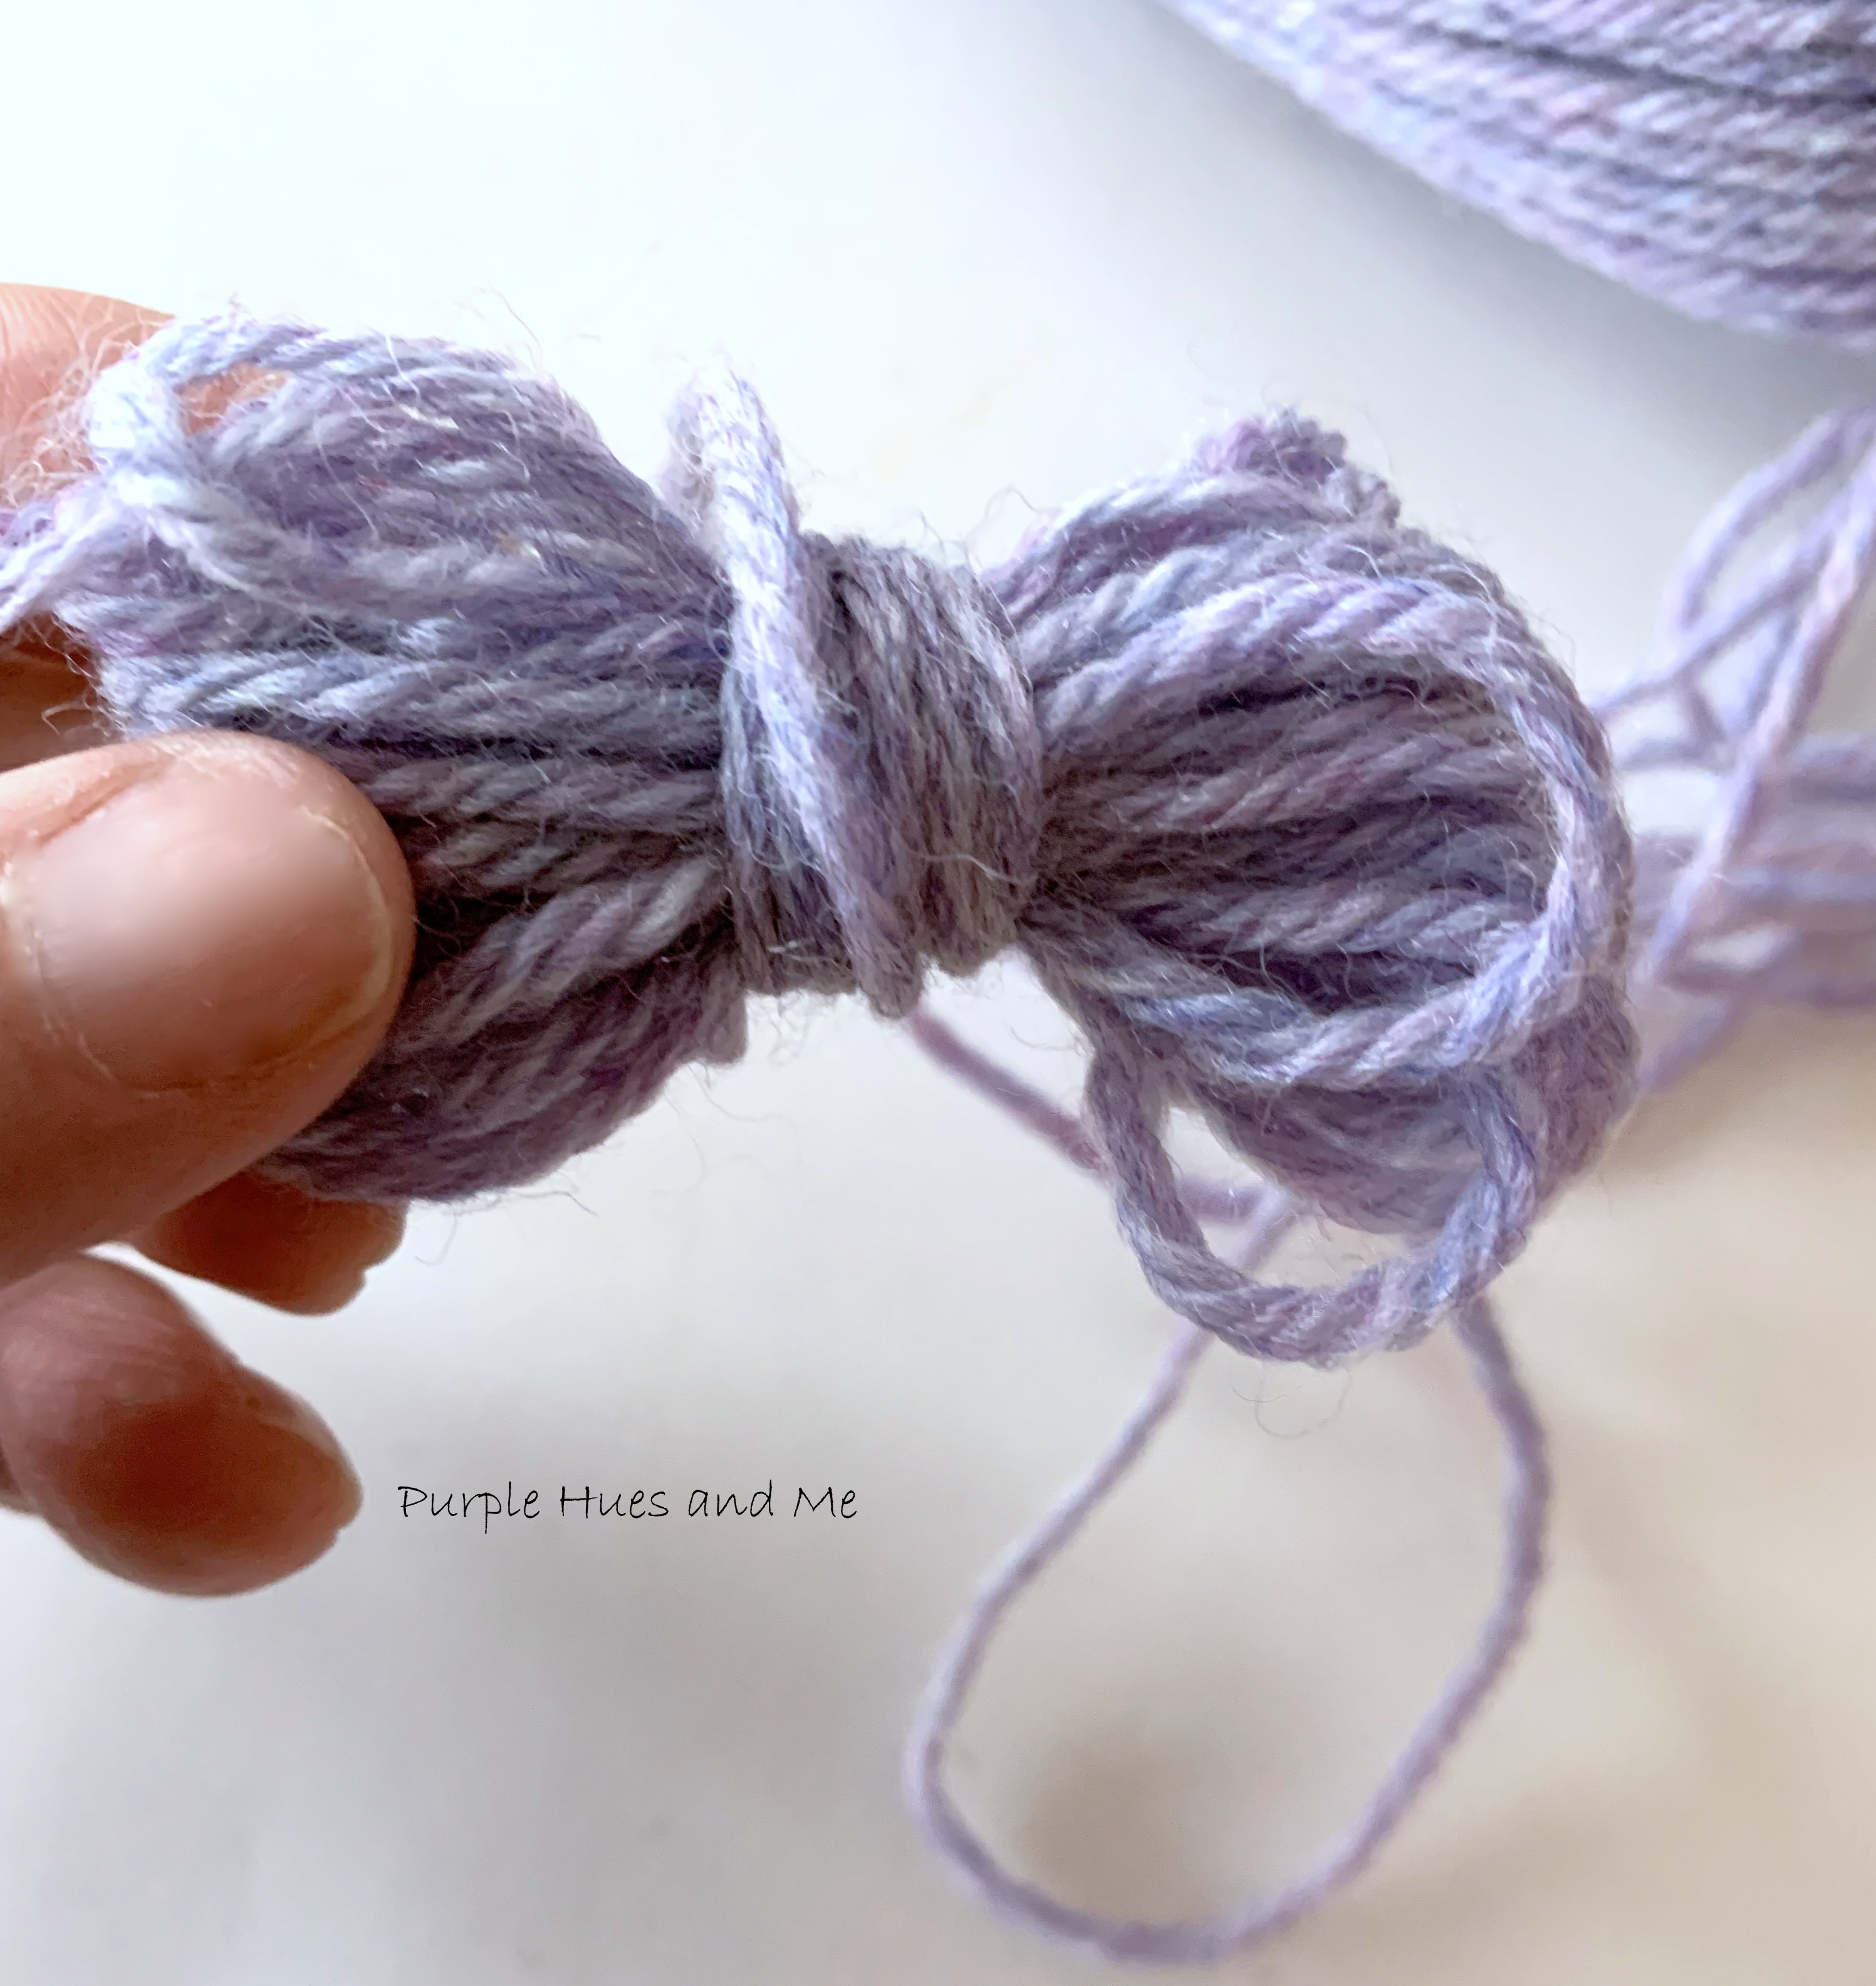
 So take a skein of 100% wool yarn and begin wrapping the end around your fingers at least ten times.
Then pinch the wrapped yarn in the middle and pull the bundle off your fingers, wrapping more yarn around the middle of the bundle.
Continue wrapping the yarn tightly, moving the bundle around forming a ball . . .until you've reached the desired size - around the size of a tennis ball. Once you've reached the desired size, cut off the excess yarn. Thread a large eyed needle with the end of the yarn on the ball . . .
tucking the needle through several layers of yarn and pulling it out leaving the end of yarn inside of ball. This is done to keep the yarn ball from unraveling.
After making a few more wool balls, cut off the leg of an old pair of pantyhose or use a knee-high stocking. Put the first ball in the foot of the pantyhose leg
tying a tight knot with the pantyhose to make sure the balls keep their round shape.Continue adding a wool ball in the pantyhose leg, as close to the previous ball and tying in a knot until all the balls are secured in the pantyhose leg.
Throw all of the yarn balls into the washing machine along with a load of towels or other items that can withstand a hot water temperature. Wash on a hot wash cycle. And then dry in the dryer using the hottest drying setting.
Once dry, cut the nylon and remove the balls . . .
checking to make sure that the wool balls have felted (the wool yarn just melts together). If the balls haven't felted, you can place them in boiling water and run through the cycle again.
Lightly scent your laundry by adding 2-3 drops of your favorite essential oil to each ball. I love the smell of sandalwood and added a few drops to the balls.
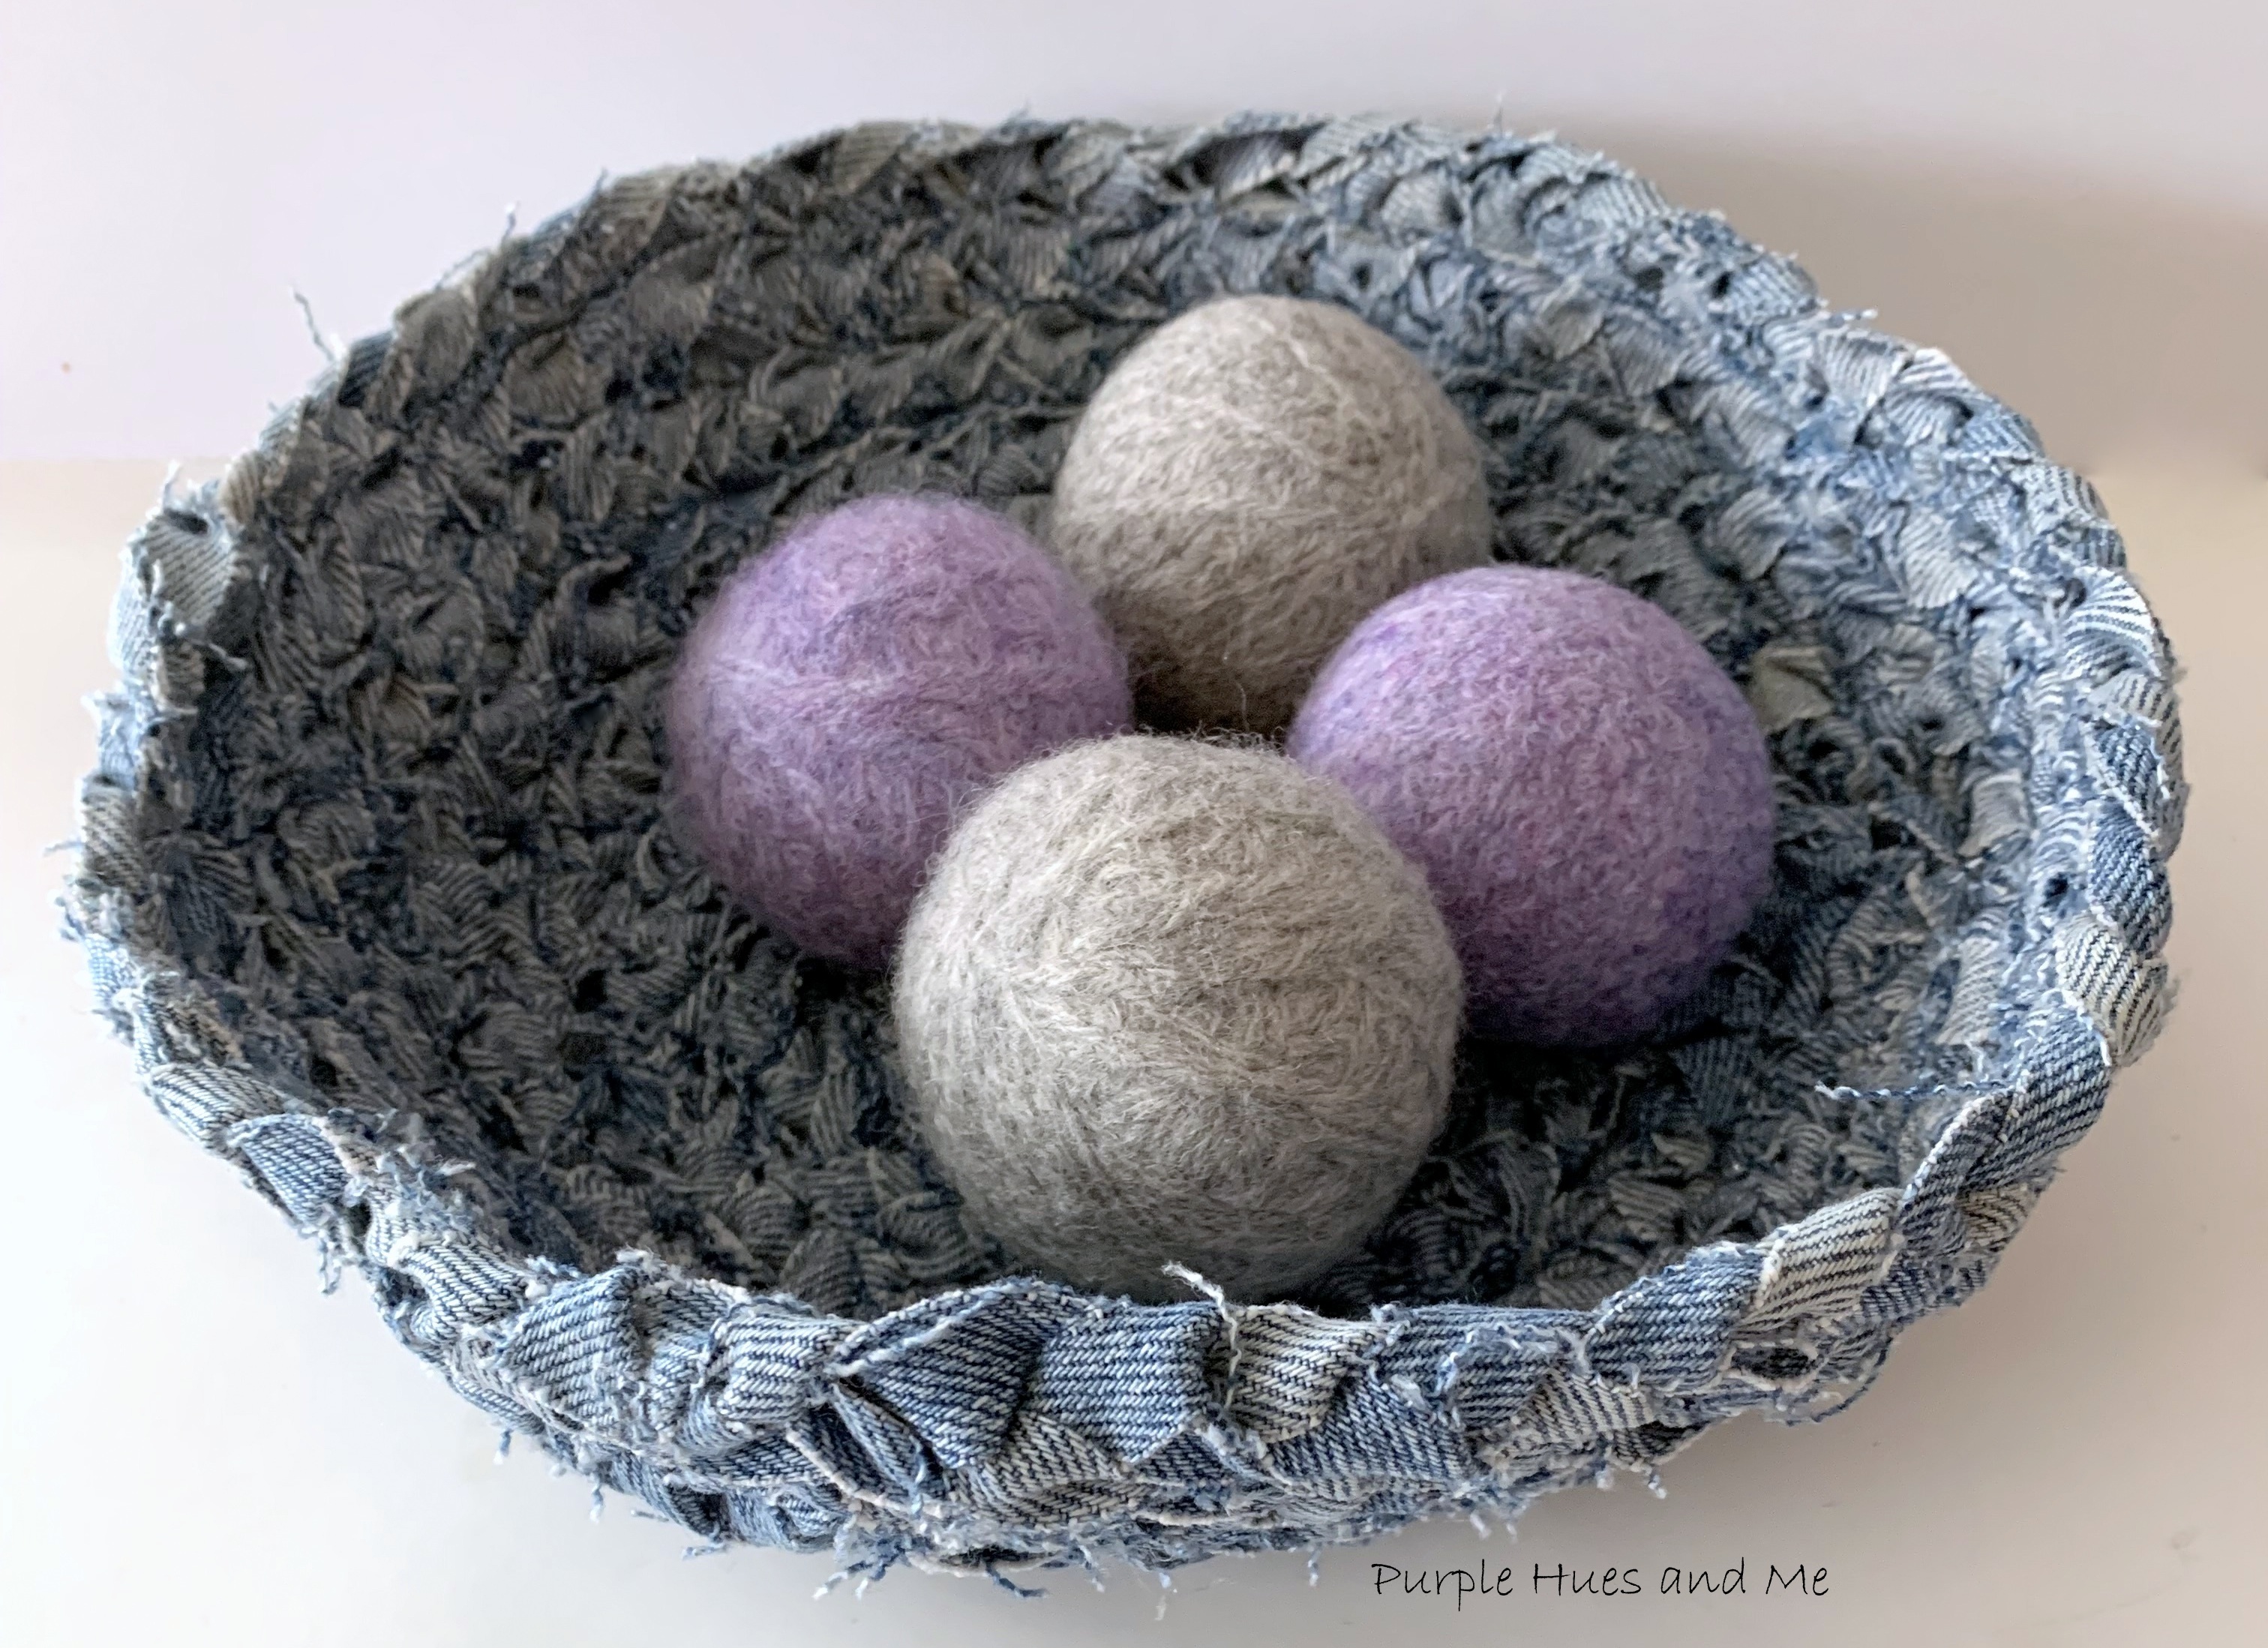
Store your dryer balls in the dryer between uses or display them in a handmade denim bowl like I did in my laundry room. Creating homemade dryer balls is a fun and easy craft that’s useful, cost-effective and environmentally friendly with zero waste. Now, it's time to meet the other Sustainable Pinterest Challenge participants and their "Zero Waste" projects!


 My taste for diy wreaths run towards a simplistic design. I don't like a lot of gaudiness or froufrou in making my wreaths. You know the old saying, less is more! Well I was inspired to make an evafoam oak leaf wreath from a festive Norwegian design wreath I saw online. I bet right now you're going "wow" how did she come up with that? Just take a look at this picture: