Monday, September 28, 2015

Mesh Tubing and Ribbon Decorated Pumpkins


Want to learn another way to use mesh tubing using the Bowdabra?   I'm over at Bowdabra.com showing you how to make exquisite fall bows to add to your pumpkins or Autumn décor.  Get all the details in my easy to follow tutorial on Mesh Tubing and Ribbon Decorated Pumpkins!

Have Fun & Keep Crafting!


Thursday, September 24, 2015

Twisted Foam Fall Flower

I want to share with you this fall flower I made out of foam sheets to compliment a huge pumpkin I am decorating with bows and embellishments for a post at Bowdabra.com where I'm on the designer team.
The flower was so easy to make but a bit time consuming since I twisted all of the petals to help form their shape and texture.  

But to back track a bit,  I started with bright orange and yellow foam sheets out of an assorted pack from the Dollar Tree.  These foam sheets are much thinner than the usual ones found in most craft stores.

To begin, I cut out 2 inch wide strips .  .  . 


dividing the strips into two sections for the largest petals, three sections for medium size petals and four sections for the smallest petals.

Next, I cut out the petal shapes, saving all of the scraps.


 Then, to add texture, fold the petals in half .  .  .

and start twisting from end to end!
You can even crumble and twist together*, too!
*try doing this to music while you craft!!!!

It's fun to open each petal to see the texture and shapes created!


Have fun twisting the scraps, too! 
 They'll be used for the center of the flower.


Next, ball up a piece of foil and place in the center of a small piece of yellow foam.

Wrap  and stretch the foam around the foil and insert a floral stem in the center using glue to adhere.


Begin gluing on the twisted scraps around the foam ball.


Once all of the twisted scraps are glued on, begin gluing on the smallest petals, slightly overlapping around the base of the flower center.


Continue gluing on the petals by size  .  .  .


first, small - next, medium and finally, large -


until you're satisfied with the spacing and look.


To tone down the bright orange and add shades of autumn, wet a small sponge and smooth on yellow and plum acrylic paint mixed with a little water
for some fall vibrant hues.


Fall flower in different lighting .  .  .


and on the pumpkin!


Be sure to check out my post on decorating a pumpkin including this flower here.

Thanks for stopping by

and take a little time to enjoy,
Happy Crafting!


Friday, September 18, 2015

Popular Fall Craft Tutorials


 Popular Fall Crafts
While I'm taking it easy with a sprain hand that I keep hurting over and over,  thought it might be fun to share some of my most popular fall crafts I've created in the past. Just click the link below each image to take you to the full tutorial.


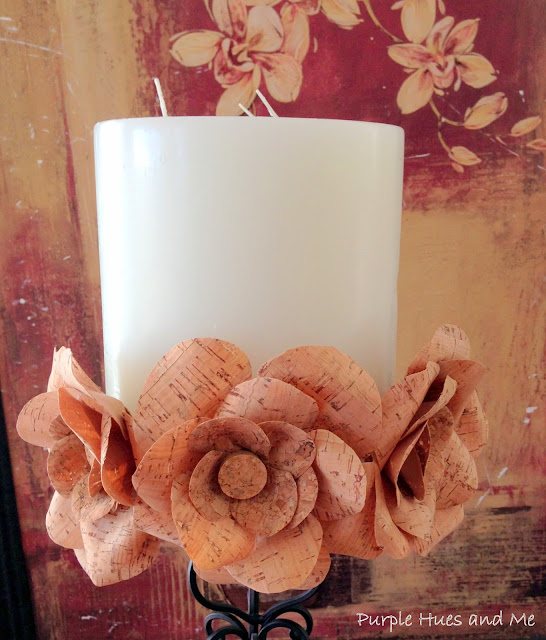
http://plumperfectandme.blogspot.com/2014/11/cork-ribbon-flowers.html


DIY Burlap Purple Coneflowers


Hope you enjoyed re-visiting some of my fall craft tutorials and inspired you to make a few of your own! 


Take a little time to enjoy


and


Happy Crafting!


Monday, September 14, 2015

Sunday, September 6, 2015

Layered Fall Leaves Placemat


Enhance your fall and thanksgiving tablescapes with this easy to make layered fall leaves placemat!  It's totally handmade using fall maple leaves packets from the Dollar Tree, pleather from a left over project and fabric glue.  How easy is that!  Best of all, the design was inspired from a placemat found at Pier1 .  .  . 
Pier1 Placemat
To begin, gather:
  • Packets of maple leaves from the DollarTree (4)
  • Sturdy material for backing - (pleather)
  • Circle template - used an old serving plate
  • Fabri-Tac fabric glue
  • Scissors, pencil

Draw a 18" circle on back of fabric and cut out.


Arrange leaves in piles according to size and color.
I had two piles of small leaves and three piles of larger leaves. 


Begin gluing on the leaves using the smaller leaves and lighter colors first, adding them in a clockwise pattern.  It's easier to have a pattern in mind to follow. Apply the leaves structurally, in a design, and not haphazardly with no direction.


 Once the pale yellow leaves were glued on, I used the darker yellow ones with reddish orange tips to continue filling in.


Next, I started gluing on the larger leaves, first adding the yellow, reddish orange ones .  .  .


and then the darker, rusty orange leaves,  adding them to the edges .  .  .


and finally, to the center.  I didn't use any of the leaves that were green and tan.


The finished placemat looks more impressive in actuality .  .  .  I think even better than the one found at Pier1! 

The underside looks great, too!


A lovely nature inspired placemat!


I'm not good at creating tablescapes - but you can get an idea how this placemat would create a "WOW" factor, especially using clear plates that show off the colors of the leaves  .  .  .


that adds a delightful fall touch to any table setting.

Now, to make a few more!


Take a little time to enjoy
and
Happy Crafting!