Thursday, April 20, 2023

Cord Wrapped Tin Can Flatware Caddy

Welcome Y'all! It's that time again for our Creative Craft Hop hosted by Sara @Birdz of a Feather! I don't know if you're like me, but I'm always on the lookout for craft project inspirations! While I was in Target some time ago, I came upon a utensil holder that was made out of seagrass, I think. I loved how it looked so I took pictures of it - just like I usually do when I'm inspired. Unfortunately, it is no longer available at Target, but here is a picture of it:

And that is where I got the idea to make a flatware caddy of my own! Since I collect tin cans and other recyclables for my projects, it was a no brainer to use tin cans to make a caddy - one with three sections or cans, sized for spoons, forks and knives!  

Cheerful and charming - especially done in purple, lol - this Cord Wrapped Tin Can Flatware Caddy adds a playful element to get-togethers and gatherings. A group of three hand wrapped upcycled tin cans in poly cord that's perfect for entertaining and a whole lot more! 

Materials Needed:
  • Tin cans - 3 (27oz.)
  • Poly Cord
  • Quick dry multi purpose glue (Starbond) or hot glue
  • Parchment paper
  • Ruler
  • Drill
  • Screws
  • Phillips screwdriver (short handle)/rachet
  • Wire clothes hanger
  • Wire cutter

Let's begin with clean, dry tin cans. I'm using vegetable cans that are a great size at 27 ounces!
Plus, I'm using leftover purple cord from a previous project making this caddy basically cost free! I also like to spread a sheet of parchment paper over my work surface to catch any glue that may fall off.
 Begin by adding a dab of hot glue to the end of the cord and .  .  .


coiling it into a circle while adding a bit of glue along the cord as you coil.
Then add a dab of hot glue to the center of the bottom portion of the tin can and continue coiling the poly cord around the can.
At first, I didn't want hot glue to show on the purple cord so I used a high performing super glue called Starbond which dried clear to attach the poly cord.

Continue coiling the poly cord until the bottom is completely covered .  .  .
and then moving up the sides of the can.
I switched to using hot glue since I was running out of Starbond. Continue adding hot glue to wrap the can with poly cord  .   .  .
going round and round until the can is completely covered.
Then wrap the other two cans the same as the first.
To secure the three cans together, use a drill to create holes near the top of the three cans aligning the holes on the cans with a ruler to match up the holes. Use a short handle Phillips screwdriver or rachet to tighten the screws and attach the cans together.  
Dab a bit of Starbond glue on the screws to hold in place and let dry.
To make the handle, cut off the straight bottom wire of a clothes hanger .  .  .
using a wire cutter.
Fold the wire in half, leaving a loop at the top and twisting the wire at the bottom to close.
Wrap the loop with cord beginning at the bottom and .  .  .
moving up along the loop and .  .  .
back down to wrap around the bottom again.
Then apply glue around the wrapped bottom cord and insert into center of cans. Hold cans together for a couple of minutes until glue dries. 
This practical upcycled caddy adds a casual warmth and welcome to the table for both inside and outside entertaining.  And as an added plus, the caddy can be used to house all sorts of things like pens and pencils, office supplies and even bottles of wine! It's really a multi- purpose handcrafted item that can be use all year long!


Once again, welcome to our monthly Creative Craft Hop! I hope you liked how I made my cord wrapped flatware caddy! Up next, is Carol @ Bluesky at Home sharing how to make pretty vinyl planters!  Be sure to stop by each and everyone in our creative group listed below to check out their exciting and inspiring project! And don't forget to pin, too!


Gail | Purple Hues and Me | Cord Wrapped Tin Can Flatware Caddy


Carol | Bluesky at Home | How to Make Pretty Planters with Vinyl


 Cecilia | My Thrift Store Addiction | Repurposed Ceiling Medallion Whimsical Mushroom Wreath


Terri | Decorate More with Tip | You Can Paint....WHAT?


 Jenna | The Painted Apron | Kentucky Derby Straws


Ann |The Apple Street Cottage | Denim Cuff Bracelets


Allyson | Southern Sunflowers | Robot Craft Idea for Kindergarten Kids to Make for Friends


Sara |Birdz of a Feather | Pegboard Display Stand DIY


Niki | Life as a Leo Wife | Beautiful Mother's Day Mason Jar Sign with Free Designs & Paper Flowers


Monday, April 10, 2023

Spring Fling Decoupage Watering Can

Welcome to our Monthly Blog Hop Challenge! The theme for this month is Spring Crafts/Projects! After basically being cooped up during the winter months, we all certainly welcome Spring and its' new beginnings! There is so much to be done during this time! So I'm looking through my stash to see what I can make since I vowed to use what I have in crafting this new year! I came across a watering can that I got on clearance from Hobby Lobby some time ago. Updating a watering can by creating a colorful spring look using decoupage and DT Spring Fling paper napkins is the perfect project for this challenge! A watering can is so easy to spruce up for spring! Decoupaging watering cans are quite popular. Most are painted first and then decoupaged. But I like the metal finish of a watering can and decided to leave it as is to decoupage!

But first, we need to gather the supplies to work with! 

Materials:

  • Watering Can
  • Paper napkins
  • Matte Mod Podge
  • Brush
  • Water brush pen
  • Tweezers (optional)
  • Plastic ziplock bag
  • Sanding block 
  • Outdoor Mod Podge (to seal)

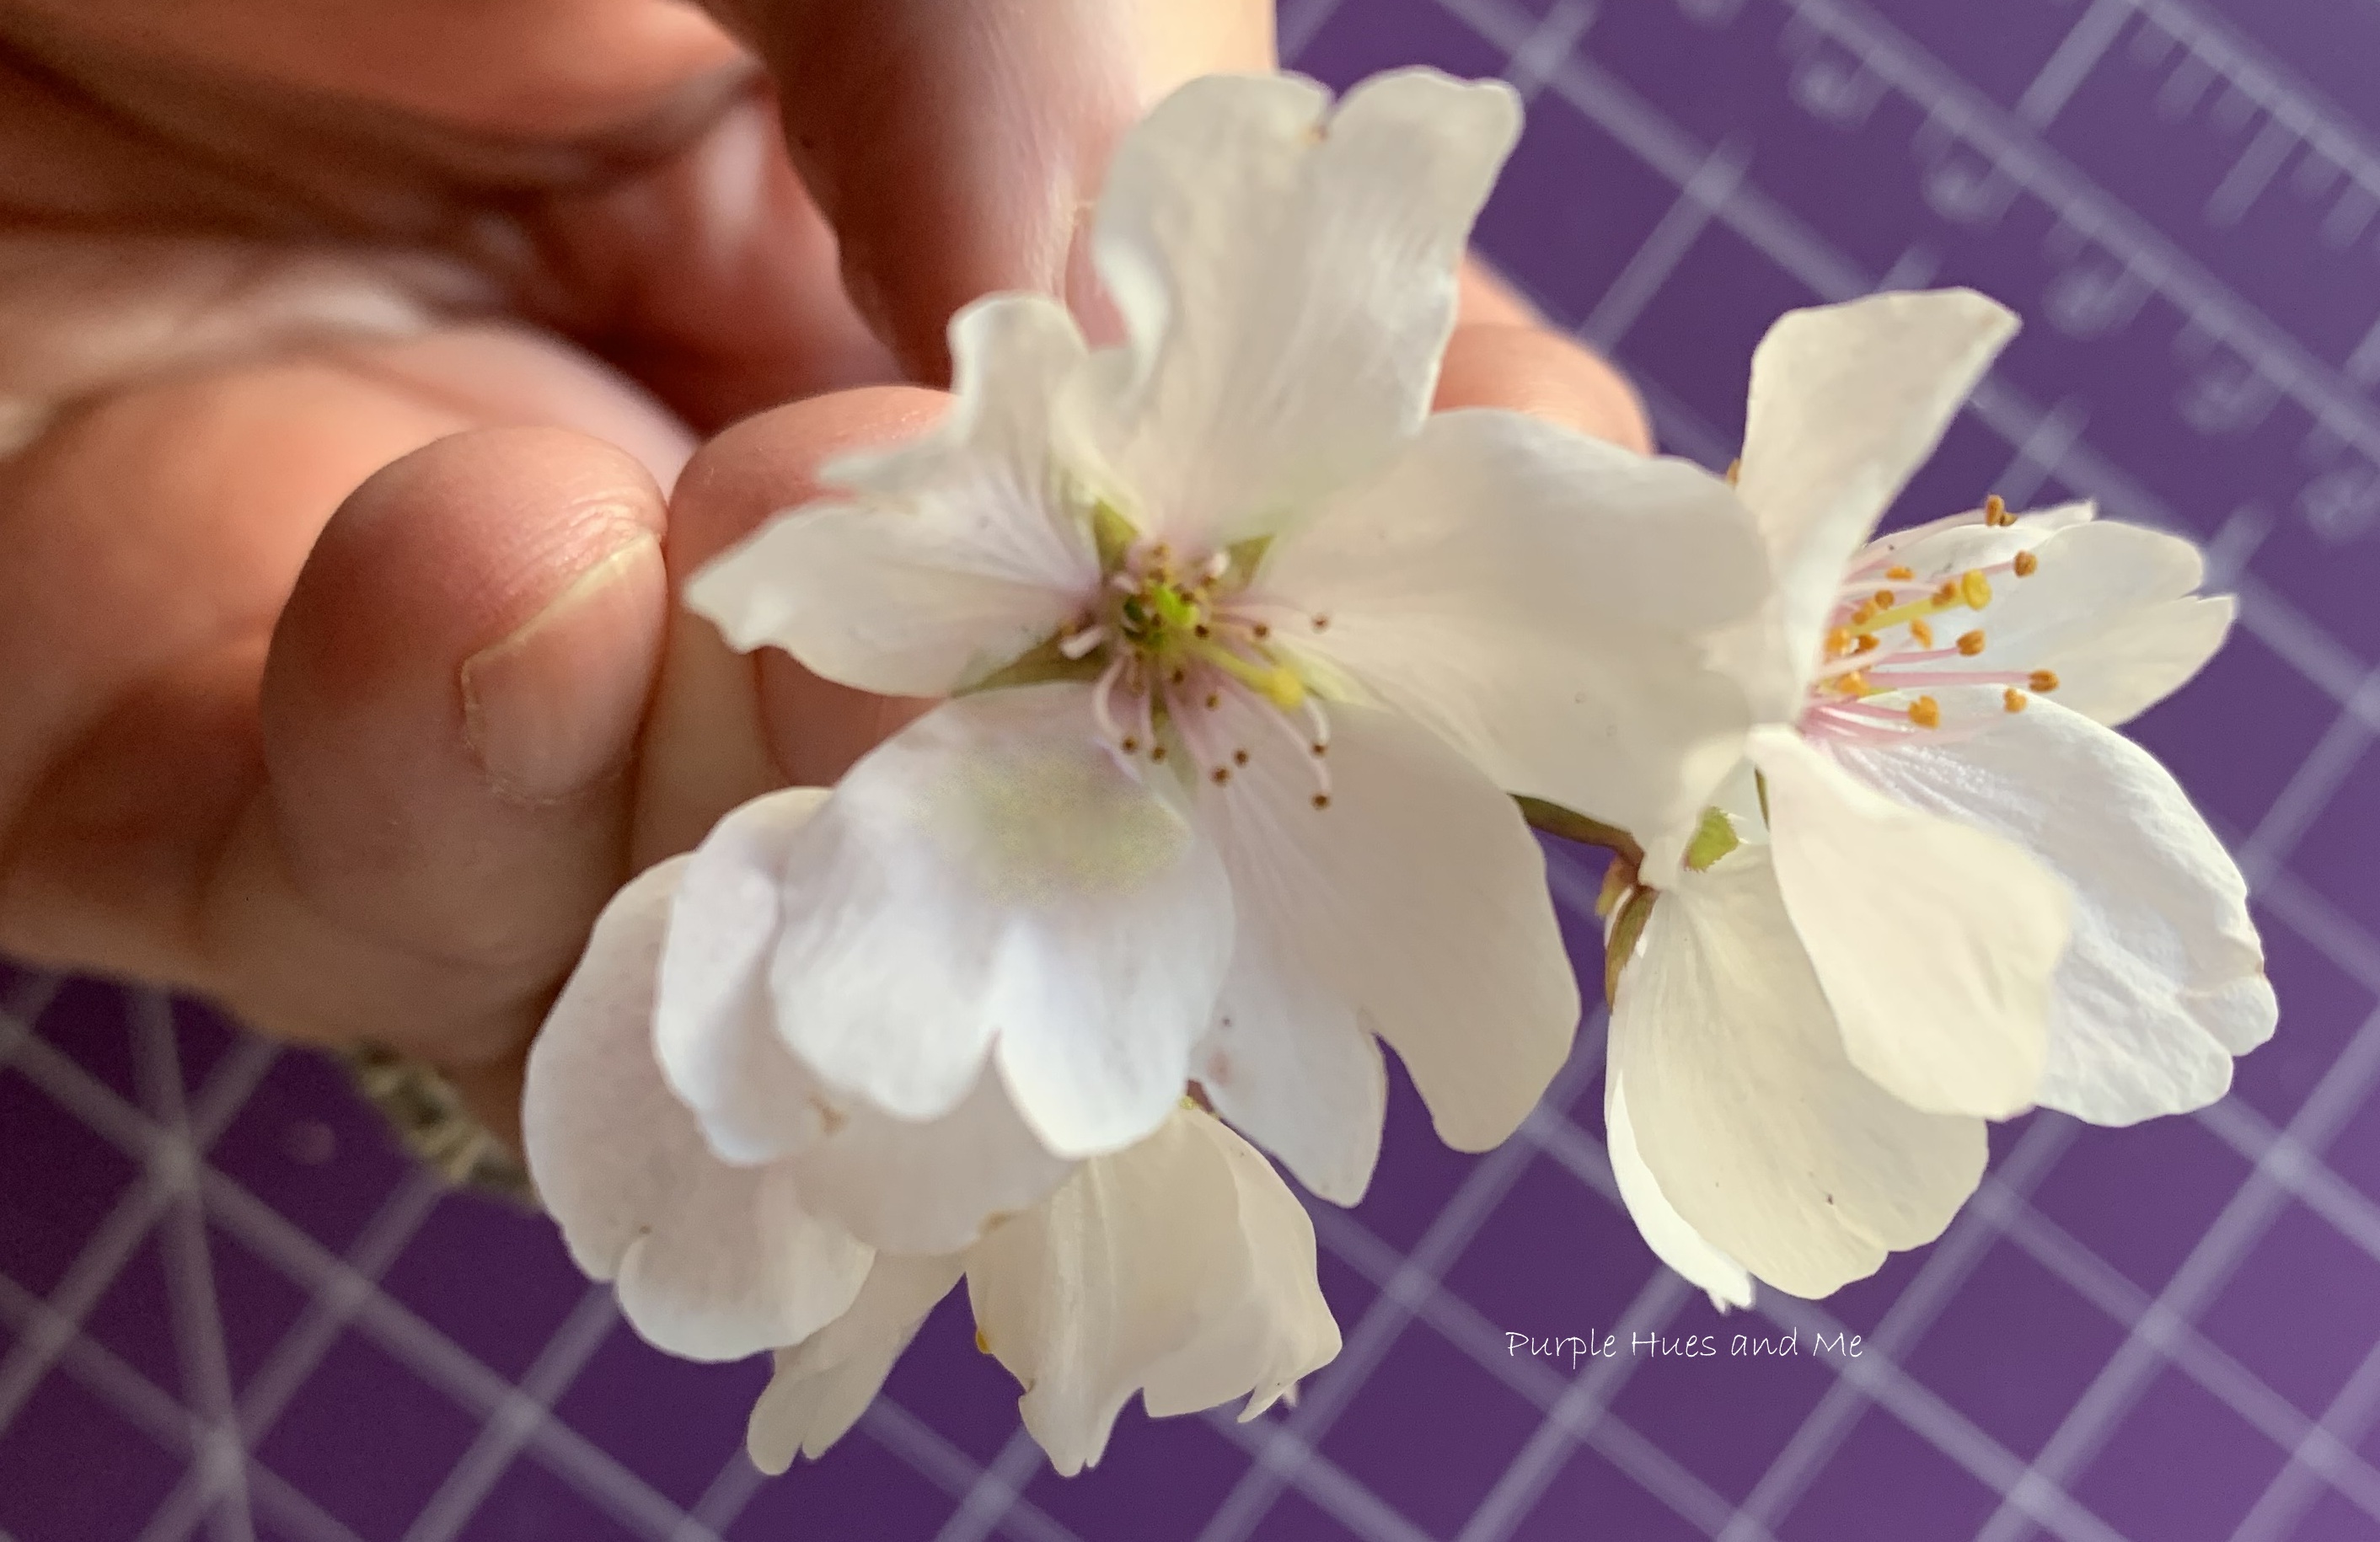
The watering can must be clean and grease free! After thoroughly washing and drying the can, use an alcohol soaked cloth to wipe down to remove any residual dirt and grime. I found a pack of napkins at the Dollar Tree appropriately labeled Spring Fling - which I take to mean "an event held in spring" - and not the romantic kind, lol! I love that there are purple flowers included in the napkin design!

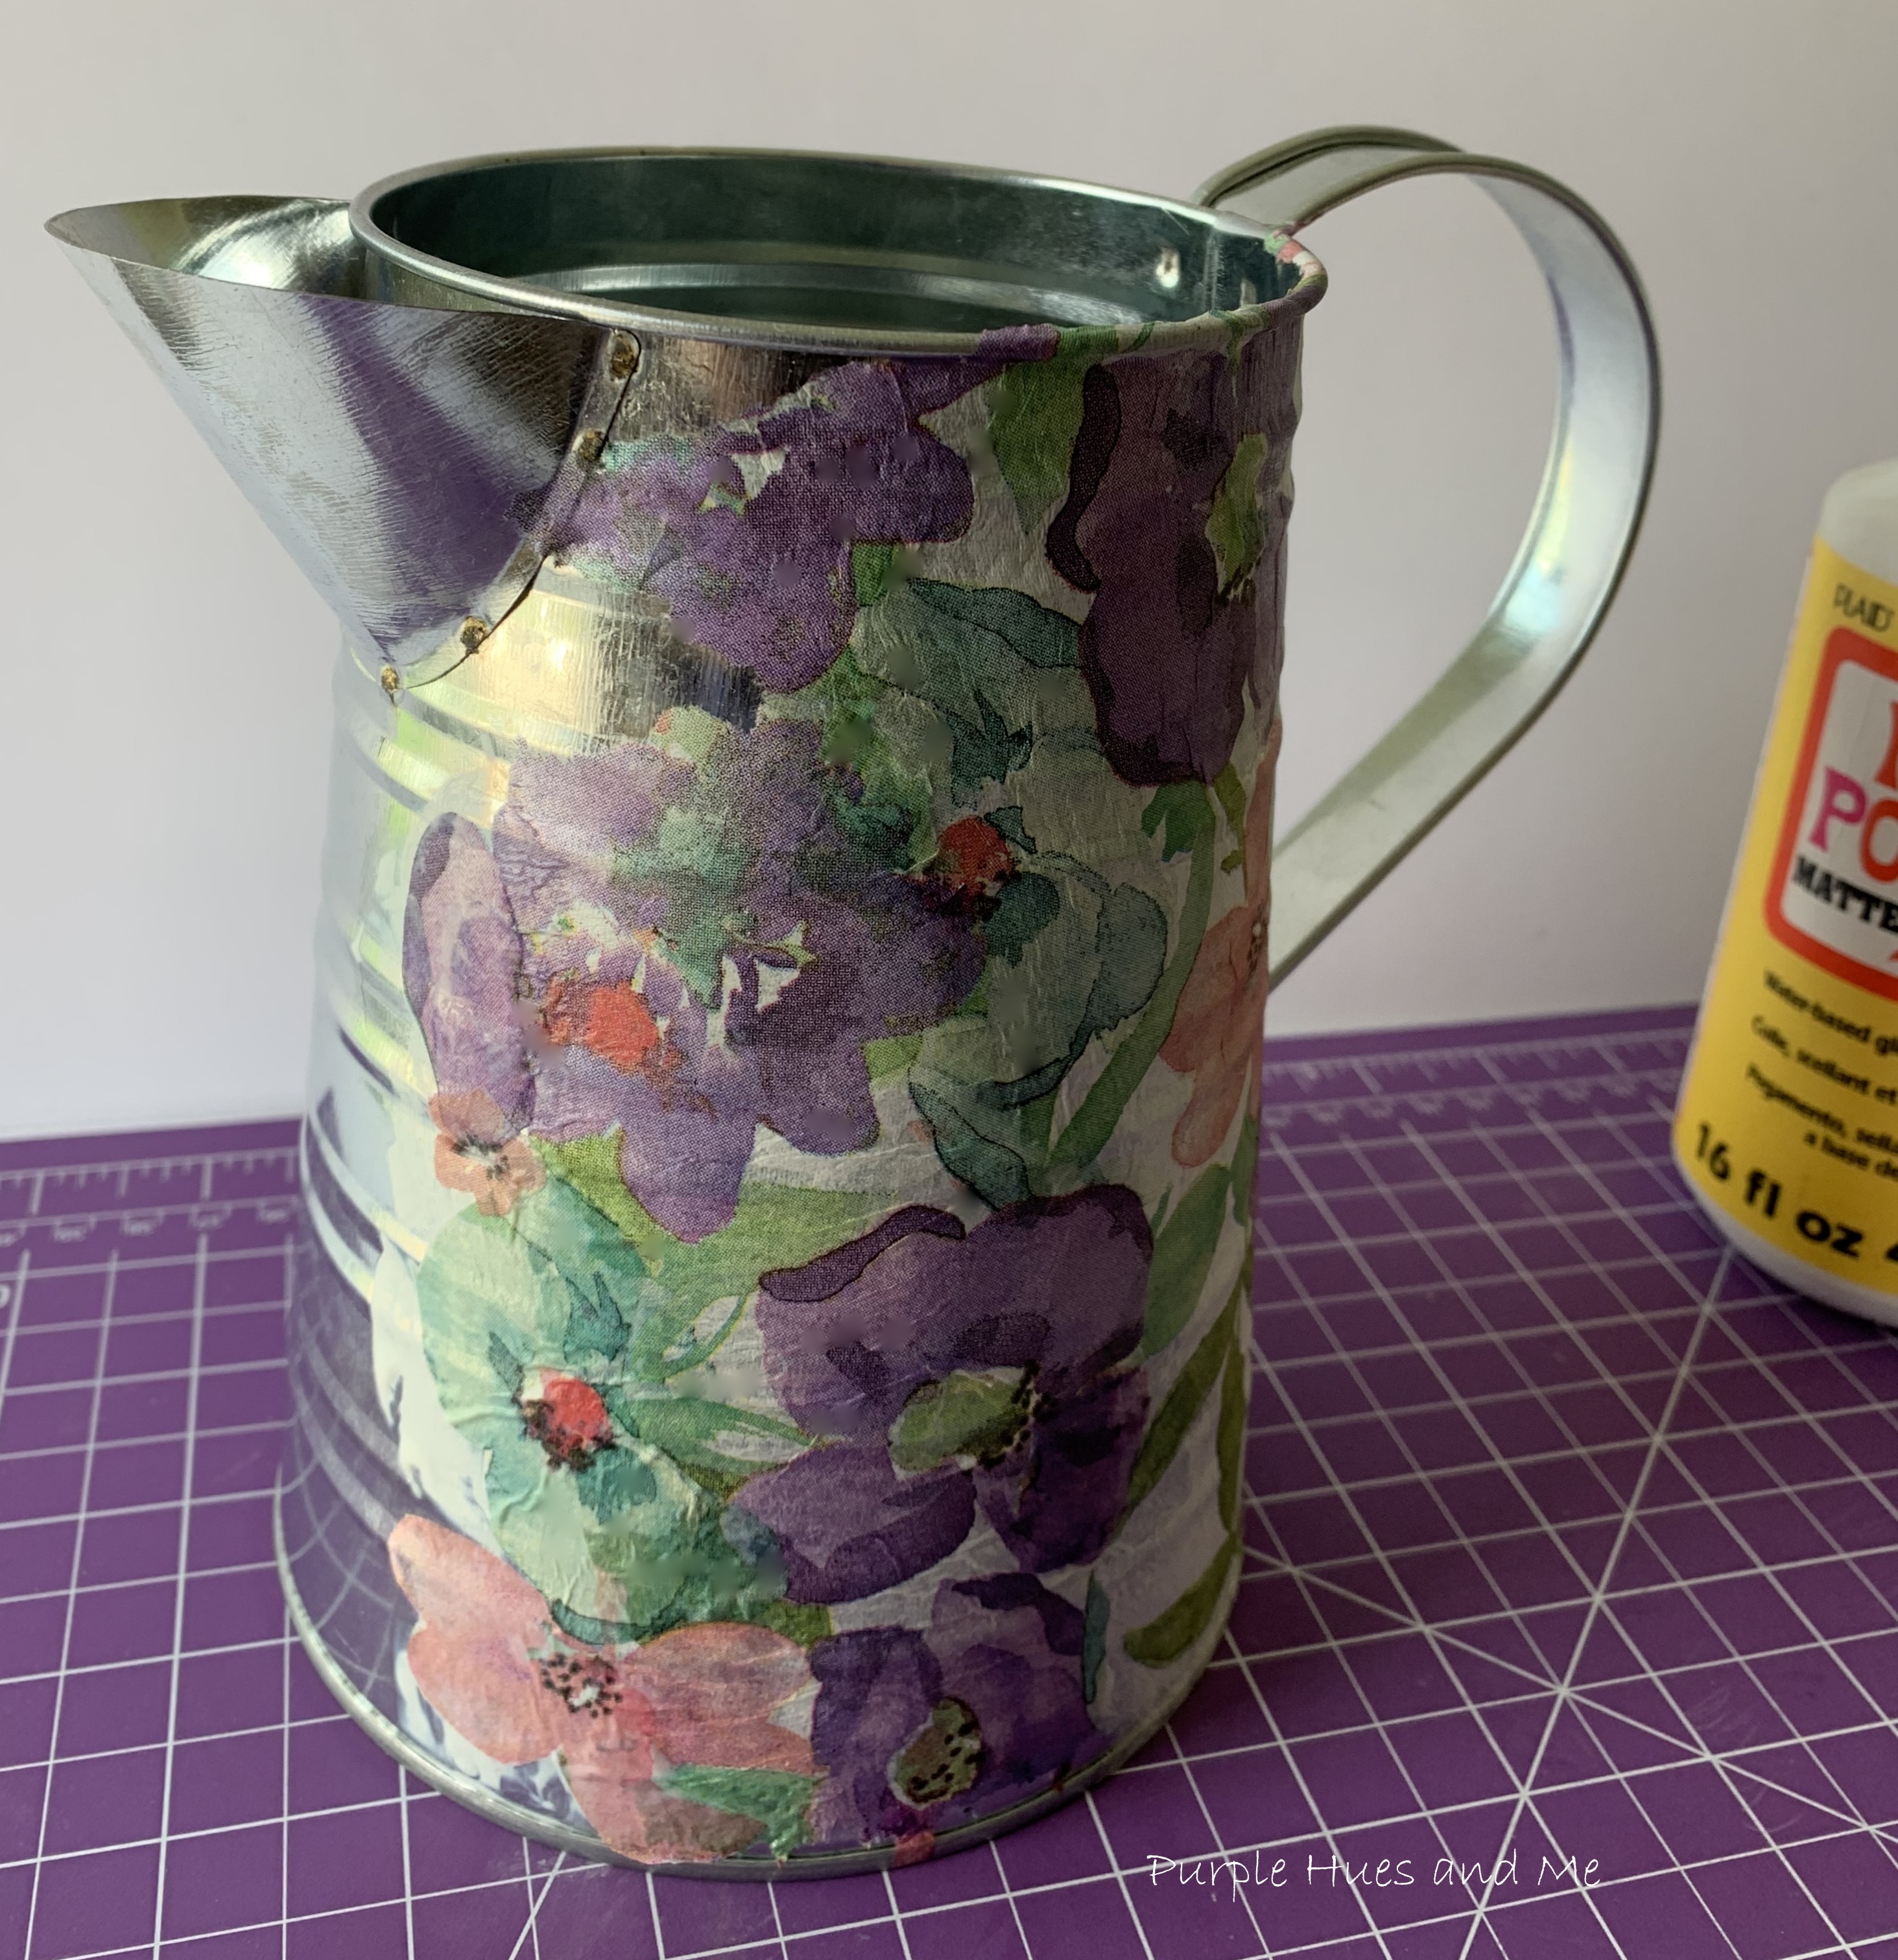
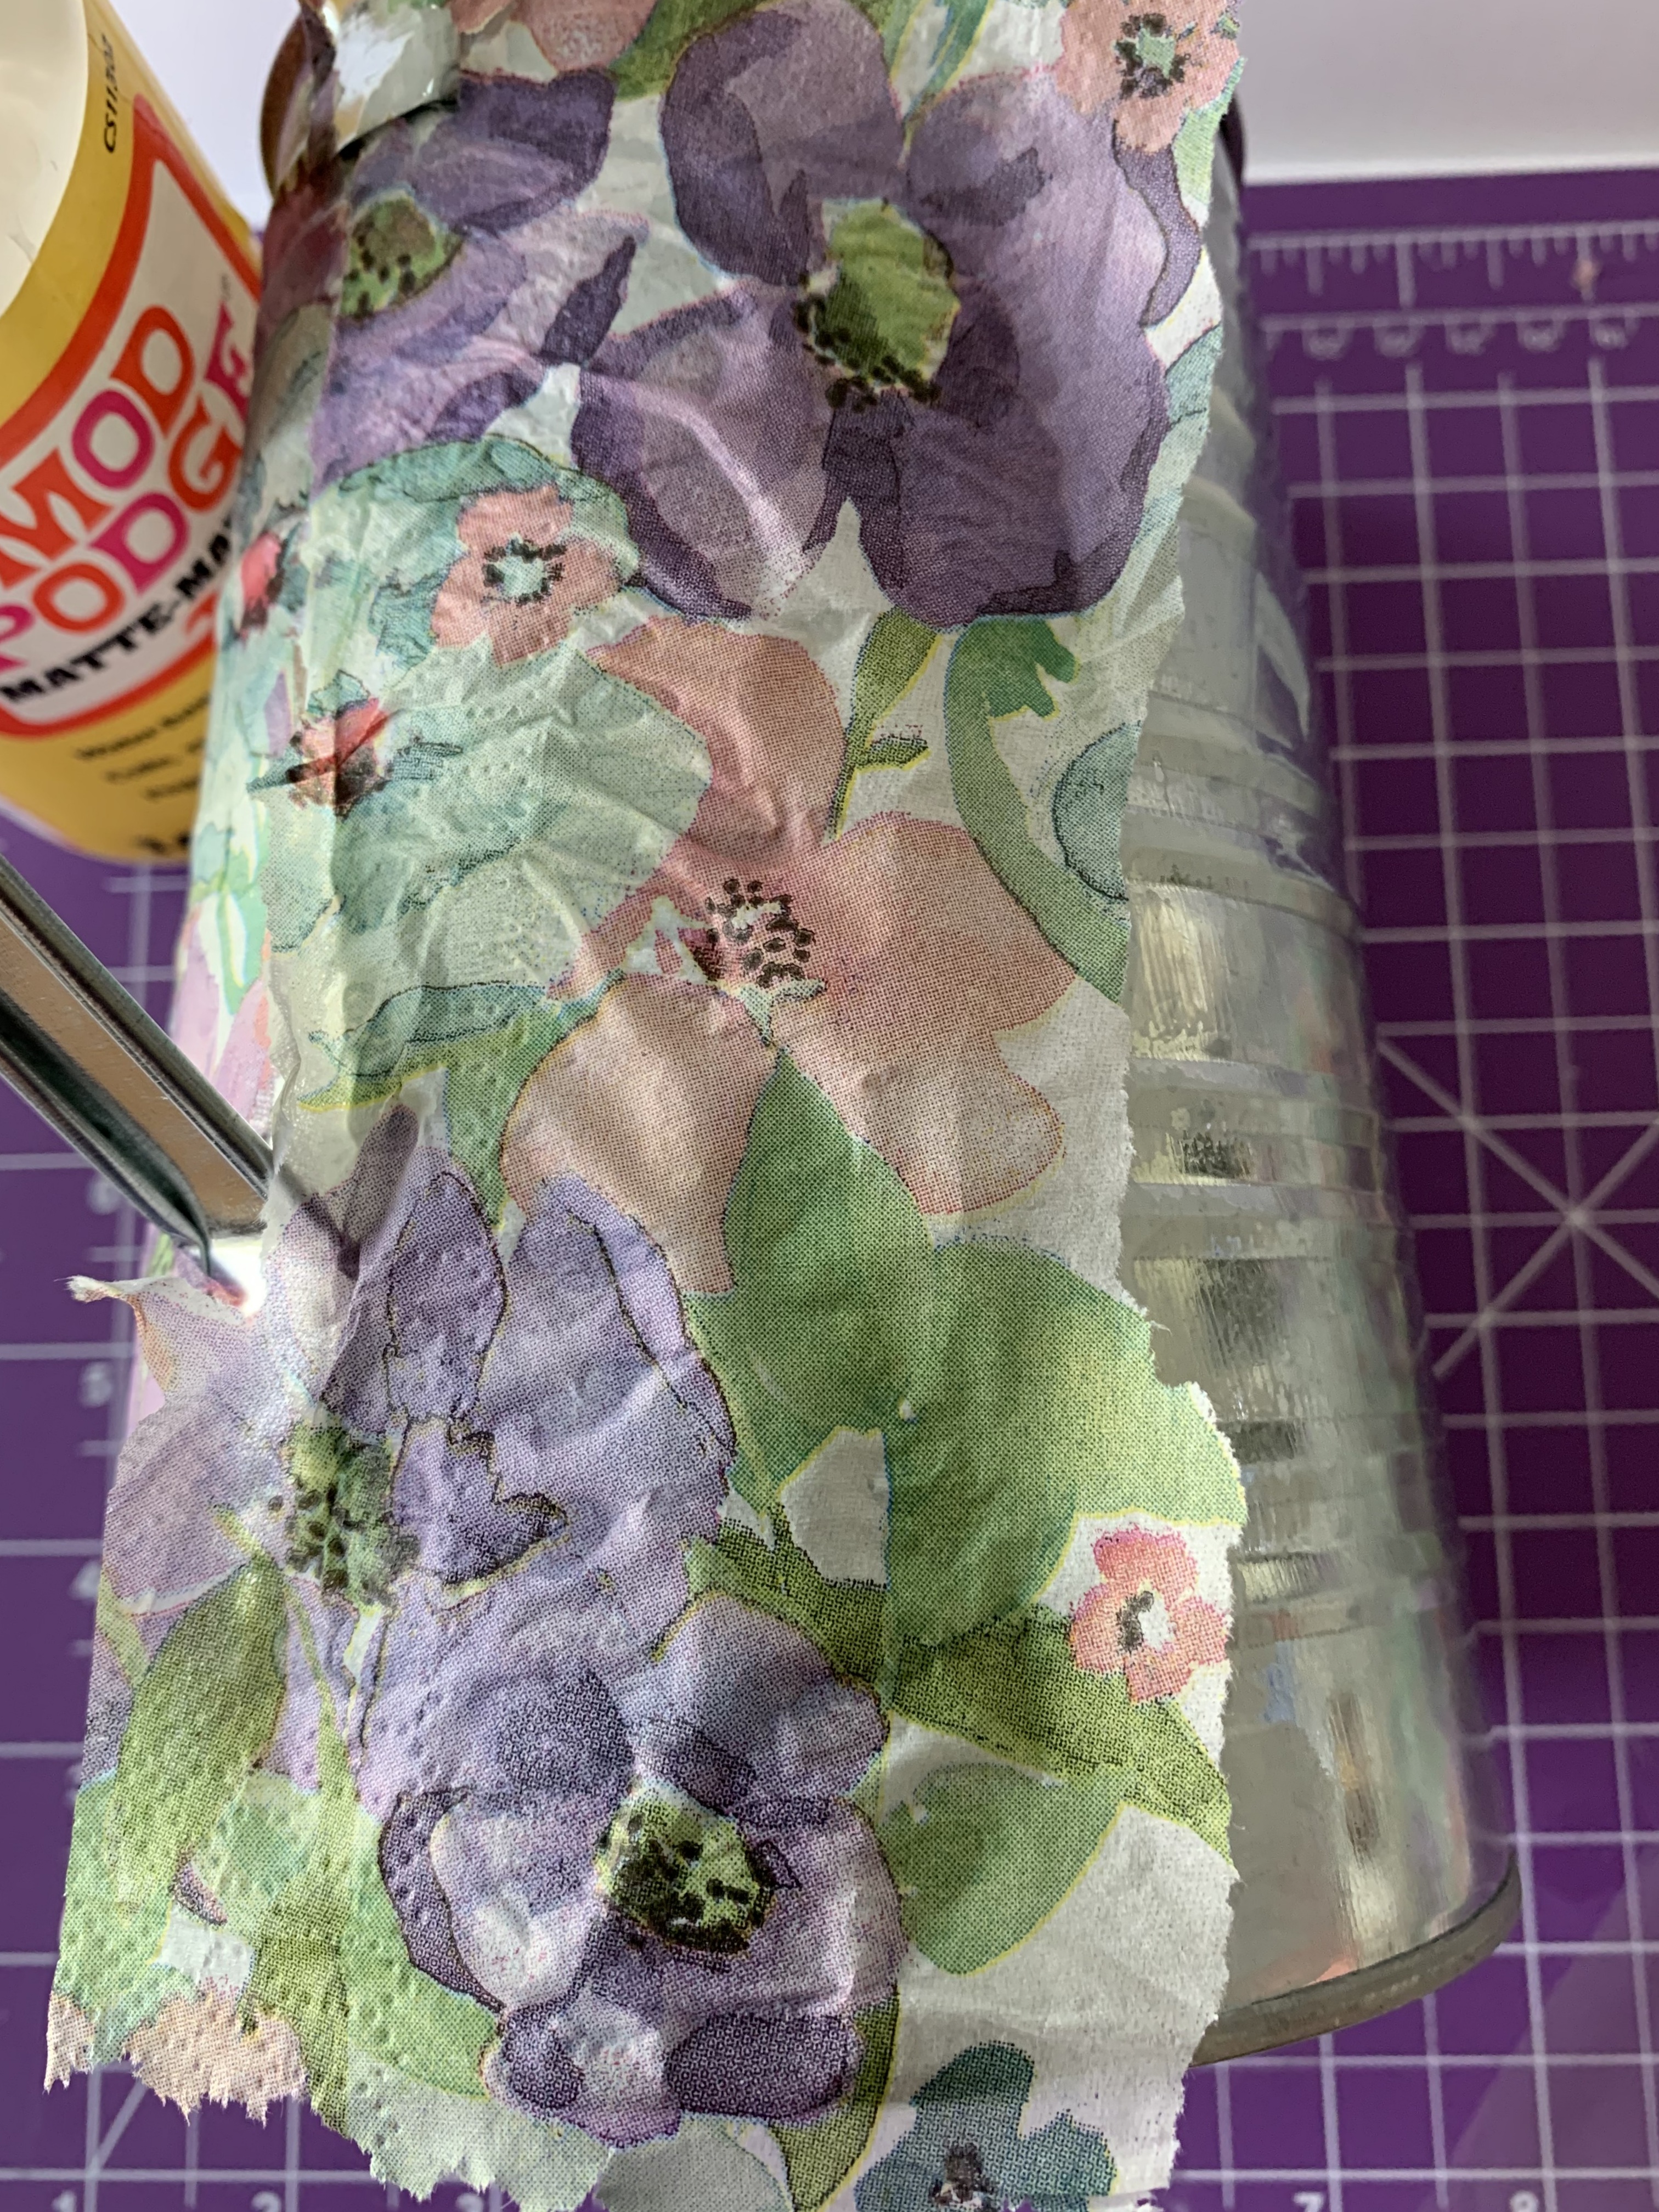
After opening the napkin and laying it on my work surface, I used a brush pen filled with water to outline the portion of the napkin I will use. I love how the brush pen works! Instead of dipping a regular brush in water, you simply add water to the barrel of the pen and squeeze it to wet the brush!
Then tear the water outlined portion of the napkin out and separate the plain layers from the printed one.
Any straight edges were feathered out using the tip of tweezers or your fingernail.
Next, lay the napkin design down (right side up) on the outside of the can for fit. 
Apply a layer of Matte Mod Podge onto the can surface. 
Place the napkin design on top of the MP, smoothing out from the center to edges using a sheet of plastic from a ziplock bag. Apply additional MP using a soft brush to smooth out wrinkles after using the plastic, and not before. Sometimes the napkin will lift up if you apply MP on top before using the plastic.
See, nice and smooth! 

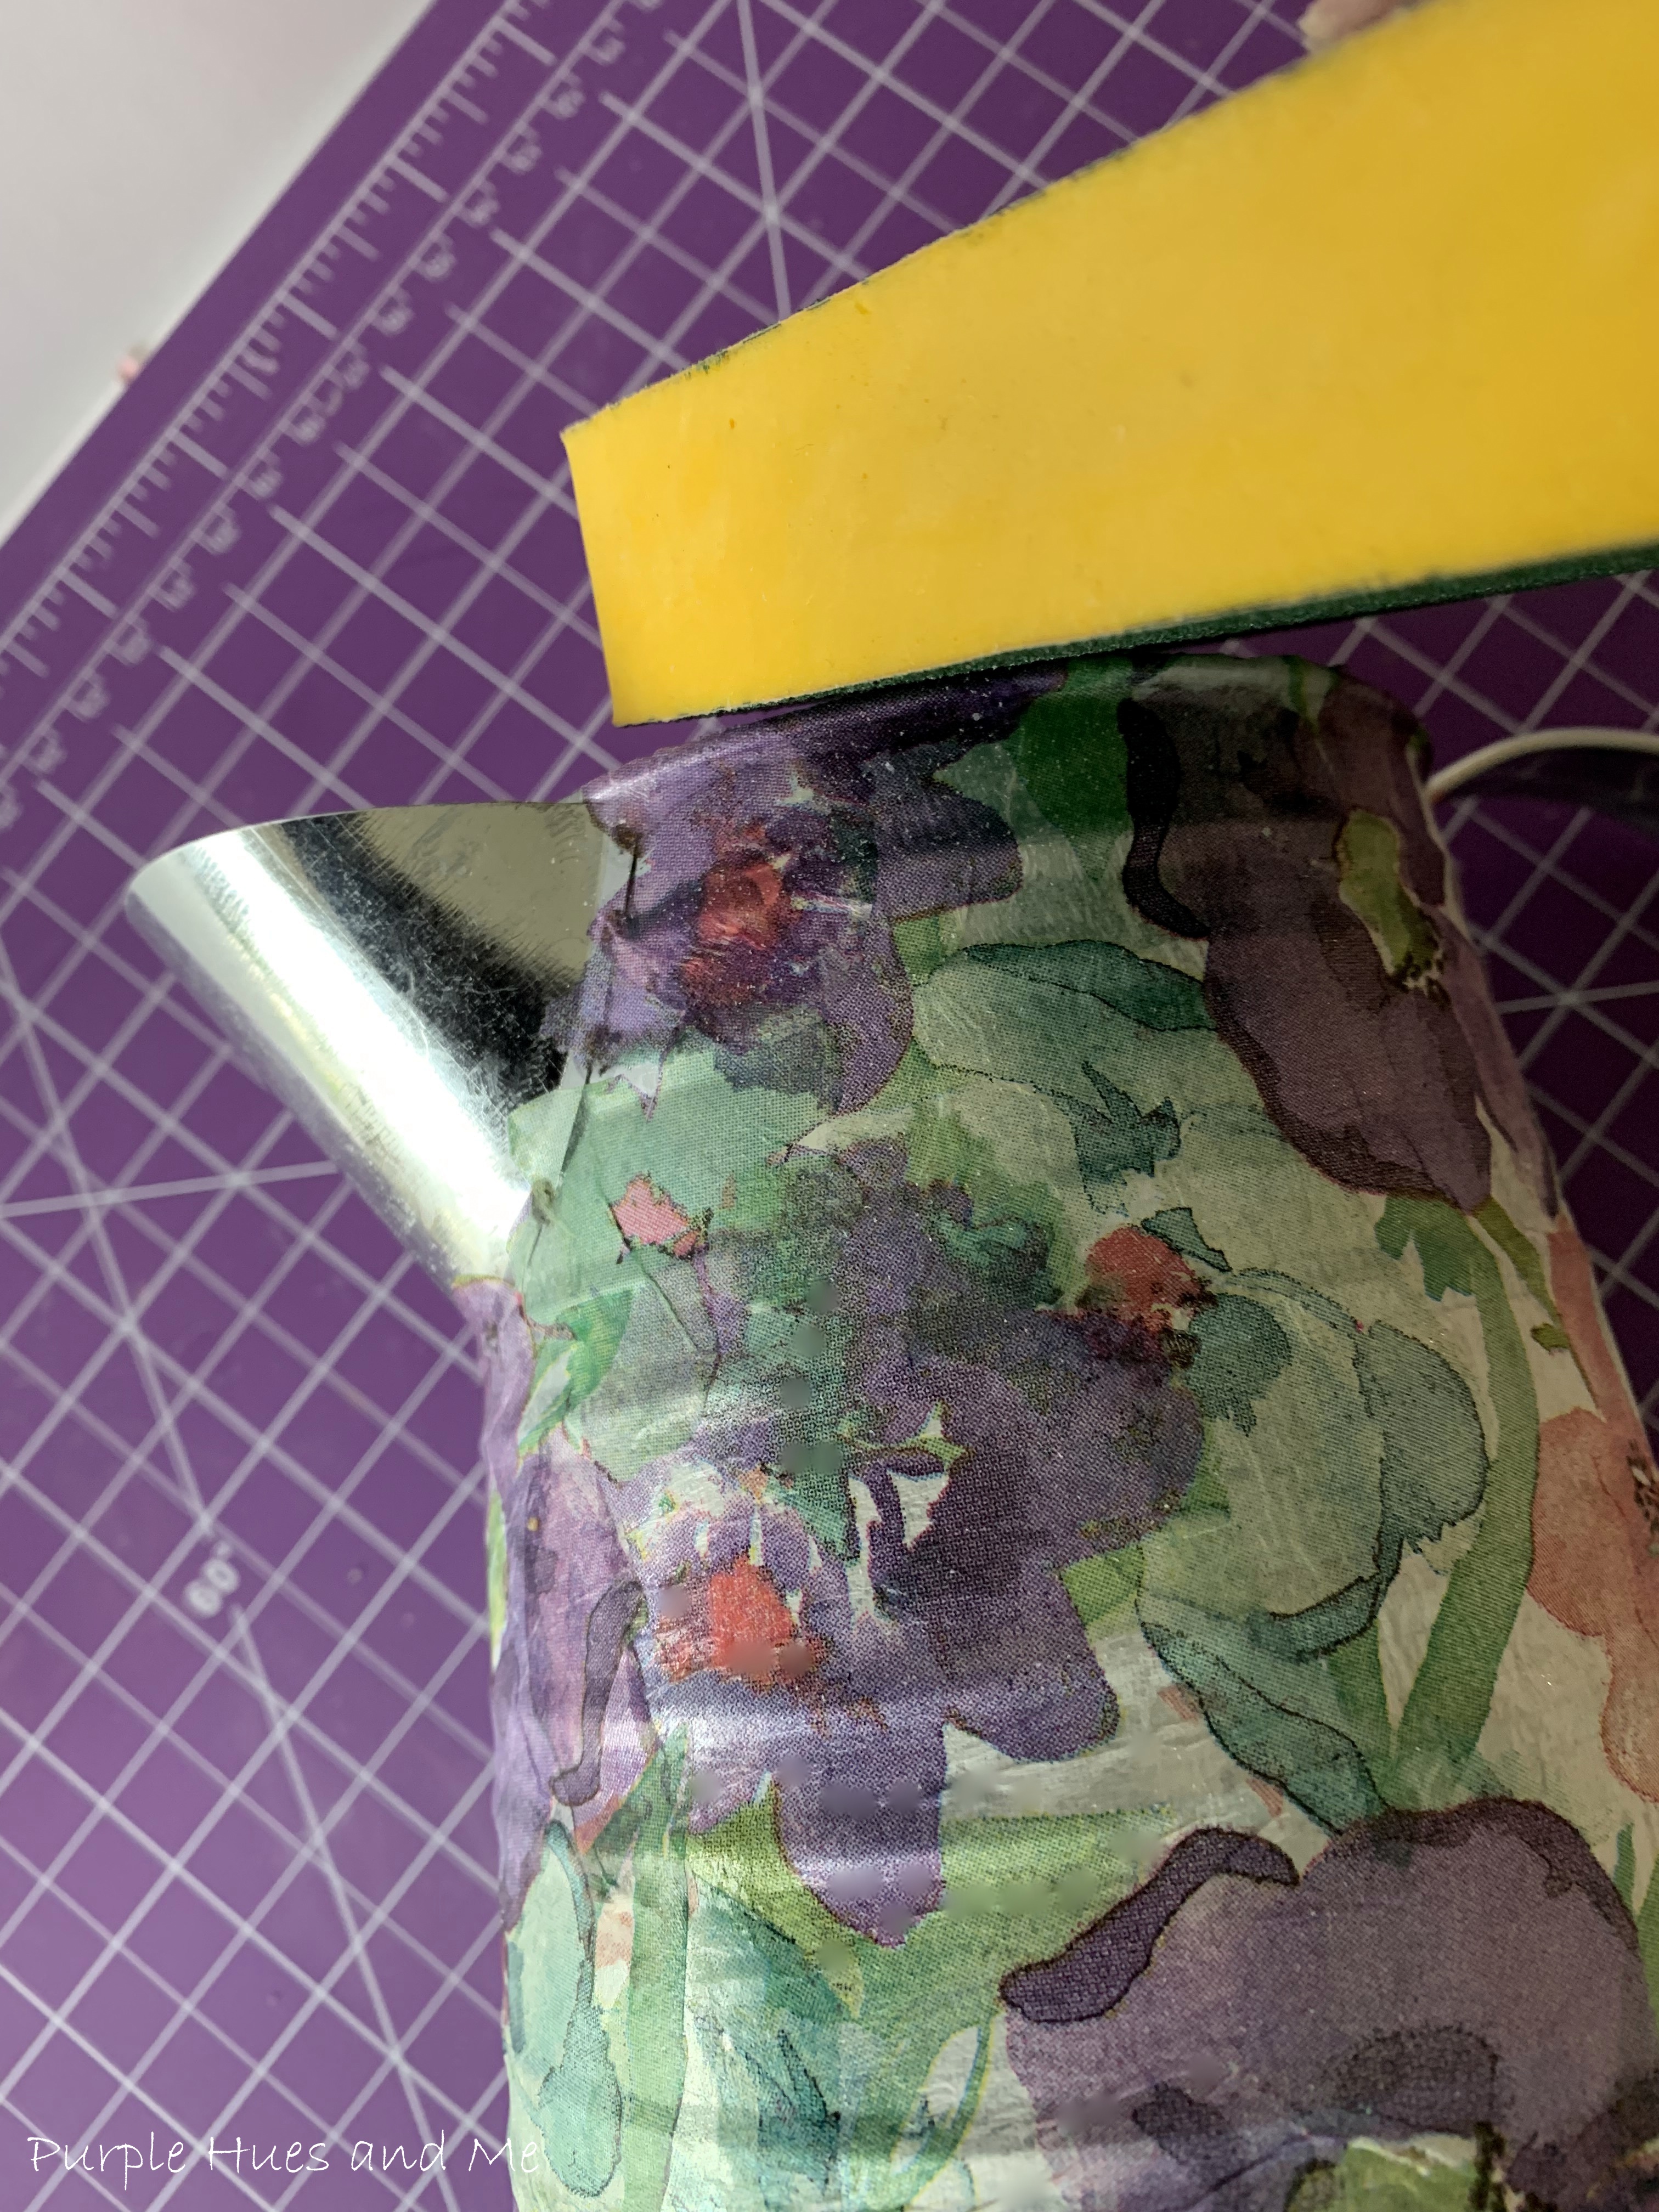
As you move around the can, continue to apply the mod podge and .  .  .
napkins in sections and .  .  .
using the plastic to remove wrinkles.
Once dry, use a sanding block to remove excess napkin on top and bottom edges.
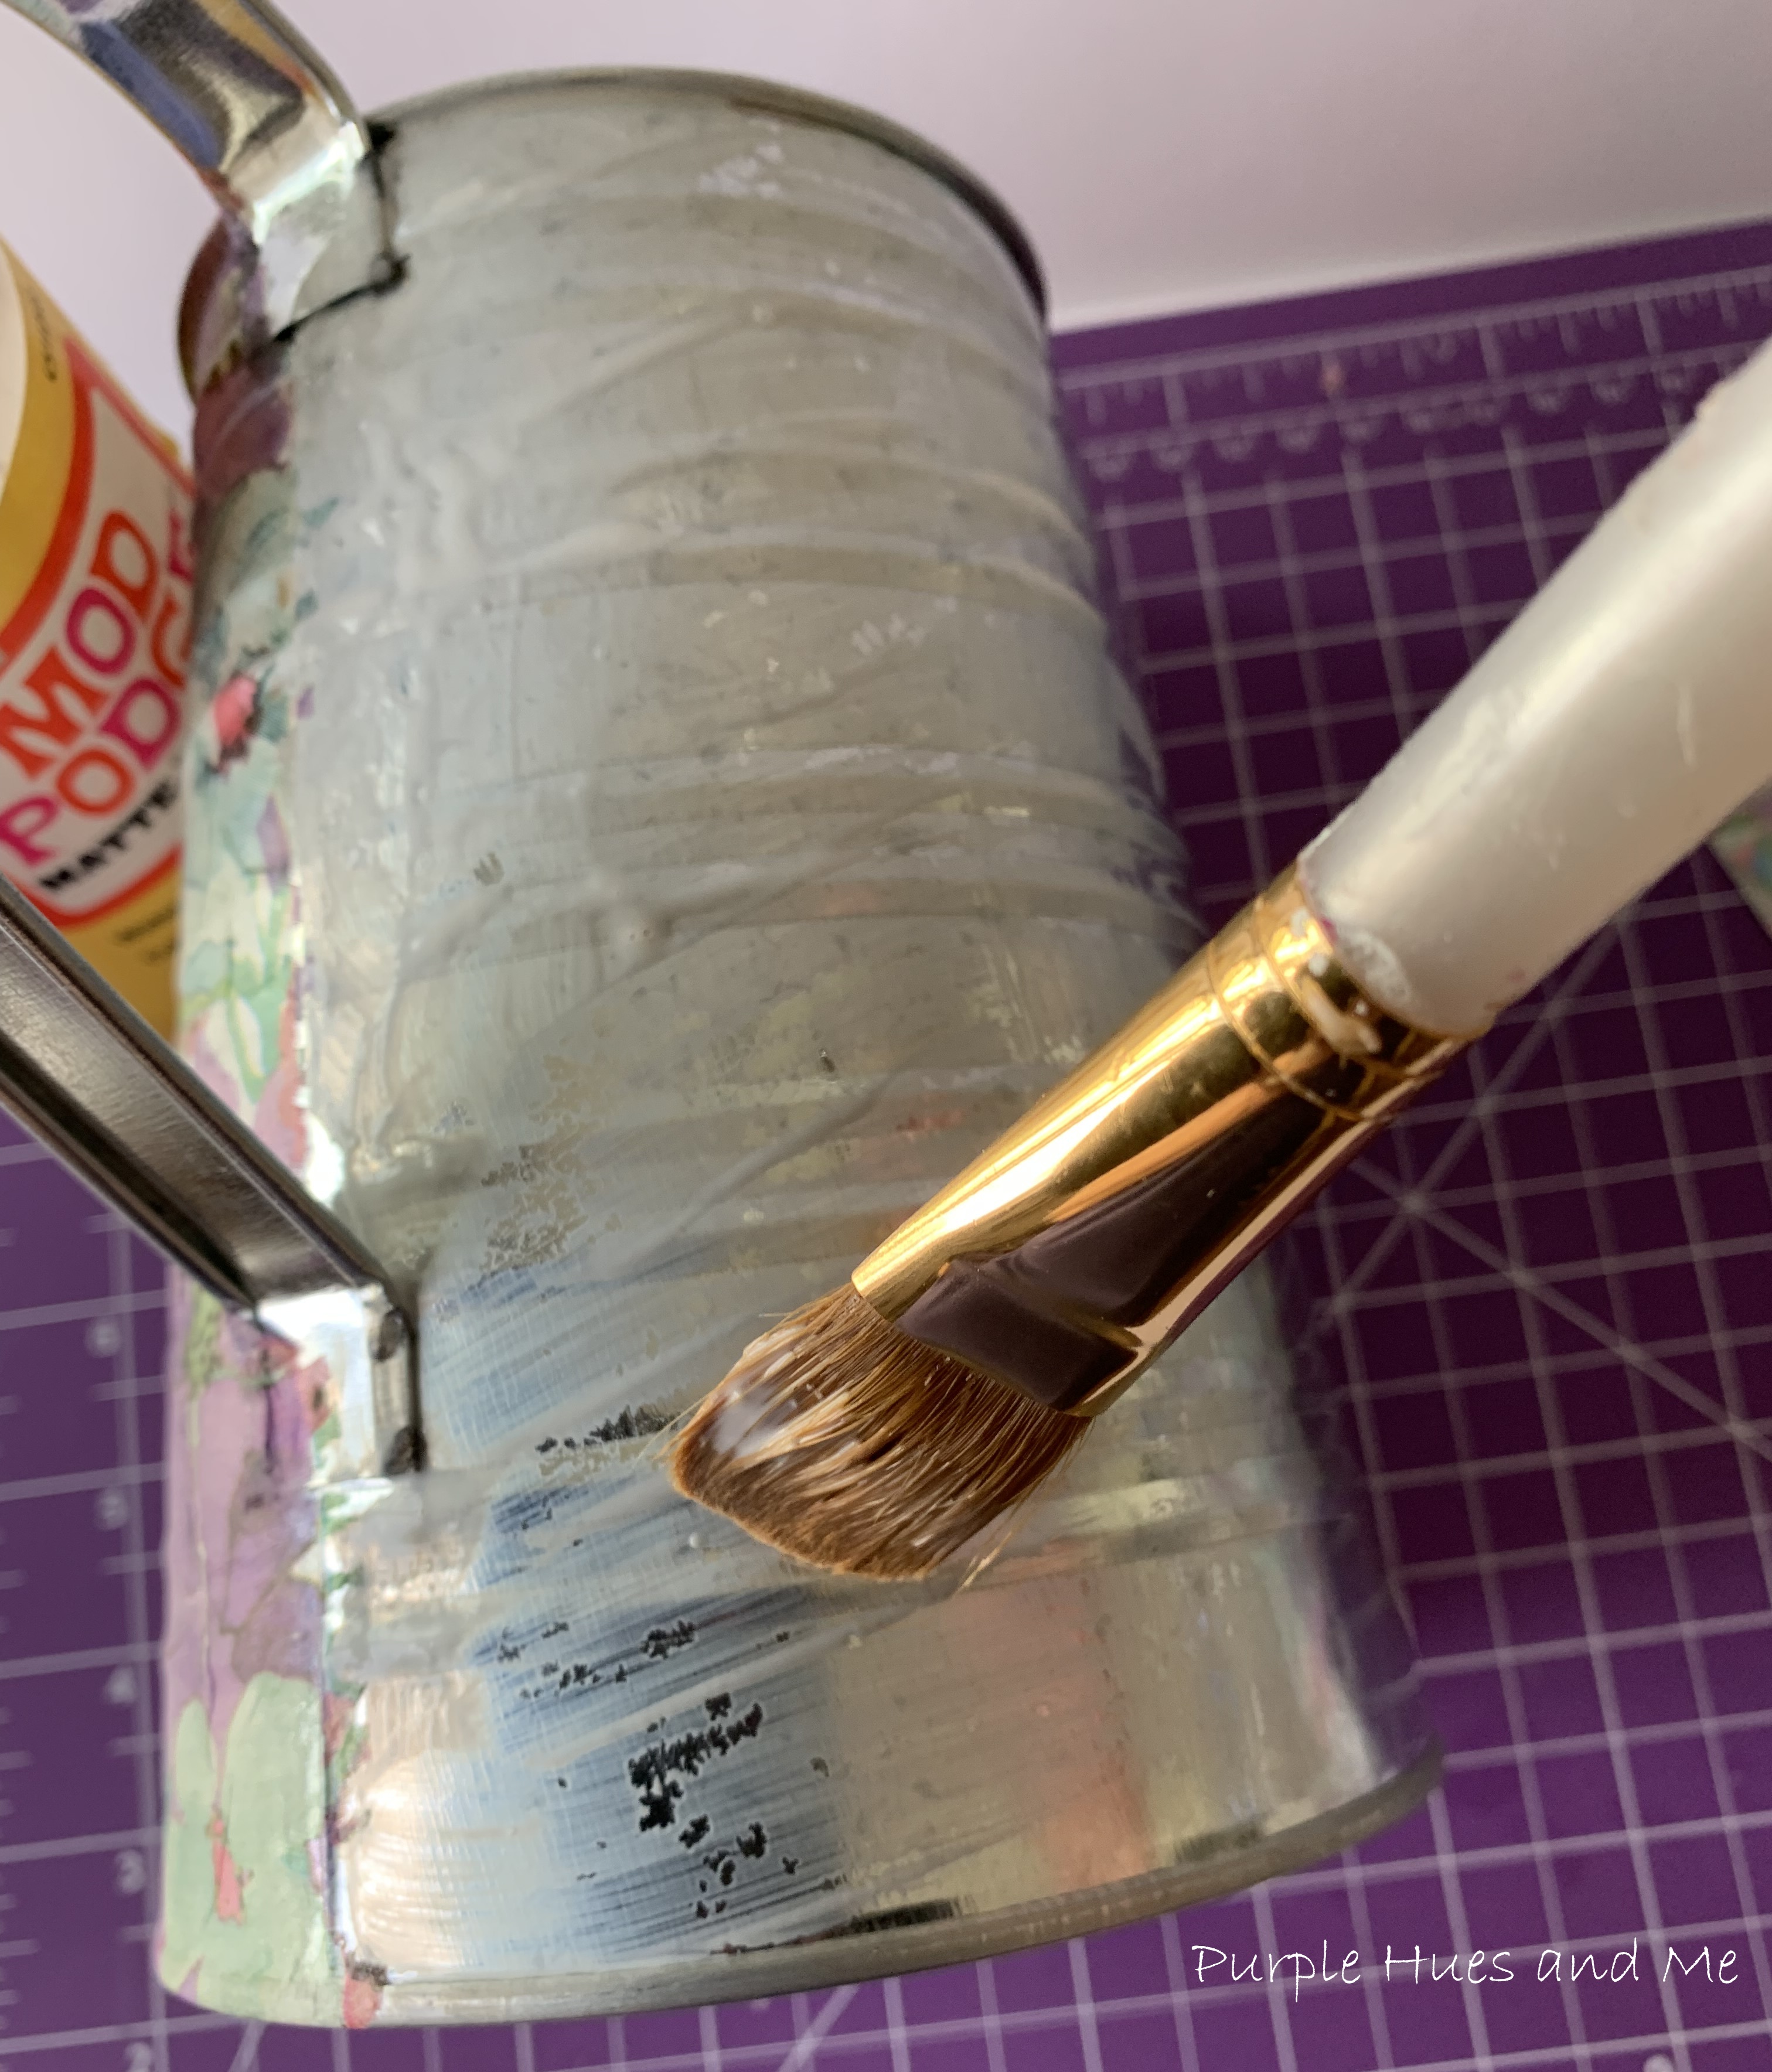
I elected not to add napkins to the spout and handle. I love the exposed look of metal.
Since the watering can may come in contact with water and or outside, once dry, apply Outdoor Mod Podge to seal.
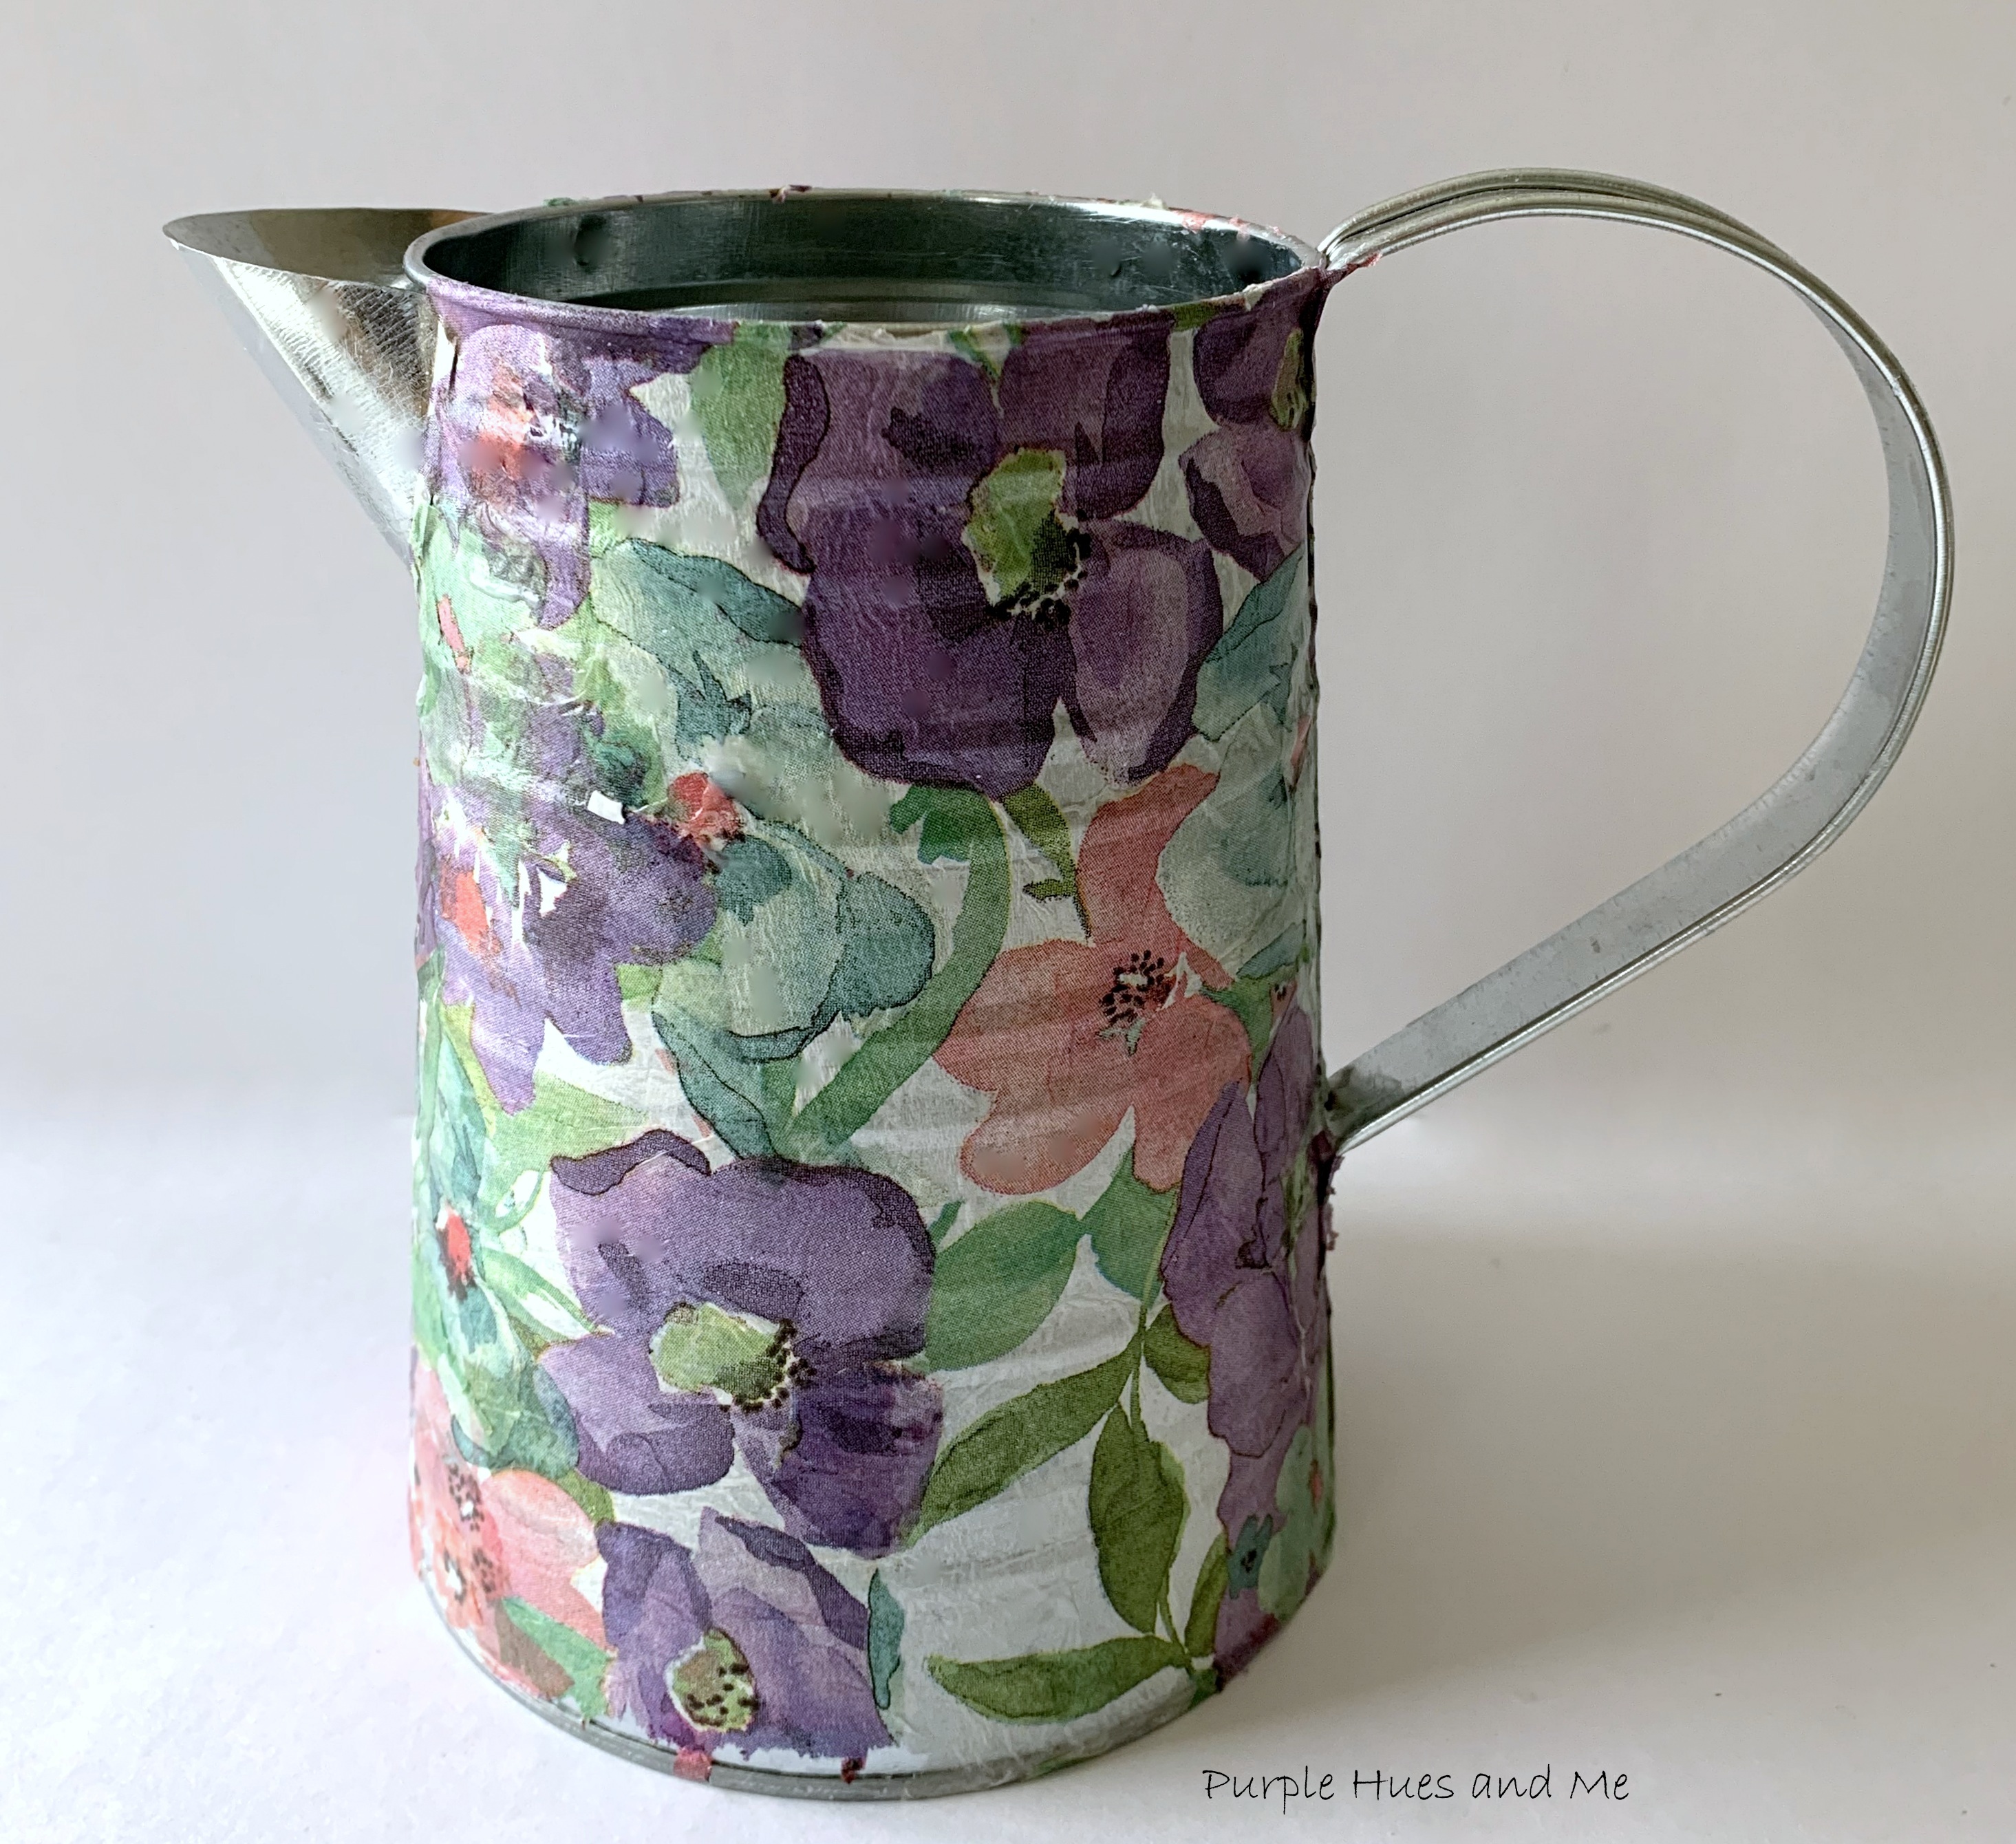
I love how the shiny finish on the metal watering can comes through the decoupaged napkin!
 The perfect addition to your Spring decor!
Which can be used as a vase or decorative watering can!
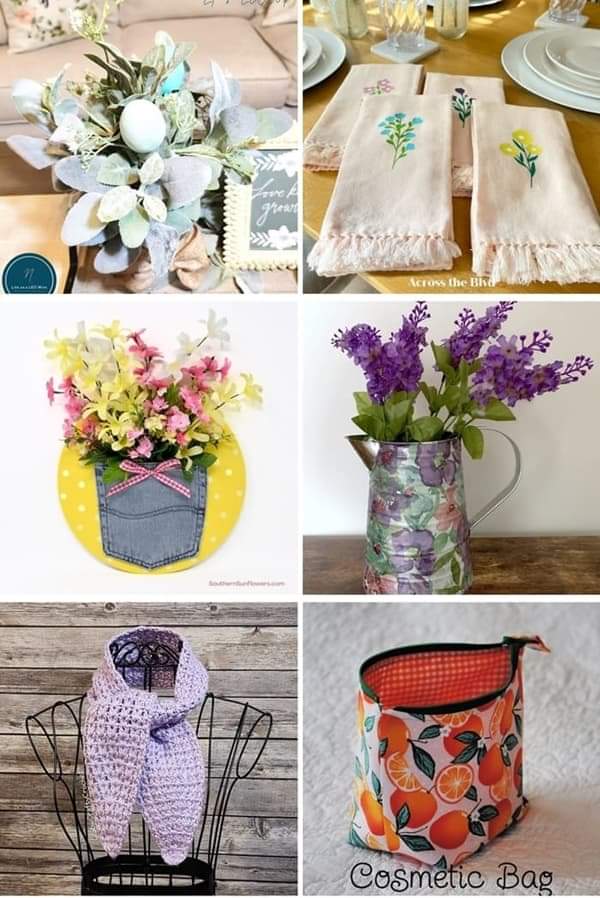
For this project, I've joined a group of bloggers to bring you a themed blog hop challenge on the 2nd Monday of the month, hosted by Beverly @Across the Blvd. This month, it's all about Spring Crafts!


Be sure to check out all the awesome bloggers and their projects listed below:

Beverly | Across the Blvd | Spring Napkins Made with Cricut

Gail | Purple Hues and Me | Spring Fling Decoupage Watering Can

Marci | Stone Cottage Adventures | Tropical Cosmetic Bag

Allyson | Southern Sunflowers Spring Door Hanger Dollar Tree DIY Idea

Niki | Life as as LEO Wife | Dollar Tree Spring Floral Arrangement

T'onna | Sew Crafty Crochet | Lilac Crochet Neckerchief


Tuesday, April 4, 2023

Everlasting Spring Blossoms DIY


Let's welcome Spring! You know spring has arrived when you see the lovely flowering of trees. How pretty is this blooming tree pictured below! Flowering in early spring before the leaves emerge is certainly one of nature's wonders! It's quite pretty!

This tree belongs to my neighbor. He recently told me he wished it would look like this all year long. But no matter how beautiful the blooms are, they are going to wilt and fall off in a matter of a few weeks. Wouldn't it be wonderful to have a  permanently beautiful, everlasting spray of these blossoms!  

I know I would! So for this project, I am being inspired by a set of blossoms that I picked up off the ground to re-create these lovelies!

Just in time for this month's Sustainable Craft Challenge Blog Hop hosted by Julie @ Sum of Their StoriesThis challenge is all about sustainable crafting! Each month is themed and all projects must have some sort of a sustainable element to them. This could be an upcycling or recycling element, or something that reduces waste, uses leftovers, etc. Guess what the theme for this month is - Spring! You got it!


I will be making the blossoms out of craft foam sheets or Eva foam - a material that I have in my stash! I've made lots of faux flowers and other craft items out of Eva foam before. These are not the usual craft foam sheets you find in craft stores. Those are too thick to make realistic looking flowers. You really need thin sheets between 1mm-0.6mm thick. The thinner, the better. One of my resolutions for this year is to use up the craft supplies that I have stockpiled, lol! I have lots of foam sheets in my stash - and I love using it in my projects! 

Concerning sustainability, EVA foam materials are widely used in everyday objects, from wireless digital products, binding books, furniture, cars and household appliances, to assembly, footwear, carpet coatings and metal anti-corrosion coating. Some say Eva foam is not recyclable - but it can be! I read that recycling of EVA foam is not only environmentally friendly, but also help enterprises to control and reduce production costs. 

Foam flowers are quite easy to make and it takes only a few items to actually make them. But for these blossoms, I made my very own stamen which required a bit more materials to re-create:
  • Eva foam -1mm-0.6mm
  • Flower template
  • Craft scissors - slim and sharp
  • Pastels - yellow and pink
  • Iron
  • Heavy duty thread
  • Open frame (wood hoop)
  • Tacky glue/sponge applicator
  • Acrylic paint
  • Ruler
  • Clamps
  • Thin craft wire - 26 gauge
  • Floral tape
  • Small tree branch

Disclosure I am a participant in the Amazon Services LLC Associates Program, an affiliate advertising program designed to provide a means for us to earn fees by linking to Amazon.com and affiliated sites, this post may contain links. I may receive a very small commission at no cost to you! The affiliate money I earn helps pay my crafting expenses. Thanks so much for your support!

To begin, draw a five petal flower template and .  .  .


cut out.
Then using scissors, make a "V" shape indentation on center edge of each petal. 
Trace lots of flowers onto foam sheets and cut out. Fyi, sharpe and thin craft scissors work best for this!
Use pastels (yellow and pink) to give a gradient effect, highlighting and mimicking the center and stamen of the blossom.

Then place the blossom on a hot clothes iron to soften and curl the edges.
And have fun making lots of blossoms!
To make the flower blossom stamen, the thread needs to be straight and stiff.  I used crochet thread to wrap straight lines of thread around an embroidery hoop. It probably would have been easier to use an open square or rectangular frame to wrap the thread around, but I couldn't find one that I didn't have to take apart. 
Once the thread was wrapped around the hoop and secured, I used tacky glue and a sponge to cover the thread to dry stiff.
Once the thread was dry and stiff .  .  .
cut the threads off the hoop and then cut the threads into 2.5" strips. Dip the ends of the thread into thick (old) acrylic paint to mimic stamen. It was easier for me to used the top of the craft acrylic paint to pour a bit of paint to dip in.
Once the ends were dipped, use a ruler propped up on its' ends to lay the stamen across to dry without the ends touching anything.
To insert the stamen through the blossom, fold a 5" length of thin wire in half .  .
around the middle of 4 or more stamens .  .  .
Use the tip of sharp scissors to make a hole in the center of the blossom and .  .  .
insert the wire ends through the hole .  .  .
pulling the stamen threads through .  .  .
leaving the ends in the center of the blossom.
Add a dab of glue at the base of the blossom and wrap green floral tape along the stamen threads, pulling down and tight to secure. 
Be sure to separate the stamen threads on top so they won't bunch together.
And finally, attach blossoms using a dab of hot glue to a saved (real) tree branch for a beautiful everlasting floral decoration. 

How's that for making beautiful realistic spring blossoms that will never wilt - a fun repurpose project!

Be sure to check out all of the "Spring" sustainable crafts projects listed below:


Julie |  Sum of Their Stories |  Tulip Collage Greeting Cards 

Christine | Christine's Crafts | How to Easily and Quickly Fold a Cute 3D Origami Tulip

Gail | Purple Hues and Me | Everlasting Spring Blossoms DIY

Mel | Decor Craft Design | DIY Spring 3D Gift Can

Marianne | Songbird | Rustic Easter Decor 

Niki | Life as a LEO Wife | Farmhouse Style Framed Bunny & Easter Egg


You are invited to the Inlinkz link party!

Click here to enter