Hey guys! Have you ever thought you loved working with a medium and then after a few successful projects discovered working with it is not what you thought! Here's my story:
I wanted to make a project using clay and raffia. I started this project too confident that it would turn out ok - a work of art (Ha!) or so I thought! I had worked with clay before and didn't foresee any problems, but then the problems began right away! But I must confess, it's my fault! I had no problems making this this and this out of clay but with this one, things just didn't go as planned.
Every month I look forward to participating in the Creative Craft Hop, hosted by Sara @Birdz of a Feather. And since I already had air dry clay left over from a previous project and loads of different colors of raffia for a project that never materialized I was all set to make a clay and raffia bowl for this hop! As I show you how I created one, I'll point out my oopsies as I call them!
So let's get started:
Materials:
- Air Dry Clay
- Raffia
- Parchment Paper
- Rolling pin
- Craft knife
- Clingwrap
- Plate/Bowl (mold)
- Phillips Screwdriver (for holes)
- Scrubber/sandpaper
- Straight edge blade
- Acrylic paint/Mod Podge
- Cord/rope
- Duct tape
Disclosure I am a participant
in the Amazon Services LLC Associates Program, an affiliate advertising program
designed to provide a means for us to earn fees by linking to Amazon.com and affiliated
sites, this post may contain links. I may receive a very small commission at no
cost to you! The affiliate money I earn helps pay my crafting expenses. Thanks
so much for your support!
How to:
First off, you'll notice a ball of Crayola Air Dry Clay. It was leftover from a previous project here. I made flowers out of it with no problems. This time, I should have done research on the best air dry clay to use. I saw one that rated Crayola next to the bottom of the group. Oops! Did you know Crayola is own by the Hallmark Corporation? Greeting cards, movies, media! Cool!
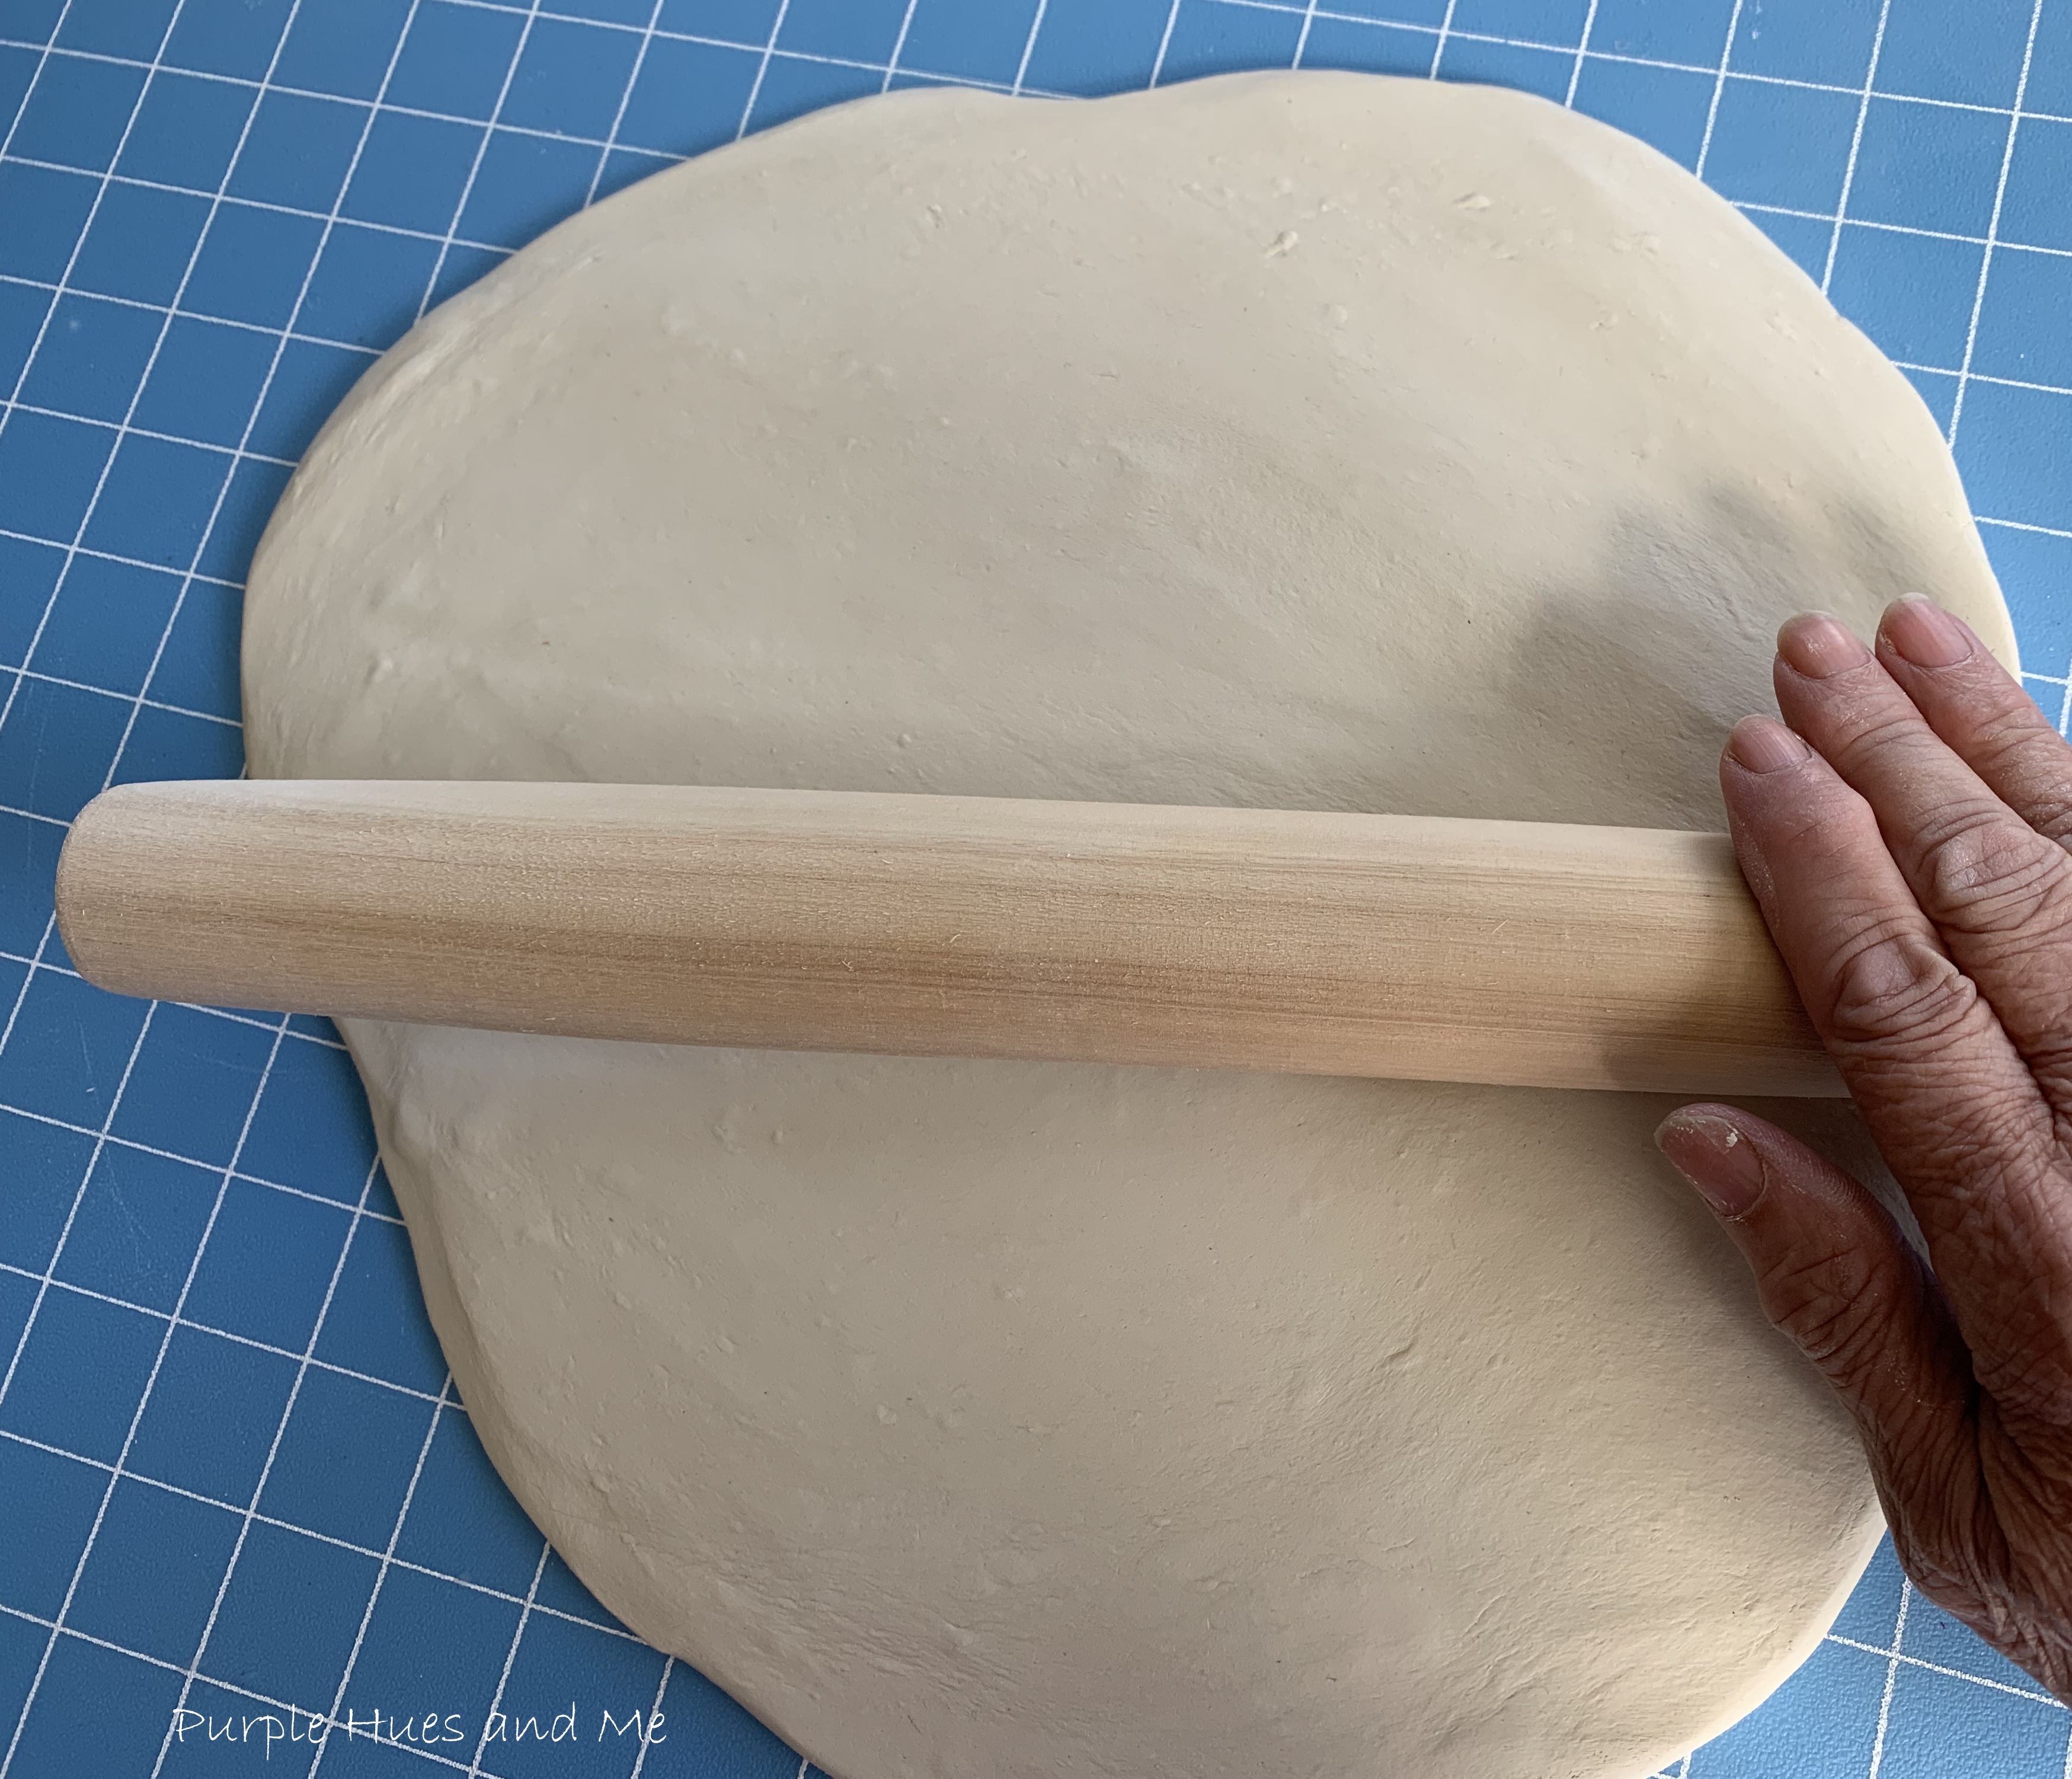
Moving on, knead the clay to soften and make pliable.Then roll the clay out using a rolling pin to at least a 1/4" thick. As you can see, I'm rolling the clay on a self healing cutting mat. Big mistake - I'll tell you later. Oops!
Use a plate or bowl as a mold for the clay bowl and use a craft knife to cut the clay around the mold.
Once the clay is cut, removed the excess clay. Then, I decided to lift the clay circle up and realized that it was stuck to the board. Oops. I should have used parchment paper instead.
I grabbed my silicone mat and flipped the rough side of the clay circle onto it. And used the rolling pin, a craft knife, and fingers dipped in water to help smooth out the rough spots on the surface and around the edge. Whew! 
To make the clay bowl interior look a bit different, I tried to add a decorative design by rolling a stencil on top. The stencil stuck to the clay and once I was able to remove it, I could barely see the design. Oops! 
So, giving that idea up and after smoothing out the design with the rolling pin, fingers and water - once again - began making holes around the rim using a Phillips screwdriver.
 I tried placing the holes evenly around and realized I couldn't smooth the edges of the holes on the backside. And even though I used the same screwdriver, the holes also looked unevenly shaped. Oops!
Next, covered the bowl mold with cling wrap . . .
and gently placed the clay into the bowl to dry. It took three days for the clay to dry. The first day, I took it outside in 90 degree temps and let it stay out for 5-6 hours, but that didn't seem to hasten the drying time. The other days I put it in the garage to dry. I don't think there is a way to speed up the drying time with air dry clay.
On day three, the bowl felt dry, so I picked it up by grabbing the plastic wrap to remove it out of the bowl mold.
And, just as I suspected, the clay on the holes protruded on the backside. So, I used a straight edge razor to cut off the excess clay. Luckily, the clay was still somewhat soft. I'm calling this an Oops, too! No where did I read from anyone who had made holes in clay did it say anything about the clay protruding and how to remove or stop it from happening. Ugg!
Everything I've read about smoothing out dried clay, called for using sandpaper - which I did. But once I started sanding (outside), the sandpaper was covered with clay and it just wasn't working. So I got out a Scotch Brite Scour pad which worked like a charm. All I had to do afterwards was to brush and wipe off the clay residue and dust particles.
Time to measure the cording to wrap with raffia. I placed the clay bowl back into the bowl mold to lay the cord on top around the rim of the clay to see how much was needed. Used duct tape to wrap the end of the cord to prevent raveling once cut.
Cover the end of the cord with raffia and begin wrapping it around the cord.
Continue wrapping the cord with raffia until . . .
Another oops! I should have painted the clay bowl first and . . .
letting it dry and sealing with Mod Pod before sizing the cord for raffia and wrapping.
Once the cord is wrapped in raffia, begin connecting it to the clay bowl by wrapping more raffia three times through each hole and cord. To attach the wrapped cord to the bowl you will need lots and lots of raffia. I measured 30 inches around the edge of the bowl and figured at least 5-6 times that for the raffia.
Continue around the clay bowl edge, passing the raffia through the holes while attaching the raffia wrapped cord until it is completely attached . . . 
it is completely attached - reaching where the cord began. What do you think? Take a look at this pin for reference.
Front
Back of bowl
Despite all my oopsies, how adorable is this! It's perfectly imperfect!
 A perfect conversation starter - a clay bowl accented by raffia that is hand wrapped around raffia covered cord placed on the bowl's rim.
 And the best part, would you believe it was actually easy to make!
Welcome to this month's Creative Craft Hop! I hope you enjoyed my tutorial on creating a clay and raffia bowl and all of my oopsies that went along with making it, lol! If you're coming over from Tammy @Patina and Paint, wasn't her Fall Wooden Bead Garland adorable! And be sure to check out all the talented craft bloggers and their awesome craft creations for this month listed below!


 I tried placing the holes evenly around and realized I couldn't smooth the edges of the holes on the backside. And even though I used the same screwdriver, the holes also looked unevenly shaped. Oops!
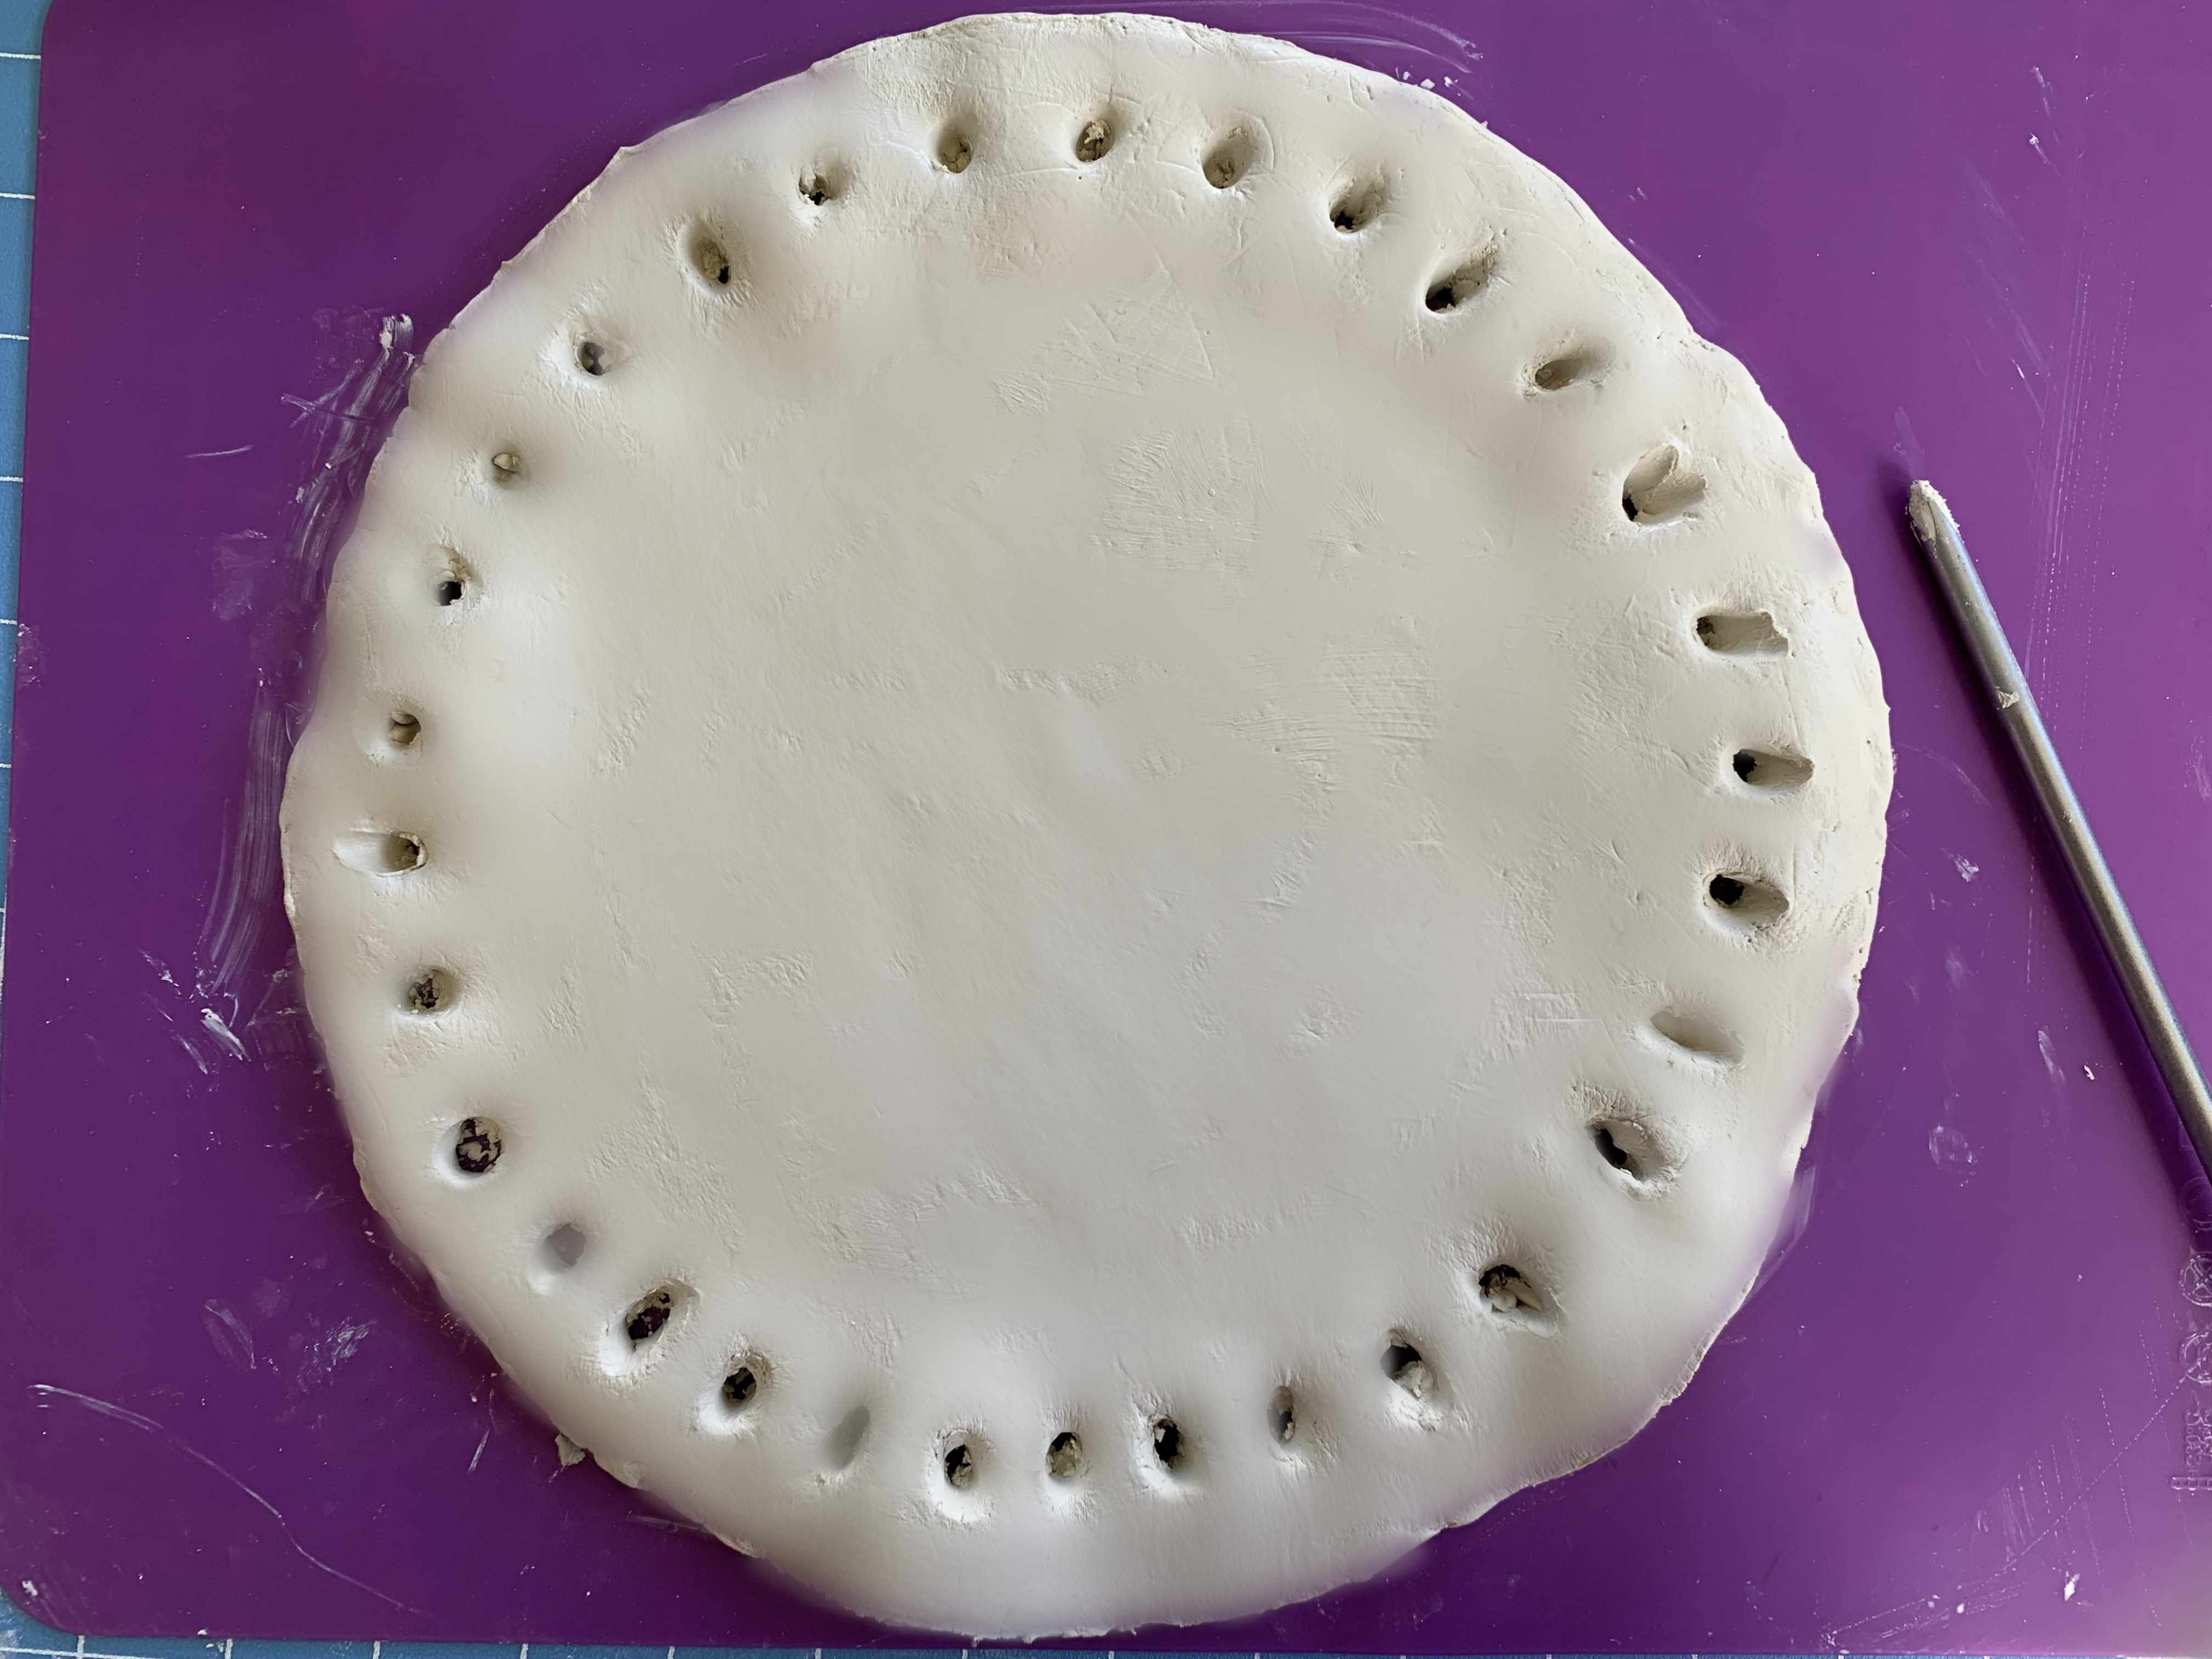


 A perfect conversation starter - a clay bowl accented by raffia that is hand wrapped around raffia covered cord placed on the bowl's rim.


I've been eyeing projects like this on Pinterest wanting to try something so am living vicariously through this project lol! I think it's gorgeous; perfectly imperfect!
ReplyDeleteThanks, Sara! There are a few more I have in mind to try, too! I look forward to this hop each month! Thanks for hosting!
ReplyDeleteI went back three times to see what went wrong, all I see is a great job, no oopsies. :) Love this and would be a beautiful piece to style in your home. Sometimes the ones you think didn't turn out the way you like is your best work! Great job Gail.
ReplyDeleteAww, thank you Terrie! The oopsies were certainly there. I was just lucky it turned out ok!
DeleteGail what a beautiful bowl! I think after the first time it stuck I might have been discouraged and given up. Thanks goodness you didn't as we wouldn't have seen this beautiful bowl. Great job and thanks for sharing. So pretty!
ReplyDeleteOh that's so sweet of you to say! Thanks, Tammy!
DeleteI've had projects go just like this, Gail. Every step seems to have an oops, but you persevered and got it done - beautifully!
ReplyDeleteThanks, Ann! I was about to give up but didn't have another project to fall back on.
DeleteThanks for sharing the good and the frustrating mishaps with your project. Even with the oopsies you still ended up with a pretty piece.
ReplyDeleteThanks so much, Donna! I really tried with this one!
DeleteYour bowl is fantastic Gail, one would never guess you struggled with it! I admire your patience and determination to master the clay! The way you created the raffia cord and secured it to the bowl edge is so clever. All of your oops really paid off, the bowl is beautiful! thank you for sharing the details~
ReplyDeleteJenna
Thanks, Jenna! I was determined to make this one work! It had been on my mind to do for a long time!
DeleteGail, I'm a huge fan of "perfectly imperfect" and your handmade bowl is lovely! Blessings, Cecilia @My Thrift Store Addiction
ReplyDeleteThanks, Cecilia! I find most of my projects are perfectly imperfect these days, lol!
DeleteI love it Gail! I doubt anyone would've noticed that the bowl wasn't exactly like you wanted it. I certainly wouldn't have! You're right, it's perfectly imperfect. I love the color of the raffia too. Pinned! Happy hopping & thanks for sharing on Crafty Creators!
ReplyDeleteI had no idea you could do something like this with that clay! Not sure why. Must be my small mindedness. Anyway, I love it and it's so fun! You should link up to Farmhouse Friday sometime. I'd love to feature you sometime. Hope you're having a great week.
ReplyDeleteGail,
ReplyDeleteThis is really great!! You are so talented!! Thanks so much for stopping by!! I hope you had a great Labor Day!!
Hugs,
Deb
Amazing content! This really gave me some fresh ideas to think about.
ReplyDelete