Saturday, May 28, 2022

Jute Vase with Flair Top DIY

If you're like me, you can never have enough vases to display beautiful flowers! And one handmade like this woven jute vase with a flair top certainly adds a personal, unique touch that you will truly love! Can you believe  - from a tin can to a decorative showpiece! And the best part, repurposing materials is always a crafter's dream - especially using items as simple and inexpensive as a tin can, jute rope and knitting wire! And although the finished look appears intricate, it's actually quite easy to do using mostly an over and under weaving technique!  So cool - just in time for our Do It Over Designers Blog Hop!  

In
 case you don't know, the Do It Over Designers is a group of talented bloggers who love to recycle/upcycle/DIY, hosted by Anne @The Apple Street Cottage. It happens the 4th Saturday of every other month and it's all about taking something old and/or unused and 'doing it over' into something new. Anything from fabric, old dishes, and decor to dressers and hutches. Items found in closets, cabinets, barns, garages, yard sales, thrift stores, you name it!
I hope you'll visit all the super creative bloggers to see their amazing "do over" projects.  The list of participants are at the end of this post.

Friday, May 27, 2022

How To Make An Adorable Patriotic Bow Ribbon Wreath

This post first appeared on the Bowdabra.com Blog site, where I'm on the Bowdabra Design Team

Create an adorable patriotic bow ribbon wreath for your red, white and blue celebrations! Show your patriotic pride for all patriotic celebrations with this beautiful red, white and blue bow ribbon wreath. It's a great addition to your celebrations, proudly showing your patriotic spirit! And it's so easy to make using a Mini Bowdabra! So many folks have problems creating gorgeous bows - and you won't believe how easy it is using a Mini Bowdabra!

This handmade wreath features patriotic colors in red, white and blue ribbon. It has nearly thirty yards of four loopy bows made with the Mini Bowdabra. Since the bows are made with the Bowdabra, they are created quickly and attached with hot glue onto the Styrofoam wreath. The wreath has a bow wire loop in the back for easy hanging. You can, however, use the patriotic ribbon bow wreath as a decorative accent table piece. The finished size is sixteen inches in diameter. This charming red, white and blue bow ribbon  wreath is the perfect way to show your patriotic spirit throughout the year. And it’s also perfect for use in a nautical theme setting, too!

Thursday, May 19, 2022

Tattoos on Glass Decor


Planning a get-together, party or cookout and wondering how you can dress up those plain glass vases, containers, dishes, or drinkware quick and easy? Have I got a fun way to do just that! Temporary tattoos! Yes, you heard me right! Turn ordinary items into fabulous decorative pieces! Decorate just about anything with temporary tattoos to add a touch of glamour to your home! And the best part, you won't believe how easy it is! 

Materials
  • Glass containers
  • Temporary tattoos
  • Scissors
  • Small towel
  • Water spray bottle
  • Paper towels
Disclosure I am a participant in the Amazon Services LLC Associates Program, an affiliate advertising program designed to provide a means for us to earn fees by linking to Amazon.com and affiliated sites, this post may contain links. I may receive a very small commission at no cost to you! The affiliate money I earn helps pay my crafting expenses. Thanks so much for your support!

How to
I have a lot of plain glass containers in my stash - but decided on one, I got from the thrift store for three dollars and a few Oui yogurt glass cups I saved instead of throwing them out. 

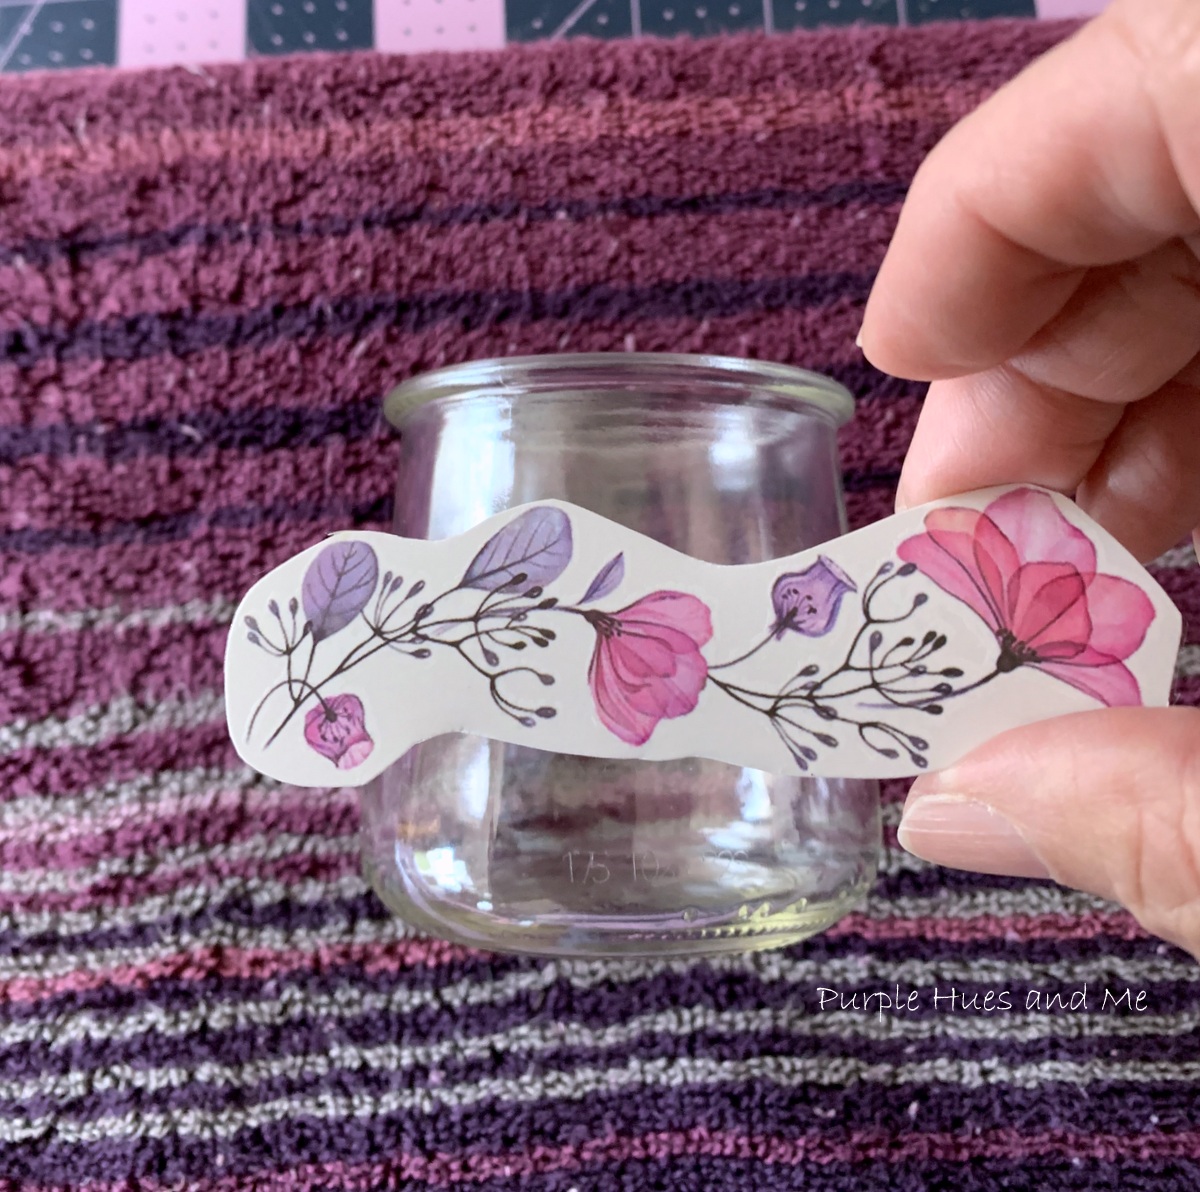
To get started, clean and dry the containers. Then wipe them down with alcohol so they are free of any oils or missed grime. and let dry.  Then cut out the temporary tattoo as close to the designs you plan to use.

Fold up a small towel to hold the container in place and to catch dripping water. Then position the tattoo design on the glass .  .  .
and peel off the transparent film.
Place the cut out tattoo face down on the container .  .  .
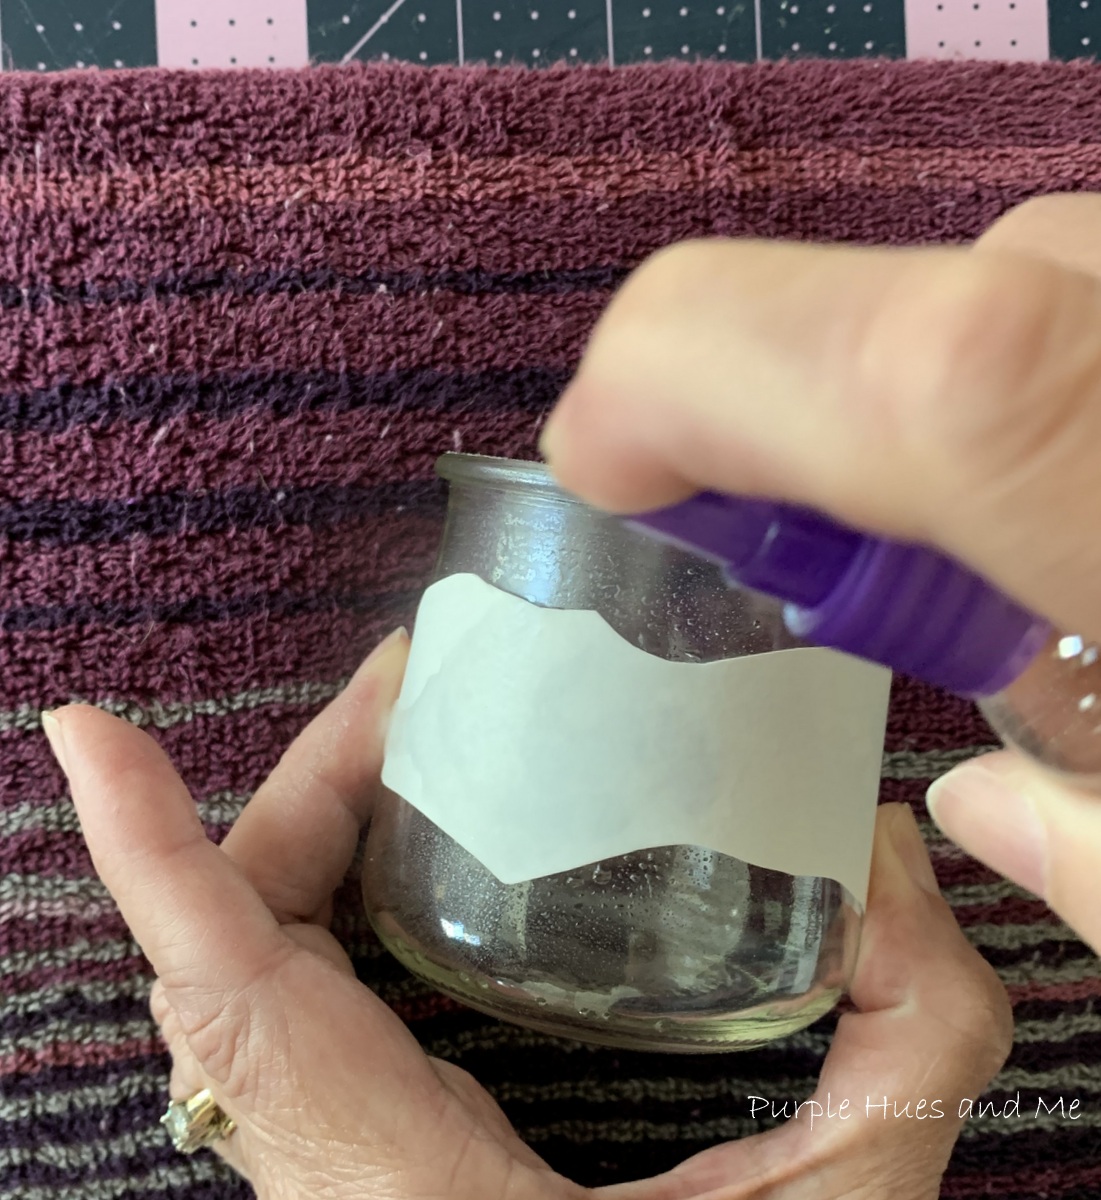
Spray the back of the tattoo with water .  .  .
completely saturating it.
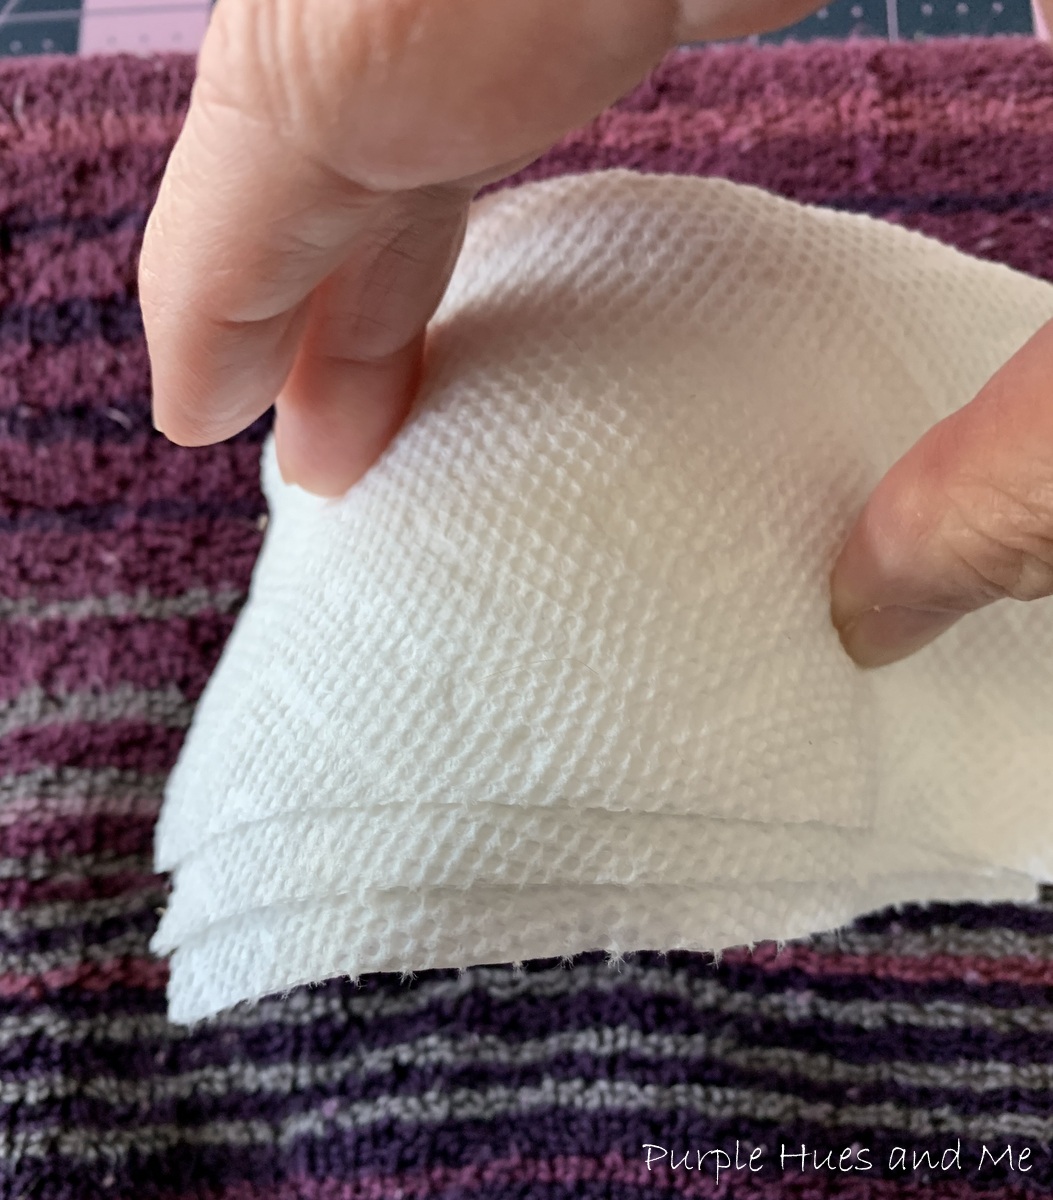
Use a dampen paper towel to cover and smooth out any wrinkles.
Start peeling at the corner to check if the tattoo has transferred - remove if it did. If not, press down the backing and wet again.
Let dry. Apply sealer like dishwasher safe Mod Podge and let dry. Hand wash only.
Aren't these Oui cups adorable!
With battery operated candles .  .  .
All lit up! How cute are these!

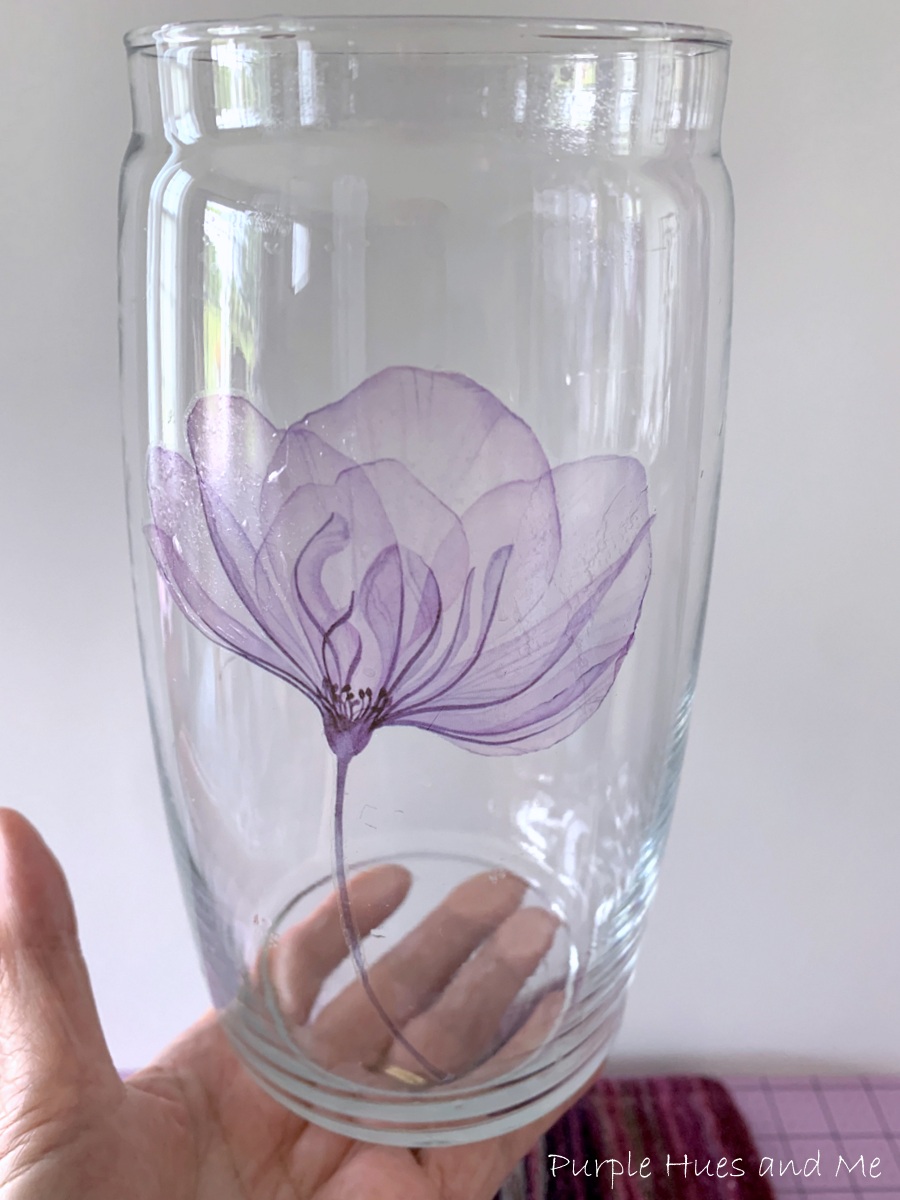
The same previous steps were done for this thrift store container - cleaning the glass and cutting out the design - placing face down. 

Then wetting the paper backed tattoos and peeling the paper off .  .  .
to reveal a pretty tattoo flower. 
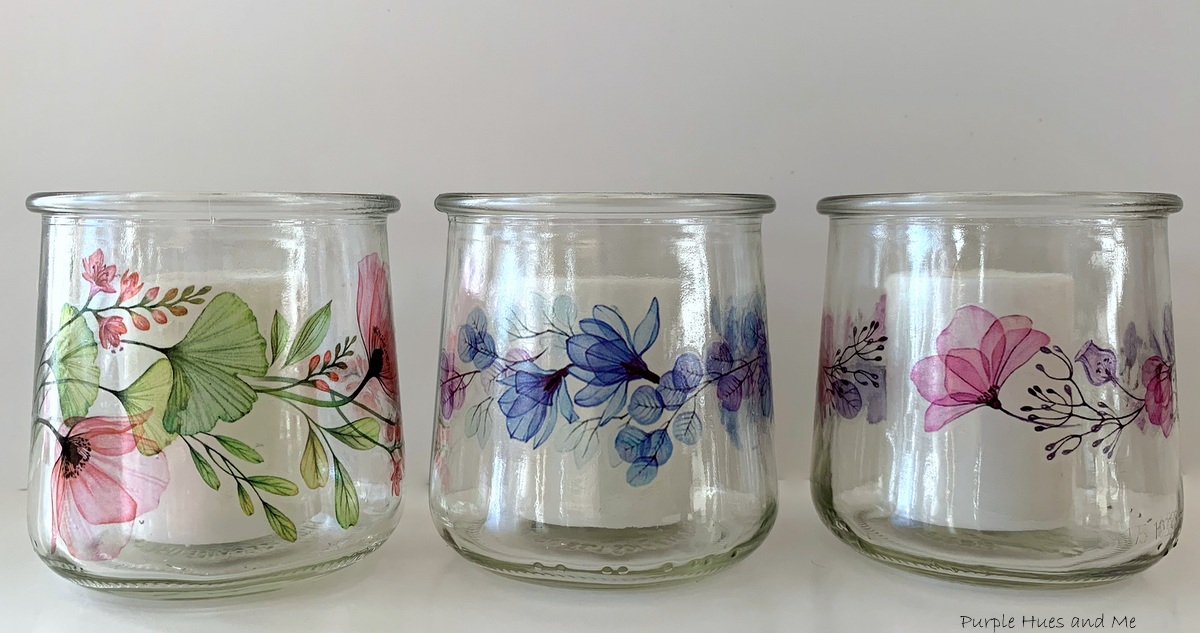
Have fun adding more decorative designs - no one will know they're really tattoos!
Perfect to enhance any decor!


Welcome to this month's Creative Craft Hop

hosted by Donna from Modern on Monticello

while Sara takes a short break

Thank you Donna!


I hope you enjoyed my tutorial on making Tattoos on Glass Decor! Up next is Ann @Apple Street Cottage, sharing her beautifully created frame! And be sure to check out all the talented craft bloggers and their awesome craft creations for this month listed below!

Easy Clearance Wreath Upcycle - Cecilia @ My Thrift Store Addiction

Dollar Tree Hand-woven Basket Stand - Terrie @ Decorate and More with Tip

Welcome Home Painted Birdhouse - Jenna @ The Painted Apron

DIY Mid Century Modern Inspired Wall Sculpture - Donna @ Modern on Monticello

Indoor/Outdoor DIY Farmhouse Lantern - Niki @ Life as a Leo Wife

Tattoos on Glass Decor - Gail @ Purplehues and Me

Finally a Frame - Ann @ Apple Street Cottage

How to Paint and Mod Podge a Wooden Tray - Allyson @Southern Sunflowers


Monday, May 9, 2022

Dollar Store Butterfly Door Hanger DIY


What better way to welcome spring and summer than with a gorgeous butterfly door or wall hanger! You've seen them already made - but have you wondered how to actually make the butterfly? Well, today I'm going to show you how! Made from scratch using dollar store items, you will be surprise how easy it is to make one! 

This whimsical wall hanger has a rope outline in a butterfly shape made out of poster foam board with a burlap fabric covering - all from the dollar store! And the best part, you can dress it up with pretty florals and bows, too! And then, this butterfly hanger can be placed on your door or wall as a decorative accent - making a great statement to welcome family and friends to your home! 

Wednesday, May 4, 2022

Plaster Doily Bowl DIY

Welcome to this month's DIY Challenge, hosted by Terrie @Decorate and More with TipIn case you don't know about this DIY Challenge, on the 1st Wednesday of each month, a group of talented bloggers create something based on a theme or material that's selected by Terri! This month Terri is raising the bar with a Plaster or Concrete theme! I had made a couple of plaster cloth projects - here and here. So I thought this theme would be somewhat simple.
But after starting what I thought would be an easy plaster bowl - my first one was a complete fail! I couldn't get the plaster bowl out of the mold! It was metal! Silly me! So I looked around in my stash and saw an old doily I had gotten from Michaels a few years ago. I knew I wouldn't have a problem making a plaster doily bowl! After all, there are so many ways to stiffen and shape a doily into a bowl! And they all seemed quite easy - including using plaster!

Tuesday, May 3, 2022

Leftover Ham and Cheese Frittata


Welcome to our Sustainable Pinterest Challenge Blog Hop hosted by Julie  @Sum of Their Stories. This month it's all about sustainable recipes or related projects! I was originally inspired by this pin and switched it up a bit to suit my family.
We all need to be a more earth friendly cook by using up what foods we buy! I truly get disgusted by the amount of food that I throw away each week. And it's always best to get the most from every dish we create so we can save money and eat well - especially during these times! 

And it's so easy to incorporate leftovers into new dishes! Plus, you can simplify your breakfast/dinner routine and cleanup with a favorite recipe made in just one dish or skillet, like a frittata - a tasty crust-less egg dish! 

Ham is frequently served on dining tables during Easter and Christmas. However, it’s almost impossible not to have some leftovers. Actually, I think everyone looks forward to eating leftovers in favorite special ways! So what do we do with all that leftover ham from this past Easter? One way is to make a delicious frittata. I especially love this recipe since you only need two eggs. Most frittata recipes usually call for at least 6 or more eggs! So this recipe is another way to save!

 Ingredients

  • 1 cup diced cooked ham
  • 3/4 cup shredded Mozzarella cheese
  • 5 bacon strips, cooked and crumbled
  • 3/4 cup shredded sharp cheddar cheese
  • 3 tablespoons chopped onion
  • Parsley flakes
  • 1 cup milk 
  • 1/4 cup Bisquick baking mix
  • 2 large eggs
  • 1/4 teaspoon salt
  • 1/8 teaspoon pepper
Directions
Step 1 Preheat the oven to 350 degrees. Dice enough ham to fill one cup.  Cook and crumble five bacon strips. I like to cook bacon in the microwave - it's quick and easy!  Then chop three tablespoons of onions. 

Step 2 Layer the ham, mozzarella cheese, bacon, cheddar cheese, and onion in a greased 10" pie plate.  The original recipe called for swiss cheese - which I didn't have, so I used mozzarella instead which I always keep on hand for pizzas! 


Step 3 Place the remaining ingredients - milk, baking mix, eggs, salt and pepper in a blender or food processor in the order given; cover and process for about a minute. Pour over the meat, cheese and onions. Then sprinkle parsley over mixture.

Step 4 Bake, uncovered for 30-35 minutes  until the frittata is light golden on top and a knife inserted into the center comes out clean. Let stand for 5 minutes before cutting. The frittata will probably deflate a little, so don't get upset it falling.
Don't you just love the ease of preparation! I sure do!
So versatile - adding your favorite leftovers to the mix!
And quite tasty, too!
Great for breakfast, brunch or any time of day!

Now, it's time to meet the other participants and their recipes or related recipe projects!


Julie | Sum of their Stories
Gail | Purple Hues and Me
Terri | A Good Life
Lydia | Life Beyond the Kitchen
Marianne | Songbird
Julie | Just Winging It
Ann | The Apple Street Cottage
Mel | Decor Craft Design

You are invited to the Inlinkz link party!

Click here to enter