
Air dry clay is becoming one of my favorite mediums to craft with. I've been playing with clay a lot - something I didn't like doing as a child. I could never make anything fun with it. But now there seems to be some amazing things you can do with air dry clay. I've made an MC design scalloped edge dish, a clay and raffia bowl, a pumpkin stem, clay angels, and decorative flowers! I've even made a few items using oven dry clay, too!
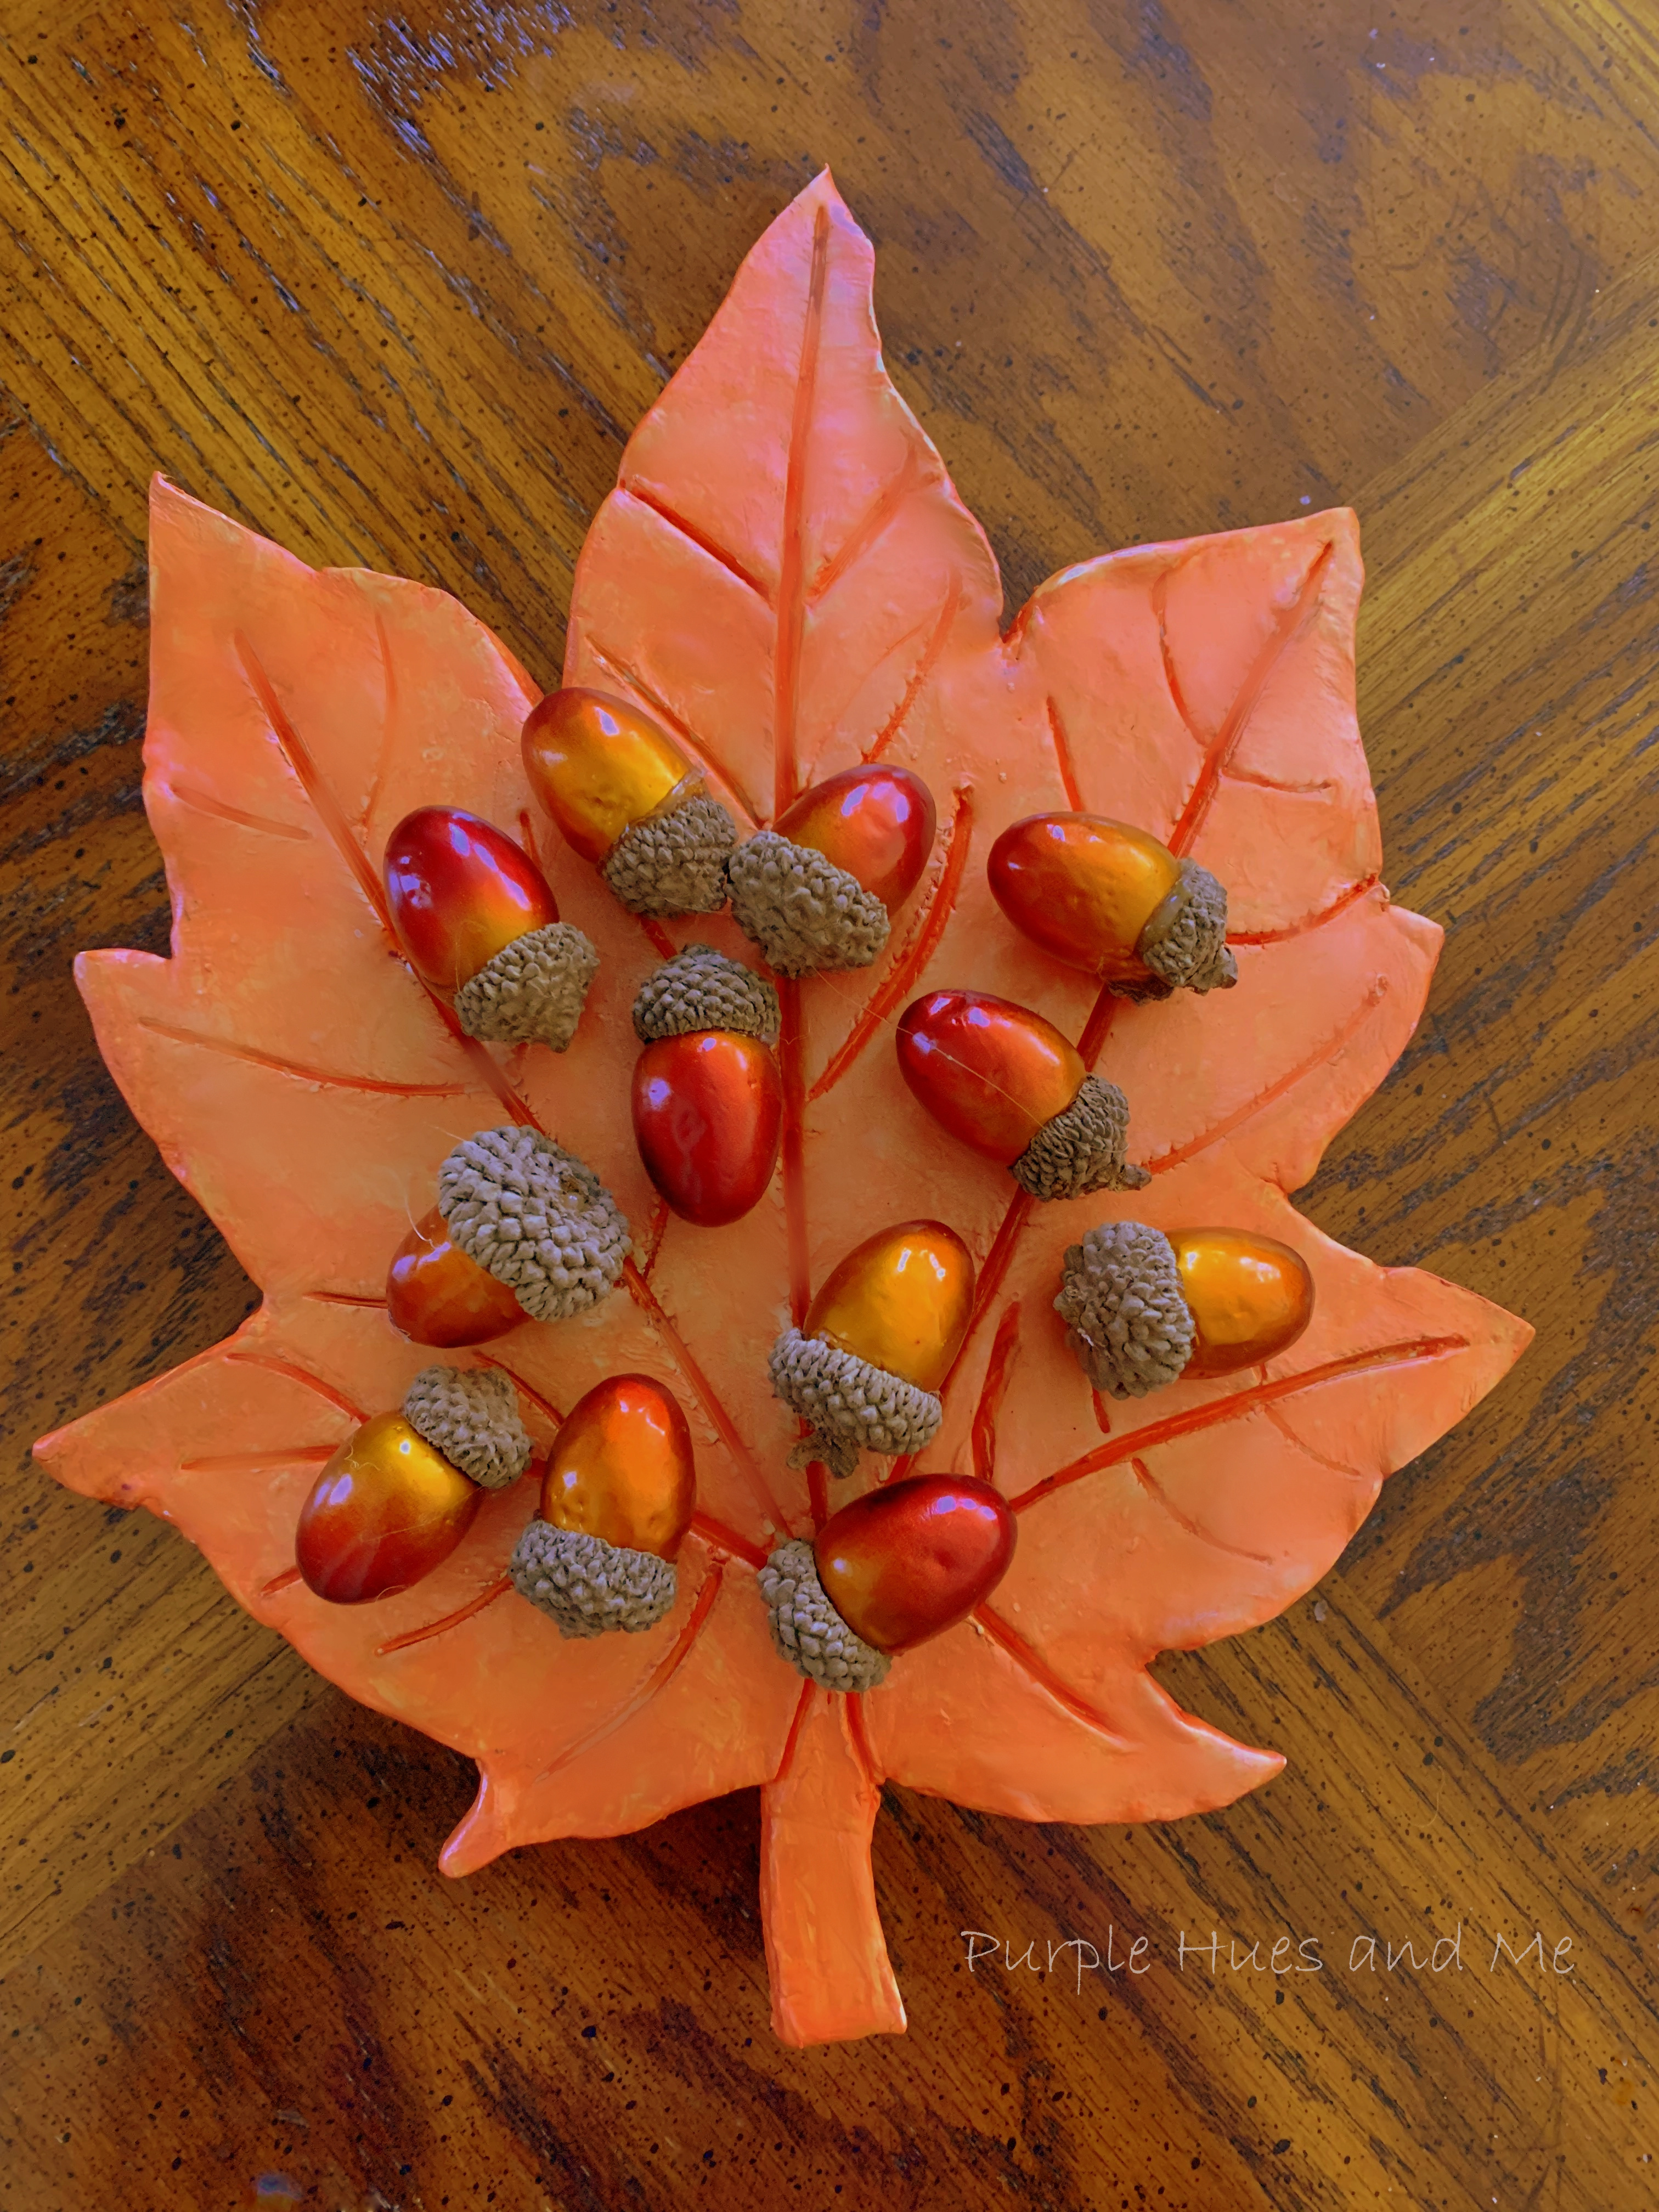
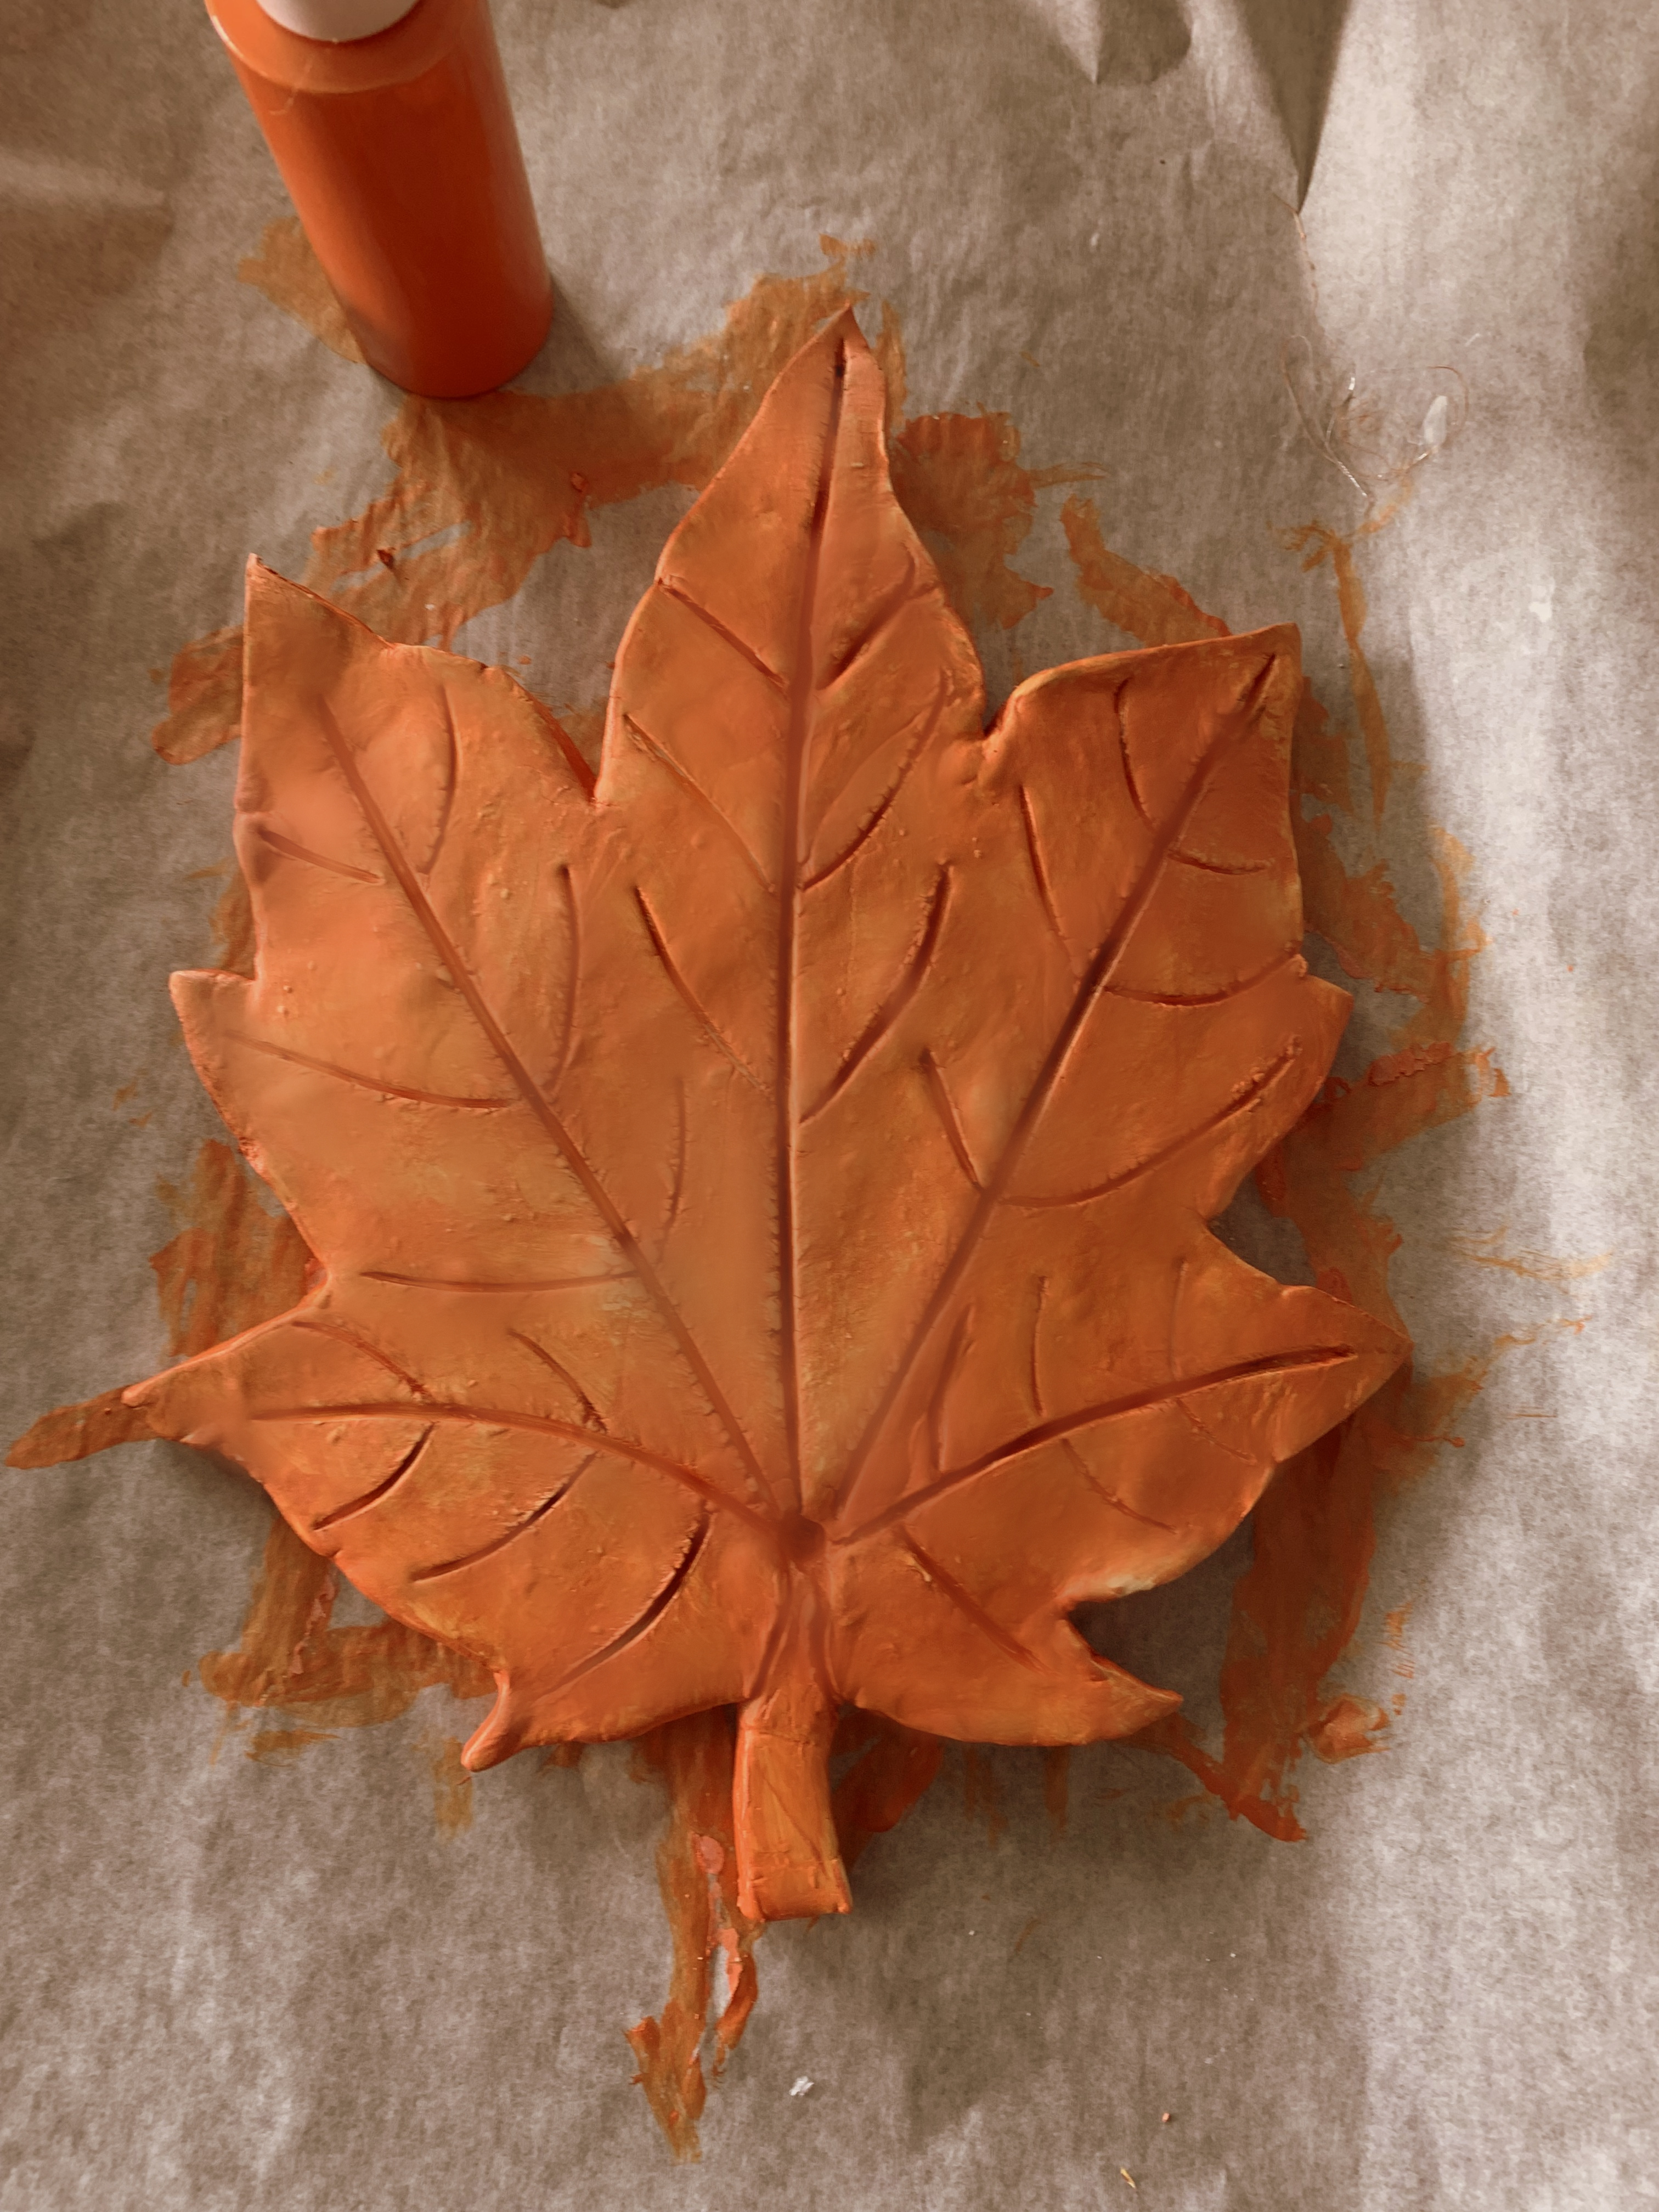
Every month I look forward to participating in the Creative Craft Hop, hosted by Sara @Birdz of a Feather. And since I already had air dry clay left over from previous projects, I decided to make a simple maple leaf dish! Something to put trinkets or decorative pieces on during the fall season! But this time instead of air drying the dish, I put it in the oven since time was running out to complete this post and couldn't wait two days or more for it to dry.
Fall is in the air, but it seems like summer is hanging around a bit longer. The temperatures outside have consistently been in the mid eighties these days, and the leaves on the trees are still green. Normally, most diy leaf dishes - and there are plenty - uses a real leaf to get the true design, including the veins of a leaf. Unfortunately, there are no large leaf trees here in my neighborhood or nearby community that I would feel safe picking. Although I was at Sam's the other day, and there were lots of maple trees along the parking lot. Again, I didn't feel safe picking leaves from the trees or ground, for that matter. I didn't want someone from the store running out after me asking what I was doing to the trees, lol!
Anyway, that being said, I found a free maple leaf template online that I downloaded, copied and enlarged just for this dish.

Disclosure I am a participant
in the Amazon Services LLC Associates Program, an affiliate advertising program
designed to provide a means for us to earn fees by linking to Amazon.com and affiliated
sites, this post may contain links. I may receive a very small commission at no
cost to you! The affiliate money I earn helps pay my crafting expenses. Thanks
so much for your support!
- Crayola Air Dry Clay
- Parchment paper
- Rolling pin
- Craft knife/ice pick
- Sandpaper
- Acrylic paint
- Mod Podge
- Wood balls


DIY Sewing Kit - Sara @Birdz of a Feather
DIY Crystal Balls from Dollar Tree Supplies - Niki @Life as a Leo Wife
How to Decorate a Glass Vase with Twine - Carol @Blue Sky at Home
Halloween Shadow Box - Tammy @Patina and Paint
DIY Clay Fall Leaf Dish - Gail @Purple Hues and Me
A Denim Pumpkin Sign - Ann @The Apple Street Cottage
Scrap Wood Black Cats for Fall - Donna @Modern on Montecello
Dressed Up Dollar Store Pumpkin Place Cards - Cecilia @My Thrift Store Addiction
Haunted Halloween Mansion - Jenna @The Painted Apron
Faux Terracotta Pumpkin Tutorial - Terrie @Decorate and More with Tip


Awesome project Gail! I've never used air dry clay before. Are you able to preserve left-overs between uses?
ReplyDeleteGail how pretty! I've never used air clay but you make it look like something I would enjoy trying. Thanks so much for sharing!
ReplyDeleteWhat a cute idea - I love playing with clay and this would be a cute little gift!
ReplyDeleteThis is adorable Gail. I love how you detailed your leaf. Great job and share!
ReplyDeleteGreat idea Gail, the leaf looks wonderful.
ReplyDeleteGail, this is such a lovely example of handmade decor and it's just perfect for fall! Blessings, Cecilia @My Thrift Store Addiction
ReplyDeleteWhat an adorable dish! I have had some air dry clay for a while and couldn't think of anything to do with it. You've given me a great idea. Pinned!
ReplyDeleteSo pretty, Gail. I love the color and the little feet!
ReplyDeleteThis new style is too good. And i appreciate your effort you put in this blog. The leaf color is so beautiful. Thanks for sharing this too informative blog. Now it's time to avail african gowns for ladies for more information.
ReplyDeleteGail, the more I see these clay projects, I like them. This one is pretty and practical.
ReplyDeleteWOW your DIY work was very nice. Keep it up. Please share more tips how to made new things. Now it's time to avail Hi Vis Traffic Jacket for more information.
ReplyDeleteThis looks great. I love the acorns!
ReplyDeleteThanks for sharing on Crafty Creators! I'll be featuring your dish on tomorrow's party. Congrats!
ReplyDelete