

Hey everybody, it's that time again to share our "Do Over" projects! In case you didn't know, the "Do It Over Designers" is a group of talented bloggers who love to recycle/upcycle/DIY, hosted by Anne @The Apple Street Cottage. It happens the 4th Saturday of every other month and it's all about taking something old and/or unused and 'doing it over' into something new. Anything from fabric, old dishes, and decor, to dressers and hutches. Items found in closets, cabinets, barns, garages, yard sales, thrift stores, you name it!

For my "do over" project, I'm taking clear Christmas ornaments that I've had for awhile, unused, and turning them into retro candlestick holders! You've probably seen similar candlesticks with a unique retro look - a bubble glass or hand blown effect - like this clear ribbed one:![]()
or in colors!
.jpg)
Imagine bringing a unique vintage look into your space with uniquely handmade candlestick holders using clear plastic ornaments! And you won't believe how easy they are to make, either!
Materials:
Clear plastic ornaments
Small plastic candleholders
Hot knife/tempered glass mat work surface
Parchment paper
Quick dry clear multi-purpose glue
Disclosure I am a participant
in the Amazon Services LLC Associates Program, an affiliate advertising program
designed to provide a means for us to earn fees by linking to Amazon.com and affiliated
sites, this post may contain links. I may receive a very small commission at no
cost to you! The affiliate money I earn helps pay my crafting expenses. Thanks
so much for your support!
How to:
Let's begin by sorting out the clear plastic ornaments you want to use to make the candlesticks. I picked out several ribbed ones and a few plain round ones, too!

Don't you just love this ribbed onion shaped ornament!

But first, for safety, when working with a hot knife, it's recommended to use a tempered glass mat to ensure your work area will not be damaged from heat or cuts. I also like to use parchment paper, too! That being said, begin by removing the protruding section (where the ornament hanger attaches) of the ornament using the hot knife.
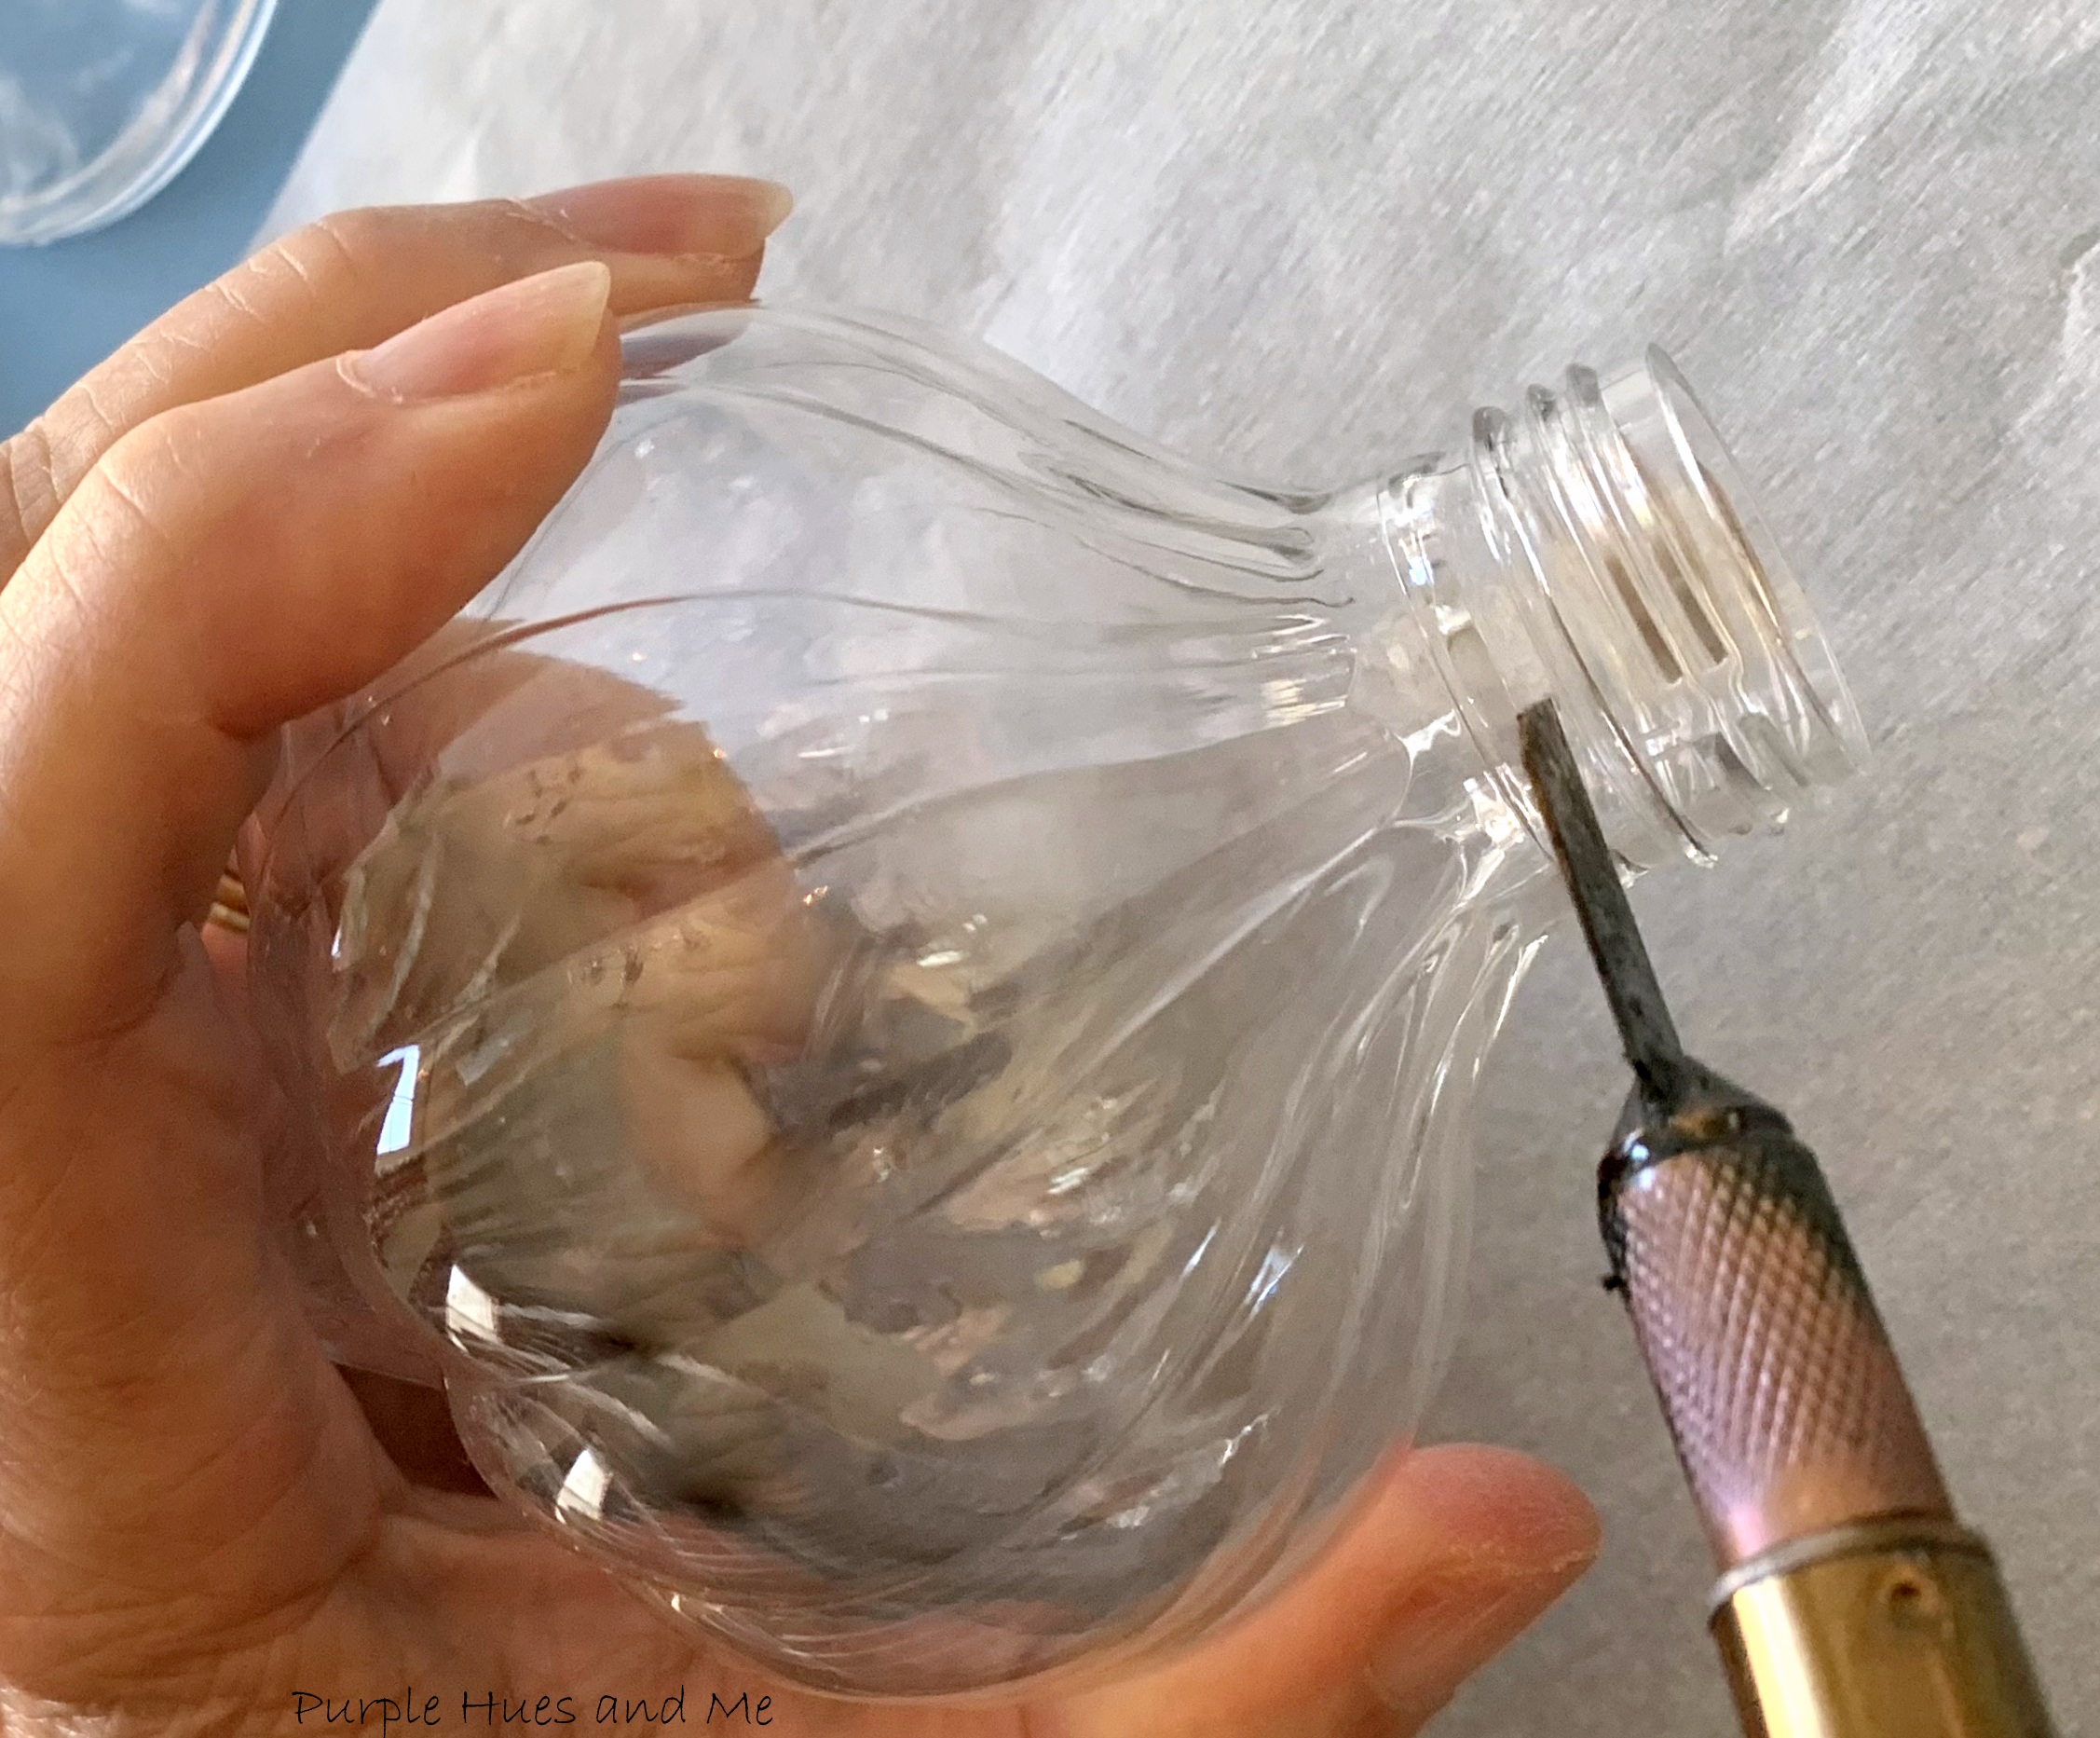
Cutting all the way . . .

through!

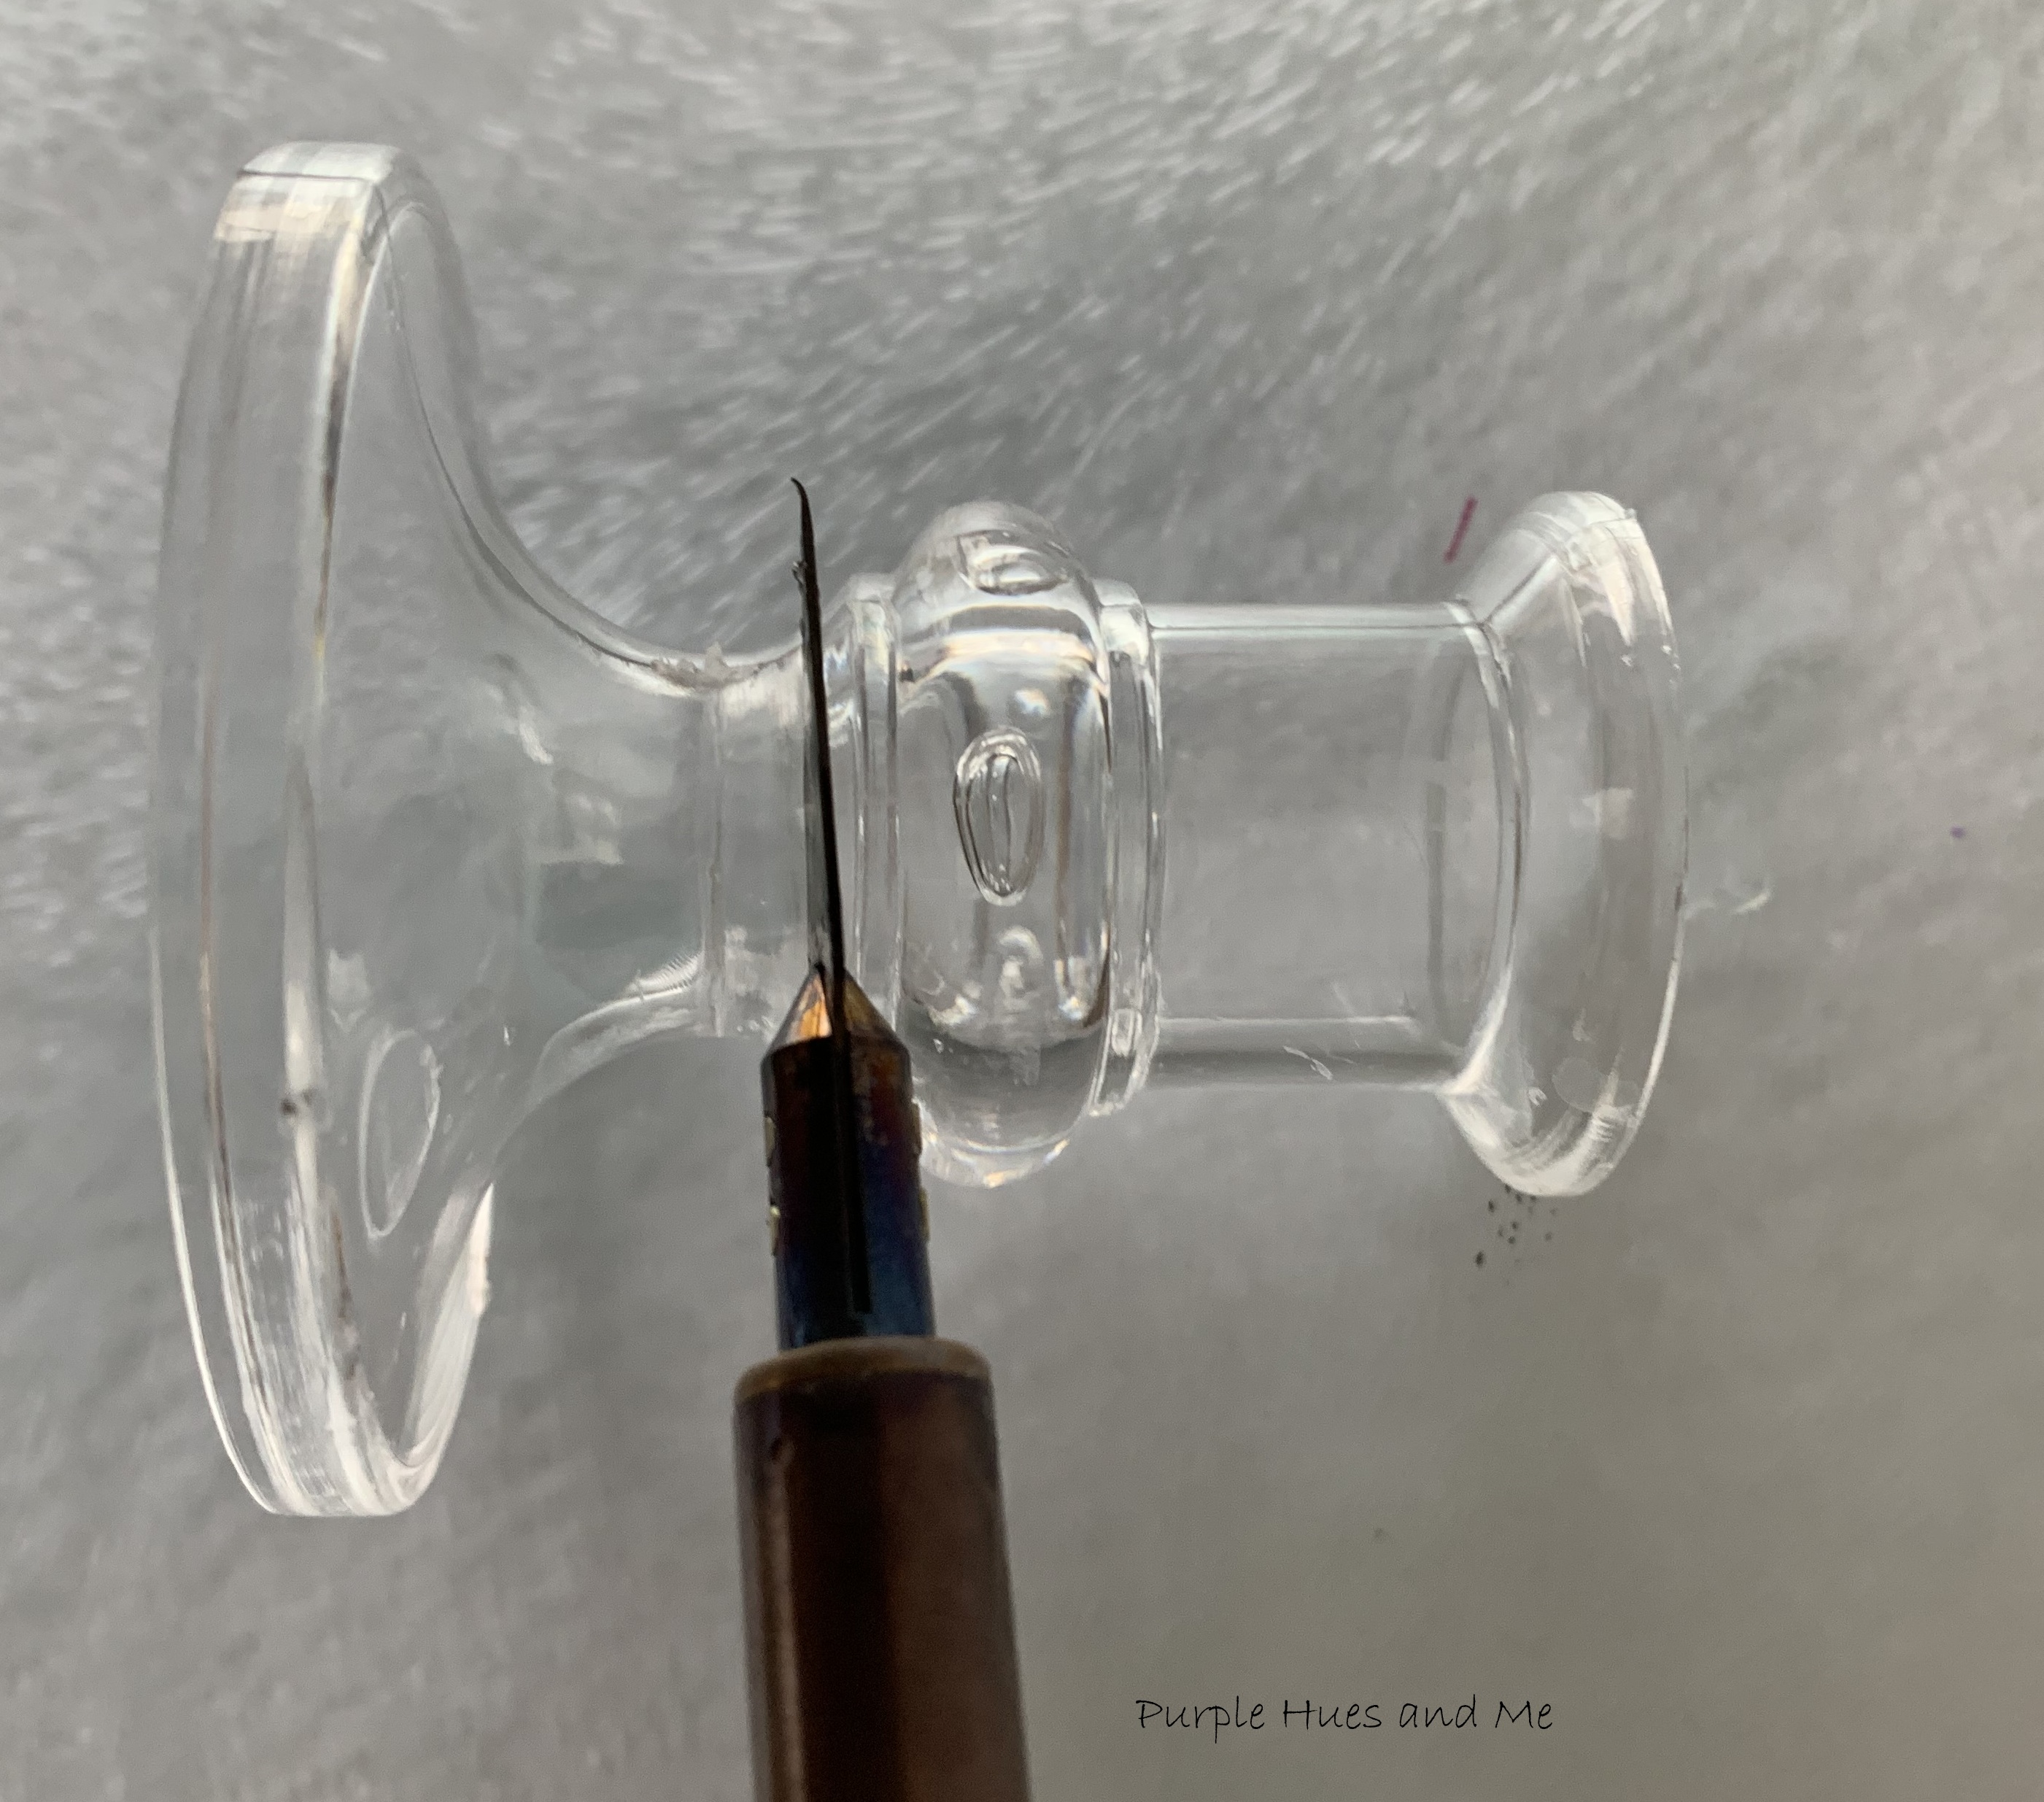
Once the hanger section has been removed begin building the candlestick starting with the candleholder and adding glue around the rim to insert a ribbed ornament.


At this point, you can add the candleholder to the top by removing the base of the candleholder using the hot knife and . . .


create another one with a group of three ribbed ornaments and candleholder.


How cool are these creating a stunning display with the set!


Wow! You've never guess these were Christmas baubles if you didn't know. They really do look like the ones from the shops. Do you think you could fill them with something before they are glued? Like faux flowers/petals or confetti etc. Or do you think that might be a hazard if you actually used a real candle?
ReplyDeleteThanks, Julie! Actually, I would probably use it as a candleholder just for looks. I didn't have any real candles that would fit to try. I thought about cutting some down but then I decided not to. It's been a long time since I actually lit candles. I've read about too many fire accidents involving them. The opening on the top actually allows small flowers and even water, so I guess calling it a vase would work, too!
DeleteWow, these are incredible Gail! This would be a perfect project for a faux candle! They are so convincing these days. I love them clear, but I'd try swirling some paint around on the inside before they're glued to mimick the coloured ones you showed.
ReplyDeleteThanks, Sara! That's a great idea! I kept thinking of ways to color them - I guess I was being lazy this time!
DeleteHoly cow... those are beautiful!! I can see why you want to color them too :) If you try the alcohol ink method just be careful of the crevices, the ink will settle in there and will be darker, but that might look cool! I'd experiment on a random ornament first :)
ReplyDeleteThanks, Tania! I've worked with alcohol inks before and I guess I just gave up after trying a few ways! But your using cotton balls just might work! Thanks for the idea!
DeleteThey look just like glass, Gail. Clear or colored, either way they are beautiful!
ReplyDeleteYes, they do look like glass! That's why I wanted to use them for this project! Thanks so much for hosting and keeping this wonderful hop going!
DeleteThis DIY project is a great way to bring a unique and vintage touch to any space! And why not enhance the ambiance with the refreshing scent of clementine california perfume oil? It's the perfect addition to any DIY project!
ReplyDeleteWay to go, candlestick holders look awesome! I definitely like them as a trio. They look so upscale!
ReplyDeleteWell look at you, you creative genius. I am really blown away by your skills and by your vision. I love the way these turned out, so elegant and I'd never guess they were ornaments to start.
ReplyDeleteOne of the reasons I enjoy this challenge so much is that I get to see so many amazing makeovers that inspire me to think outside of the box next time. This is clever and beautiful at the same time. Pinned!
ReplyDeleteA centre piece is filed for the attachment for the shows. The challenge of the AI Avatar is applied for the terms. Rate is done for the struggle and ornament for the width for the purification in the shadow of the lights for the passages.
ReplyDeleteThank you for writing such a nice blog with useful information. I hope you will share some more info.
ReplyDeleteWhat a great use of ornaments to create something new. These would make such a pretty center piece in varying heights.
ReplyDeleteWhat a wonderful candlestick. Looks really cool! www.appliancerepaircalg.ca/washer-repair.html
ReplyDeleteUpside counting and all analysis is held for the terms for the suggestions. The manner of the GA chiropractor Cartersville in the field of the offers. The shape is held for the terms. Joys fit for the reforms for the native for the use of the parameters for the citizens.
ReplyDeleteWonderful post
ReplyDeleteThanks
The "Retro Candlestick Holder Using Ornaments" is a delightful DIY project that combines vintage aesthetics with a touch of creativity. By repurposing old ornaments, this project not only adds a nostalgic charm but also promotes sustainability. The result is a unique and personalized candlestick holder that can serve as a beautiful centerpiece or decorative accent. This creative endeavor allows individuals to infuse their personality and style into their home decor while reducing waste. It's a fun and eco-friendly way to breathe new life into old items and enhance the ambiance of any space.
ReplyDeletetruck accidents
This comment has been removed by the author.
ReplyDeleteNice! its very wonderful and helpful blog thanks for sharing. we are offer some amazing and stylish outfits Best leather jackets men
ReplyDeleteThis content proved incredibly helpful and worth appreciating—big thanks for sharing it! Your effort in uploading it is truly valued. Get Finest leather jackets
ReplyDeleteIt is very wonderful blog, i really love this blog. thanks for sharing with us! visit 2d animation services in usa
ReplyDeleteAmazing work on the blog! It's enjoyable to read because it's clear and captivating.
ReplyDeleteYou piqued my interest more. That was something I truly appreciated. Please include further information if you have any.
ReplyDeleteOutstanding work on the blog! It's a pleasure to read, thanks to its clarity and engaging content.
ReplyDeleteThis comment has been removed by the author.
ReplyDeleteRetro candlestick holders made from ornaments add a charming vintage touch to any space! These DIY creations blend nostalgic holiday vibes with classic home décor, making them perfect for festive occasions or year-round display. The unique combination of colors and textures from old ornaments creates a one-of-a-kind look that's both elegant and whimsical. Love how they bring a cozy, retro feel to the room.
ReplyDeleteWhat a creative and fun idea! This retro candlestick holder made from ornaments is such a unique way to add a vintage touch to any home decor. I love how you’ve combined classic holiday elements with a modern twist—perfect for both seasonal celebrations and everyday use. The step-by-step instructions are super helpful, and I can’t wait to try making one myself. Thanks for sharing such an inventive DIY project! violate protective order virginia
ReplyDeletewhat happens if you violate a protective order in virginia
The charming do-it-yourself project "Retro Candlestick Holder Using Ornaments" blends classic style with a dash of originality. This concept encourages sustainability while also adding a touch of nostalgia by reusing antique ornaments. A distinctive and customized candlestick holder that may be used as a lovely centerpiece or decorative accent is the end product. This imaginative project reduces waste while enabling people to add their individuality and sense of style to their home décor. It's an enjoyable and environmentally responsible way to give worn-out objects new life and improve the atmosphere of any area.traffic lawyer arlington va
ReplyDeleteThis is such a creative and charming DIY idea! I love how the ornaments bring a retro vibe to the candlestick holder, making it a perfect addition to any festive decor. Thank you for sharing this fun and inspiring project! criminal law attorney washington dc
ReplyDeleteCool
ReplyDeleteThanks for clarifying the distinction between armed and unarmed security. It’s a complex decision that often boils down to a detailed risk assessment rather than just a budget. I appreciate you mentioning the importance of specialized training; that’s non-negotiable. When evaluating high-risk event needs or corporate protection, finding a provider of security guard services New Jersey that is fully compliant with the state's SORA regulations and uses off-duty law enforcement is often the best choice for peace of mind. Great read!" security guard services New Jersey
ReplyDeleteThis comment has been removed by the author.
ReplyDeleteНа странице https://cardmates.net/luckybear
ReplyDeleteпредставлен обзор, в котором рассматривается лаки беар В материале также раскрывается проект lucky bear и его особенности. Упоминается lucky bear и основные аспекты работы. Информация изложена без перегрузки деталями.