Sunday, December 6, 2015

Dollar Tree Mesh Tube Christmas Trees


OMG!  Imagine my surprise when I saw packages of mesh tubing, silver bells and chenille stems at Dollar Tree. I always had in mind to see how mesh tubing would work on cone shaped trees but didn't want to buy more of anything mesh since I had plenty of the regular kind and had really fallen out of interest in using it. But for a dollar, how could I go wrong.  And then I saw regular little bells - in packages of 50 and 25, depending on the size.  Wow, bells are not cheap in craft stores! And hanging next to them - glitter chenille stems!  Say what you want about the Dollar Tree but it's becoming my go to store for lots of craft items!

And I don't think you can make an easier holiday project using these items. here's how:

First, roll poster board (also from Dollar Tree) into a cone .  .  .


cutting off excess (side and bottom) to even out and taping side edges.


Secure end of mesh tube on bottom edge with hot glue, and begin twirling tube around cone, pushing the mesh tube down as you wrap.  Hot glue tube in place every few wraps.  *Mesh tube has a pattern of its' own so be sure to let the tube "relax" to its shape as you are wrapping the cone without stretching it.


You can tighten the top area when reaching and glue in place to finish.


I painted the next cone silver since you might be able to see between the tubing and wrapped it the same way.


Once the cone is wrapped with the mesh tubing, take a chenille stem and fold it into six points to make a star.  I know, a star has five points but you need an extra one to glue onto the top of the cone.


Pinch together each point and begin shaping chenille around to form a star.


Once you have the star shape, wrap the last two chenille pieces together to form a straight side. Make another, and glue the two together at the points for a fuller look.

Hot glue stars on top of the cones.


For the green tube tree, string bells on a string and .  .  .


wrapped them around the cone by tacking the ends on using a needle and thread.


Not bad for a few dollars!


Take a little time to enjoy


and


Happy Holiday Crafting!


Saturday, December 5, 2015

Ribbon Flower Decoration


I hold "Let's Get Crafty" sessions in my community clubhouse each month.  For this month's get together we made pretty ribbon flower and bow decorations. I am on the design team for Bowdabra but had never shown the ladies how I use my Bowdabra to make bows. So instead of just making bows, I thought I would show them how to add a handmade decorative flower to a bow that can be used the same way as a regular bow, only it's so much prettier!

ACMoore offered 10yds of ribbon for one dollar during its' Black Friday sales so I picked up enough ribbon for everyone to have a roll each. 

This project was so easy using just a few items. 
Materials needed:
Wired Ribbon - 2 1/2" wide
Fabri-tac fabric glue
Scissors
Triangular shape pattern (7 1/2"x2 1/2")
Bowdabra, wire, and wand

Begin by laying the pattern on the ribbon and cutting out about 8 triangular shapes.  It was easy to just match the slanted lines once cut and then cutout - no wasted ribbon.


Add glue to the underside of ribbon edge.


Bring ends together into a point, overlapping and sealing edges into a cone shape.


Place dabs of Fabri-tac glue on top and bottom sides and press two cones together, matching seams and lines.
 
 
Continue gluing on the cone shapes to form a circle. Lay the cones down on a flat surface as you are gluing so that the cones are level and even.


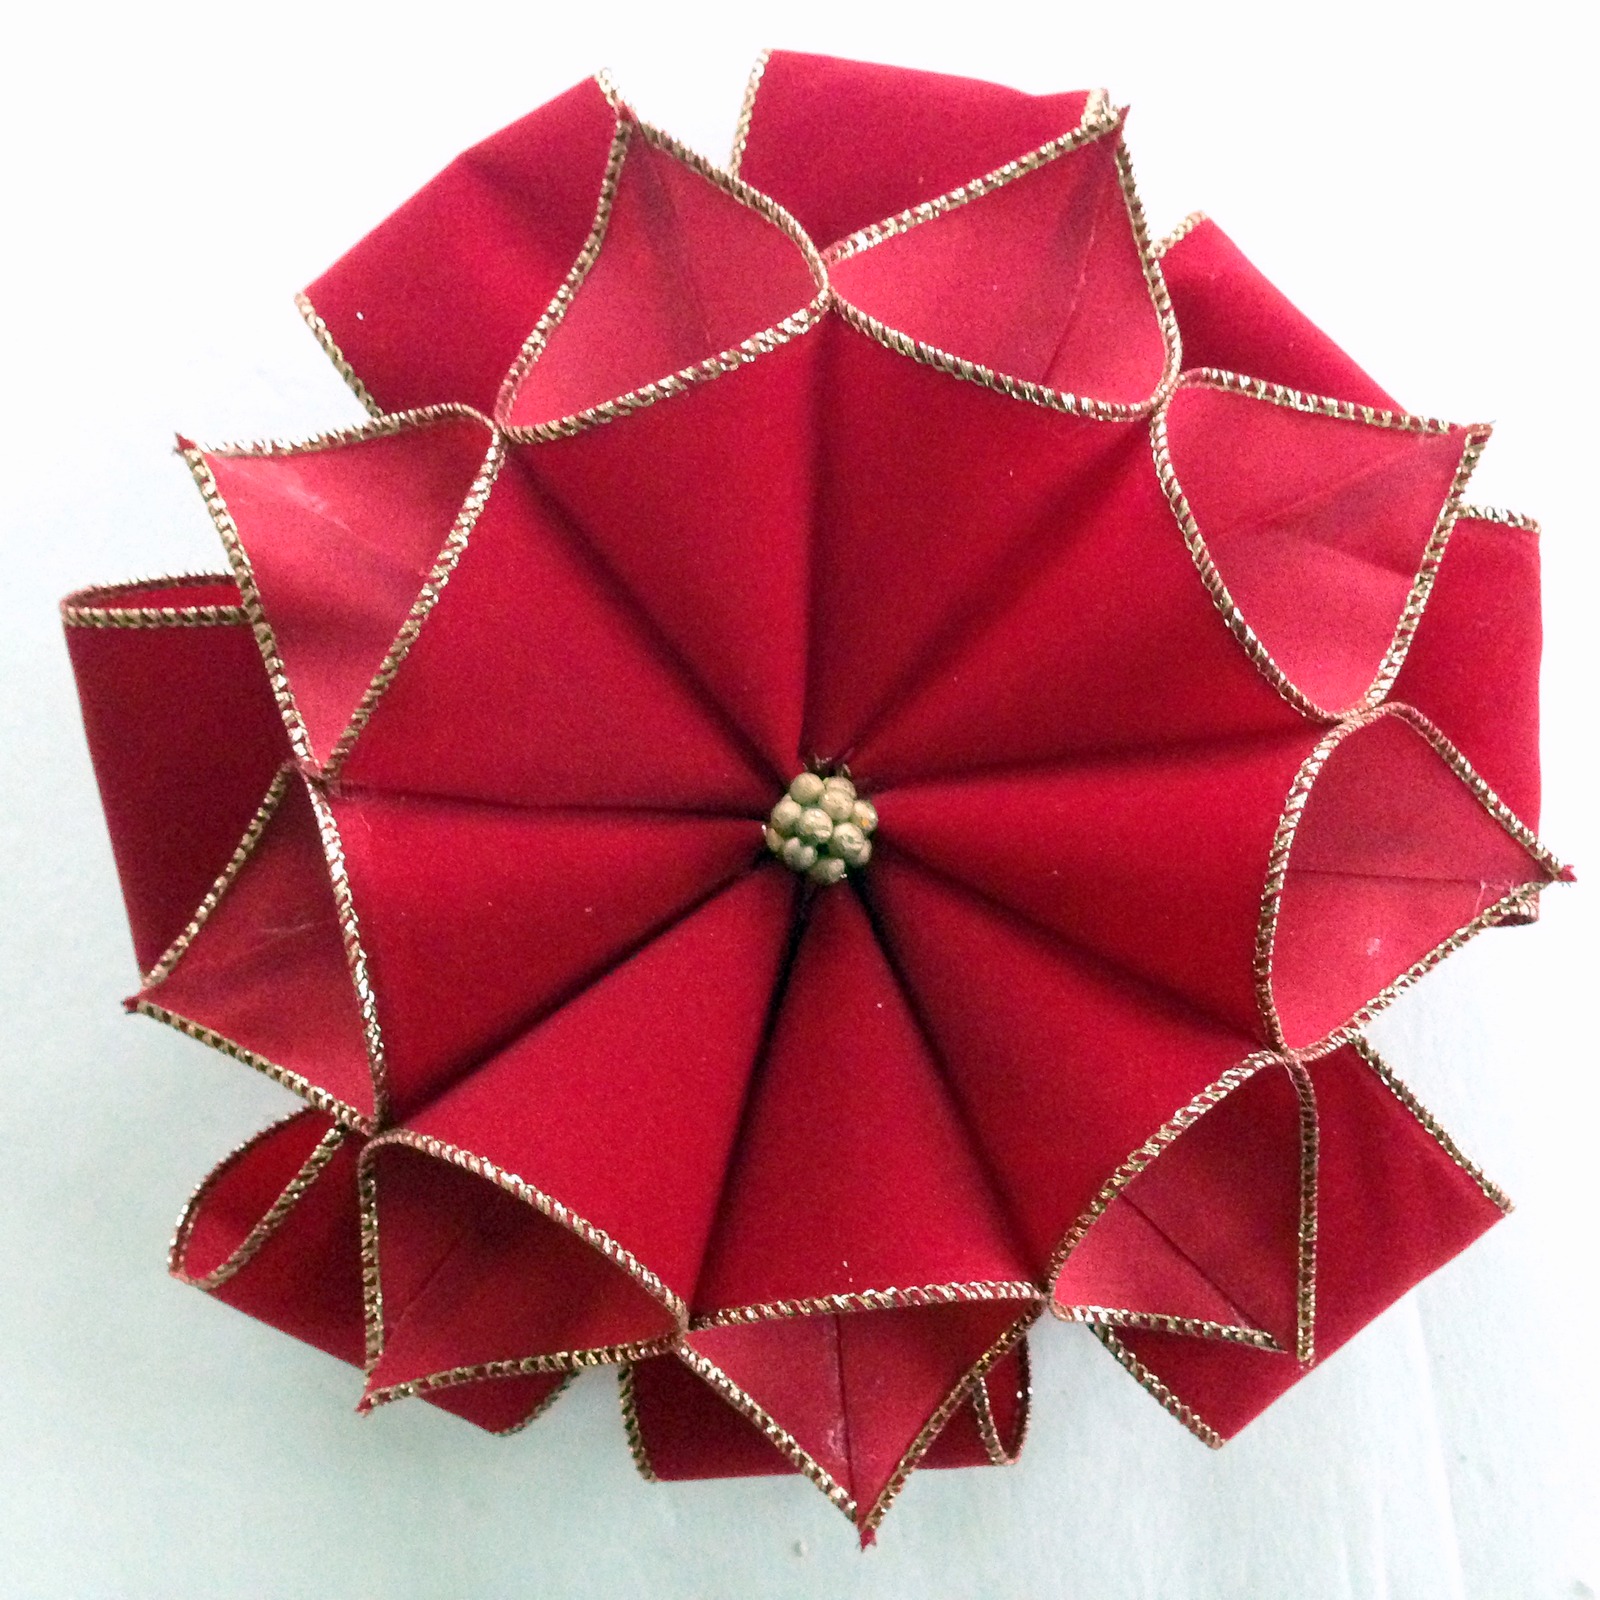
Looks sorta like a ribbon pointsettia .  .  .

 
and even looks good on the underside, too.


Add a decorative trim in the center for a finished look.


To make the bow, fold a 24" piece of bow wire in half and place in the Bowdabra. Decide how big you want your loops and fold the ribbon into a loop and press into the Bowdabra.  Twist and fold the ribbon so that the right sides are showing.


Continue twisting and folding the ribbon back and forth, until you have created as many loops as you want. I made four loops on each side.
 

Scrunch down the ribbon with the wand.
 
 
While the bow is still in, push the two loose ends of the bow wire through the loop at the other end and pull the wire tightly. Remove the bow out of the Bowdabra and tie the ends to the back. Shape and fluff the bow.

 
Glue on the decorative flower to the top of the bow.
 
Pretty!
 
Imagine this on top of a beautifully wrapped present!


We had a fun time putting the flower bow decorations together.  We joked about adding faux flowers to the center and using it as a bouquet.  The ladies were so excited when they finished that I forgot to take more pictures - especially of their finished flower bows!


Take a little time to enjoy

and

Happy Holiday Crafting!



Tuesday, December 1, 2015

Saturday, November 28, 2015

Santa Bow Wreath/Wall Hanging DIY


Most of you might already know that I am a designer for Bowdabra.  The Bowdabra is a fun and handy tool to make bows of all sizes and styles.  I'm so excited this time of year about using the Bowdabra to make lots of holiday crafts and décor.  My latest project is one of the cutest things I've ever made, a Santa Bow Wreath or Wall Hanging. 

Materials needed:
1 1/5 yards of 5 1/2" wide ribbon
1/2 yard Faux fur trim
18"x12" Sheet of stiff black felt
Glue/Hot glue gun
Cardboard
Boot pattern
Glitter stick-on foam sheet
Scissors
Bowdabra, wire, and wand


To begin, I found a boot pattern online that I saved to Word and increased the size to line up with the width of my ribbon. I traced two patterns on cardboard (opposite facings), and added it between two pieces of stiff felt for each boot for added stability. 
 
Next, I folded 24" of  bowdabra wire and placed it in the Bowdabra and then inserted an 18" piece of ribbon for "Santa's legs."

 
I took the remaining yard of ribbon, folded the ends together with loops on both sides and inserted it into the Bowdabra.


While all of the ribbon is still in the Bowdabra, I glued on faux fur trim to the ends of the "legs" .  .  .


and then glued on the boots.
 
After scrunching down the ribbon, I took the two loose wire ends and pushed them through the wire loop, pulling tightly, lifting out and tying the wire in a knot to the back of the bow. 

The excess bow wire, looped and tied, will be used as a hanger.

 Next, I glued strips of cardboard in a V shape to the back to prevent the legs from moving. 


And finally, I cut out a 3" square of glitter foam sheet with a one inch square opening, adding a piece of black felt over the opening and gluing on top of the bow for the buckle.
          

This is just too cute!


Take a little time to enjoy

and

Happy Holiday Crafting!


Thursday, November 26, 2015

Tuesday, November 24, 2015

Bowdabra Swag Lantern Topper


Hi everyone!  I'm back from a lovely vacation cruising the Hawaiian islands and getting ready for lots of holiday projects! Today I'm over at BowdabraBlog where I'm sharing how to create a gorgeous Swag Lantern Topper.  The best part about using a Bowdabra for making this lantern swag topper is that everything is contained together in one unit, secured with Bowdabra wire!  How easy is that!  So hurry on over and enjoy the full tutorial!


Take a little time to enjoy

and

Happy Holiday Crafting!


Tuesday, November 10, 2015

Create A Recycled Newspaper Woven Stars Tree


In my quest to make more recycled crafts for the holidays, I was inspired by these on Pinterest when I put this tree together.  It's made of recycled newspaper tubes woven into stars made in graduated sizes and glued together.

The tree is really easy to do once you make lots of newspaper tubes and master weaving the tubes into a star. But first, let's briefly go over making newspaper  tubes.

1.  Fold a newspaper section in half and fold again so you have four sections.
2.  Cut out the four folded sections and open length-wise.
3.  Take a thin skewer stick and place on the corner edge of paper at an angle, as pictured.
4.  Place the end tip of the paper over the skewer and start rolling the paper with fingers pressed down on the table first.  Once you've started rolling the paper, lift up the tube so your left fingers are controlling the roll while your right hand is rolling the stick and tightening the tube.
5.  Just before finishing the roll, add glue to the corner end tip and continue rolling until reaching the end to seal. 

You will need to make lots of tubes for the eleven stars that make up this tree.

The largest star (base) is 9 1/2 inches wide and took about 9 tubes to make.
 
Here are the measurements (tip to tip) for the eleven stars that I made:
1 star -  9 1/2"
2        -  9"
3        -  8 1/2"
4        -  8"
5        -  7 1/2"
6        -  7"
7        -  6 1/2"
8        -  6"
9        -  5 1/2"
plus
 2 small stars for the top - 3"  
 
Sorry, I didn't count all the tubes used to make each star.  I got too involved in weaving each one!  

To begin, take a tube and make about an inch fold on one end.  Next, with a ruler, measure the tube the size of star you want to make.  So, for the first star, measure 9 1/2" with a ruler and fold the tube into 9 1/2 inch lengths.  I forgot to take pictures of measuring at first because I had to figure it out and wasn't comfortable with making the stars.  The tutorial on Pinterest was in pictures and it took me a couple of times making one to get the hang of it.  In this picture, I'm measuring 7 inch folds for a seven inch star.

 
Make three  "V" folds, measuring the same length, as pictured.
*Your tube may not be long enough for folding this way so you'll need to add more tubes by putting a little glue on one end and inserting it into the other tube to make it continuous.
 
 
Next, open the folds and shape the folded portions into a star.  The one inch bended tip is glued to the last end of the tube at the fold and clamped until dry. 


 To start weaving the star, turn the star upright where the end was glued and clamped.  Take the tube around the point and down, parallel to the star tube (1) to the next star point (2) and around (3)  and over to the next point(4) and around and over to the next point (5).  I hope this isn't too confusing.


Continue following the original pattern with the tubes running parallel so you would see rows of two, then three, then four, etc., beside each other.

 
*Add additional tubes by putting a little glue on one end and inserting tube into new tube end.


Continue wrapping until reaching the center, making sure all points look about the same.  You should see a weaving pattern on each star point or leg. To finish off the end tube, wrap it to the back, adding glue and .  .  .


tuck the end under an inside tube.  You can cut off the excess tube after tucking and gluing it under one or more of the tubes on the underside.
 
 
Finished back of tube:


Front of finished star:

 
All of the finished stars:
 
 
Spray painted with satin white multi-purpose paint and sprayed with a gloss sealant.

 
Sprinkle on white glitter while paint is still wet.

 
Once dry, start hot gluing stars on top of each other.


Hot glue the two small 3 inch stars together .  .  .


and glue the bottom on top of the center of the stars.

 
For a snowy effect, mix glitter, decorative filler and mod podge together and add the mixture to the tips of the stars and let dry.


I love how the tree turned out! 
It's so adorable and can be used as a snowy centerpiece, not just for the holidays, but for the entire winter season!


What a fun recycled/upcycled craft!


Take a little time to enjoy

and

Happy Holiday Crafting!