Showing posts with label For the Holidays. Show all posts

Tuesday, November 15, 2016

Ribbon Quilling Comb Ornament

Welcome to our Wrapping Up the Holidays Link Party!  I'm thrilled to be joining a group of talented ladies for an awesome link party highlighting Christmas ideas ranging from Tree Trimmings, Gift Wraps & Cards, Recipes, Holiday Traditions and Family Activities!  
We thought it would be fun for all of us to share an extended link party celebrating all that's Christmas from November 15th to December 24th.


Handcrafting my Christmas décor is one of my favorite traditions this time of year and I'm so excited to be sharing with you how to make a ribbon quilling comb snowflake ornament.  You might know that quilling,  the coiling and shaping of narrow paper strips to create a design - has been around for many, many years and that beautiful paper quilling patterns and designs can be created with a quilling comb technique. But instead of using paper, I'm using ribbon to make an ornament.  And I'm also creating a "comb" out of cardboard and skewer sticks so that I can use a larger width ribbon and a simple quilling technique to make a lovely ribbon snowflake. A regular quilling comb just wouldn't work for this size.

Materials Needed:
Ribbon - 3/8" & 1/8" wide
Cardboard corrugated flap
Skewer sticks
Hot glue gun
Scissors/embellishments
  
Let's begin by making the quilling comb:


1.  Cut the closing flap off of a cardboard box making sure the corrugated openings are large enough for skewer sticks.
2.  Insert pointed ends of skewer sticks into every other corrugated hole or channel.  Press the flap with the pointed stick ends down on a flat surface so none will be protruding out.
3.  Continue inserting sticks until flap is filled and your handmade quilling comb is ready!

4.  Next, cut approximately 60 inches of ribbon for each snowflake "ray" (depending on size of flap and skewers). Insert ribbon in between the first and second stick or prong and place a dab of glue on the ribbon end to secure  around the first prong.  Gently move ribbon sideways and back to make sure it is not stuck to the wood. 
5.  Next, wrap a long loop around the tenth prong, down and around the first prong and apply a little bit of glue on the ribbon.
6.  Wrap a second loop around to the right on the eight prong, down and back around the first prong, applying a bit of glue to the back and front of the ribbon base.
7 & 8.  Next, wrap a loop on the eighth prong to the left of the first loop and back down to the first prong, securing the ribbon with a bit of glue on the front and back. 
9, 10, 11.  Continue decreasing the loop sizes on the prongs, adding a right loop and left loop, wrapping down and around, as before, adding glue to secure.
12. When finished looping, apply a bit of glue to the bottom of the looped ribbon to hold the shape, cut off excess ribbon and remove from comb.

Voila! What a pretty design for a snowflake ray!
Now make five more!
Then take a strip of 1/8 inch ribbon and thread it through the open bottom loops of each snowflake ray .  .  .
gathering into a circle.  Tie into a knot and make a loop for hanging.
Add an embellishment to front and back center and your adorable
Ribbon Quilling Ornament is ready for hanging on the tree!


   Have fun linking up your favorite projects, both new or old and family friendly!Be sure to click on the links below to see the awesome holiday projects each host shares!
And please don't forget to visit, comment and share on social media!
When you link to any one of our lovely co-hosts your post will be seen on ALL of these great sites!

Sherry @ Olives & Okra


Saturday, December 5, 2015

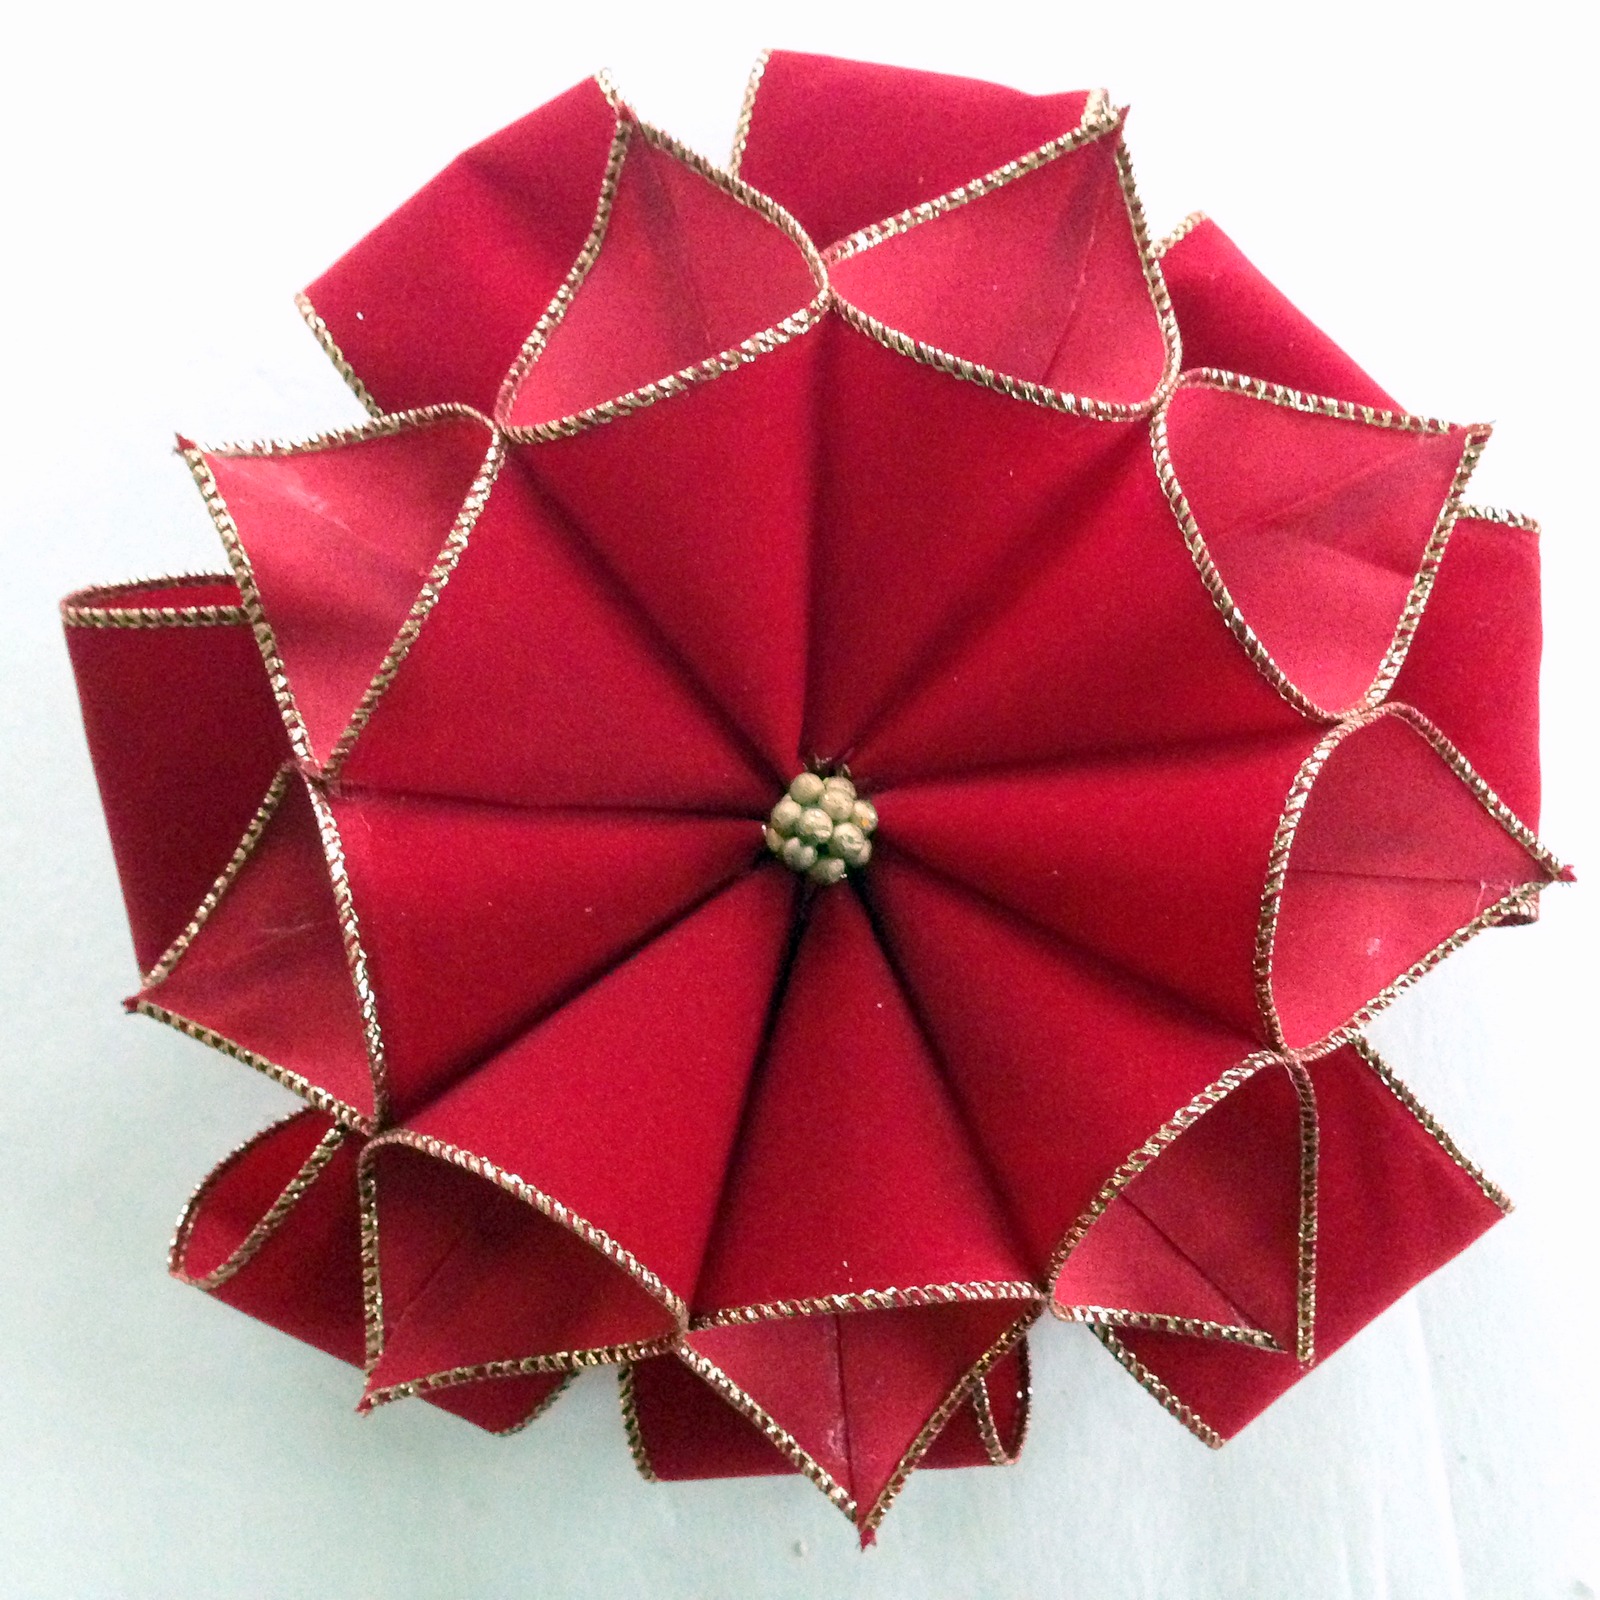
Ribbon Flower Decoration


I hold "Let's Get Crafty" sessions in my community clubhouse each month.  For this month's get together we made pretty ribbon flower and bow decorations. I am on the design team for Bowdabra but had never shown the ladies how I use my Bowdabra to make bows. So instead of just making bows, I thought I would show them how to add a handmade decorative flower to a bow that can be used the same way as a regular bow, only it's so much prettier!

ACMoore offered 10yds of ribbon for one dollar during its' Black Friday sales so I picked up enough ribbon for everyone to have a roll each. 

This project was so easy using just a few items. 
Materials needed:
Wired Ribbon - 2 1/2" wide
Fabri-tac fabric glue
Scissors
Triangular shape pattern (7 1/2"x2 1/2")
Bowdabra, wire, and wand

Begin by laying the pattern on the ribbon and cutting out about 8 triangular shapes.  It was easy to just match the slanted lines once cut and then cutout - no wasted ribbon.


Add glue to the underside of ribbon edge.


Bring ends together into a point, overlapping and sealing edges into a cone shape.


Place dabs of Fabri-tac glue on top and bottom sides and press two cones together, matching seams and lines.
 
 
Continue gluing on the cone shapes to form a circle. Lay the cones down on a flat surface as you are gluing so that the cones are level and even.


Looks sorta like a ribbon pointsettia .  .  .

 
and even looks good on the underside, too.


Add a decorative trim in the center for a finished look.


To make the bow, fold a 24" piece of bow wire in half and place in the Bowdabra. Decide how big you want your loops and fold the ribbon into a loop and press into the Bowdabra.  Twist and fold the ribbon so that the right sides are showing.


Continue twisting and folding the ribbon back and forth, until you have created as many loops as you want. I made four loops on each side.
 

Scrunch down the ribbon with the wand.
 
 
While the bow is still in, push the two loose ends of the bow wire through the loop at the other end and pull the wire tightly. Remove the bow out of the Bowdabra and tie the ends to the back. Shape and fluff the bow.

 
Glue on the decorative flower to the top of the bow.
 
Pretty!
 
Imagine this on top of a beautifully wrapped present!


We had a fun time putting the flower bow decorations together.  We joked about adding faux flowers to the center and using it as a bouquet.  The ladies were so excited when they finished that I forgot to take more pictures - especially of their finished flower bows!


Take a little time to enjoy

and

Happy Holiday Crafting!


Thursday, December 11, 2014

Holly Leaf Christmas Tree Skirt DIY


In keeping with my tradition of making a Christmas tree skirt every year, this year I was inspired by the tree skirt I found online at Pier1. 
I already had crushed velvet fabric (although not in the color pictured) I picked up last year to make velvet pumpkins.  That didn't happen so the fabric came in handy this year using it for my skirt. The tree skirt was quite easy to make and is really a no-sew except for the silver bells I tacked on the hollies. I chose to use wide metallic ribbon instead of fabric for the holly.  It was much cheaper and thicker than fabric and was available in the regular ribbon section at Hobby Lobby @50% off that day.


Materials used:
  • 1 1/2 yds of crushed panne velvet (JoAnn)
  • 2 rolls (18ft each) of 4" wide silver metallic ribbon (Hobby Lobby)
  • 1 pkg Wonder-Under paper backed fusible web (JoAnn)
  • Bells
  • Holly pattern
  • Scissors
  • Iron
To get started,  I made a plain round skirt using the same easy and quick technique as before with my snowflake treeskirt  and my poinsettia treeskirt so I'm not going into any details here.

The  crushed velvet fabric doesn't fray so I didn't finish the back closing edges (keeping with the no-sew) and the round edges were covered and sealed by fusing on the holly leaves.


Next, I drew a very large holly leaf pattern on cardstock and cutout.  Then, I followed the directions for pressing wonder-under onto the ribbon, and after

drew 33 hollies on the paper backing. Each leaf was approximately 9 1/2 inches long and I was able to make 21 from a 18 feet roll of ribbon and 12 from the second roll.  


Once I had most of the hollies cut out from the first ribbon roll, I started ironing the leaves on the edge following the fusible web directions and the pattern of leaf placement of the skirt from Pier1. During the process of fusing the fabric onto the velvet, I added a line crease while the fabric was warm (using the back of an xacto knife) in the center of the leaf for a more dimensional look.  


(Sorry, it's been raining and gloomy for a few days so the coloring in the photos is a bit off)


And finally, I added three silver bells to the grouped leaves.


The skirt looks so glamorous at night under the lit white tree with the purple ornaments.


I can't decide which one I like the best of the three Christmas treeskirts I've made so far.   I do know Pier1 also has a matching mantel scarf - maybe I'll just start another tradition. Stay tuned!

Take a little time to enjoy
and
Happy Holiday Crafting!


Saturday, December 6, 2014

Turn Dollar Store Buckets into a Christmas Wall Hanging In Less Than 10 Minutes


Transform dollar store buckets into a festive wall or door hanging in less than 10 minutes using two buckets, ribbon, faux evergreen, poinsettias flowers and bells.


Here how:

1.  Turn bucket bottoms up and punch holes in bottom (which is now top) using a large nail and or screw driver.

2.  Take a strip of ribbon, insert through top hole, into body of bucket and tie a double knot with a bit of the ribbon hanging.


3.  Tie bells onto portion of hanging ribbon on bottom.


4.  Place a small evergreen wreath (I used stems wired together to form wreath) on edge of bucket and decorate with holiday trim such as faux poinsettia stems and pinecones.


5.  Cover holes on top with an evergreen stem piece.


6.  Add the two decorative buckets together, leaving one ribbon longer than the other.


7. Gather ribbon at top into bow and add decorative trim.


How's that for a quick way to make a decorative holiday wall hanging!


Take a little time to enjoy
and
Happy Holiday Crafting!