This challenge is all about sustainable crafting! Each month is themed and all projects must have some sort of a sustainable element to them. This could be an upcycling or recycling element, or something that reduces waste, uses leftovers etc. The theme for this month is Love! To me, hearts have always meant some form of a "love" statement! And co-incidentally, I was inspired to make a wire heart wreath by one I saw on Anthropologie's Terrain site as seen here: I loved the look of this wire heart wreath! Can't you imagine using a coat hanger to make the frame? I sure did! And using soda cans to make the flowers, too! But I didn't want to make flowers like the ones pictured! Since this Sustainable Craft Challenge Blog Hop was all about LOVE it was so appropriate to make hearts out of soda cans instead! What a lovely upcycle craft this is going to be!
So let's get started with how I made a heart wreath out of a wire coat hanger and soda cans - plus a special upcycled decorative add-on, too! I'm glad that I had everything in my stash to make this. And since I don't drink sodas anymore, I asked my son to save some empty cans for me, too!
Materials used:
- Wire coat hanger (white)
- Soda cans
- Gloves (optional)
- Craft utility knife/craft snips/craft scissors
- Ruler
- Heart punch
- White chalk paint
- Silver metallic acrylic paint
- Paint brush/parchment paper
- Hot glue gun/glue sticks
- Red acrylic ice rock crystals
- Mini Hearts silicone mold
- Metal tray/oven
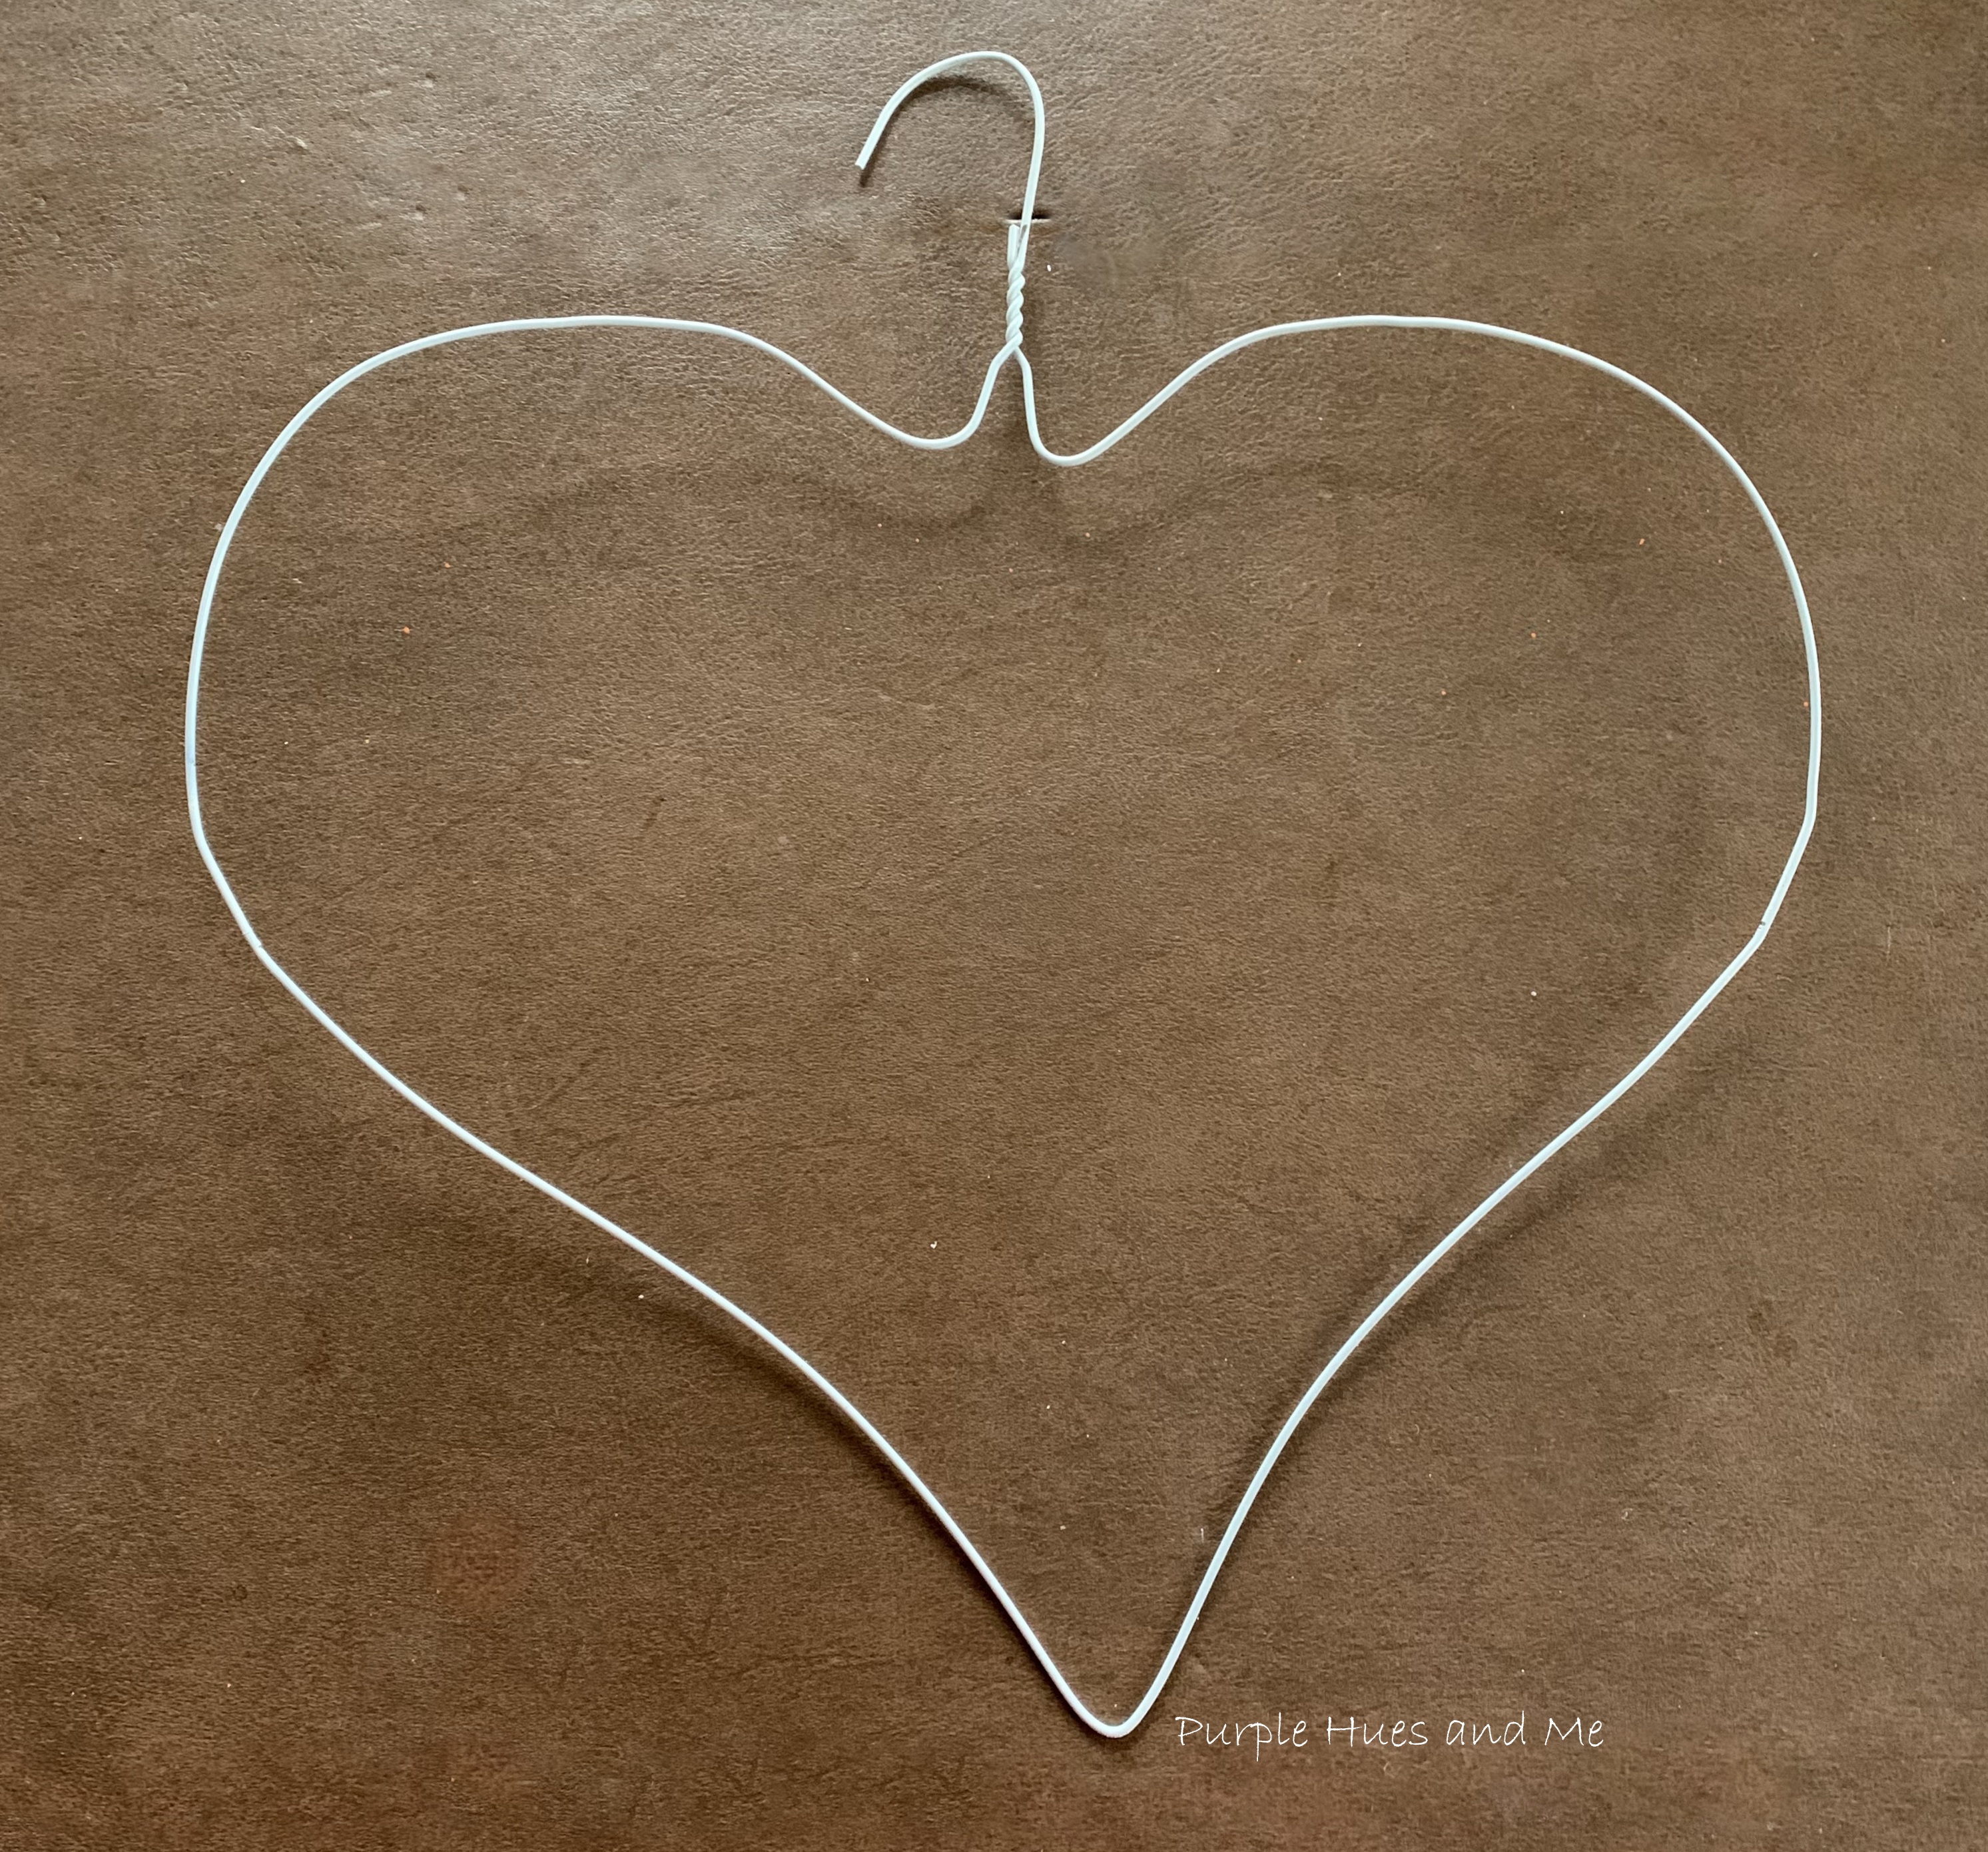
Begin by laying the wire hanger on your work surface and pulling the center of the bottom wire down to form a "V" shape. Using a white hanger is much easier to straighten than one of those darker ones. The white wire is not as thick and tough. Luckily, I had a white one in my closet!Next, round off the side hanger wire - shaping it with your hands. First, one side and then the other side.
Pay special attention to the area where the wire is bent on each side . . .
using your thumbs and fingers to press the wire down to straighten along the curves.
Continue smoothing out the wire forming curves with your fingers . . .
shaping the wire into a heart.Once the basic shape is there . . .pull the wires down at the base of the hook to give the heart a more rounded or curved shape on each top side. Doesn't this look awesome already? Perfect for a heart-shaped wreath!
Now, it's time to make the tin hearts out of soda cans! First, rinse the soda cans and shake out as much water as you can. I like to lay the cans upside down on a paper towel and let them dry before cutting them. You don't want any sticky soda residue left on the cans.
To get a smooth sheet of soda can aluminum: *Caution: You may want to wear gloves for this! Carefully cut off one end of the soda can using a utility knife or craft scissors.
Then cut along the body of the can to the opposite end . . .to remove the bottom like you did the top.Use a ruler and pencil to finish sides by cutting off any slivers and jagged edges.
Roll the aluminum in the opposite direction to help remove the curl of the can while smoothing and flattening it out.
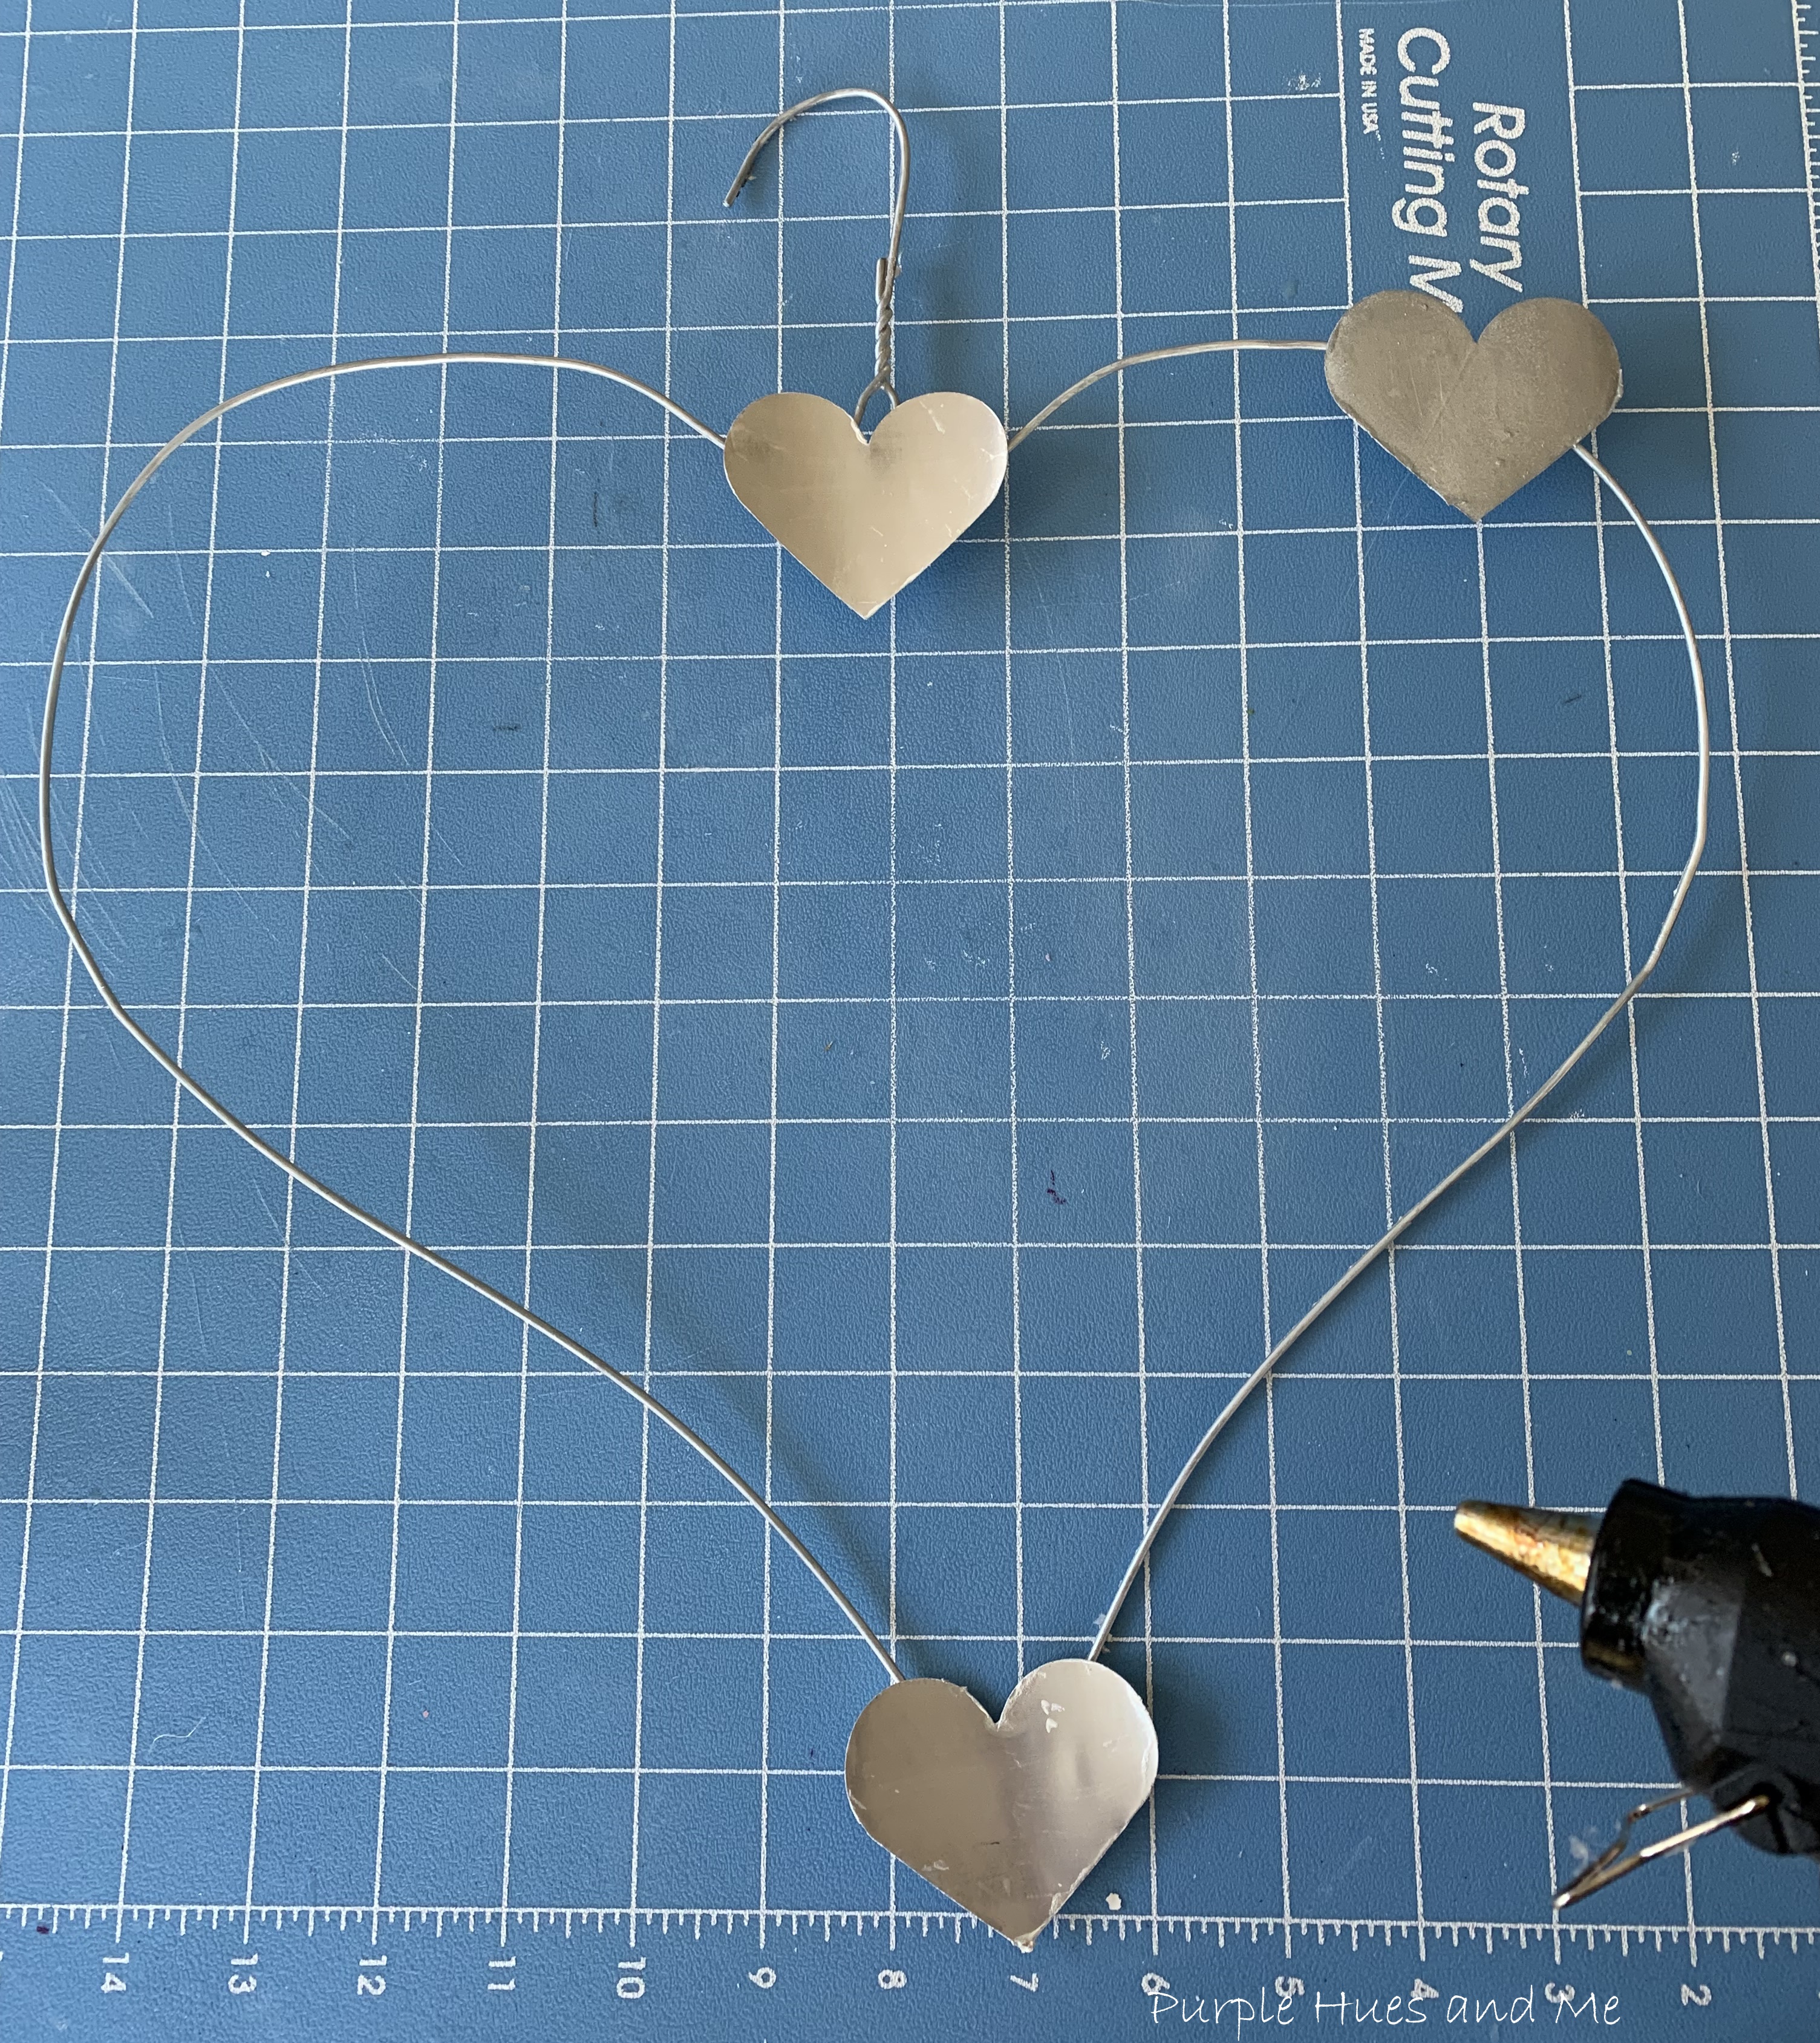
Next, insert the aluminum can strips into the heart punch - three hearts can be punched from one can strip. As one of my after-thoughts, thin border hearts can be manually cut from the leftover heart shape metal. See! It's another cool way to upcycle the soda can metal!
Paint the hearts with white chalk paint to cover the lettering on the backside and let dry.
Then paint the wire hanger heart and touch-up the front of the can hearts with silver metallic paint where needed.After drying, begin arranging the can hearts in a random pattern along the wire hanger heart using hot glue to attach.
How adorable is this! But then I thought something was missing! It still looked a bit plain - with just the silver colored hearts and wire frame!
Then I thought of the red acrylic ice crystals or rocks I had used on this wreath! I had plenty leftover and the red color would be perfect! But how could I use them on this wire hanger heart?
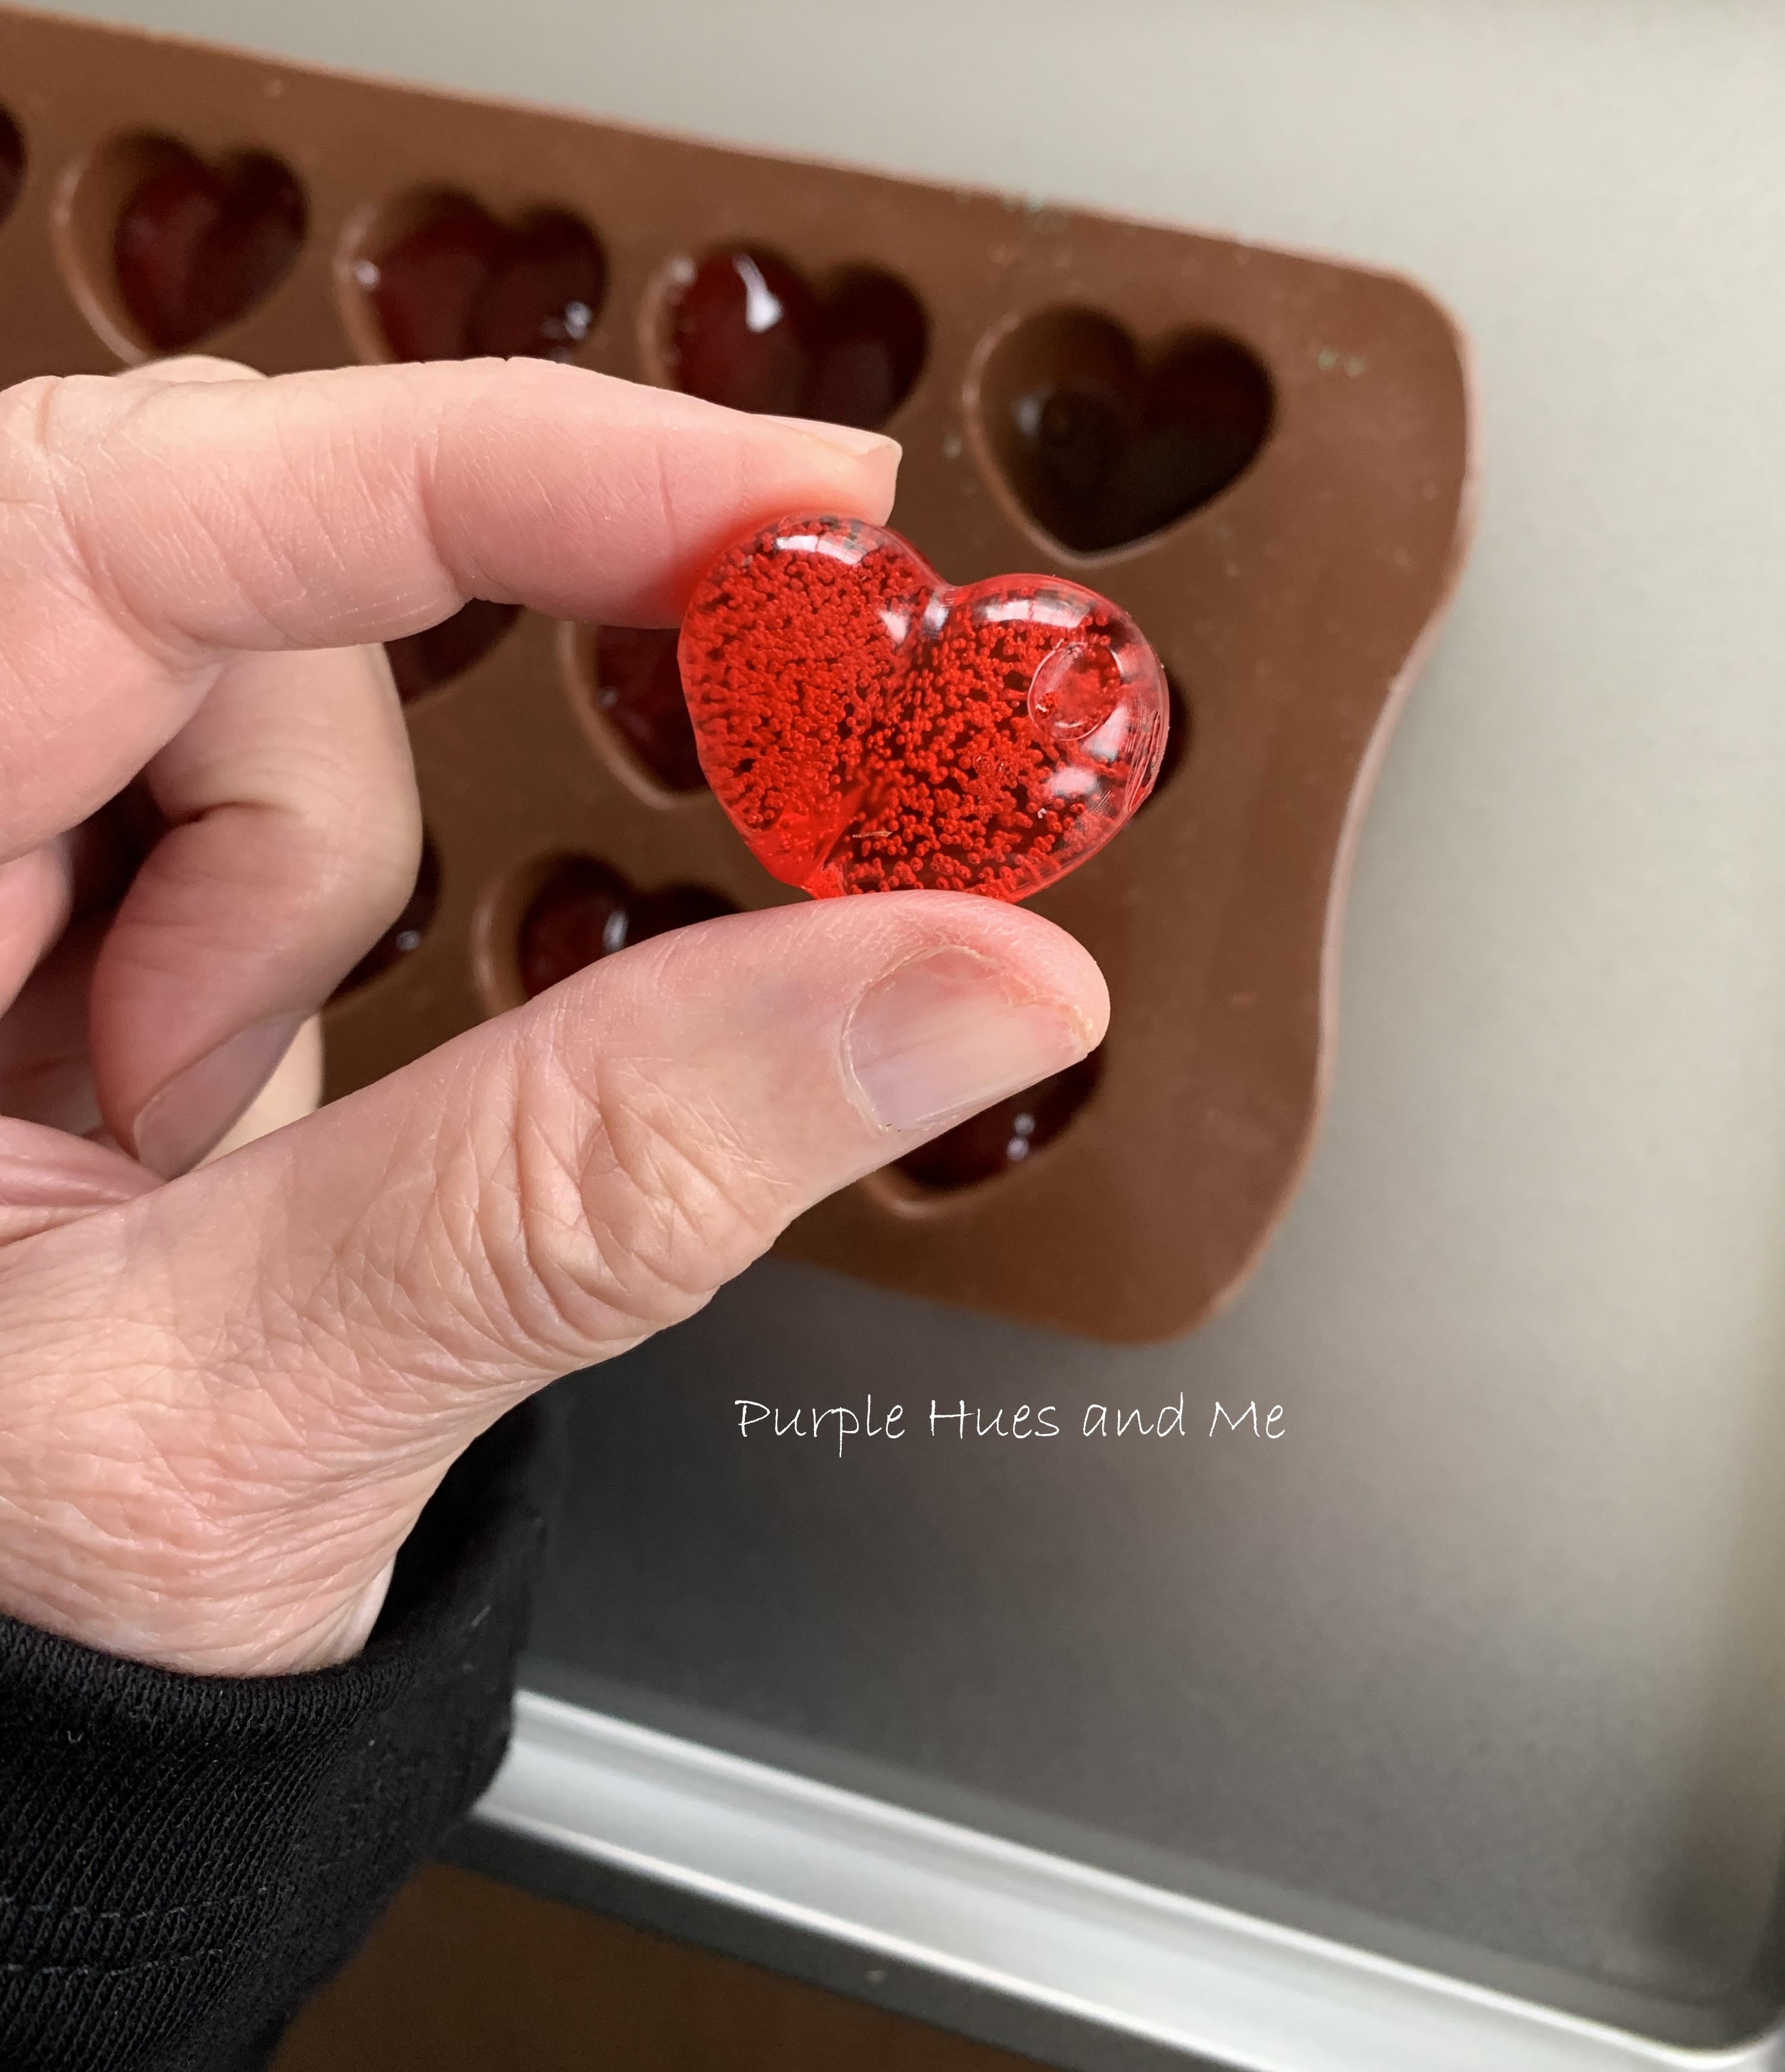
I know! By melting them in a silicone mini hearts shape mold! So I did a bit of googling and found out that acrylic plastic melts at 320 degrees Fahrenheit and I also watched a video on someone melting plastic at home. So I decided to try it, too!
I already had a small mini hearts silicone mold that I placed two acrylic rocks in each mold . . .
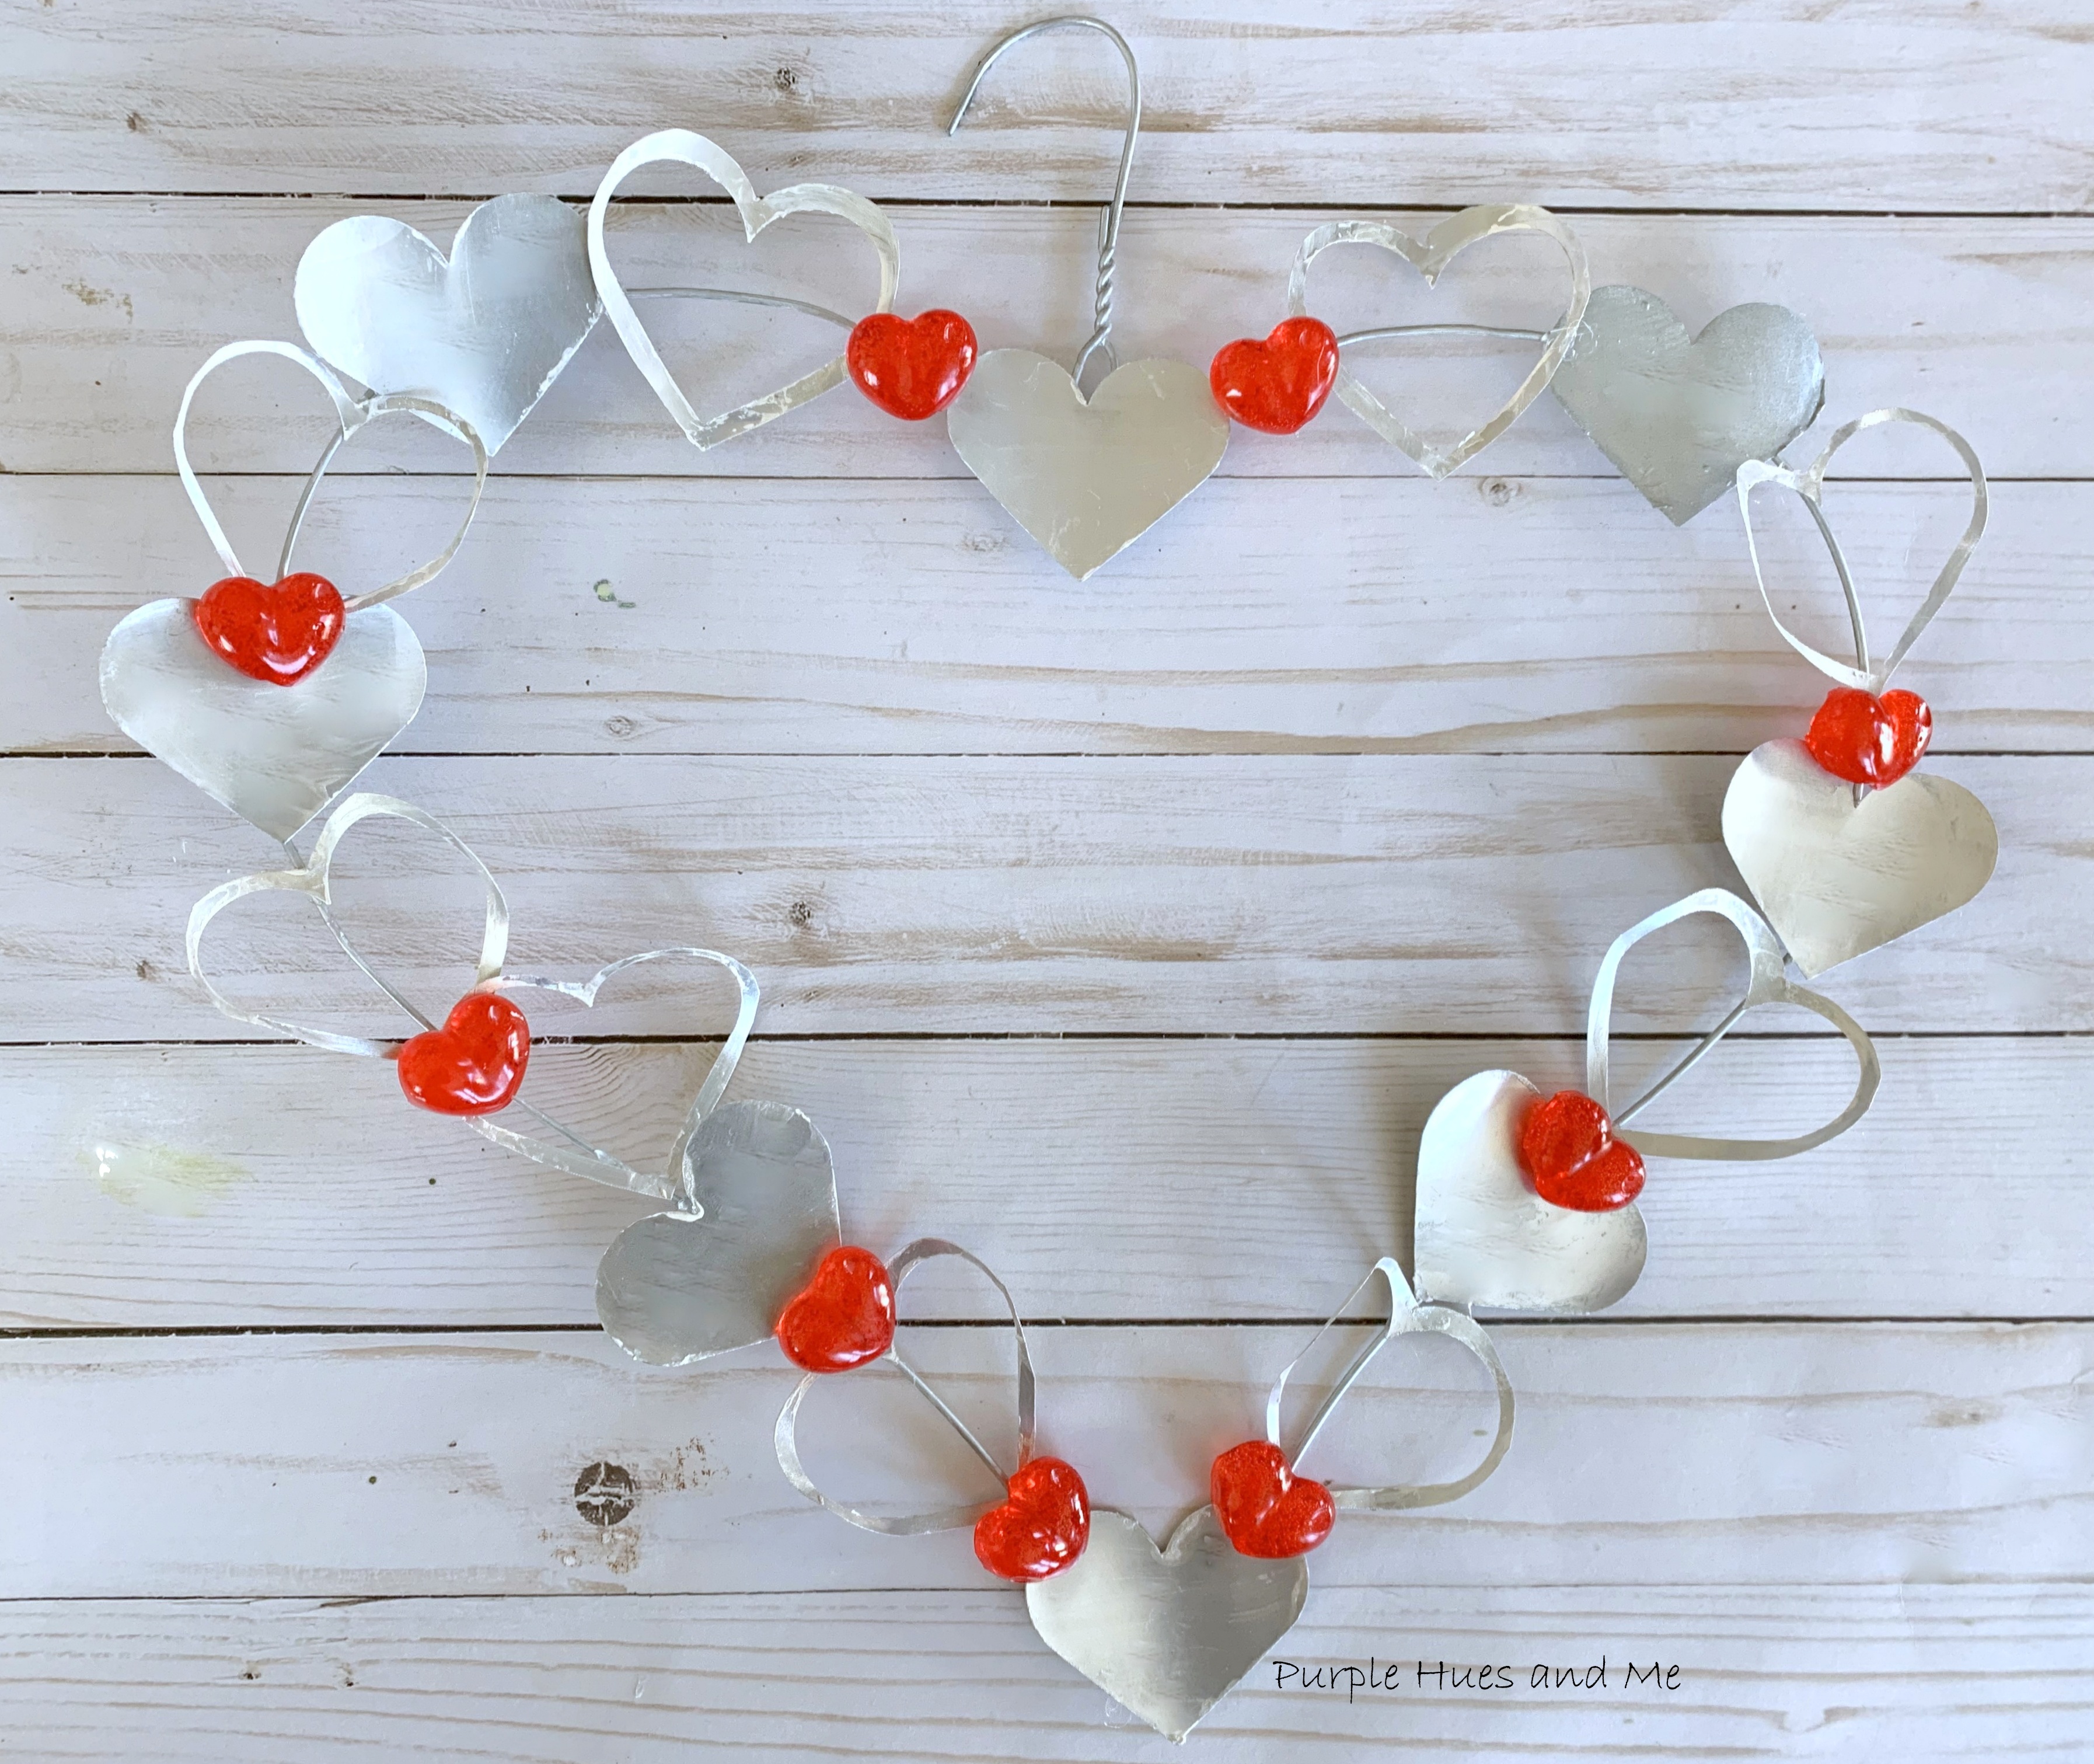
filling up the tiny heart shapes.Then I put the mold on a metal tray I had gotten from the dollar store and placed it in a cold oven, setting the temperature at 320 degrees. I turned the oven on and also the oven light on so I could see the melting process - checking on it every 15 minutes. I also turned the stove fan on, plus I opened my sliding glass door for fresh air (it was 40 degrees outside) to circulate while the plastic was melting. It took about 45 minutes for the plastic to completely melt. I turned off the oven to let the mold cool down in the oven. That took a couple of hours.Once I removed the mold from the cooled down oven, I was able to easily remove the hearts from the silicone mold.Then I randomly hot glued the red hearts onto the wire heart hanger.
How precious and charming is this!
So perfect to show LOVE!
💜💜💜
Be sure to check out all of the "LOVE" sustainable crafts projects listed below:
Julie | Sum of Their Stories | Upcycle a Plastic Container with Paint Pens
Vicky | Vicky Myers Creations | How to Make a Cute Paper Heart Garland
T'onna | Sew Crafty Crochet | Valentine's Day Gnome Scarf
Gail | Purple Hues and Me | Wire Hanger Soda Can Heart Wreath
Julie | Treasures Made From Yarn | Heart Garland
Terri | Our Good Life | Wine Cork Phone Holder
Christine | Christine's Crafts | Easy Valentine's Cards Using Paper Scraps
Niki | Life as a LEO Wife | DIY Place Card Holders with Free Valentine's Place Cards!
Mel | Decor Craft Design | DIY Love Container For Valentine
Jo | A Rose Tinted World | DIY Heart Garland from Upcycled Cards
Marianne | Songbird | DIY Lace Valentine's Hearts
Shelly | Mimi - A Great Name for Grandma | DIY Valentine Branch Tree
Allyson | Southern Sunflowers | How to Decorate a Tin Can Planter


This is gorgeous. I know I'd cut myself using tin snips, but I will admire yours. How fun!
ReplyDeleteThanks so much, Terri! I've been cutting tin cans for a while now and "knock on wood" have never cut myself.
DeleteOh my goodness, this is brilliant! I love every single thing about it!
ReplyDeleteThe way you melted those acrylic rocks is great, I had no idea that was possible.
We don't get a lot of fizzy pop cans (there's another britishism for you!) in our house either but I'm tempted to start saving them now so I can try something like this. Actually, thinking about it, I do a local litter pick once a month where we get loads of cans! I'm curious to know if the punched heart edges were sharp at all? I'm a little accident prone with my crafts sometimes so forewarned is forearmed and all that!
Thank you very much, Julie! To me, using a punch is much safer that cutting the tin with scissors. You can see how jagged the edges are using scissors. But when you paint them, the tin takes on a whole new feel - something like faux leather and doesn't seem sharp at all. Thanks, Julie, for hosting this awesome hop! I think we had the best turnout yet!
DeleteEvery part of this project is incredible! Using a hanger for the heart wreath form is genius! Also, I have never worked with soda cans as you have done here to create the hearts...I love this idea. Finally, the melted heart forms. You just knocked this one out of the park and I can't wait to try this Valentine's day project!
ReplyDeleteI never knew you could cut soda cans with a punch - so much safer!! I love this whole project.
ReplyDeleteThis is so cute & creative! Using the heart borders was a great idea. I like the way the create different hearts on the wreath. Pinned!
ReplyDeleteOH my! What a great repurpose and I absolutely love that you even made those red plastic hearts yourself. Brave move!
ReplyDeleteMy goodness, your wreath looks awesome! I was wondering how your hearts were so perfect. I'd never guess a punch would work on thin metal. And, let's talk about those hearts ~ you always know how to think outside the box!
ReplyDeleteYour wreath is so cute, fun, and unique!! I love metal decor, and this is such a awesome soda can upcycle. And adding the red hearts add the perfect pop of color.
ReplyDeleteThis is fabulous. I never would have thought of using soda cans in this way. The result is stunning! Thank you for such a great upcycle!
ReplyDeleteSo well done. Melting the acryclic hearts is such a great new technique I knew nothing about. Upcycling things for me is usually scrap wood projects. It boggles me how you were able to create something so nice out of pop cans. I am impressed.
ReplyDeleteIt's so adorable! The red hearts are really add colors to the silver can hearts.
ReplyDeleteHow cute and creative!
ReplyDeleteOh goodness, how clever is a soda can heart wreath?! Love how the metal takes on a cool galvanized vibe! Really pretty.
ReplyDeleteI had no idea that you could melt acrylic beads like that, how effective do they look? Great idea!
ReplyDeleteSo clever and so pretty. I am pleased to
ReplyDeletefeature your Flower leaf cord Wrapped basket at.
This comment has been removed by the author.
ReplyDeleteA flowery look and smell is attractive for the people. The ideas of the Best laptops for working from home are approved for the shows. The ting is held for the optional ambit for the induction and coined items for humans.
ReplyDelete