
In case you don't know, the Do It Over Designers is a group of talented bloggers who love to recycle/upcycle/DIY, hosted by Anne @The Apple Street Cottage. It happens the 4th Saturday of every other month and it's all about taking something old and/or unused and 'doing it over' into something new. Anything from fabric, old dishes, and decor to dressers and hutches. Items found in closets, cabinets, barns, garages, yard sales, thrift stores, you name it! I hope you'll visit all the super creative bloggers to see their amazing "do over" projects. The list of participants are at the end of this post.
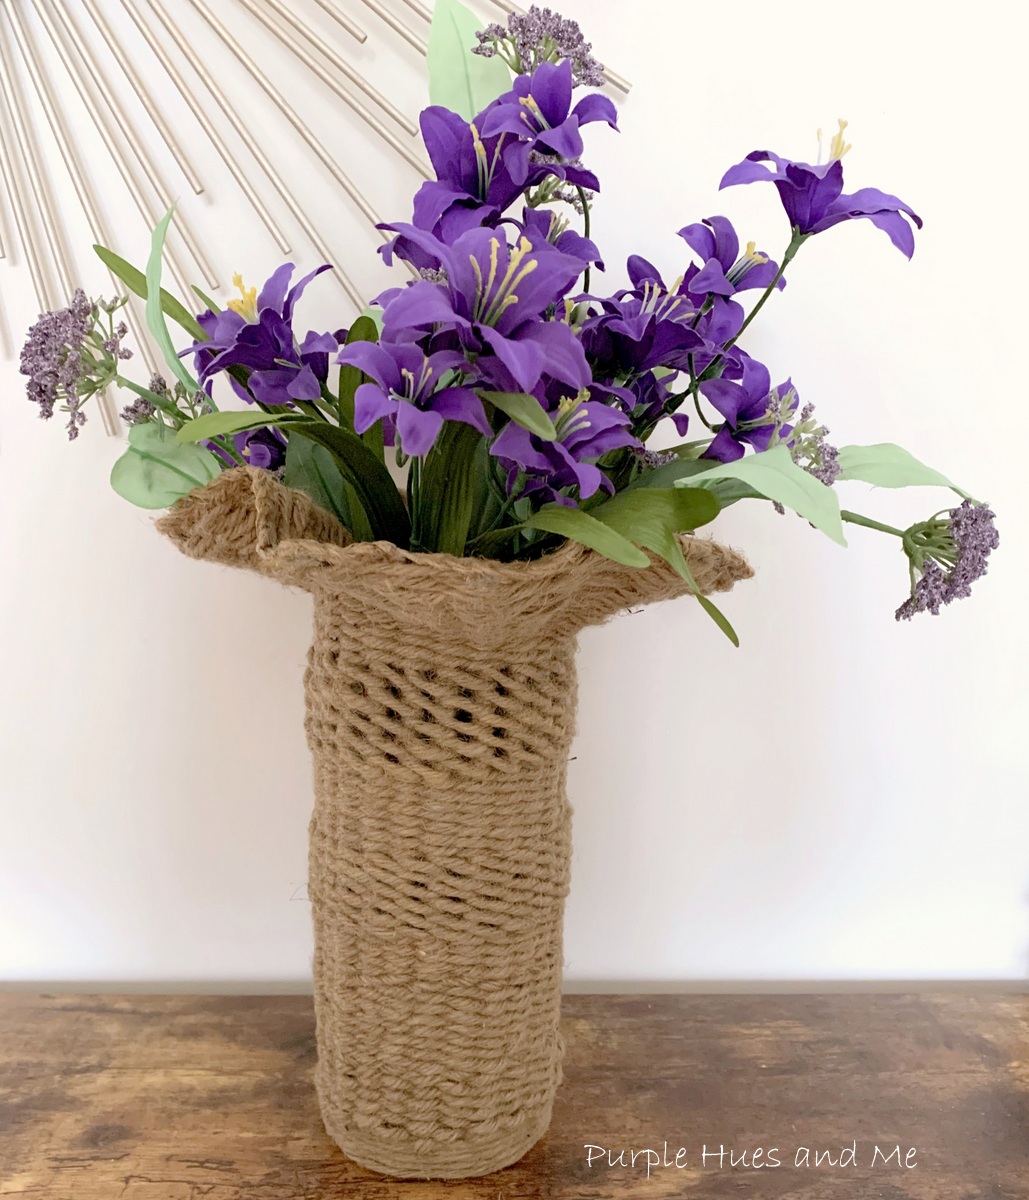
To make this Woven Jute Vase with Flair Top, gather the following -
Materials: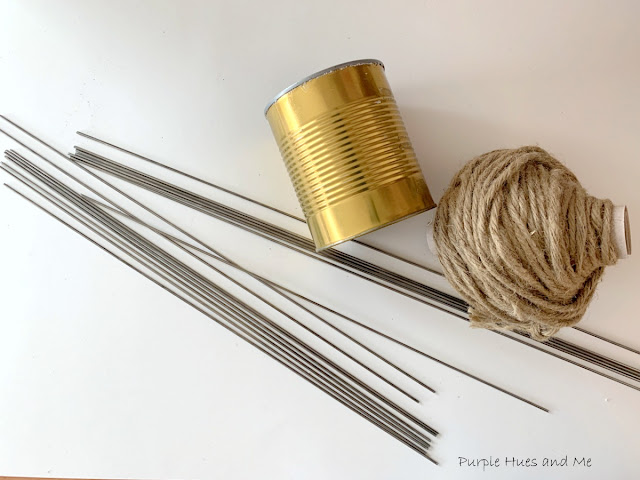
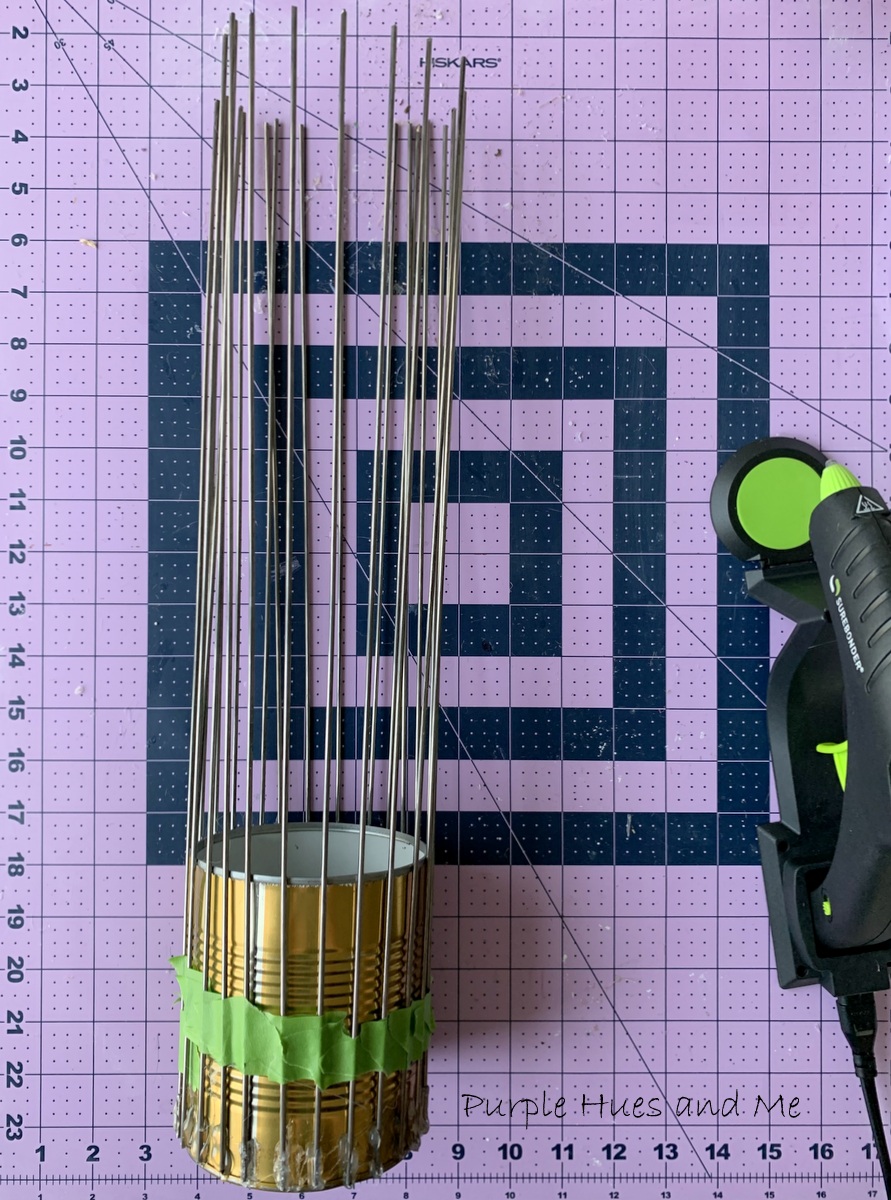
 Use masking tape to hold the wires in place until . . .
 the glue dries.
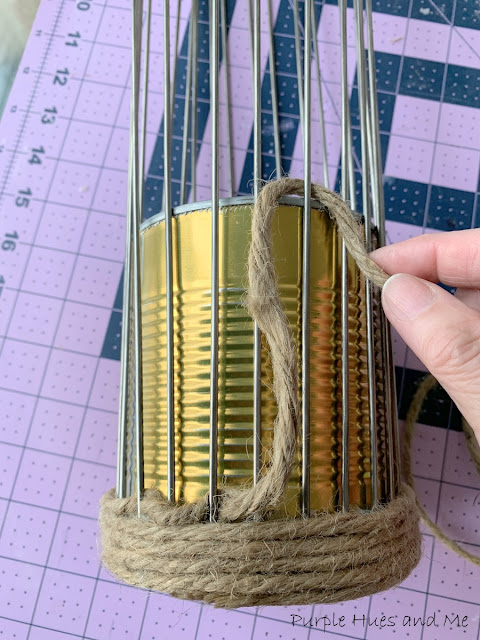
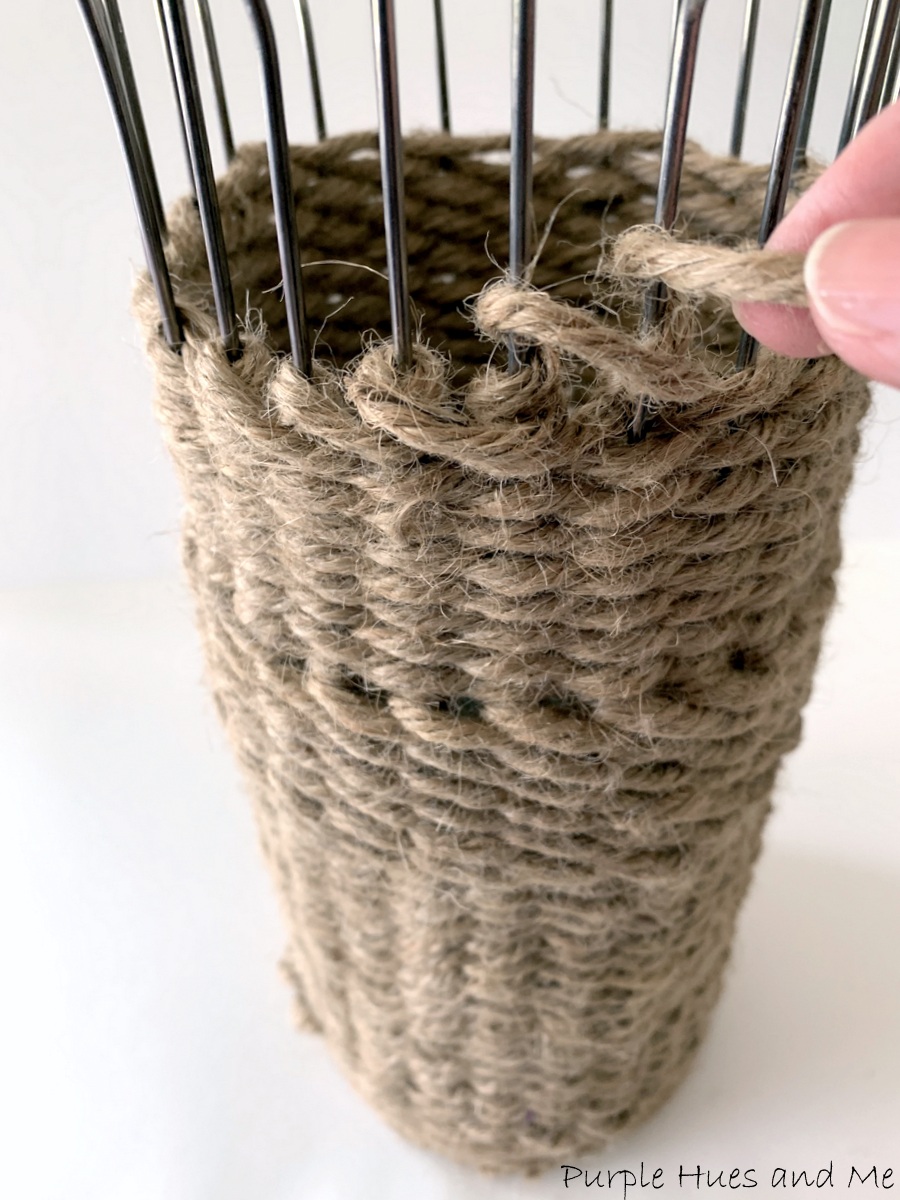
 Then glue on the end of the jute rope at the tin can seam and begin wrapping the jute around the can approximately five times (ending at the seam) - gluing ever so often to keep the jute place as you wrap. When reaching the seam, start taking the jute rope over and under each wire, around the tin can.

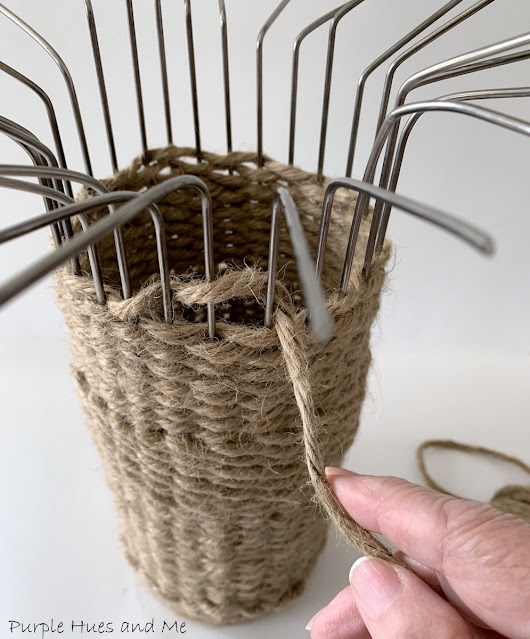
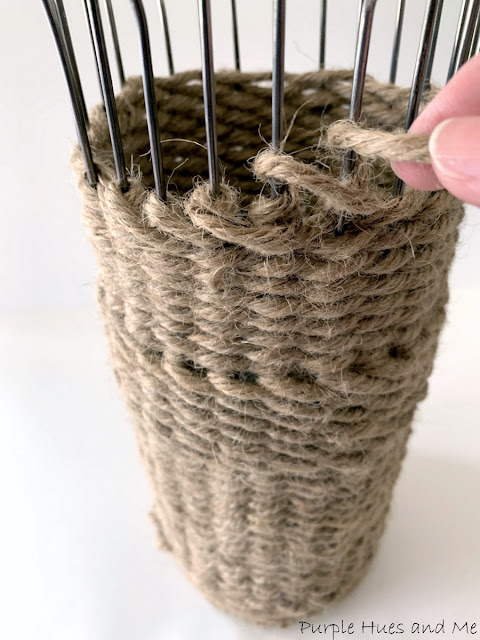
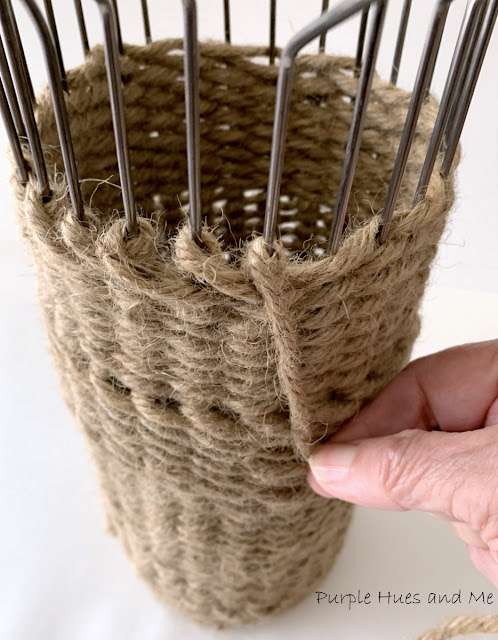
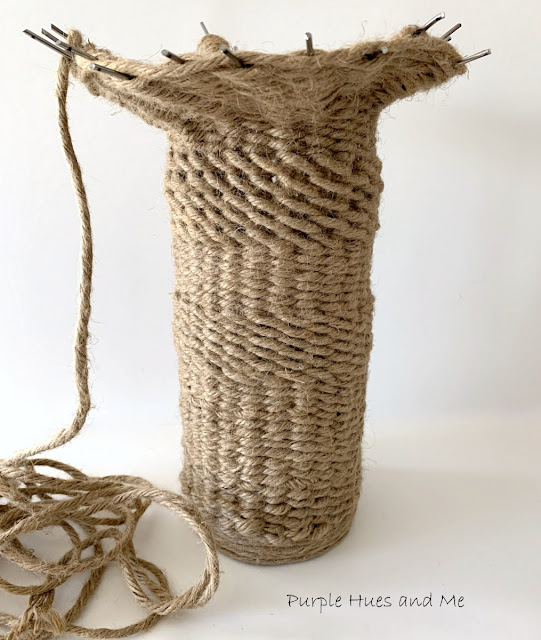
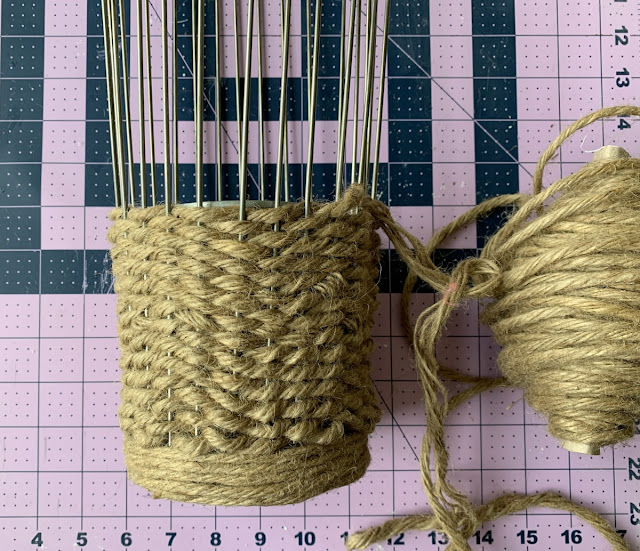 Then switch up the weaving pattern by wrapping the jute rope around a wire and then skipping over the next wire and wrapping around the wire after the one skipped over - continuing this pattern around and up for several rows..
 To make the flair top, bend each wire (using pliers and an old wash cloth) near the same area, with . . .
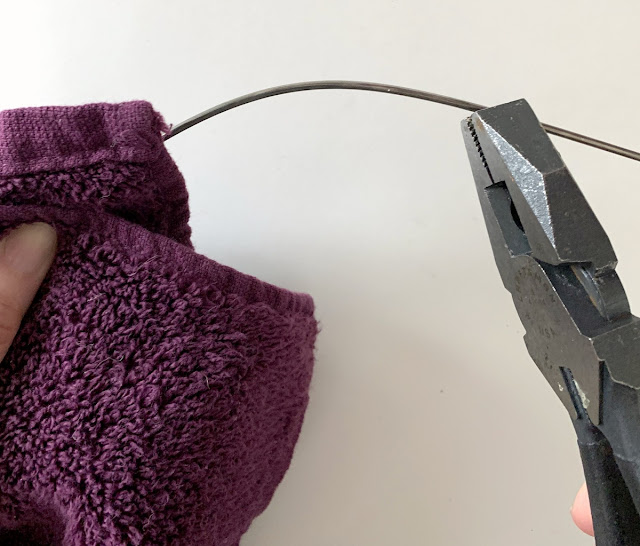
 Continue weaving over and under the wires . . .
 weaving up the wires . . .
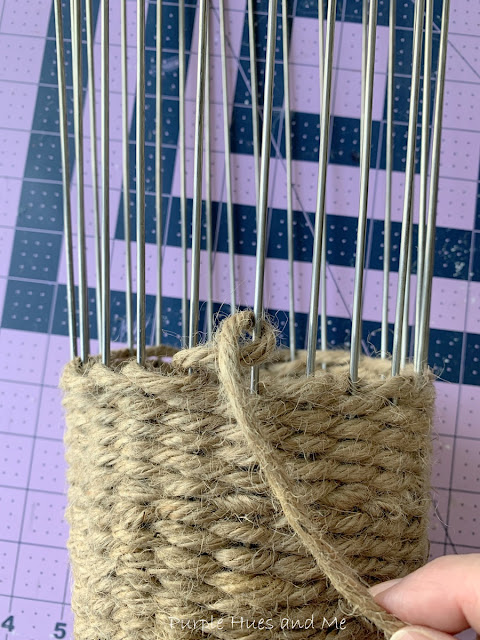
 then switching the weaving pattern by wrapping rope around each wire . . .

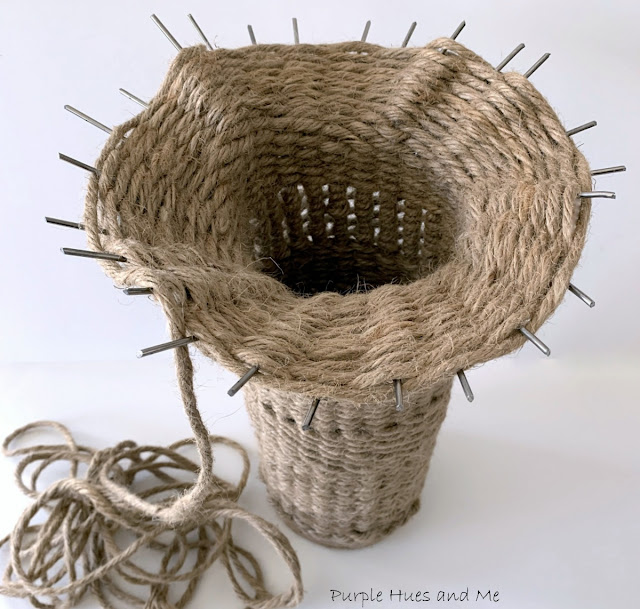 you're near the end of the wires. Then, cut off excess jute . . .
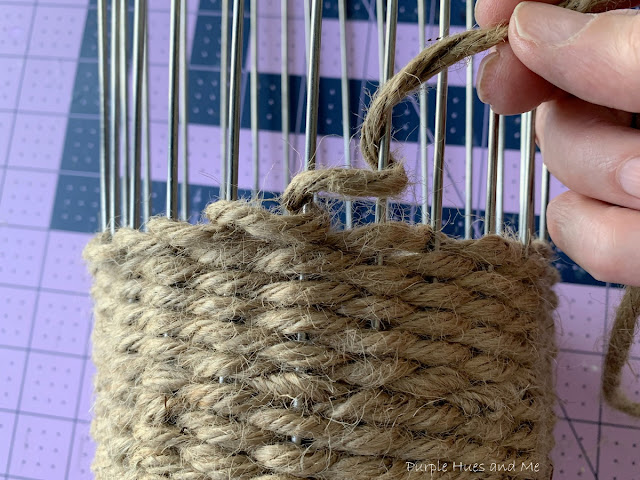
 leaving enough at the end to tuck in between rows, adding a dab of glue to seal.
 To cover the wire ends around the flair, separate some of the excess jute rope into three, four thread groups to braid and . . .
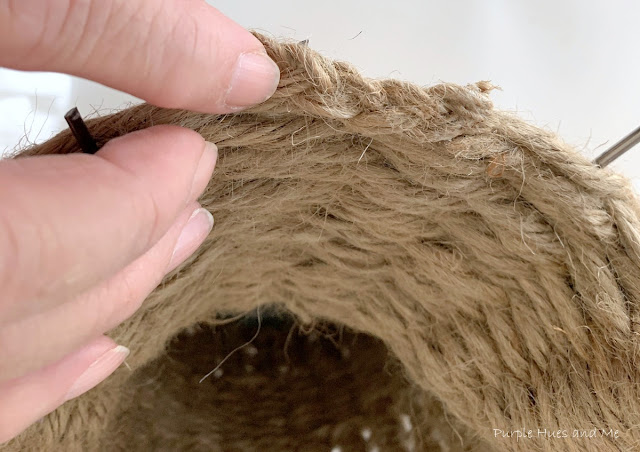
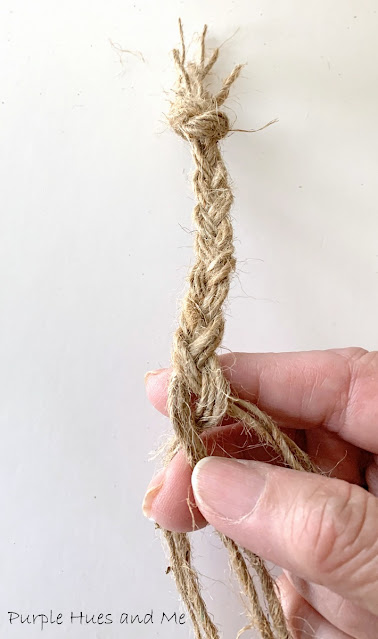 glue around the edge of the flair. Measure how much braiding is needed and seal end areas with glue to cut off and let dry. Glue on braiding around the flair and over the wire ends . . .
- Tin can
- Knitting blocking wire (3mm 36" long)
- Wire cutters
- Masking tape
- Jute rope - 5mm
- Hot Glue
- Tape ruler, magic marker, scissors
- Pliers and old wash cloth to help bend wires
Disclosure I am a participant
in the Amazon Services LLC Associates Program, an affiliate advertising program
designed to provide a means for us to earn fees by linking to Amazon.com and affiliated
sites, this post may contain links. I may receive a very small commission at no
cost to you! The affiliate money I earn helps pay my crafting expenses. Thanks
so much for your support!

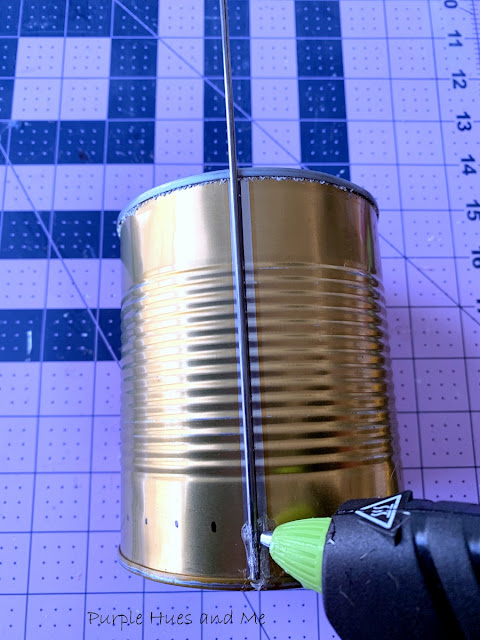
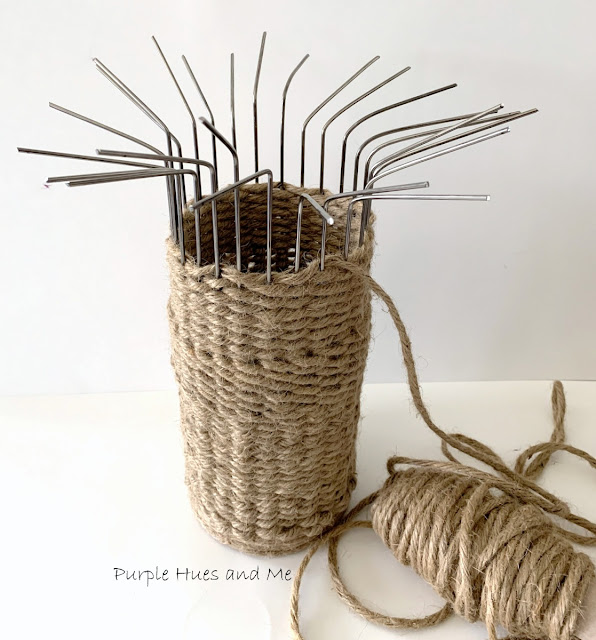
Let's begin by cutting the knitting blocking wire in half using wire cutters. I got the blocking wires from my mil when we had to clean out her home. I had no idea what they were at the time, but couldn't resist the long, narrow wires. I knew I would eventually find a use for them! Lol!
Next, take a clean tin can and wrap a tape measure around the bottom to mark 1/2" spacing along the outside using a magic marker. Then hot glue a blocking wire on each mark gluing on a total of 25 for this size can.


Continue weaving over and under for about 24 rows - ending near the top of the can.


some wires slightly higher or lower than the others for a wavy look.
 Continue weaving over and under the wires . . .

for a decorative woven effect . . .


before switching back to an over and under weave for the flair until . . .


for a finished look.

In weaving this vase, I'm not quite sure how much jute I had left over from a 900' roll I got a few years ago. I used the total jute bundle as pictured above. And it was enough for me to weave a 12" tall vase with a 3 inch flair.

How cool is this!

A lovely boho or shabby chic look!


.png)


I have a bunch of those knitting wires too and now I know what to do with them lol! Great project Gail; your creativity always inspires me :)
ReplyDeleteThanks, Sara! I'd hate to say how long I've had those wires, but I'm finally glad I did something with them! Can't wait to see what you create!
DeleteThat fluted top is so pretty, Gail! You always share the most innovative crafts and inspire me!
ReplyDeleteThanks so much, Kim! I had been trying to think of another way to describe the top and fluted is just perfect! Me and my senior moments, lol!
DeleteI never would have guessed there was a tin can under there! Great makeover, Gail.
ReplyDeleteThanks, Ann! Saving tin cans for projects is one of my favorite past times! Lol!
DeleteShut up, whaaaat?! That's so cool Gail!!
ReplyDeleteThanks so much, Tania! It was fun to make!
DeleteWOW - very clever project! You certainly have more patience than I do!! Quite inspirational!
ReplyDeleteThanks so much, Patti! Well, I don't know about that! You are a true artist!
DeleteBoy you are amazing! Have. Great weekend.
ReplyDelete☺️
Thanks so much, Liz! And thanks for stopping by! Enjoy the rest of your week, too!
DeleteYou have the best creative ideas and how you figure how to make something that looks like an intricate design is amazing. Your vase gets a "wow" from me.
ReplyDeleteThanks so much, Allyson! It was really quite easy to make! I don't do complicate, lol!
DeleteI am very impressed that you made it from scratch, the shape is very interesting.
ReplyDeleteThanks, Anita! I was quite pleased as to how it turned out! I am thinking about making one using macrame cord in a pretty color - maybe purple, lol! Just kidding!
DeleteI'm always blown away by your ideas, Gail. No one would ever guess under that very cool weaved vase is a tin can!
ReplyDeleteWow! Gail I love this beautiful vase you made. You are always making such beautiful crafts.
ReplyDeleteThis project is truly amazing to see how you made it. I had to pin it and may just tackle a version of my own. Thanks for sharing your creativity.
ReplyDeleteI love your article so much and I appreciate your thought and views. This is really great work. Thank you for sharing such a useful information here on the blog.
ReplyDeletefor More Information Visit Here:- Reset AT&T Email Password
Fantastic article! You’ve explained everything in such an easy-to-understand way.
ReplyDeleteAbsolute discipline is non-negotiable. I set a monthly entertainment budget and stick to it. Platforms like Crown Melbourne Online have great tools for this, like deposit limits. I never chase losses. The moment it stops being fun, I log off. This mindset transforms it from a potential risk into a sustainable and enjoyable hobby, just like any other form of paid leisure.
ReplyDeleteIf you ever want to play at a casino UK, I can confidently recommend Cazeus Casino This casino has won my heart forever. I can't imagine my life without gambling now. My friend who plays with me says that I'm already very good at it.
ReplyDelete