Showing posts with label rope craft. Show all posts

Thursday, March 16, 2023

Twisted Rope Container with Top


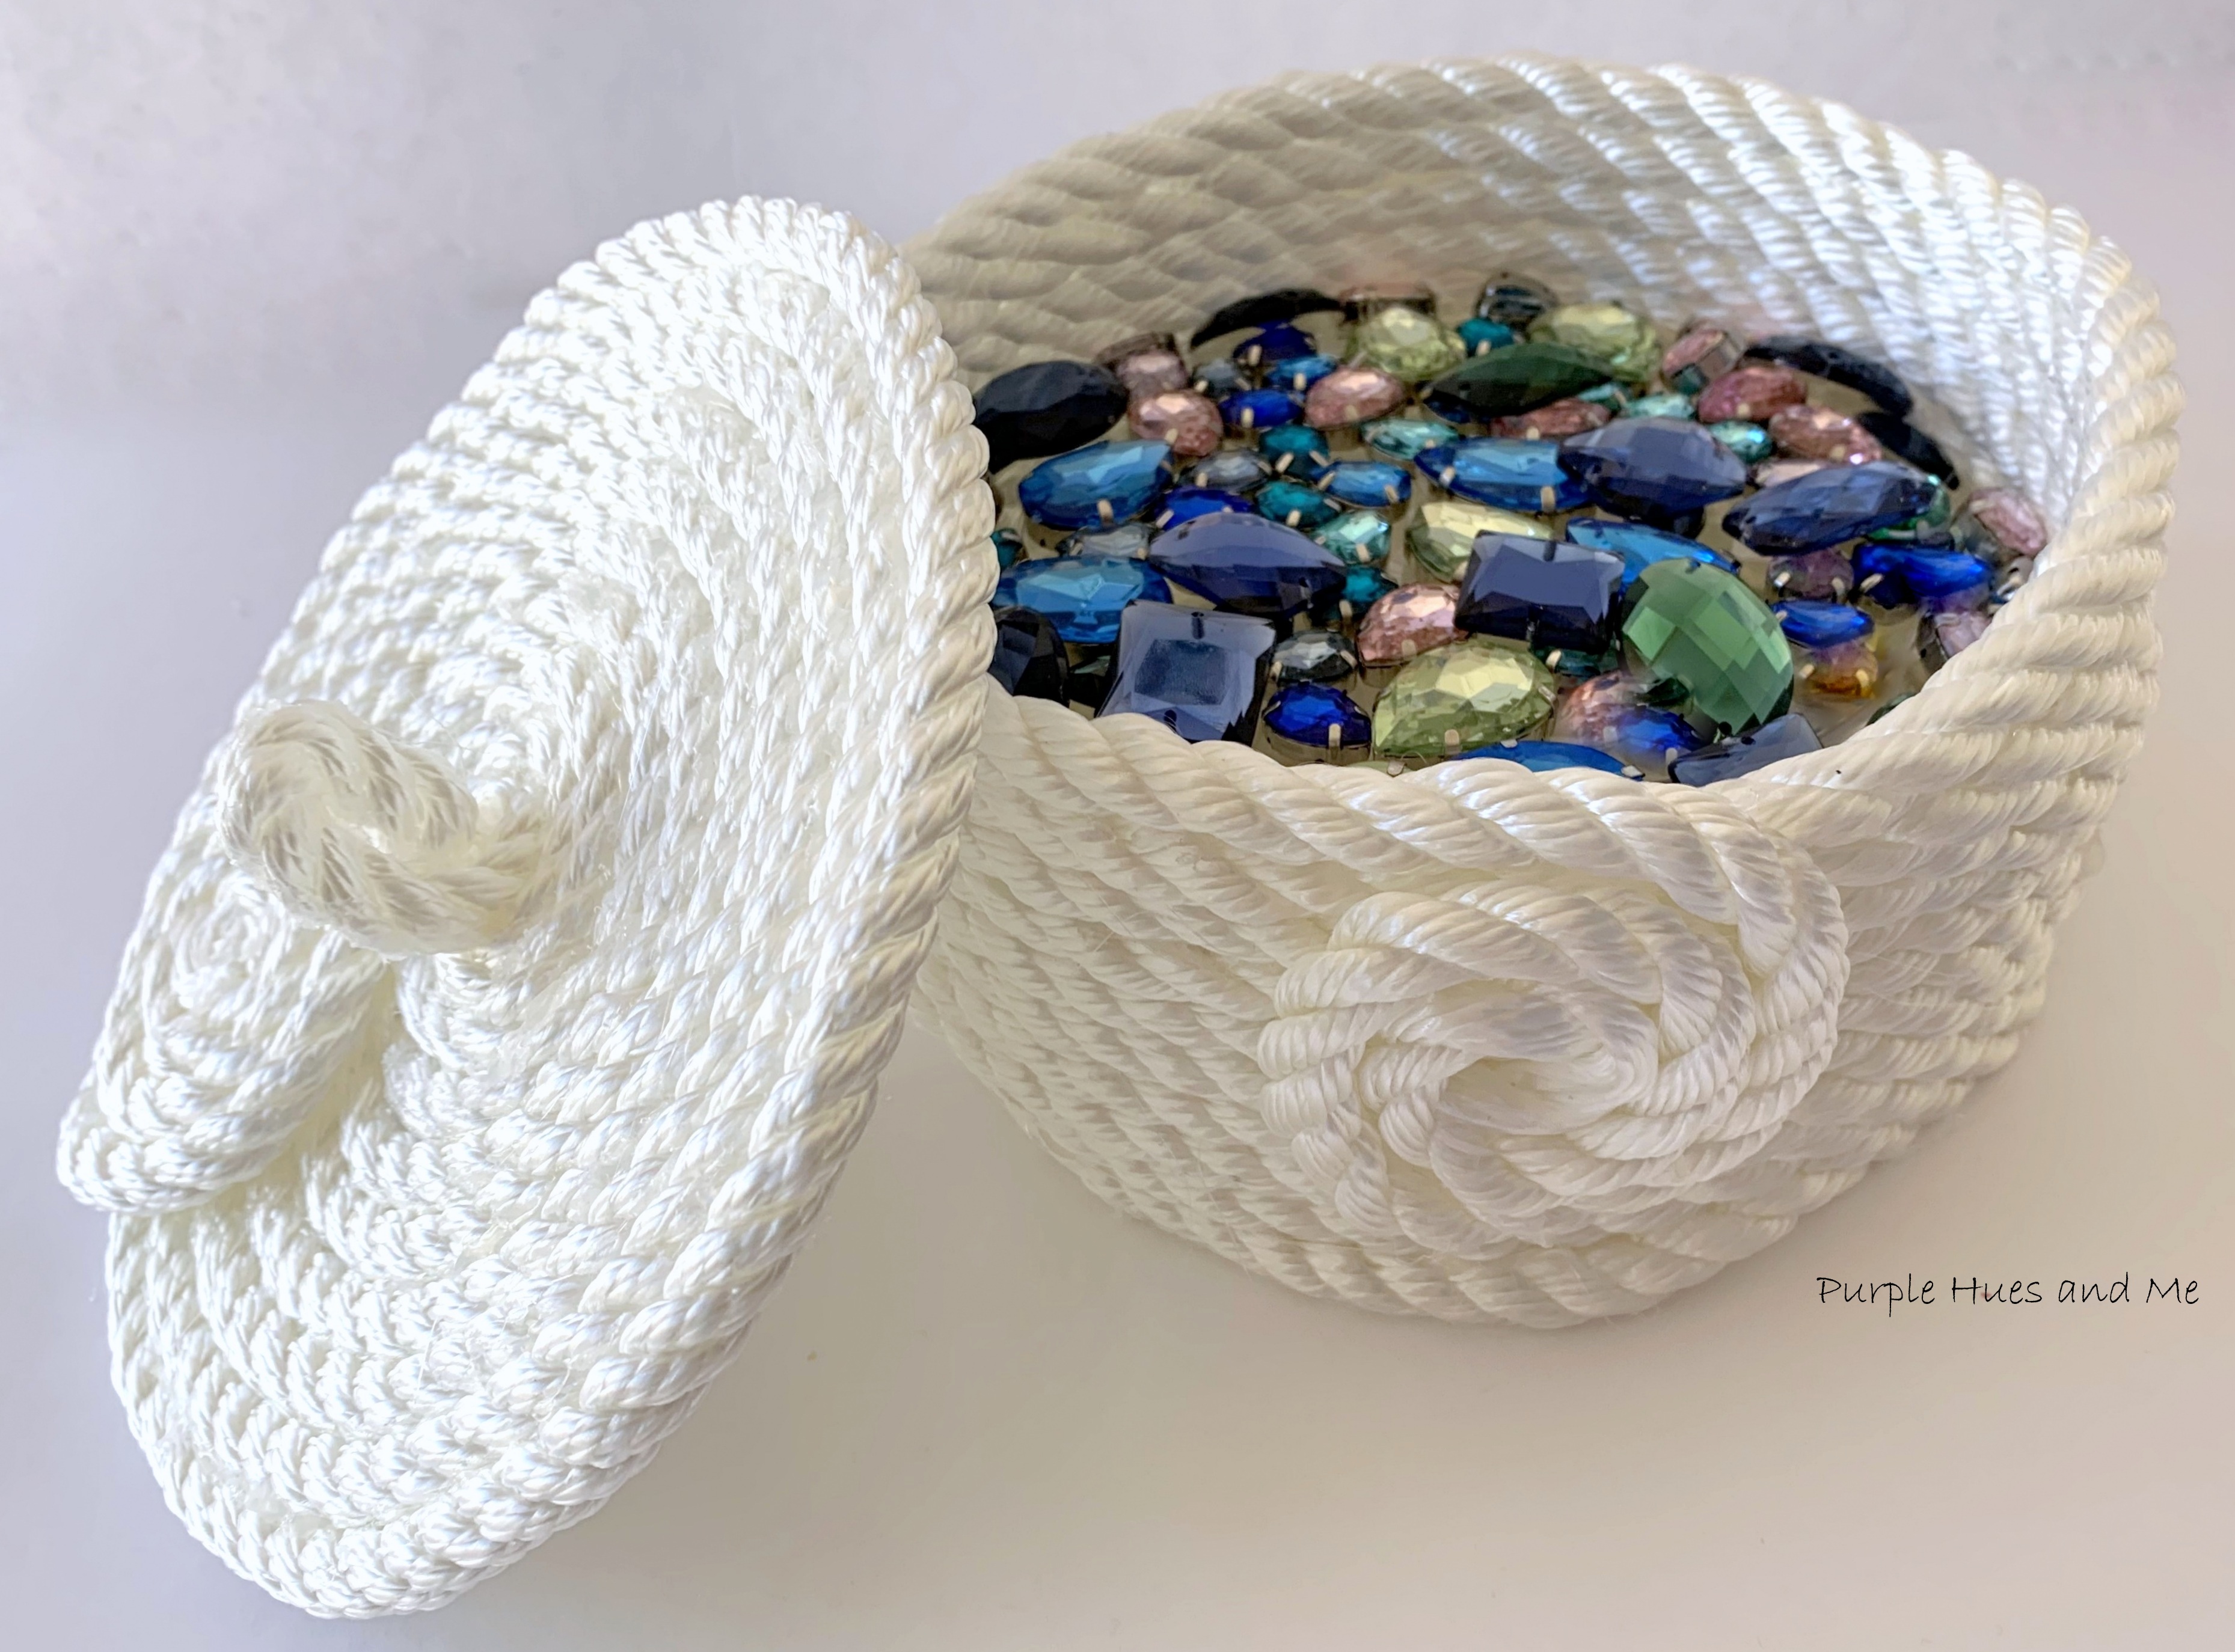
 Hey everyone! It's time for our monthly creative craft hop and I was thinking about what I might make this month! We all love having small storage containers for our trinkets, knick-knacks and even things like small gems we use in crafting! As a crafter, the best and easiest way is to make our own small containers! And the best part is when you are able to find all the materials already in your home! Hot damn! Imagine finding a bag of rope in your garage! Not just any kind of rope, but one that's satiny with a sheen! Who knew they come this way!

Plus, you only need a couple of items to make this lovely container: twisted rope (this one is 3/8" by 25ft.) and hot glue in addition to incidentals like a circle template, parchment paper and scissors. All basic household supplies!

So let's begin with drawing a 5.5" circle - I wanted a small container to hold my craft gems and five and a half inch is perfect!  Next, place a sheet of parchment paper over the circle. Hot glue won't stick to parchment paper. You can just rub it off after cooling!

Begin by tightly wrapping and gluing the rope in a circle. 
Apply glue to the outer center edge of the rope and continue wrapping and gluing, following the outline of the circle until .  .  .
you are on the circle outline
Make sure you line up the wrapped rope with the circle. Then begin adding hot glue on top of the wrapped rope on the last row to start building up the sides to make the container higher. 

Add glue along the middle of the rope and be sure to cover the entire length of the rope. You don't want any gaps in the sides. 

Do this by adding a bit of glue and smoothing the rope down on top of the previous wrapped rope - making sure the rope is centered and straight on top as you wrap.

Continue adding glue and wrapping the rope around on top of the previous rope until .  .  .
you have reached the desired height. I ended extending the height right above where I began building the sides.

I want to mention that at this point I wrapped a model of the top (without gluing) on the larger 5.5" template with small decorative circles on the bottom and top to make sure I had enough rope to complete the container with a top - which I did.
So I glued on a decorative disc shape along the side cutting off the excess rope. I had to add a bit of glue to the cut off end to keep the rope from raveling. 
Don't you just love how this look!
To make the top, I created a loop in the center of the circle template and continued gluing on and wrapping the rope .  .  . 
around and .  .  .

around until .  .  .

finishing the top with a decorative disc shape like on the side of the container .  .  .
for a lovely polished look!
What a great way to recycle unused fashionable rope from around the house!
How adorable is this to store craft gems!

Perfect to share on this month's  Creative Craft Hop hosted by Sara @Birdz of a Feather If you are visiting from  Niki @Life as a Leo Wife, WELCOME! Wasn't Niki's bunny topiaries gorgeous!

Up next is  Cecilia @My Thrift Store Addiction sharing her beautiful  Egg-cellent DIY Floral Arrangement .  Be sure to stop by each and everyone in our creative group listed below to check out their exciting and inspiring project! And don't forget to pin, too!

Leanna | Pretty DIY Home | Peat Pot Easter Basket Gift Ideas


Jenna | The Painted Apron | Spring Bottle in Bloom


Tammy | Patina And Paint | Easy Easter Craft


Niki | Life As A Leo Wife | Farmhouse Bunny Topiaries


Gail  | Purple Hues and Me | Twisted Rope Container with Top


Cecilia  | My Thrift Store Addiction | Egg-cellent DIY Floral Arrangement in 2 Easy Steps


Terrie | Decorate and More With Tip | Adorable Easter Craft DIY


Sara | Birdz of a Feather | Slip on Coaster


Carol | Blue Sky at Home | How to Easily Decorate Old Bottles with Paper and Vinyl


Allyson | Southern Sunflowers | How to Decorate a Dollar Tree Bunny Wire Wreath


Donna | Modern on Monticello | Easy Tile Pallet Wall Art


Ann | The Apple Street Cottage | Spring Fence...and a Bunny



Monday, April 1, 2019

Rope Wrapped Bunny DIY

While looking through the Hub's stuff for sandpaper I came across a familiar item - clothesline rope. Boy, did this bring back memories! How many of you hung laundry out to dry on clothesline back in the day?
 Hated it!!!
One of the benefits of this "torture" I mean, chore, was the "fresh air smell!" Nope, not for me! Too much work!
Anyway, forgive me, I digress!
Of course I saw a craft project in the works when I saw the rope! But what kind? Wrapped eggs or bowls.  Twine wrapped eggs are quite popular this time of year, but rope is really too thick for that! And I've made a rope bowl before. 

But what about a bunny? How cool would that be!

In addition to the above items, you will need: 
Hot glue 
 Fabri-Tac glue
2.5" Ribbon
Animal eyes
White fabric floral stem wire
Pink felt
Hot wire foam cutter tool (Proxxon) or craft knife
Silicone finger protectors (optional)

 I am a participant in the Amazon Services LLC Associates Program, an affiliate advertising program designed to provide a means for sites to earn advertising fees by advertising and linking to Amazon.com. This post also contains affiliate links.  I may receive a very small commission.  It does NOT result in additional charges to you or cost you anything extra.  The affiliate money I earn per month helps pay my crafting expenses. Thanks so much for your support!


Let's begin by placing a dab of hot glue in the center of the bottom of a 6" smoothfoam egg (body), and after squeezing the tip of the rope end together, place down on the glue and begin swirling the rope around in a circle.
Continue wrapping the rope around the egg shape, adding glue periodically down along the rope.
Using hot glue is the quickest way to hold the rope but it can burn your fingers quite easily - oozing up between, so I switched to Fabri-Tac fabric glue to hold the rope in place for the body. It's a quick grab glue, drying in a few minutes.
 Continue wrapping the rope around near the top end, leaving an opening to hot glue a smoothfoam ball (head) on.
After the head is glued onto the body, continue wrapping the rope around adding glue periodically until reaching the top. Secure the rope in the center with more glue,  cutting off the excess.  
To make the bunny ears and arms: Draw and cut out the patterns on cardboard.  Paint all of the pieces white on both sides.  
The original rope size was a bit too thick to wrap the ears and arms, so I unraveled the rope at the end to reveal a thinner piece inside. It was easier to push the outer rope layer away together .  .  .
to wrap both ears with the thinner size using hot glue!
Next, cut ribbon mimicking a smaller ear shape and glue in place for the inner ears.
Next, hot glue the ears onto the head, holding in place for a few minutes until dry!
Then, wrap the arms with the thinner inside rope, being careful not to burn your fingers near the ends.
Hot glue on the arms, curving them 
around the body.
For the bunny feet, I had a time trying to cut the foam egg in half down the middle with a knife. I ended up using my Proxxon hot wire tool to make the perfect cut!
Next, wrap both pieces using the inner rope, once again.
Glue the two feet together at the top sides (slightly spreading apart)  .  .  .
before gluing the bunny body on top.
Next, glue on the animal eyes, heart shape mouth (felt) and whiskers (floral stems).
And finally, glue on a matching ribbon bow tie and of course, a carrot to complete the look!
How cute is this!

Thanks for stopping by
and take a little time to enjoy,
Happy Crafting!

