Showing posts with label diy napkin rings. Show all posts

Thursday, January 20, 2022

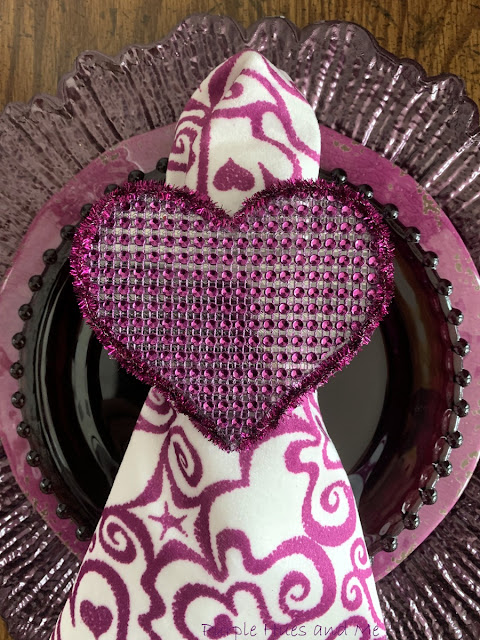
Mesh Bling Heart Napkin Rings

Since we're all kinda stuck at home more than we want to be these days, wouldn't it be fun to have an occasional 'get dressed up' evening with that special someone by cooking something delicious and create a beautiful tablescape to get you in a warm festive mood! And one way to help in creating a beautiful table setting is to make gorgeous napkin rings! Napkin rings are so simple and easy to make that you can create fabulous new ones for each occasion, season, everyday use and even gift giving, too!

So for Valentines' or a romantic evening, here's a fun way to add a little extra love and glam to your tablescape with handcrafted mesh bling napkin rings! Here's how!

Supplies: 
  • Rhinestone Mesh Ribbon - 4.75"x10yds
  • Heart template
  • Marker
  • Clear acetate plastic/paper
  • Fabri-Tac fabric glue
  • Parchment paper
  • Chenille stems
  • Clamps
 
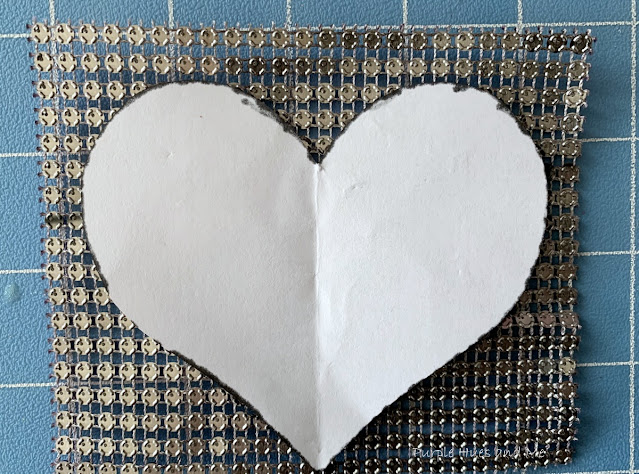
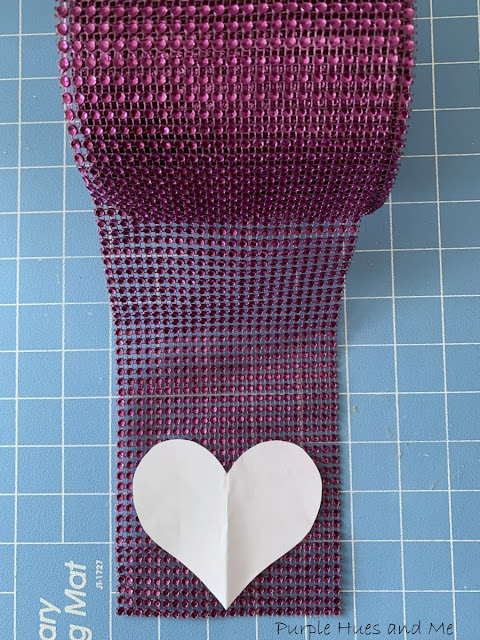
Let's begin by making an easy heart template using a piece of paper 3.5"x4.5" - folding in half and drawing a half heart shape. Then open the paper and cut out the heart. 


If you're like me, you probably have at least one roll of mesh bling left over from when it was so popular a few years ago. Next, place the heart template on the mesh for fit - making sure it's even with the rows straight .  .  .
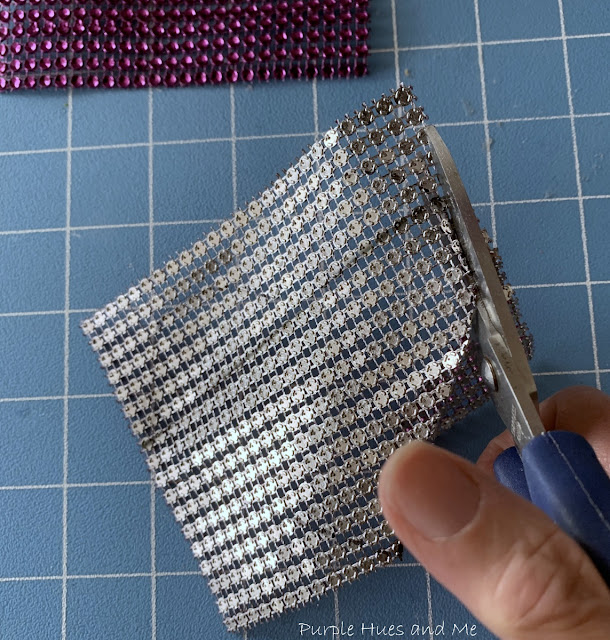
then turn the mesh over, outlining the heart shape on the wrong side using a black marker .  .  .
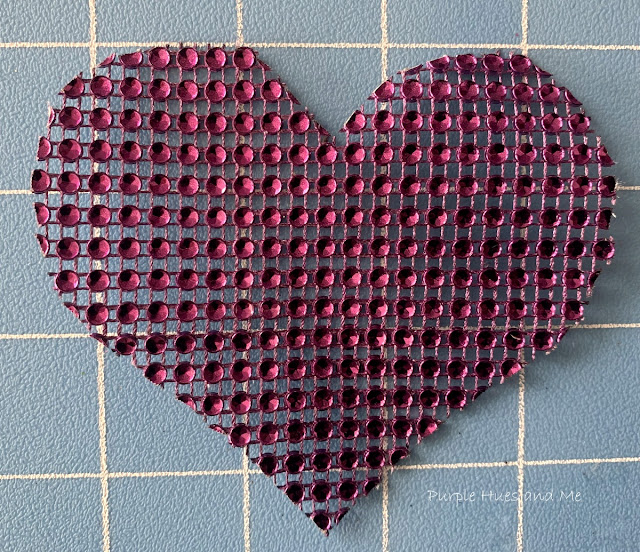
and cut out! 
Repeat cutting out a second heart shape for the backing.
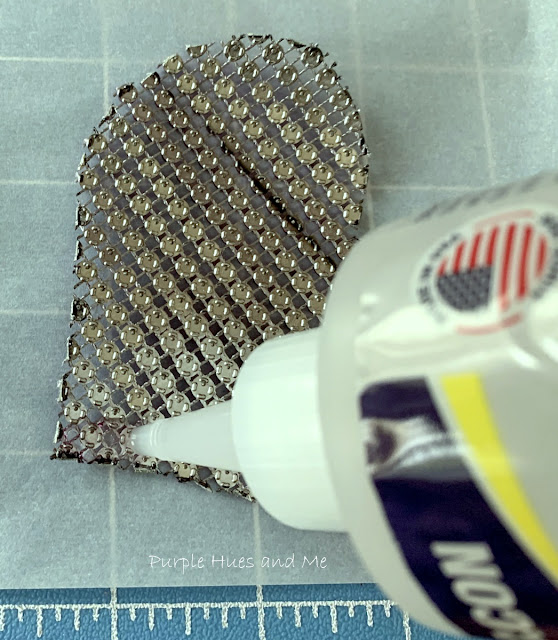
Next, apply Fabri-Tac fabric glue to the wrong side of one heart and  .  .  .
lay it on top of a clear acetate plastic sheet. Then smooth the mesh heart down over the clear acetate. 

I know you've noticed how large rolls of ribbon are covered with a piece of heavy duty clear acetate or plastic to protect the ribbon. Well, I save them for projects just like this one. This acetate paper came from a five inch wide roll of ribbon I got from Costco. It's perfect to use as support for the mesh which is very flexible! You wouldn't want to use cardboard because it would show through the open mesh effect.
 
In addition, use parchment paper to help smooth out the mesh and glue. Let dry.
Once the glue has dried, cut out the heart shape. Repeat gluing the mesh heart shape to another piece of clear acetate for added strength and cut out. 
Then glue the second mesh heart to the back of the mesh heart on the acetate paper. Let dry.

Next, twist two chenille stems together for added thickness and glue on the edge around the mesh heart starting at one side of the 'V' spot and ending on the opposite side. Sorry, I was so involved gluing on the chenille that it was difficult to take pictures with sticking fingers at the same time.
To make the mesh napkin ring, count five rows of bling across - approximately 1.5" and 6.5" long. Cut out. Then glue onto a piece of clear acetate. Let dry and cut out, leaving a 1/2" inch clear edge. Repeat, gluing mesh strip on clear acetate, for stability and let dry.  Then cut out.
To form the napkin ring, apply glue to the clear edge .  .  .
and place the bling edge on top of the clear acetate matching bling rows, creating a ring. Clamp ends together to dry.

To attach the bling ring to the heart, apply glue along the edge where ring comes together, centering the ring in the middle of heart. Clamp in place until the glue dries.
I love the oversize look of the bling heart napkin ring. 
Have fun making lots more!

It's a lovely effect and .  .  .
 a pretty way to dress up a Valentine tablesetting or decoration! 
I hope you enjoyed my tutorial on making a mesh bling heart napkin ring and take advantage of having a dress-up or romantic evening - Just in time for our monthly Creative Craft Blog Hop hosted by Sara @BIRDZ OF A FEATHER.
If you're coming over from Cecilia @ My Thrift Store Addiction welcome! Up next, is Carol @ Bluesky at Home sharing easy Valentine's Day sticker decorating ideas!

Be sure to have fun and get inspired with all of the wonderful creations offered this month by clicking on the links below!


Thursday, August 26, 2021

DIY Kartoos Flower Napkin Rings


Fall is just around the corner and that means you're probably thinking about having family and friends over for a festive dinner during that time. Here's a creative idea to decorate your table setting even if it's just family this year. 

Why not give your fall table settings an extra handmade touch with adorable dried kartoos napkin rings! I really don't know much about the kartoos flower - just that it's an exotic dried pod usually from India and that it's sometimes called a dried natural achiote/articoke - often packaged in potpourri bags! Sounds wonderful, doesn't it! Used in decor, the kartoos flowers are a little less expected and a whole lot more sophisticated and unique looking!   And the attached intertwined paper fiber rush rings are so easy to make and perfect to go with the unusual looking dried flowers! 

Disclosure I am a participant in the Amazon Services LLC Associates Program, an affiliate advertising program designed to provide a means for us to earn fees by linking to Amazon.com and affiliated sites, this post may contain links. I may receive a very small commission at no cost to you! The affiliate money I earn helps pay my crafting expenses. Thanks so much for your support!

Materials Needed:
So let's get started making the napkin ring out of paper fiber rush. In case you don't know what that is, it's chemically treated kraft paper used primarily for wicker furniture or seat weaving and basket weaving.

Using a bottle or round object like a rolling pin as a round guide for the ring, initially wrap the rush around the bottle 4-5 times.
Then measure that amount on a yard stick (30") and cut at least four strips or more depending on how many napkin rings you want to make. Next, wrap one of the fiber strips around the bottle one time, inserting the end up and over the strip and clamping in place.
Remove the fiber ring and clamp from the bottle and begin wrapping the strip over and under and around following the initial ring shape until .  .  .

you have intertwined the fiber strip four or five times and you're satisfied with the look.
Then tuck the ends inside the wrap to conceal, adding a bit of quick grab glue to secure and stay in place. 

Then make at least four more the same way.
Now it's time to attach the kartoos to the ring.
Just pick out the most attractive and about the same size dried flowers and .  .  .
add a blob of quick grab glue on the center of the kartoos flower.
Then place the ring on top of the glue, along the length of the petals, holding in place until the glue sets - usually a minute or two. 


Now stand back and admire how wonderful your handcrafted napkin rings look!
Perfect for any Fall table setting .  .  .
that looks fabulous and quite unusual, too!
I hope you enjoyed seeing how I created this fun and easy way to make napkin rings using twisted paper fiber and dried kartoos flowers for this month's Creative Craft Blog Hop!
I'm pleased to welcome you to our monthly Creative Craft Blog Hop - Summer Edition where I've teamed up with a talented group of creative bloggers to bring you lots of wonderful ideas and inspirations!  Our regular hosts are on hiatus for the summer and Sara @Birdz of a Feather volunteered to take over during that time! Thanks so much, Sara! 

Be sure to have fun and get inspired with all of the wonderful creations offered this month by clicking on the links below!

Thursday, October 22, 2020

Shrinky Dinks Decor

For this month's Creative Craft Blog Hop, I'm sharing how I've updated the fun and popular Shrinky Dinks plastics into fabulous items to use in home decor.
Were you a fan of shrinky dinks as a kid. I missed all of that, but now, I am truly amazed at what you can do with shrinky dinks or shrink plastics or film these days - especially in terms of creating small items for home decor. I had to go back and read up on playing working with shrink plastics. 

It seems like it's popularity is on the rise again, and in ways you won't believe! But I think it never really went away. Adults seem to like playing with it, too! Several years ago, the Shrinky Dinks company started making blank sheets of the plastic paper, opening up a door for all sorts of artists! It's mind boggling to think shrinky dinks has been used in stem cell research and in art therapy, too. Did you know that in 2014, a team from Harvard University and MIT used Shrinky Dinks to create self-assembling robots? How cool does that sound!  
I thought it would be so cool to make napkin rings or a small dish - just by printing out a design on inkjet plastic sheets and then heating it to shrink to the perfect size. That sounds so easy, doesn't it!

You can transform any image or make your own into a hardened piece of plastic creating unusual items. I had fun making designs for napkin rings, including the actual rings to hold the napkins. Plain napkin rings can be unbelievably expensive. But making you own can really come in handy for home tablescapes, celebrations and gift giving! Plus creating an adorable small floral dish that can be used for jewelry and what-nots, how could I resist?

Disclosure I am a participant in the Amazon Services LLC Associates Program, an affiliate advertising program designed to provide a means for us to earn fees by linking to Amazon.com and affiliated sites, this post may contain links. I may receive a very small commission at no cost to you! The affiliate money I earn helps pay my crafting expenses. Thanks so much for your support!

Materials Used:
  • Shrink Film for Inkjet Printers (clear)
  • Designs (online or make your own)                                                                                      Inkjet Printer
  • Scissors
  • Oven (regular/toaster)
  • Baking Pan
  • Parchment Paper
  • Glass (opening)/oven mitts
  • Paper Trimmer
  • Rolling pin/tube
  • DAP RapidFuse (quick grab multi-purpose glue) 
Let's begin by finding a free design online that you like. Keep in mind that the colors will deepen when heated. Next, copy and enlarge the design to fill the entire page of printer paper. The finished piece with be 20-30% of the original size so allow for shrinkage. Then print out on clear inkjet shrink film .  .  .
 using an inkjet printer. Allow the ink to dry before picking it up.
Next, cut out the shape before baking. Try to make sure you round off the edges - you don't want to have any sharp edges for the finish piece.

Following the directions for the shrink film, preheat the oven 300-350F.  Place a sheet of parchment paper on a baking pan and then place the cut-out design in the center of the sheet. 
Place another sheet of parchment paper on top of the design to help keep the plastic from curling or sticking to itself.
Bake for about 2-3 minutes. If you do find your design curling anyway, you can continue heating or re-heat and it will flatten out. Ask me how I know this.
Once the design has shrunk, quickly remove it from between the parchment paper using an oven mitt and .  .  .
place the plastic on top of a glass opening .  .  . 
pushing it down to give it a bit of a curved shape.  
How awesome does this look?
To make the ring, cut a two inch strip from the 11" length side of the shrink film using a paper trimmer. Round off the end edges using a water bottle cap.


Bake the plastic strip in-between parchment paper, as before, for 1-3 minutes. Remove wearing oven mitts and immediately wrap the plastic around a small round object like a dollar store rolling pin. It's the perfect diameter for napkin rings.

I can think of so many ways just to use plain napkin rings like this!
Attach the napkin ring to the back of the design using a permanent quick grab and drying glue like RapidFuse.


I found a pretty purple flower design online to make a small dish for my bathroom. Following the same directions, as before.
How pretty is this!
Perfect to hold my ring or what-nots!

Welcome to our monthly Creative Craft Blog Hop created by Chloe @ Celebrate & Decorate and Andrea @ Design Morsels!  I've teamed up with a talented group of creative bloggers to bring you lots of wonderful ideas and inspirations! 
If you're coming over from my blogging friend, Chas @Chas' Crazy Creations sharing her fabulous tutorials on what to do with plastic pumpkins, WELCOME!
After reading mine, up next would be Andrea @Designs Morsels with her awesome tutorial on making Felt Ornaments!

Have fun and get inspired by all of the wonderful creations this month by clicking on the links below!

Celebrate & Decorate - Minnie Mouse Halloween Swag


Birdz of a Feather - Milk Can Decor


At Home Withe Jemma - Fresh Handmade Holiday Magnolia Wreath


Debbees Buzz - Thanksgiving Bread Cornucopia


B4 And Afters - White Pumpkin Centerpiece


The Painted Apron - Fall Signs and Spoon Faces


My Hubbard Home - Dollar Store Glitter Candles


Chas' Crazy Creations - What To Do with Plastic Pumpkins


Purple Hues and Me - Shrinky Dinks Decor


Design Morsels - DIY Felt Ornaments


Home Is Where The Boat Is - DIY Thanksgiving Cone-ucopias


Decorate and More with Tip - Bohemian Tassel Christmas Tree Plaque


BlueSky At Home - Fun Thanksgiving DIY Wood Block Decoration


Zucchini Sisters - DIY Painted Placemats with a Fork Motif


My Family Thyme - Christmas Ornament Reverse Canvas