
Hello! Have I got an easy all season craft for you using plastic cups! Once you're done with drinking out of them, here's a resourceful way to reuse them and celebrate any season or occasion! Just rinse out, dry, and use them to create a lovely vase! Perfect for the upcoming entertaining season!
Welcome to this months' Creative Craft Hop hosted by Sara @Birdz of a Feather! So glad Sara's back! But Donna @Modern on Monticello did an amazing job filling in these past three months for Sara! If you're coming over from Cecilia's @My Thrift Store Addiction, wasn't her whimsical chandelier centerpiece adorable!
Upcycled plastic cup vase is all about reusing before recycling! And making a vase is so easy and simple to do!
Materials:
- Plastic Cups - 16oz or larger
- X-acto craft knife/sharp scissors
- Quick dry multi-purpose glue (Fabri-Tac)
- Plastic storage container bottom
- Velvet wired cord 20+yds
Start with two clean plastic cups. These cups are 16oz.
Use an x-acto knife to cut out an . . .
opening in the center of the bottom of both cups! Basically that's so you won't have to shorten or cut off the stems of real flower or foilage - just in case.
Then glue the two bottoms together.
The bottom opening of the plastic cup "vase" needs to be closed, so I'm using the bottom of a clear plastic container to cut out a round closure and . . .
glue it onto the bottom opening (which is on top in the picture below).
Once the bottom closure is dry, cut off excess plastic. And check for openings you might have made while cutting, and add additional glue to seal.
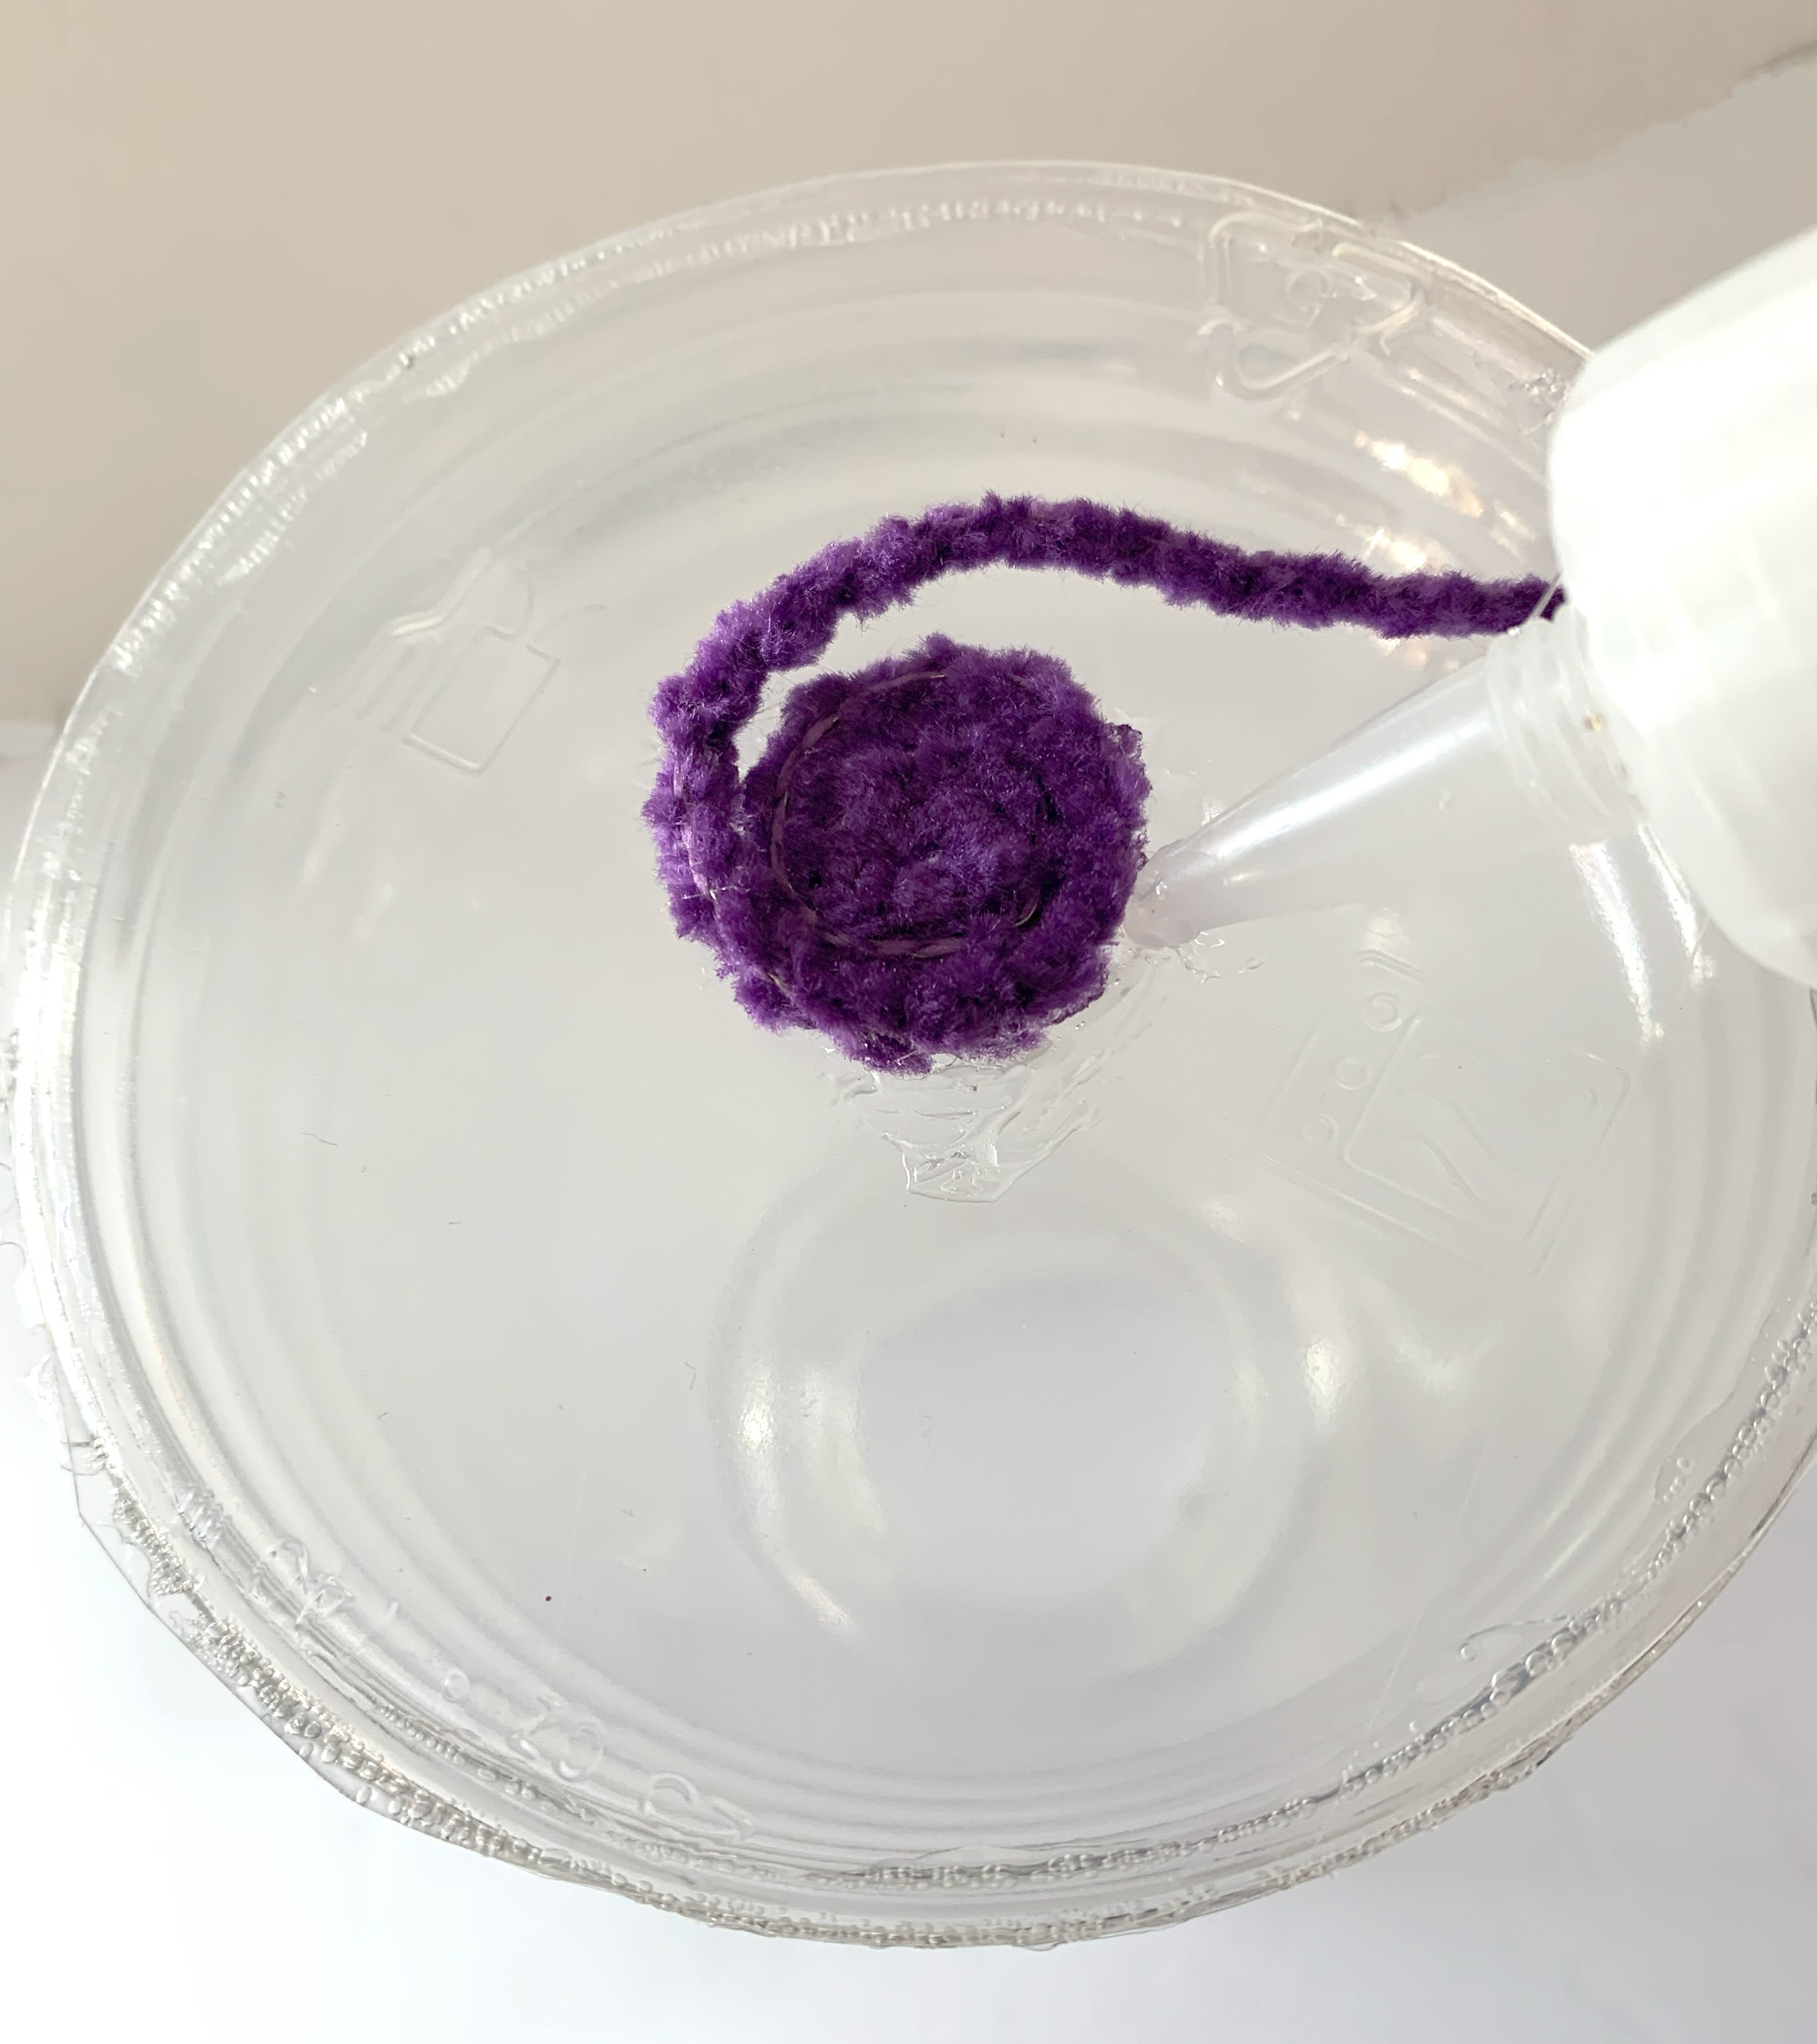
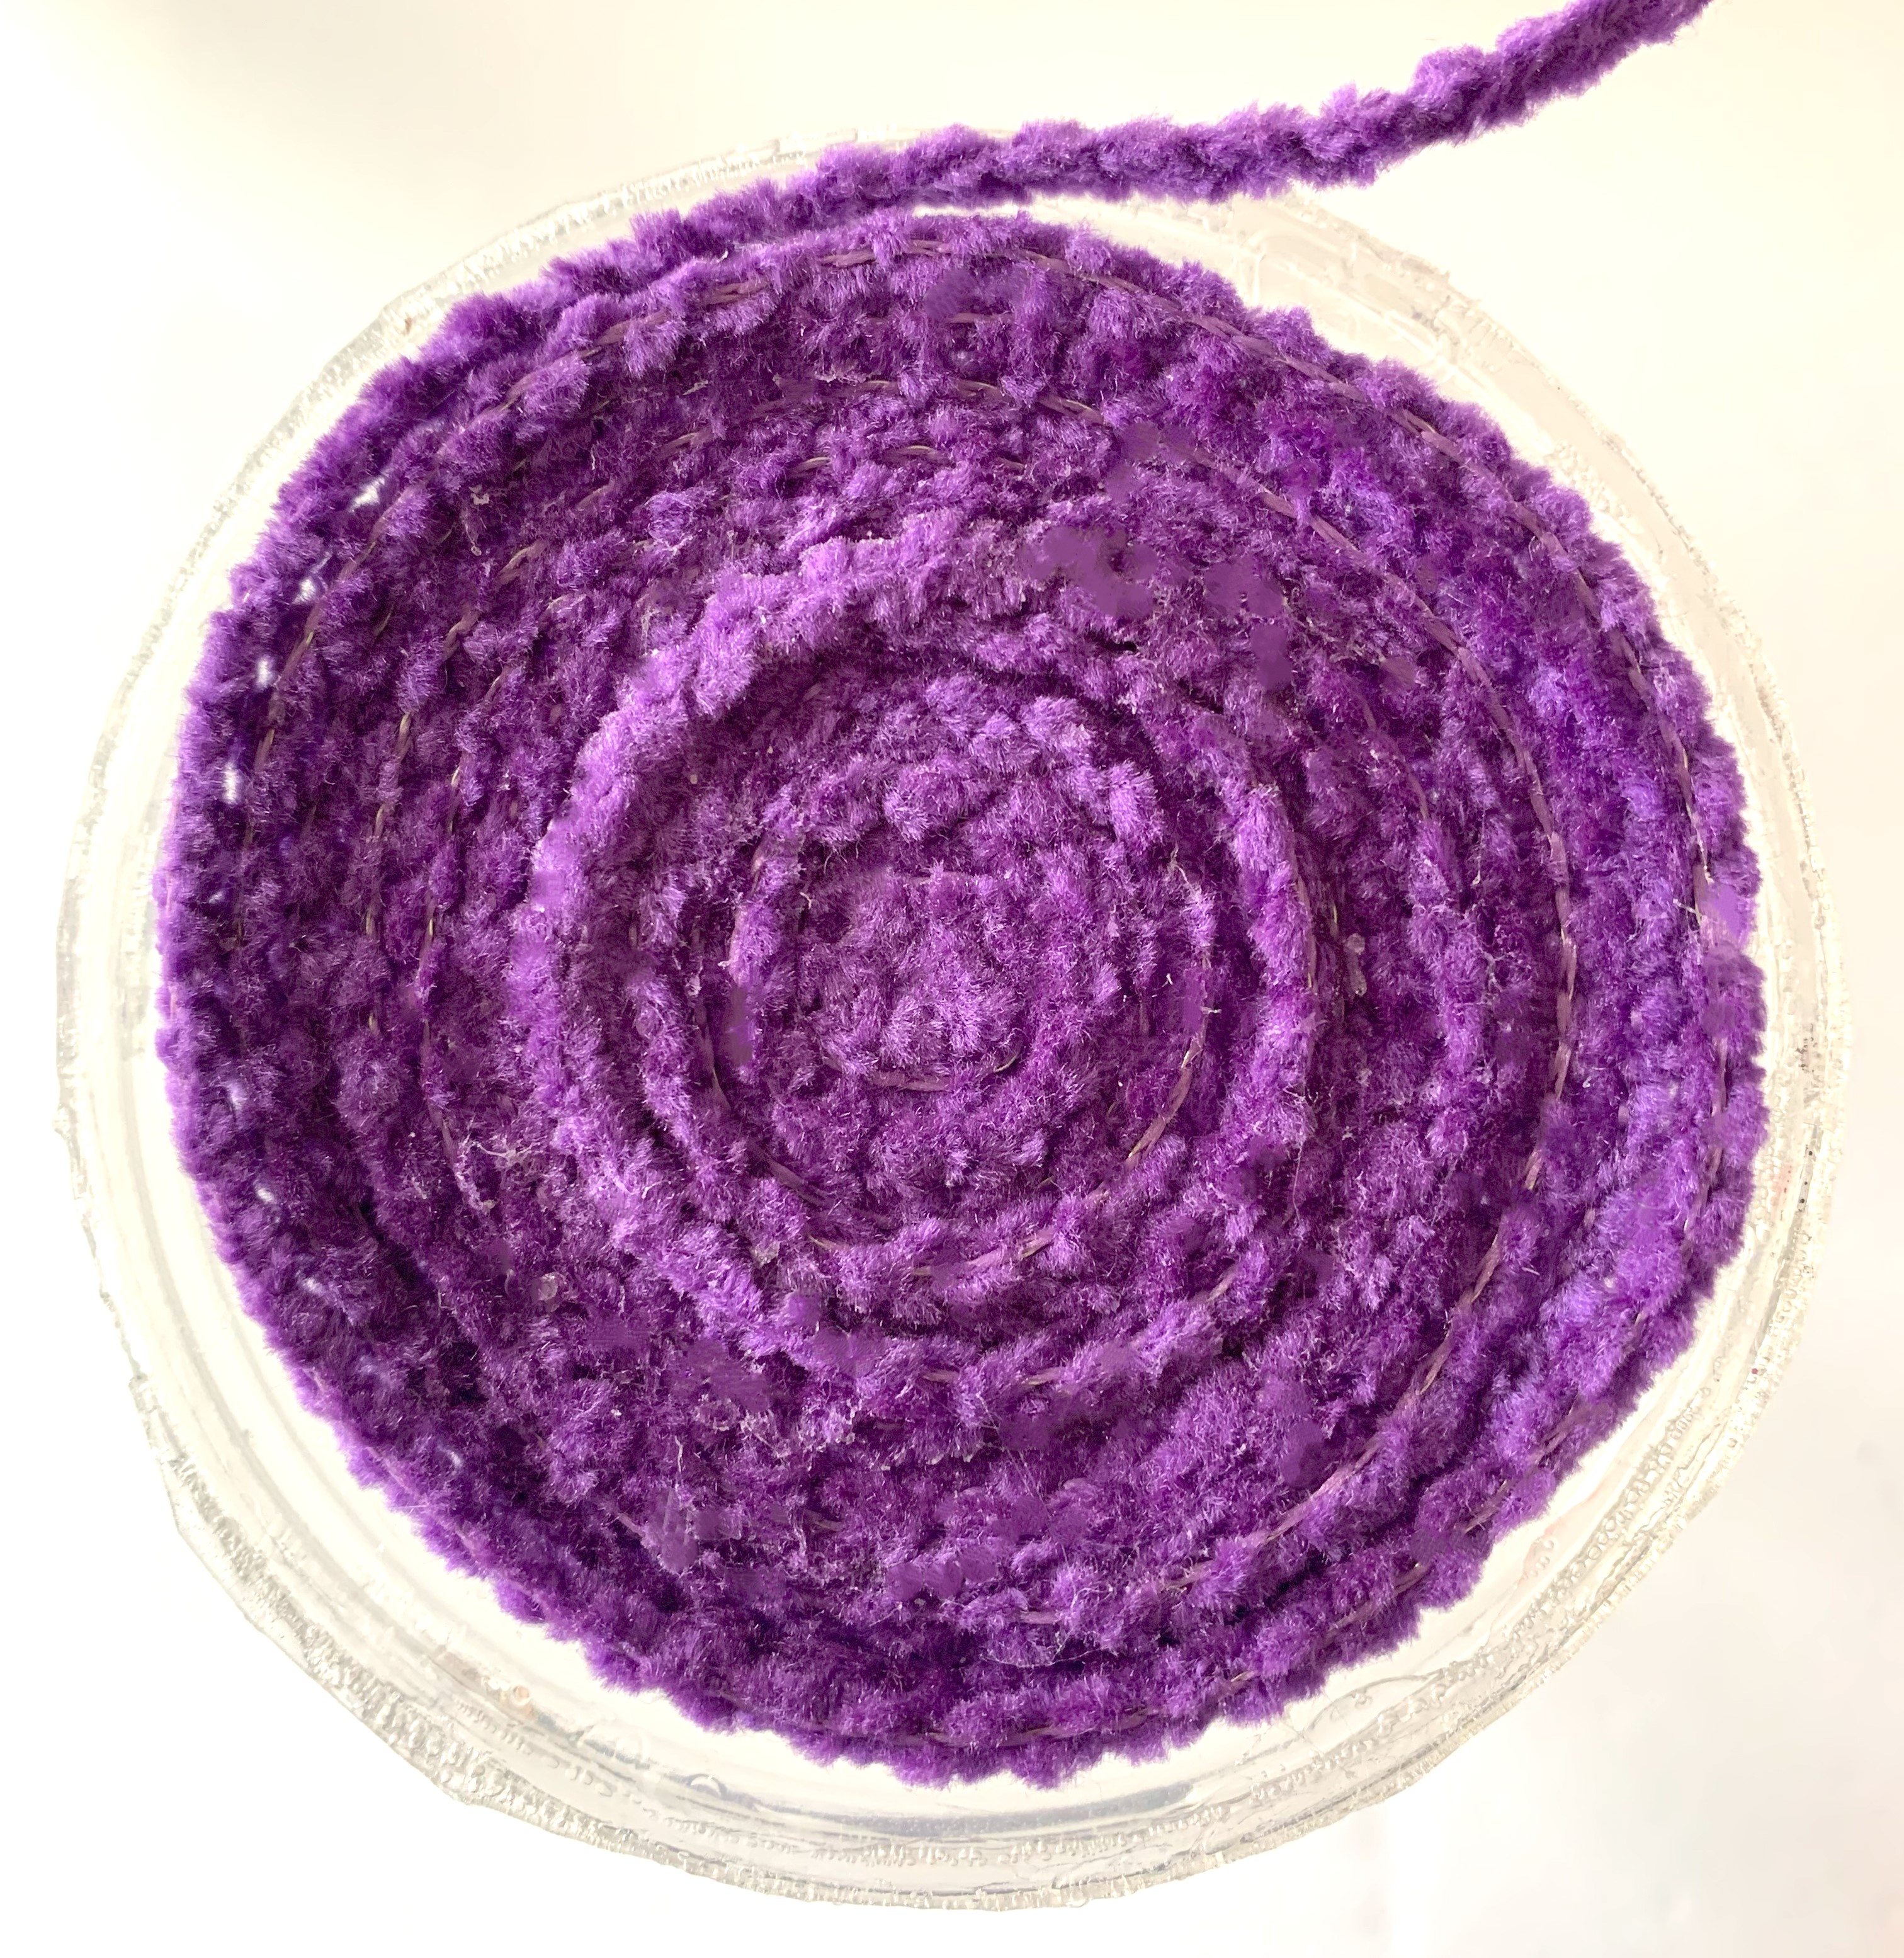
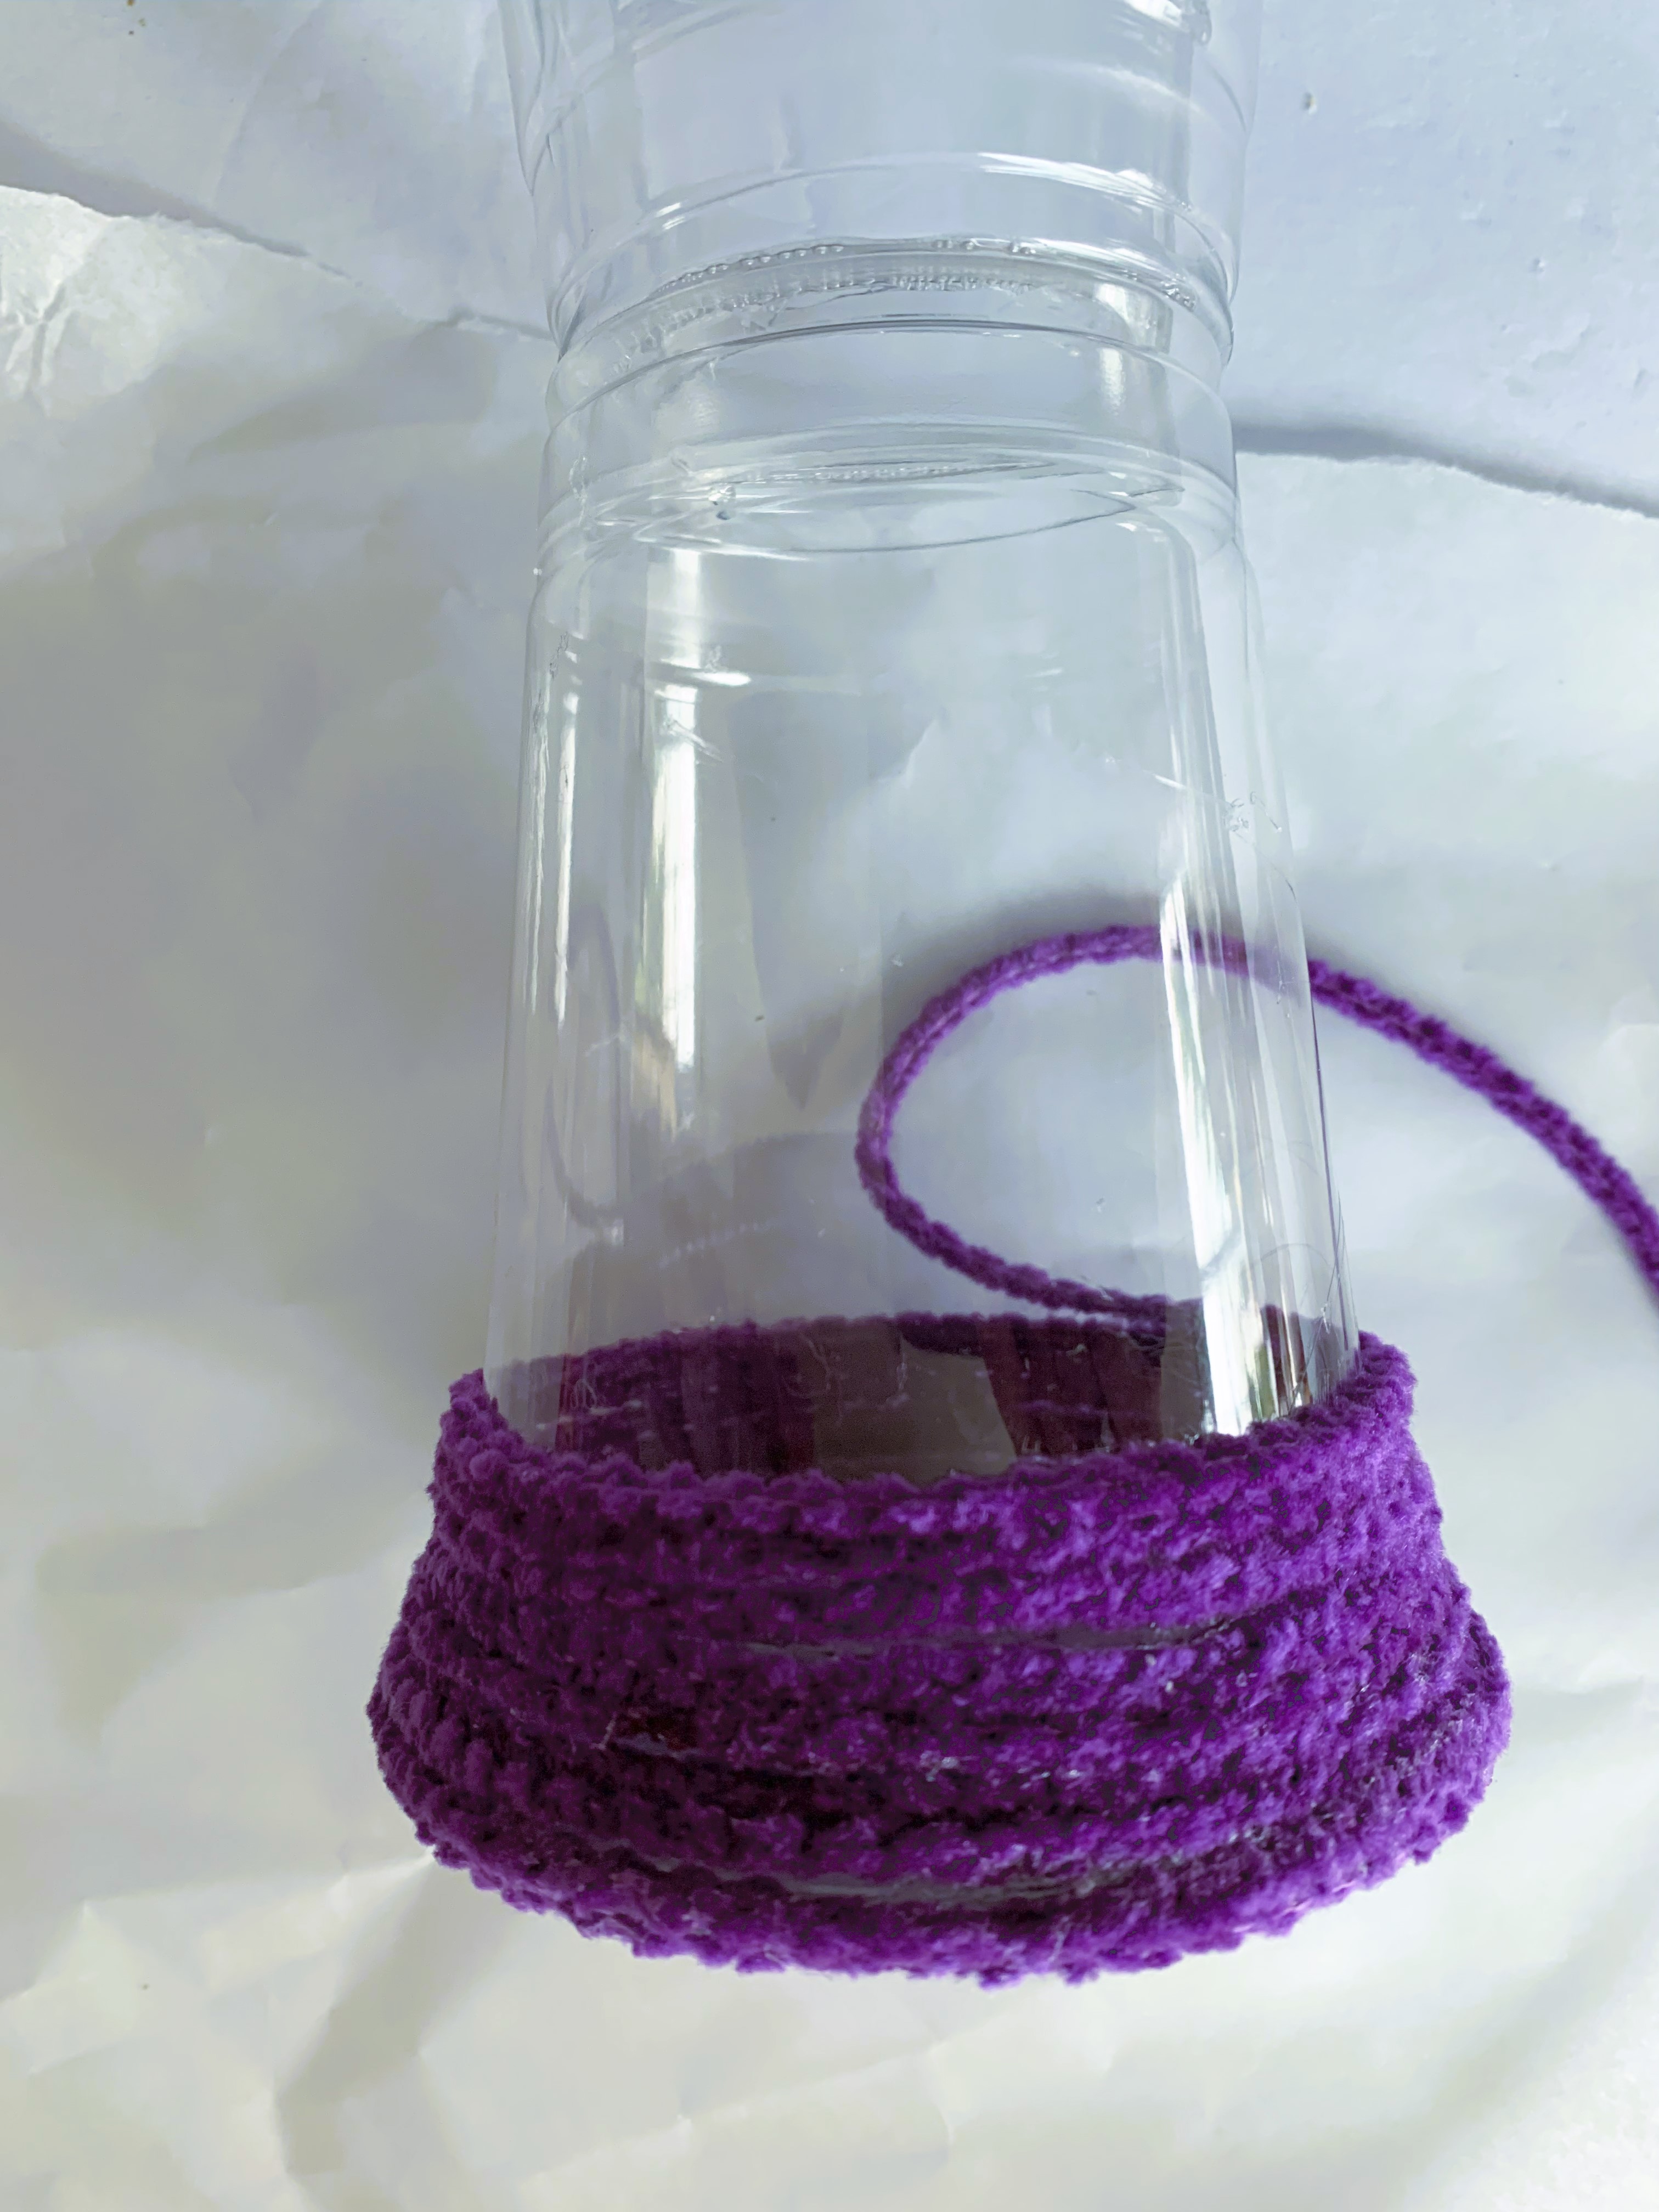
Then begin adding the velvet wired cording by coiling it around into a circle and gluing in place to the center of the bottom plastic.
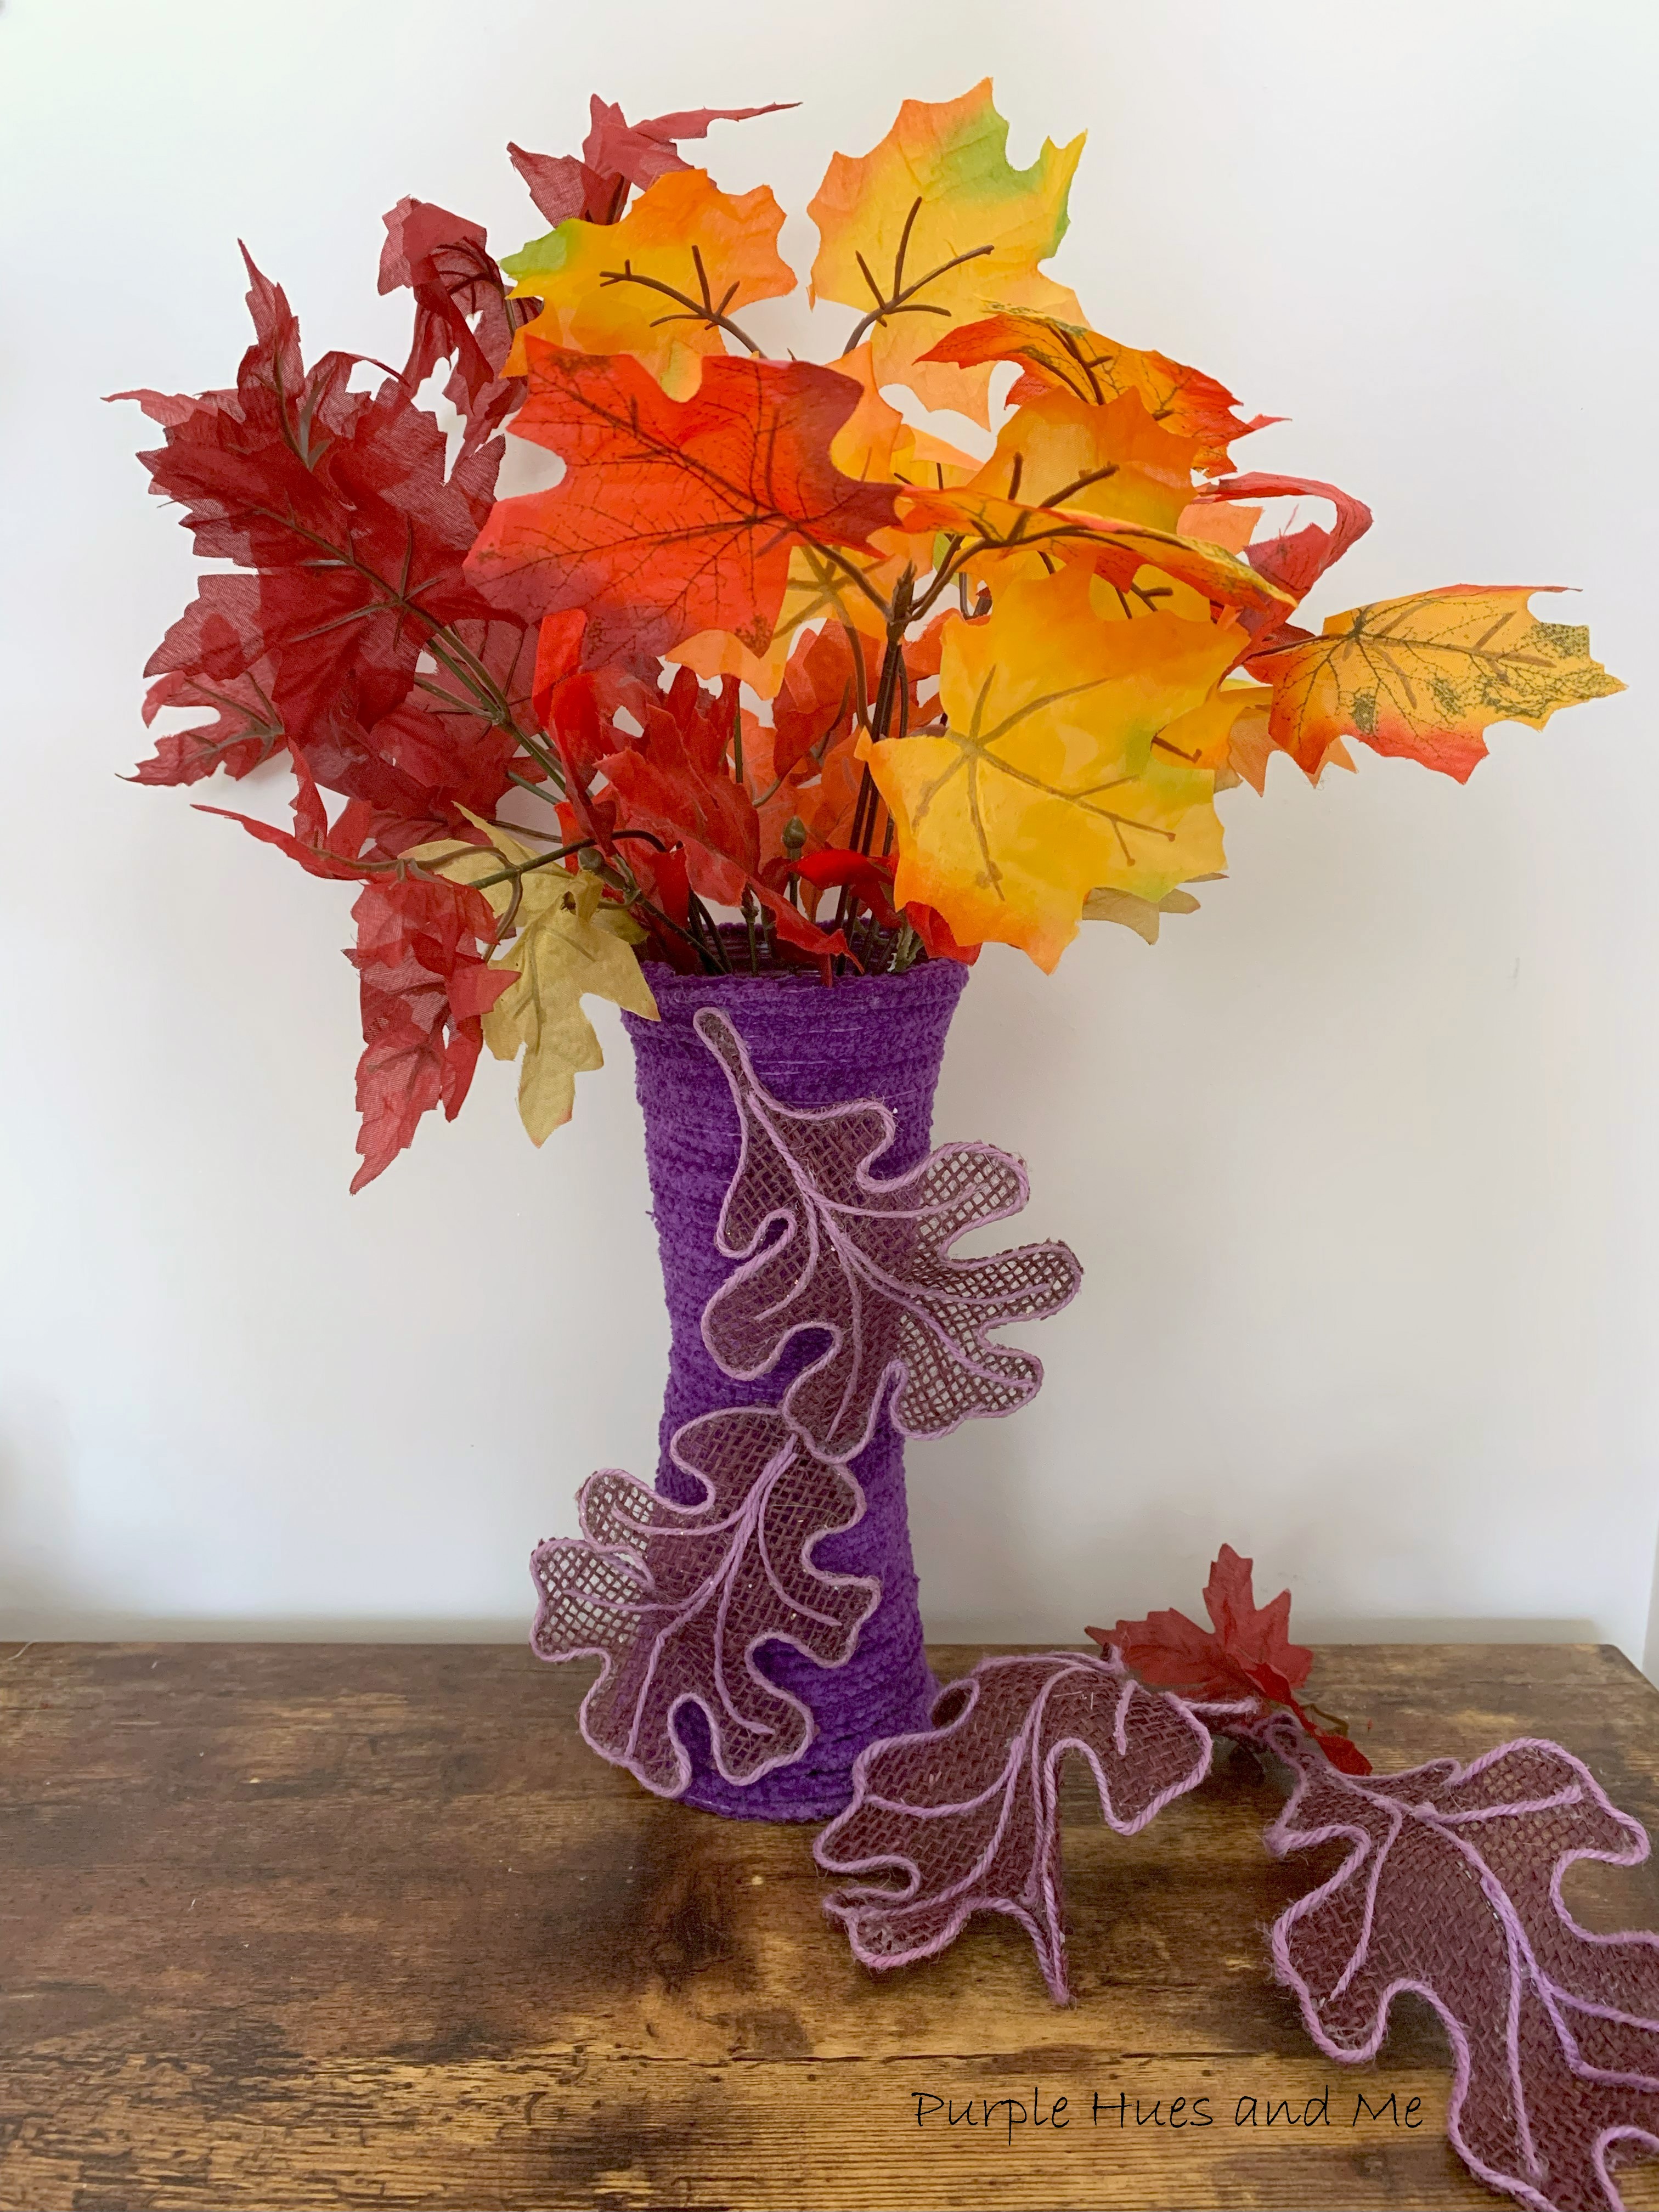
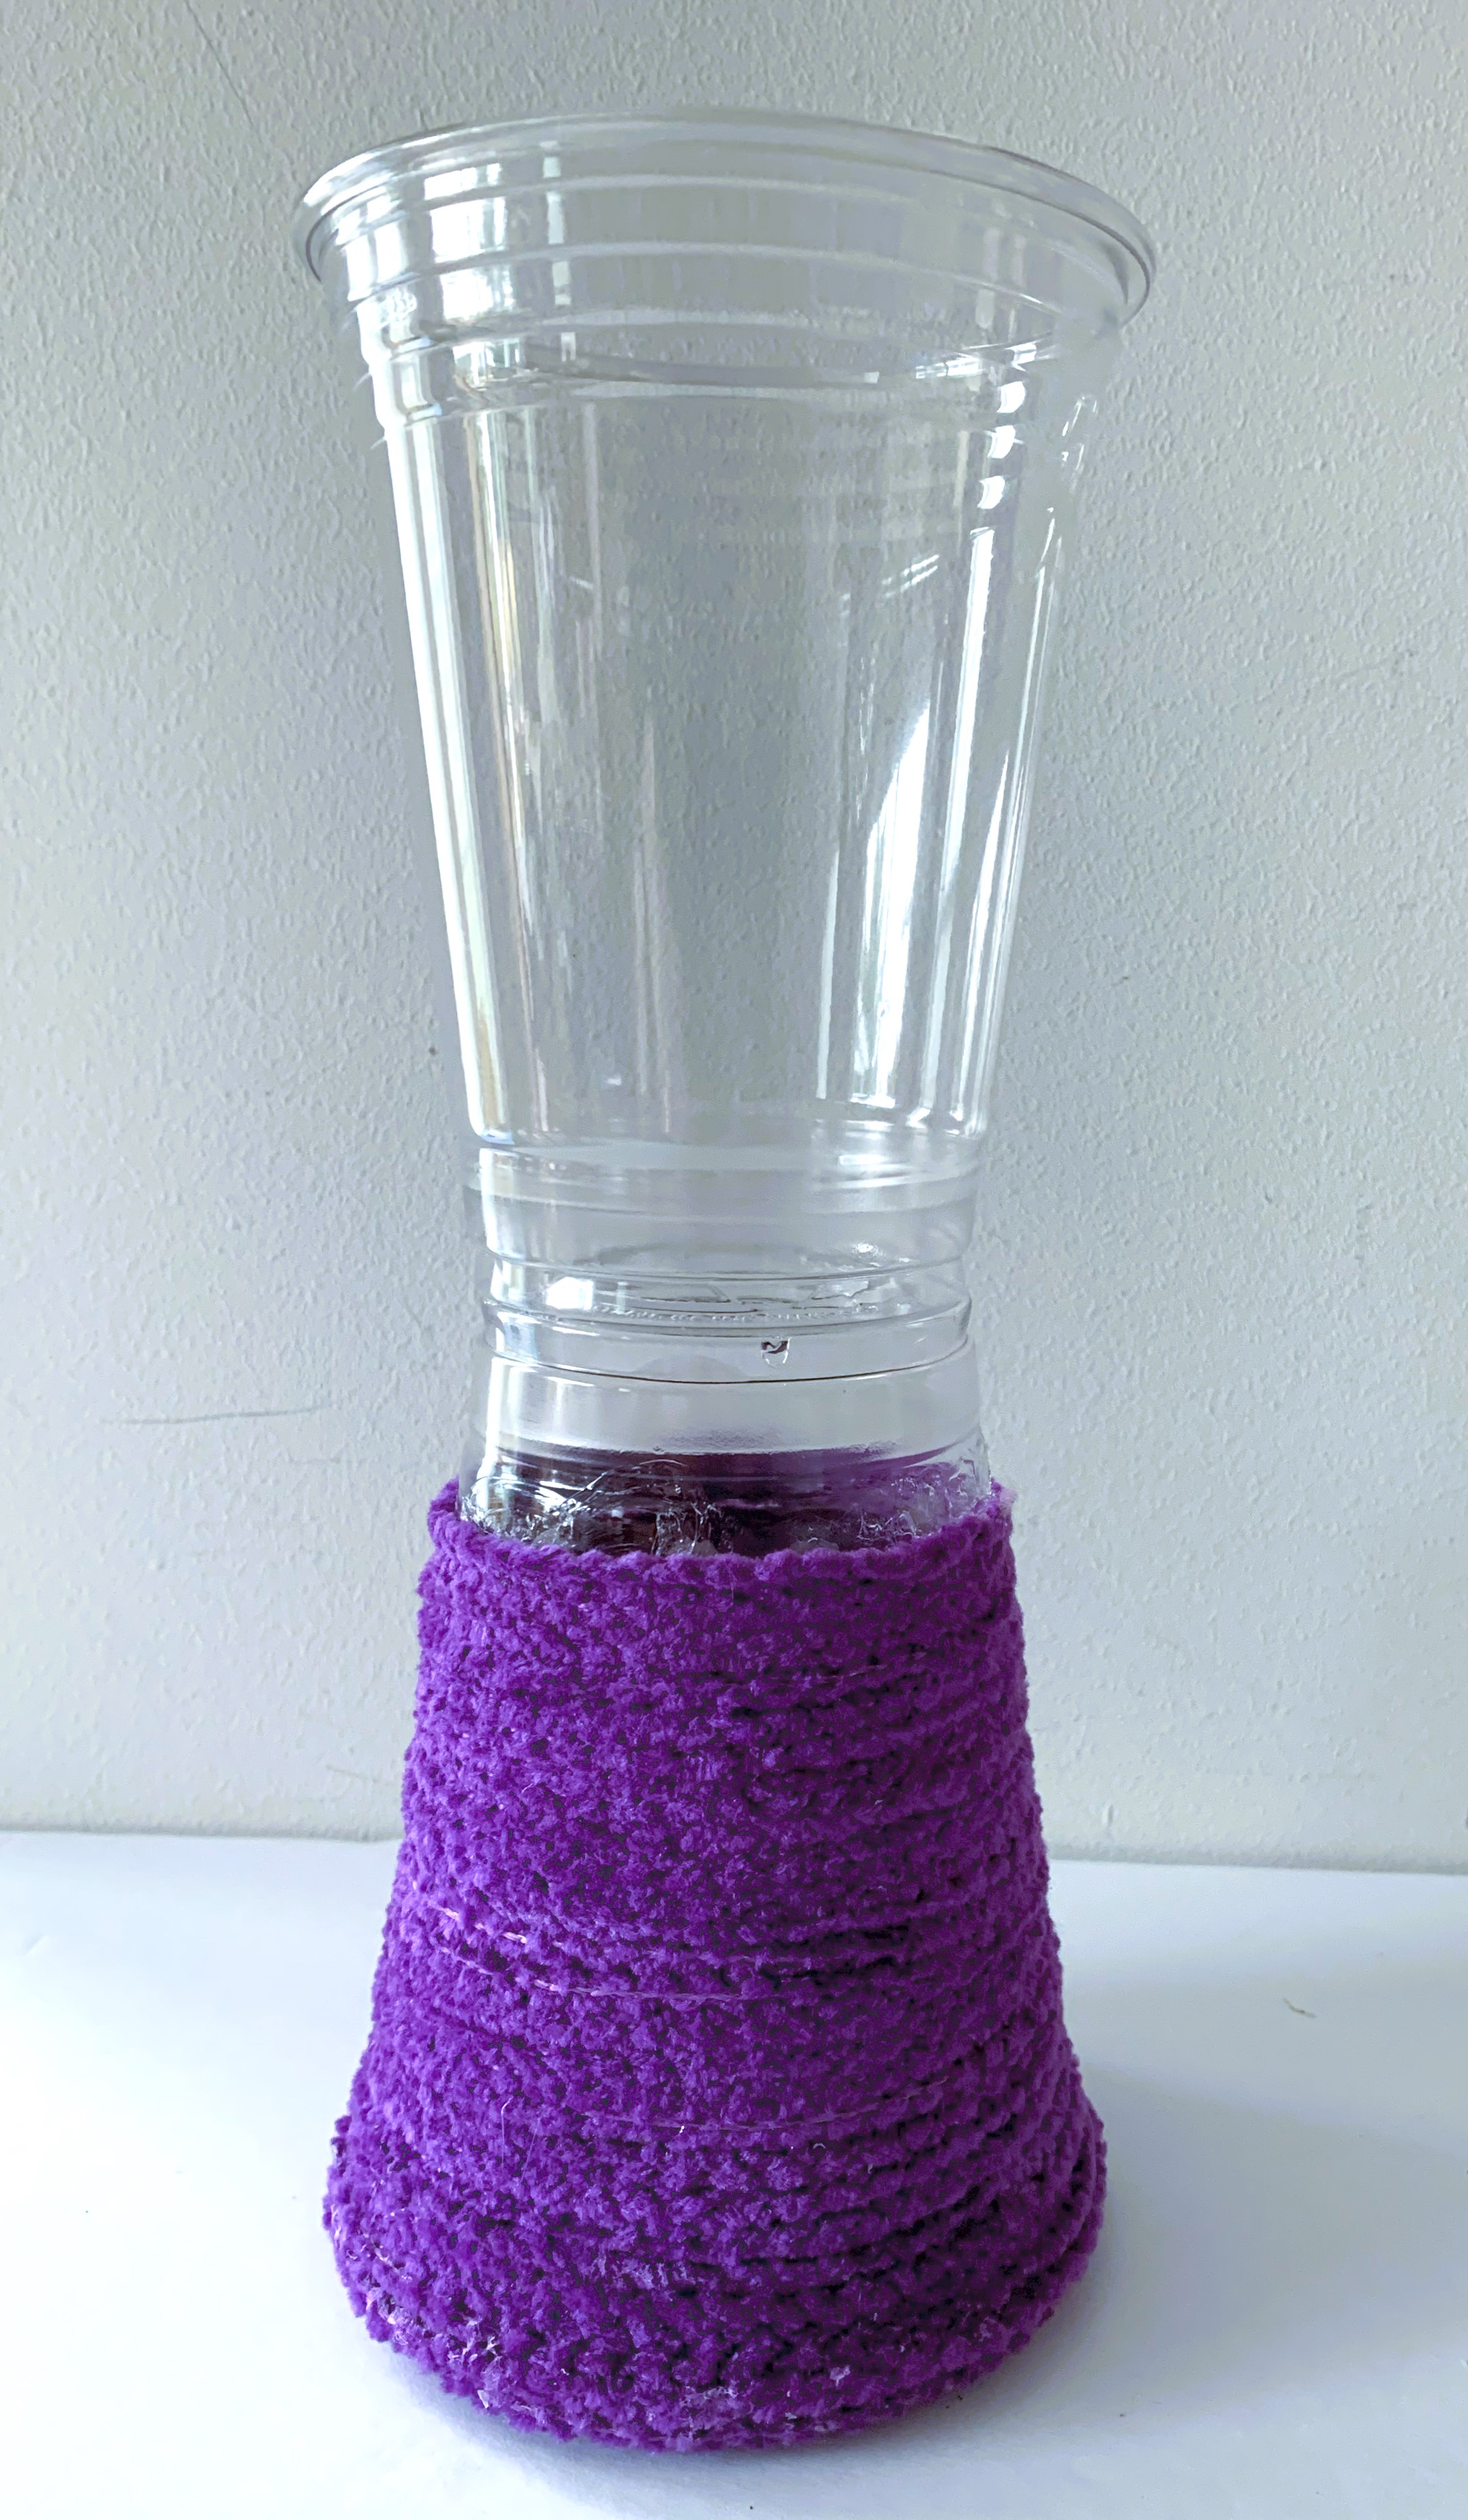
Continue coiling the cord and gluing in place as you cover the plastic cups.Coiling from the bottom . . .up towards the center . . .and then around to the top, gluing in place as you coil.Here is the finished vase wrapped in wired velvet cording. The vase looks beautiful as is, but I wanted to decoupage borders of leaves on the top and bottom of the vase for the fall season.
I printed out a fall border design on rice paper but as I tried to decoupage it on the vase, it just wouldn't stick. Then I tried other papers to see if they would stick.

This leaf was actually a napkin that I cut out. It looks good on the front of the vase, but once I applied mod podge, it wouldn't stick either and ended up stuck on plastic film instead of the vase. It was a hot mess! Luckily I was able to wash all the mod podge off and let the vase dry overnight.
I so wanted to put some sort of decoration on the vase. I didn't want to use any type of stones, beads or glitter. Then I remembered making fall leaves using an oak template. Some of you may remember this oak leaf template that I used to make a clay leaf dish. and also leaves for my paper mache pumpkin centerpiece. I reduced the size in Word, printed it, and then cut it out. You can also free-hand a leaf design, if you want. I still had all the supplies to make a few leaves.
To make the leaves, you will also need:
- Clear film sheet
- Purple Burlap Ribbon 5.5"wide
- Twine
- Tacky Glue/Fabric Glue (quick grab)
- Parchment paper
- Scissors
- Floral Stem Wire
Then place a clear film sheet on top of the template (so it wouldn't stick as much) and the burlap on top of that. Begin tracing the leaf around on the burlap in small increments with a quick grab, tacky glue. Quickly place the jute twine down on top of the glue, following the outline. Use the pointed nose of pliers to press the twine down onto the burlap to prevent too much glue getting on fingers.
Once the twine is in place, cover the leaf with a sheet of parchment paper and press down around the twine outline to smooth out with fingers for better adhesion to the burlap, and then remove.
Let dry!
Once the glue is dry, time to cut out the leaf following the leaf outline.Glue on a strip of floral stem wire (I painted mine to match the burlap) to the back of the leaves to make them bendable for dimension.
Perfect to place on the vase!
You know I love my purple hues!
A recycled plastic cup vase is a unique and creative way of decorating and a great way to put a personal touch to your decor!
Up next, is Niki @Life as a Leo Wife, sharing her adorable Halloween Candleholder!
Be sure to visit all the creative crafters listed below and be amazed!
Winter Wine Glasses Jenna @ The Painted Apron
Candy Corn With Pom Poms Ann @The Apple Street Cottage
Fall Wreath Using Fabric and Burlap Allyson @Southern Sunflower
5 Easy Steps to Make a Thanksgiving Wreath Carol @Blue Sky at Home
Wickedly Whimsical Salvaged Chandelier Centerpiece Cecilia @My Thrift Store Addiction
Upcycled Plastic Cup Vase Gail @Purple Hues and Me
DIY Dollar Tree Halloween Candleholder Niki @Life As a Leo Wife
How to Make a Scrap Robot Sara @Birdz of a Feather


Oh my Gail - you are the master when it comes to making every day items look like a million bucks lol! Fabulous as always!
ReplyDeleteThanks so much, Sara! And welcome back! You were truly missed!
DeleteVery clever, Gail, and thanks for sharing how you made the leaves - great idea!
ReplyDeleteThanks, Ann! I love how the leaves turned out!
DeleteThanks for all the instructions for making this fun and functional vase and decorations!
ReplyDeleteHi Miss Kitty! You are so welcome, and thanks! So glad you stopped by! I've really missed seeing you and your interesting posts! Hope you have a great holiday season!
DeleteVery creative and pretty Gail. Love the leaves.
ReplyDeleteThanks so much, Linda! The leaves are one of my favorite creations for fall!
DeleteSo cute Gail! I will never look at a plastic cup in the same way again! I love the way you created the leaves and they look great on your signature purple wire covered cord vase. Such a bright and pretty fall decoration!
ReplyDeleteJenna
Your ingenuity always blows my mind! The vase is so pretty and I'm lovin' those leaves.
ReplyDeleteWhat a fun idea! It's a great way to reuse plastic cups that you would normally throw away after using. It's great hopping with you! Pinned.
ReplyDeleteNiki | Life as a LEO Wife
Gail, I know I've said it before, but you are so creative and resourceful! Your vase and leaf embellishments are lovely!
ReplyDeleteLas hojas son impresionantes!!
ReplyDeleteEl jarrón es muy original y todo ♻️
BESOS
Gail, glass vases are so versatile. Wrapping them to add color and texture is a smart idea.
ReplyDelete