
Hi everybody! Welcome! It's the first Tuesday of the month and time for our Sustainable Pinterest Challenge hosted by Julie @ Sum of Their Stories!

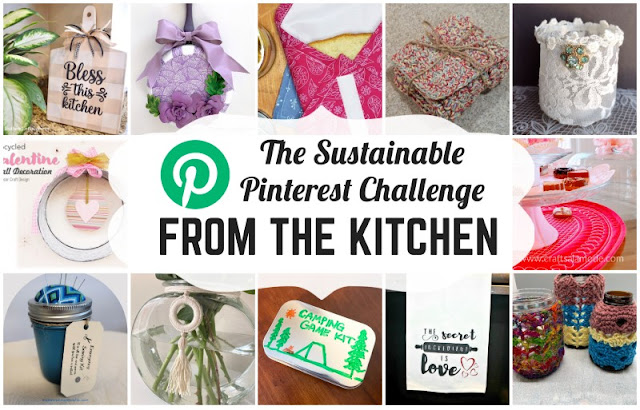
The purpose of this Pinterest Challenge is to motivate all of us to create a project that a) is inspired by a pin on one of our Pinterest boards and b) have some sort of a sustainable element to it. This could be an upcycling or recycling element, or something that reduces waste, uses leftovers, etc. This month's challenge is all about sustainable projects From the Kitchen! This is the pin that inspired me.
I loved my pretty, speckled purple fry pan! It was part of a seventeen piece set that I purchased at a Paula Deen store while on vacation in Myrtle beach a number of years ago!

But the non-stick Teflon began to bubble and then peel and no longer safe to use. I'm not sure if my recycling center would take it because of the many materials it is made of - especially the non-stick coating. That would have to be removed first before dismantling the pan for recycling. And special equipment is required to do that!

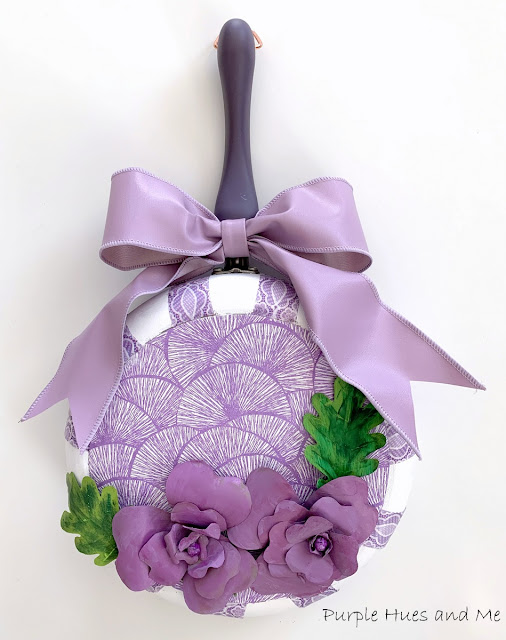
So instead of throwing it in the trash and ending up in a landfill destined to waste away - probably taking more than most lifetimes to do, plus causing lots of environmental problems, I decided to upcycle my favorite fry pan by decoupaging it, and then decorating it with handmade soda can flowers! Resulting in a pretty decorative kitchen item - perfect in any kitchen decor - especially mine, lol!

Materials used:
- Fry pan
- De-greaser/alcohol
- Chalk paint/sponge/brush
- Paper/pencil/scissors for template
- Decorative napkins
- Matte Mod Podge
- Washi tape
- Aluminum can flowers and leaves
- Utility knife/craft knife
- Hot glue gun/glue sticks
- Faux leather ribbon
Instructions:
Let's begin by cleaning the fry pan with a de-greaser or wipe down with alcohol after cleaning with dish detergent and water to remove grease and cook-on stains. Next, apply chalk paint to bottom and sides. Two or three coats are needed! Let dry.


and then used to draw on and cut-out a decorative napkin to decoupage.


Next, the printed napkin needed to be glued down in small sections since it is thin, delicate and easily tears when wet with mod podge. To do this, position the printed portion of napkin on the pan and lift up an end side to lightly apply mod podge over a small area of the pan. Carefully, replace napkin on the decoupage glue and lightly pat the napkin down smoothing out as you pat.

Continue applying mod podge in small sections and smoothing napkin out . . .


Amazingly, the colors and design of the washi tape match perfectly with the decoupage napkin.

Next, I wanted to add dimension to the pan by using a couple of leftover aluminum can flowers and leaves I had made previously. You can find the tutorial here.


And finally, toping the pan below the handle with a handmade leather-like bow!

How cute is this!
Be sure to visit each participant listed below to see their
From the Kitchen Inspirations!
Gail | Purple Hues and Me - Upcycle Fry Pan DIY
Julie | Treasures Made From Yarn - Crochet Jar Covers
Allyson | Southern Sunflowers - Wooden Cutting Board Makeover
Donna | Modern on Monticello - Jelly Jar Sewing Kits
Niki | Life as an LEO Wife - DIY Tea Towel


Wow Gail, this is a perfect kitchen decoration. Why am I not surprised that you have purple pans?
ReplyDeleteI didn't realise the washi tape ending wasn't the same as the napkin at first, it really is a perfect colour match.
That's adorable! I love the napkin you chose and the tape is a perfect match. I'm off to learn more about those flowers....great project!
ReplyDeleteYou just know how to play with purple, that fry pan just transformed into such a lovely elegant wall decoration. Fantastic job, Gail!
ReplyDeleteWhat a fun project! I love the designs of the napkin and washi tape and the aluminum can flowers look like fun, too.
ReplyDeleteThis is beautiful Gail! The washi tape works perfectly with the napkin. You hit the jackpot finding that in your stash! You had me at aluminum can flowers. I drink about 5 cokes a day (which everyone should give me HUGE kudos for because it was a 12 pack lol) and I have coke cans galore!! I'll be pinning that tutorial! This is such a great way to use old pans. So many ways to customize for anyone's home. Love it! I would love for you to come over & share on Crafty Creators Link Party on Thursday.
ReplyDeleteXOXO,
Niki ~ Life as a LEO Wife
Really really cute Gail and super creative and clever!
ReplyDeleteJenna
This is super cute. I know someone who would really like one. Now off to find an old skillet.
ReplyDeleteGail, I saw the purple and knew it had to be one of your projects. What a cute idea for a present.
ReplyDeleteRachelle
Another gorgeous purple creation! You find the prettiest napkins to craft with. I have a pan that my husband scratched up, so now I'm thinking that I could give it a similar makeover! Thanks for sharing this wonderful idea! Pinning!!!
ReplyDeleteOh my goodness. This is so cute. I love it. Pinned to my Crafts Board. Love your blog, Gail. Best wishes, Linda @Crafts a la mode
ReplyDeleteOmg, I would have never guessed a pot and pan set could be found in purple. The transformation of your pan is absolutely amazing! What luck you had with the washi tape an exact match to your napkin. Great upcycle!
ReplyDeleteLove your project, I am already thinking of ways I could upcycle my old pans.
ReplyDeleteWhat a creative upcycle! Thank you so much for sharing at Tuesday Turn About! xo
ReplyDeleteWhat a novel idea for a frying pan. Love how it turned out Gail
ReplyDeleteGreat idea. It's all about smart consumption. I think that you need to buy new things at a minimum, but in any case, something can be used elsewhere. Give things a second chance. chat hot
ReplyDelete
ReplyDeleteGreetings. I believe that this site is the best place to play online casinos and slot machines in the Canada, because this site Starlight Cаsino has many gaming features and opportunities to play, and so I want to recommend this site to you, because it is of high quality and very reliable to play!! Bye.
I have been playing only at this Australian site - King Billy Casino - for a long time. I choose it because it has a lot of quality slots that I like so much, I have been playing at this site for a long time, and that is why I recommend it to you, because this site has never let me down in so many years of active gaming!
ReplyDelete