

But unraveling ribbon isn't all that easy. The trick is finding those threads that are continuous on the ribbon and unwinds it all. And it can be tricky because all ribbons are not created equal. There're the ones where you can find that particular thread - like here: You simply start pulling the threads on the end and suddenly it's starts to unravel - the thread coming off - going back and forth - unraveling the ribbon!


The ribbon is very rough and not soft like the other type. I got it from Hobby Lobby for 50% off. HL has ribbon on sale for half price just about every other week. The sides of this ribbon seems to be stamped sealed and not woven. It's the only ribbon I had that was long enough to make a few plumes. I didn't have enough of the first ribbon or any other ribbon that I could find "the thread" that unravels it all!
Do you see the large safety pin in the picture? That is what I used mostly to remove the threads from the length of the ribbon. I also used a seam ripper when my hand started to cramp (something that happens often - not just for this project). But I'm jumping ahead of showing you how I made the ribbon plumes. So let's begin by gathering what you need:
Supplies
- Ribbon - 1.5 width
- Double-sided tape
- Ruler
- Scissors
- Large safety pin/seam ripper/small brush
- Cutting board surface
- Floral stem wire (16-18 gauge)
Instructions
After gathering your supplies, start cutting about thirty, 5" ribbon strips to make one plume. Next add double sided tape to one of the short end edges. Do this for all the ribbon strips. After adding the double sided tape, cut the side edges, sometimes called the welting, off of the ribbon strips.
 Then start removing the fray threads from the end.
 Use the tip end of a large safety pin to scrape the fraying threads off to reveal soft silk-like fibers. I like using a small cutting board as a work surface to scrape the ribbon. It's nice and sturdy and seems to make it all work better.
 Use a small brush . .
  to help remove the gathered loose threads that bunch up from scraping the ribbon. . .
 creating a nice smooth silky fringed piece. It took me about four minutes to get it to look like this. Imagine doing thirty of these - it can be very time consuming! So take a seat in front of the tv and binge watch a good movie or series! Better yet, listen to some good music to make it all go quicker!
 To add the ribbon fringe to the stem wire to create the plume, remove the backing from the double-sided tape and . . .
 place the tip of the wire on the edge of the tape and . . .
 begin rolling the ribbon fringe around the wire stem . . .
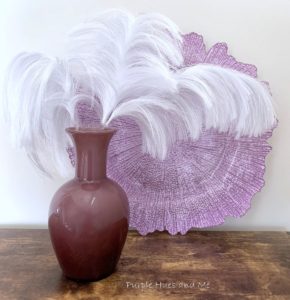
until the ribbon fringe is secured around and onto the wire stem. Isn't this beginning to look fabulous! Continue adding the ribbon fringes to the stem wire, staggering the tape slightly below the previous ribbon fringe.
Adding each fringe on - one by one.


If you're coming over from Cindy @Cloches and Lavender, welcome! To see more knock-off ideas click on the blog titles below to check out their awesome knock-off creations!
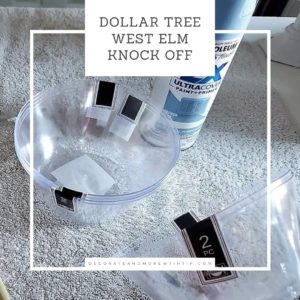

Decorate and More with Tip Sweet Southern Grace

Cloches and Lavender Purple Hues and Me

B4 and Afters Patina and Paint


I love to! Super creative and budget friendly!!!!
ReplyDeleteThanks so much, M!
DeleteGail you always surprise me with your talents. This is such a neat trick, I would of never thought to do this. You know I love the Boho look and this would be perfect!
ReplyDeleteThanks, Terrie! Yes, I was a bit surprised how it turned out, too! Lol!
DeleteOh, that is such a wonderful idea, Gail! Thanks for sharing it with us.
ReplyDeleteThanks, Gayle! It's so great hearing from you! Hope you had a great Easter!
DeleteI love using ribbon to craft with, but I have to admit that I would never have thought to use it this way. What a great idea! Thanks for sharing.
ReplyDeleteYou are quite welcome and thanks so much, Tammy!
DeleteI can't believe how feathery your ribbons look! That's amazing how you did that-- they look so nice. I've pinned them.
ReplyDeleteThanks, Liberty! I know! They take on a whole new silky look and feel!
DeleteGail, this is an amazing project. I’ve never even thought that you would unravel ribbon. The plume is really pretty.
ReplyDeleteThanks, Carol! I was surprised at how ribbon could look this way, too!
DeleteThey look so good. I'm going to have to make some of these. Thanks for sharing the idea.
ReplyDeleteYou are so welcome, Denise! I love sharing my crafts!
Delete