Tuesday, September 5, 2023

Eco Friendly Fall Decorative Wreath


Nature can come up with some wonderful decorating ideas, don't you think! A homemade, eco friendly fall decorative wreath using fresh foraged materials such as ornamental grasses and pine cones from your yard is a great natural way to make an entrance look welcoming or to spruce up an area in your home for Fall! It's certainly is a no cost or low budget and eco friendly option instead of using expensive, store bought items to decorate this time of year!

There are lots of ornamental bushes and pine trees in the back of my yard and along the berm of my community. I usually pick up pines cones by the bag full that have fallen during the winter months .  .  .
and cut off the plumes of the ornamental grass bushes this time of the year into early winter. The landscapers usually trim the ornamental grass bushes down to small mounds during the winter.  Right now, the ornamental bushes are really showing their beauty this time of year - especially when it's windy!
This ornamental grass bush happens to be in my yard, so I snipped off a few plumes especially for this project.


I love that this is an easy, almost free to make craft inspired by Nature! Perfect for this month's theme on Nature for our monthly Sustainable Craft Challenge that's hosted by Julie @Sum of their Stories!

Materials Used: 
  • Grapevine wreath
  • Ornamental grasses
  • Pine Cones
  • Wood Glue/Super Glue
  • Snips or pruning shears, scissors
  • Brown floral wire stems (24 gauge)
I wanted my wreath to be as natural as possible using a grapevine wreath I had in my stash, as a base. But I didn't want the fullness or thickness you usually see in a grapevine wreath. So .  .  .

I separated several smaller vines from the larger one and .  .  .
wrapped the vines together using very thin brown floral wire stems. 
The thinner grapevine looks so much better than using a thicker grapevine wreath or a wire or wood form or frame you often see that's not natural.
Next, begin laying out the individual plume design to the grapevine. First, one side and then the other.
Cut off excess stalks, once satisfied with the layout.
To secure the individual grass stalks on the grapevine wreath, dip ends into the wood glue bottle and .  .  .
insert/intertwine into the grapevines. Let dry.
Continue dipping each plume into the wood glue and inserting it into the grapevine .  .  .
until satisfied with the look and fullness.
The cool thing I discovered about working with ornamental grass plumes is that they become fuller - taking on a whole new shape as they dry out from clipping.
While the glue is drying on the plumes and grapevine, it's time to make natural pine cone flowers!
I collected these pine cones that had fallen to the ground last winter. I kept them in a trash bag in my garage. I did not clean them or put them in the oven as they recommend. I did check for bugs, etc., and didn't find any. However, there were clumps of sap along some of the pine cone scales (pine cone “leaves”) which I scraped off. 

I think you will be pleasantly surprised if you just take pruning shears or snips and cut the pine cone in a few sections, cutting horizontally across the cone  and 
  discovering a design similar to flowers! 
How cool are these!

Perfect to add between the ornamental grass plumes.


But wait! I wanted to see how a bow made out of a few of the leftover vines would look on the wreath!  First, placing a few vines in hot boiling water for a couple of hours to make them pliable.
And then, once pliable, removing the vines from the water - it's amazing how quickly they cooled off to shape them into a simple bow. I must say that boiling the vines turned the water a dark brown that turned the vines dark brown, too.
Then wrapping the center of the bow with a longer vine .  .  .
tucking the ends in between to keep the bow together.
And attaching it to the wreath! 
Do you like the wreath with a vine bow?
Yay or Nay?

I also added a few more pine cones to the center so you can see them better 
for an .  .  . 


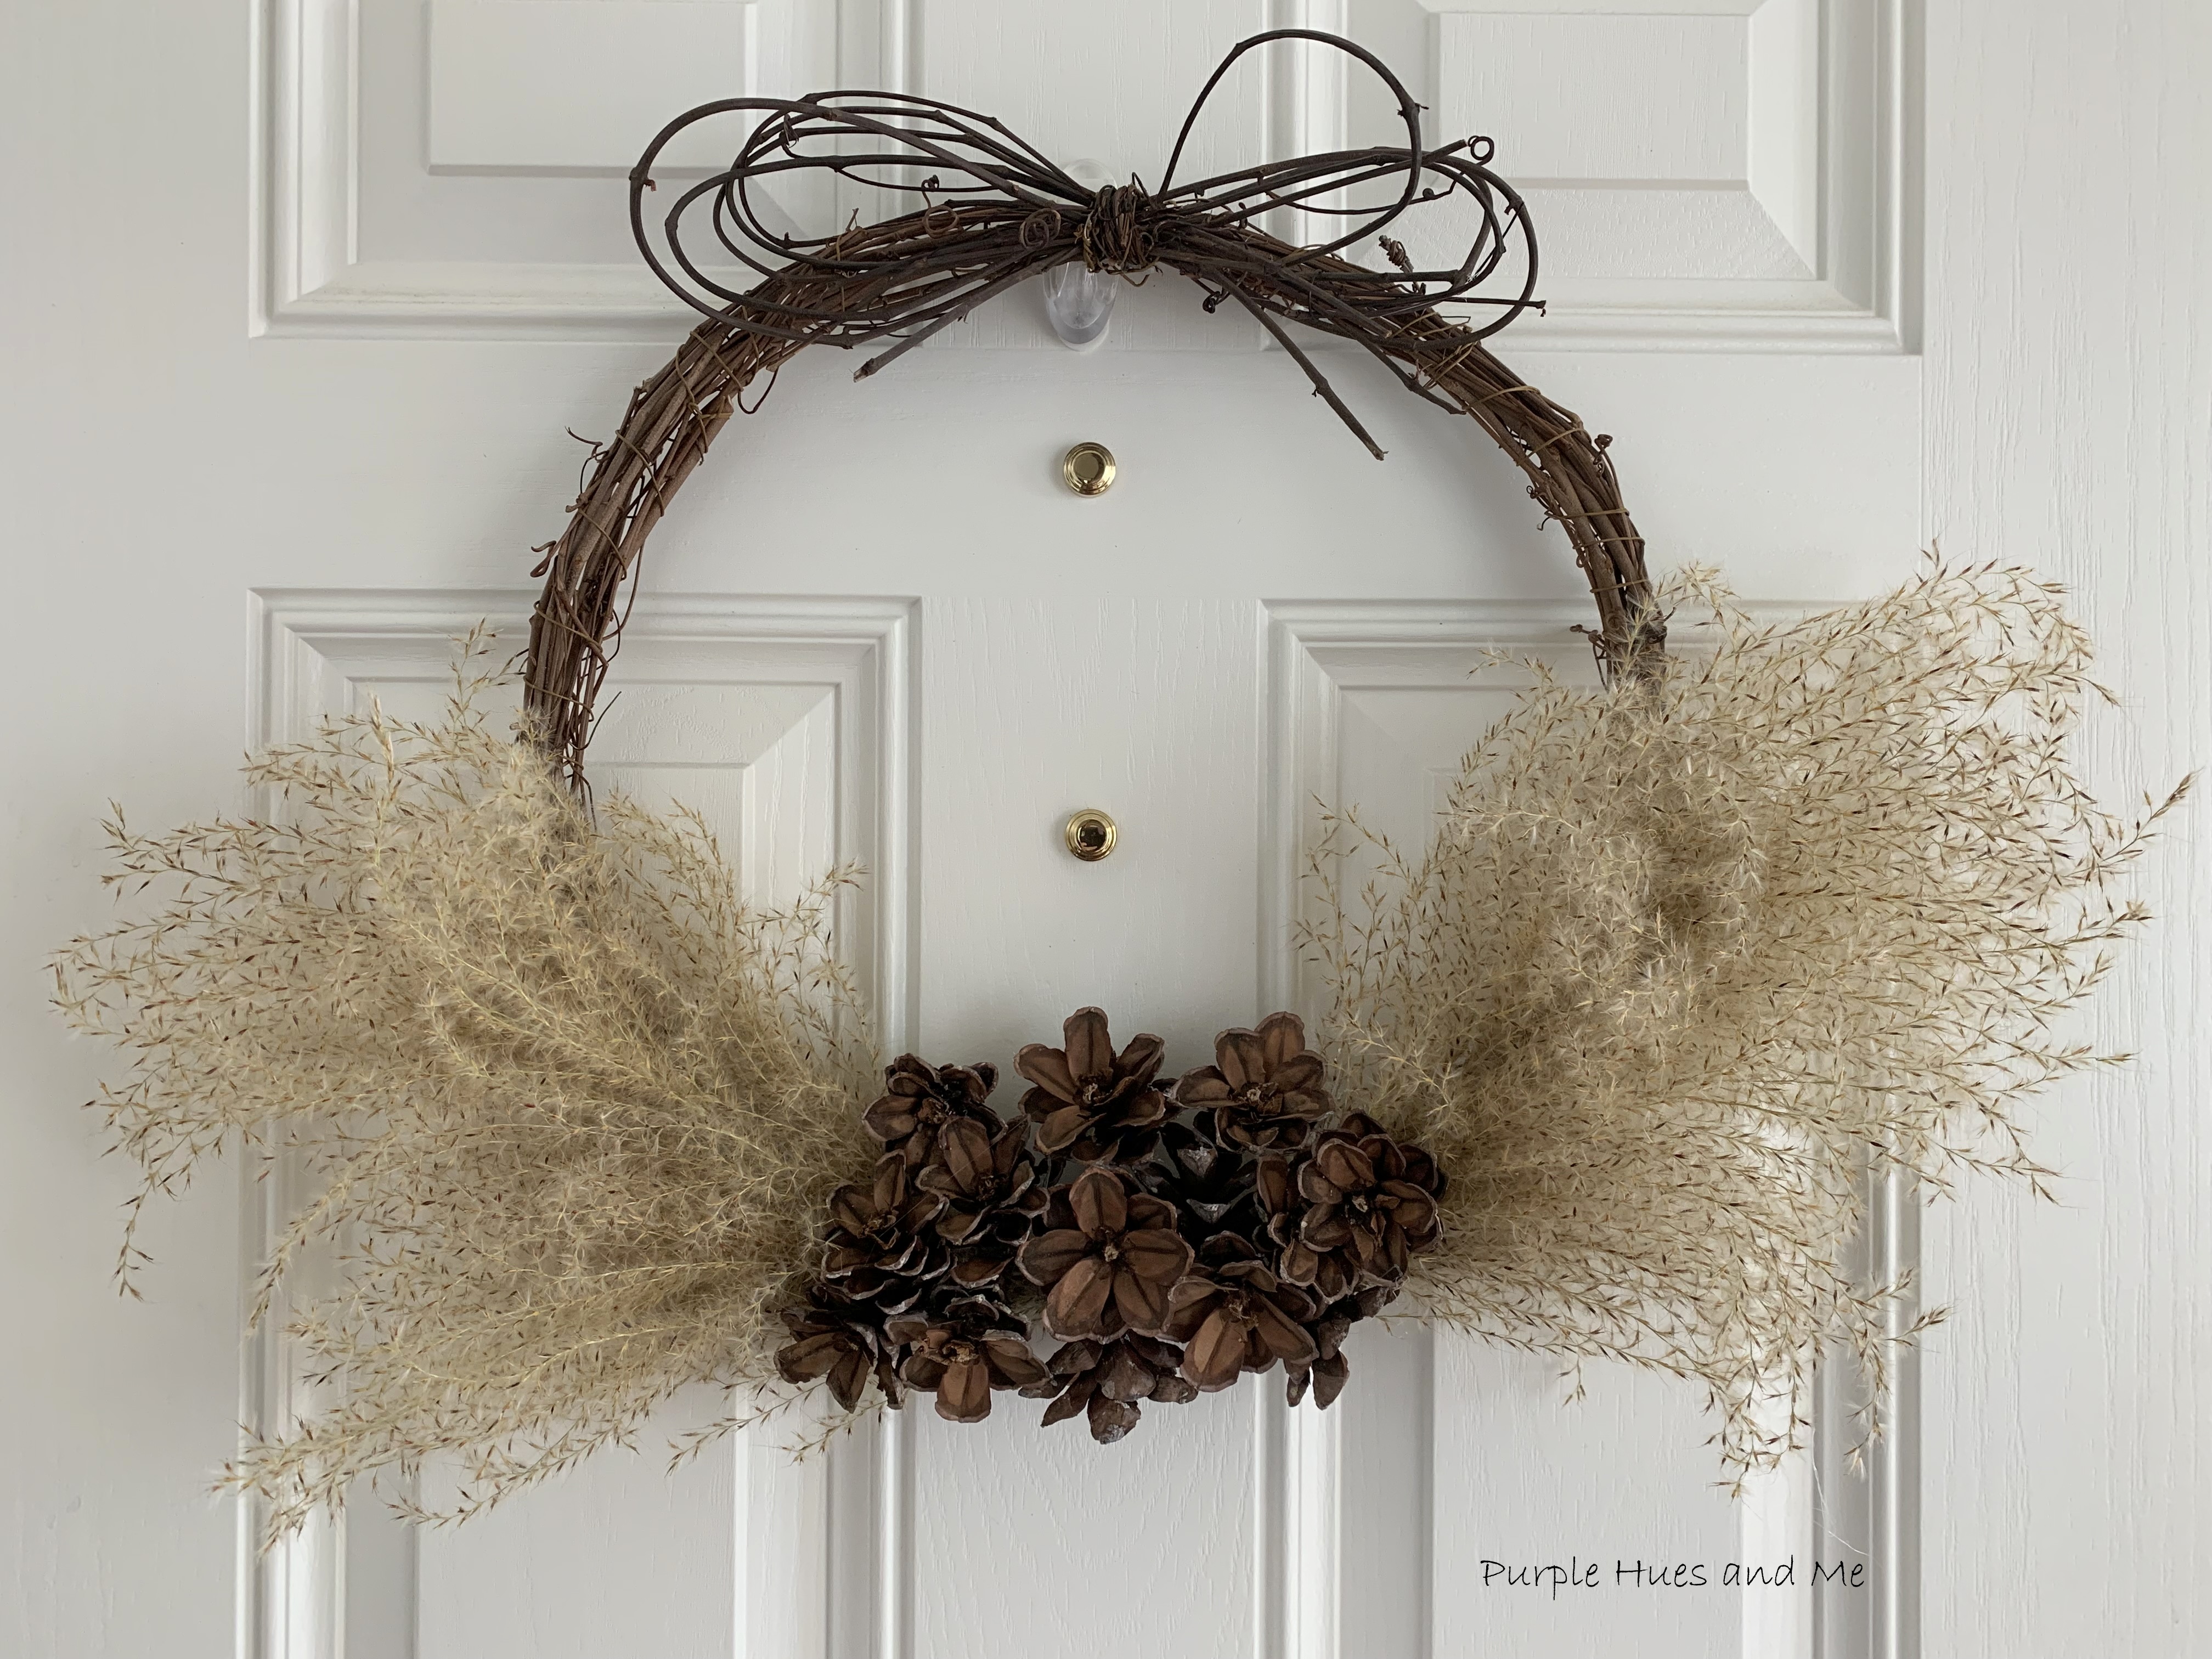
 All Natural Fall Decorative Wreath!

This challenge is all about sustainable crafting! Each month is themed and all projects must have some sort of a sustainable element to them. This could be an upcycling or recycling element, or something that reduces waste, uses leftovers, etc. The theme for September is Nature!

Be sure to check out all the Nature Sustainable Crafts projects listed below:


Julie @Sum of their Stories - Mini Vases Upcycled From Yogurt Bottles

Vicky @Vicky Myers Creations - Cyanotype Art

Gail @Purple Hues and Me - Eco Friendly Fall Decorative Wreath

T'onna @Sew Crafty Crochet - Three-Strip Flower Scarf

Terri @Our Good Life - Pressed Flower Lantern

Maria @Simple Nature Decor - Sea Glass Candle Holder


Mel @Decor Craft Design - DIY Fall Sign Gold Dried Leaves

Julie @ Treasures Made From Yarn - Upcycled Project Bag


Thursday, August 17, 2023

Embellish Pumpkin with Flower Molds


It's almost Fall y'all and you know what that means! Time to decorate pumpkins! Why not take your pumpkin decorating skills to the next level using clay and a silicone flower mold! I know you've seen lots of pumpkins decorated using ornate molds! Most look antiquated - or not quite your style! But I'm here to show you how to use fashionable or up to date flower molds to decorate your pumpkins! Sounds like fun, doesn't it! And it is! 

 Welcome to this months' Creative Craft Hop! For the next couple of  months, Creative Craft Hop will be hosted by Donna @Modern on Monticello who's filling in for Sara @Birdz of a Feather while Sara is dealing with health issues.  Please keep Sara in your thoughts and prayers. And thank you Donna for keeping this awesome hop going! If you're coming over from Tammy @Patina and Paint wasn't her Pumpkin Soap Dispenser adorable! And be sure to check out all the talented bloggers and their wonderful creations listed at the end of my post. 

We all love decorating pumpkins in so many cool ways for fall! The options are almost unlimited! And I'd like to share a  chic and stylish way using clay and flower molds to beautify a pumpkin! 

Materials used:

Disclosure I am a participant in the Amazon Services LLC Associates Program, an affiliate advertising program designed to provide a means for us to earn fees by linking to Amazon.com and affiliated sites, this post may contain links. I may receive a very small commission at no cost to you! The affiliate money I earn helps pay my crafting expenses. Thanks so much for your support!

Let's start with a plain paper mache 10" pumpkin I had in my stash and .  .  .


a silicone flower mold I had gotten from Amazon sometime ago for another project. Begin by lightly brushing corn starch on the mold which makes it easier to release the clay from the mold. 
Cover the entire mold with corn starch and then shake off the excess.

Pinch off an amount of air dry clay needed to begin filling the mold. Because the mold design is rather large, it's best to work in sections. Roll the clay into a ball and begin kneading it to make it soft and pliable.

Once the clay is pliable, begin pressing the clay into the mold..  .  .  

filling the flower design mold with clay.


Once the flower mold is filled, use a plastic spreader to smooth out the clay and to remove any excess clay around the rim of the flower design.

Then turn the mold over onto where you want to place it on the pumpkin and begin folding back the top of the mold - a little bit at a time so you won't break the design until the clay flower is completely on the pumpkin. Gently raise the clay flower to squeeze wood glue in-between the pumpkin and back of the clay flower. Press in place to secure.  Continue filling the mold with clay as before, adding the flower around the pumpkin and gluing in place.
I placed six flower molds around the 10" pumpkin. And I loved, loved, loved how the pumpkin was taking shape!

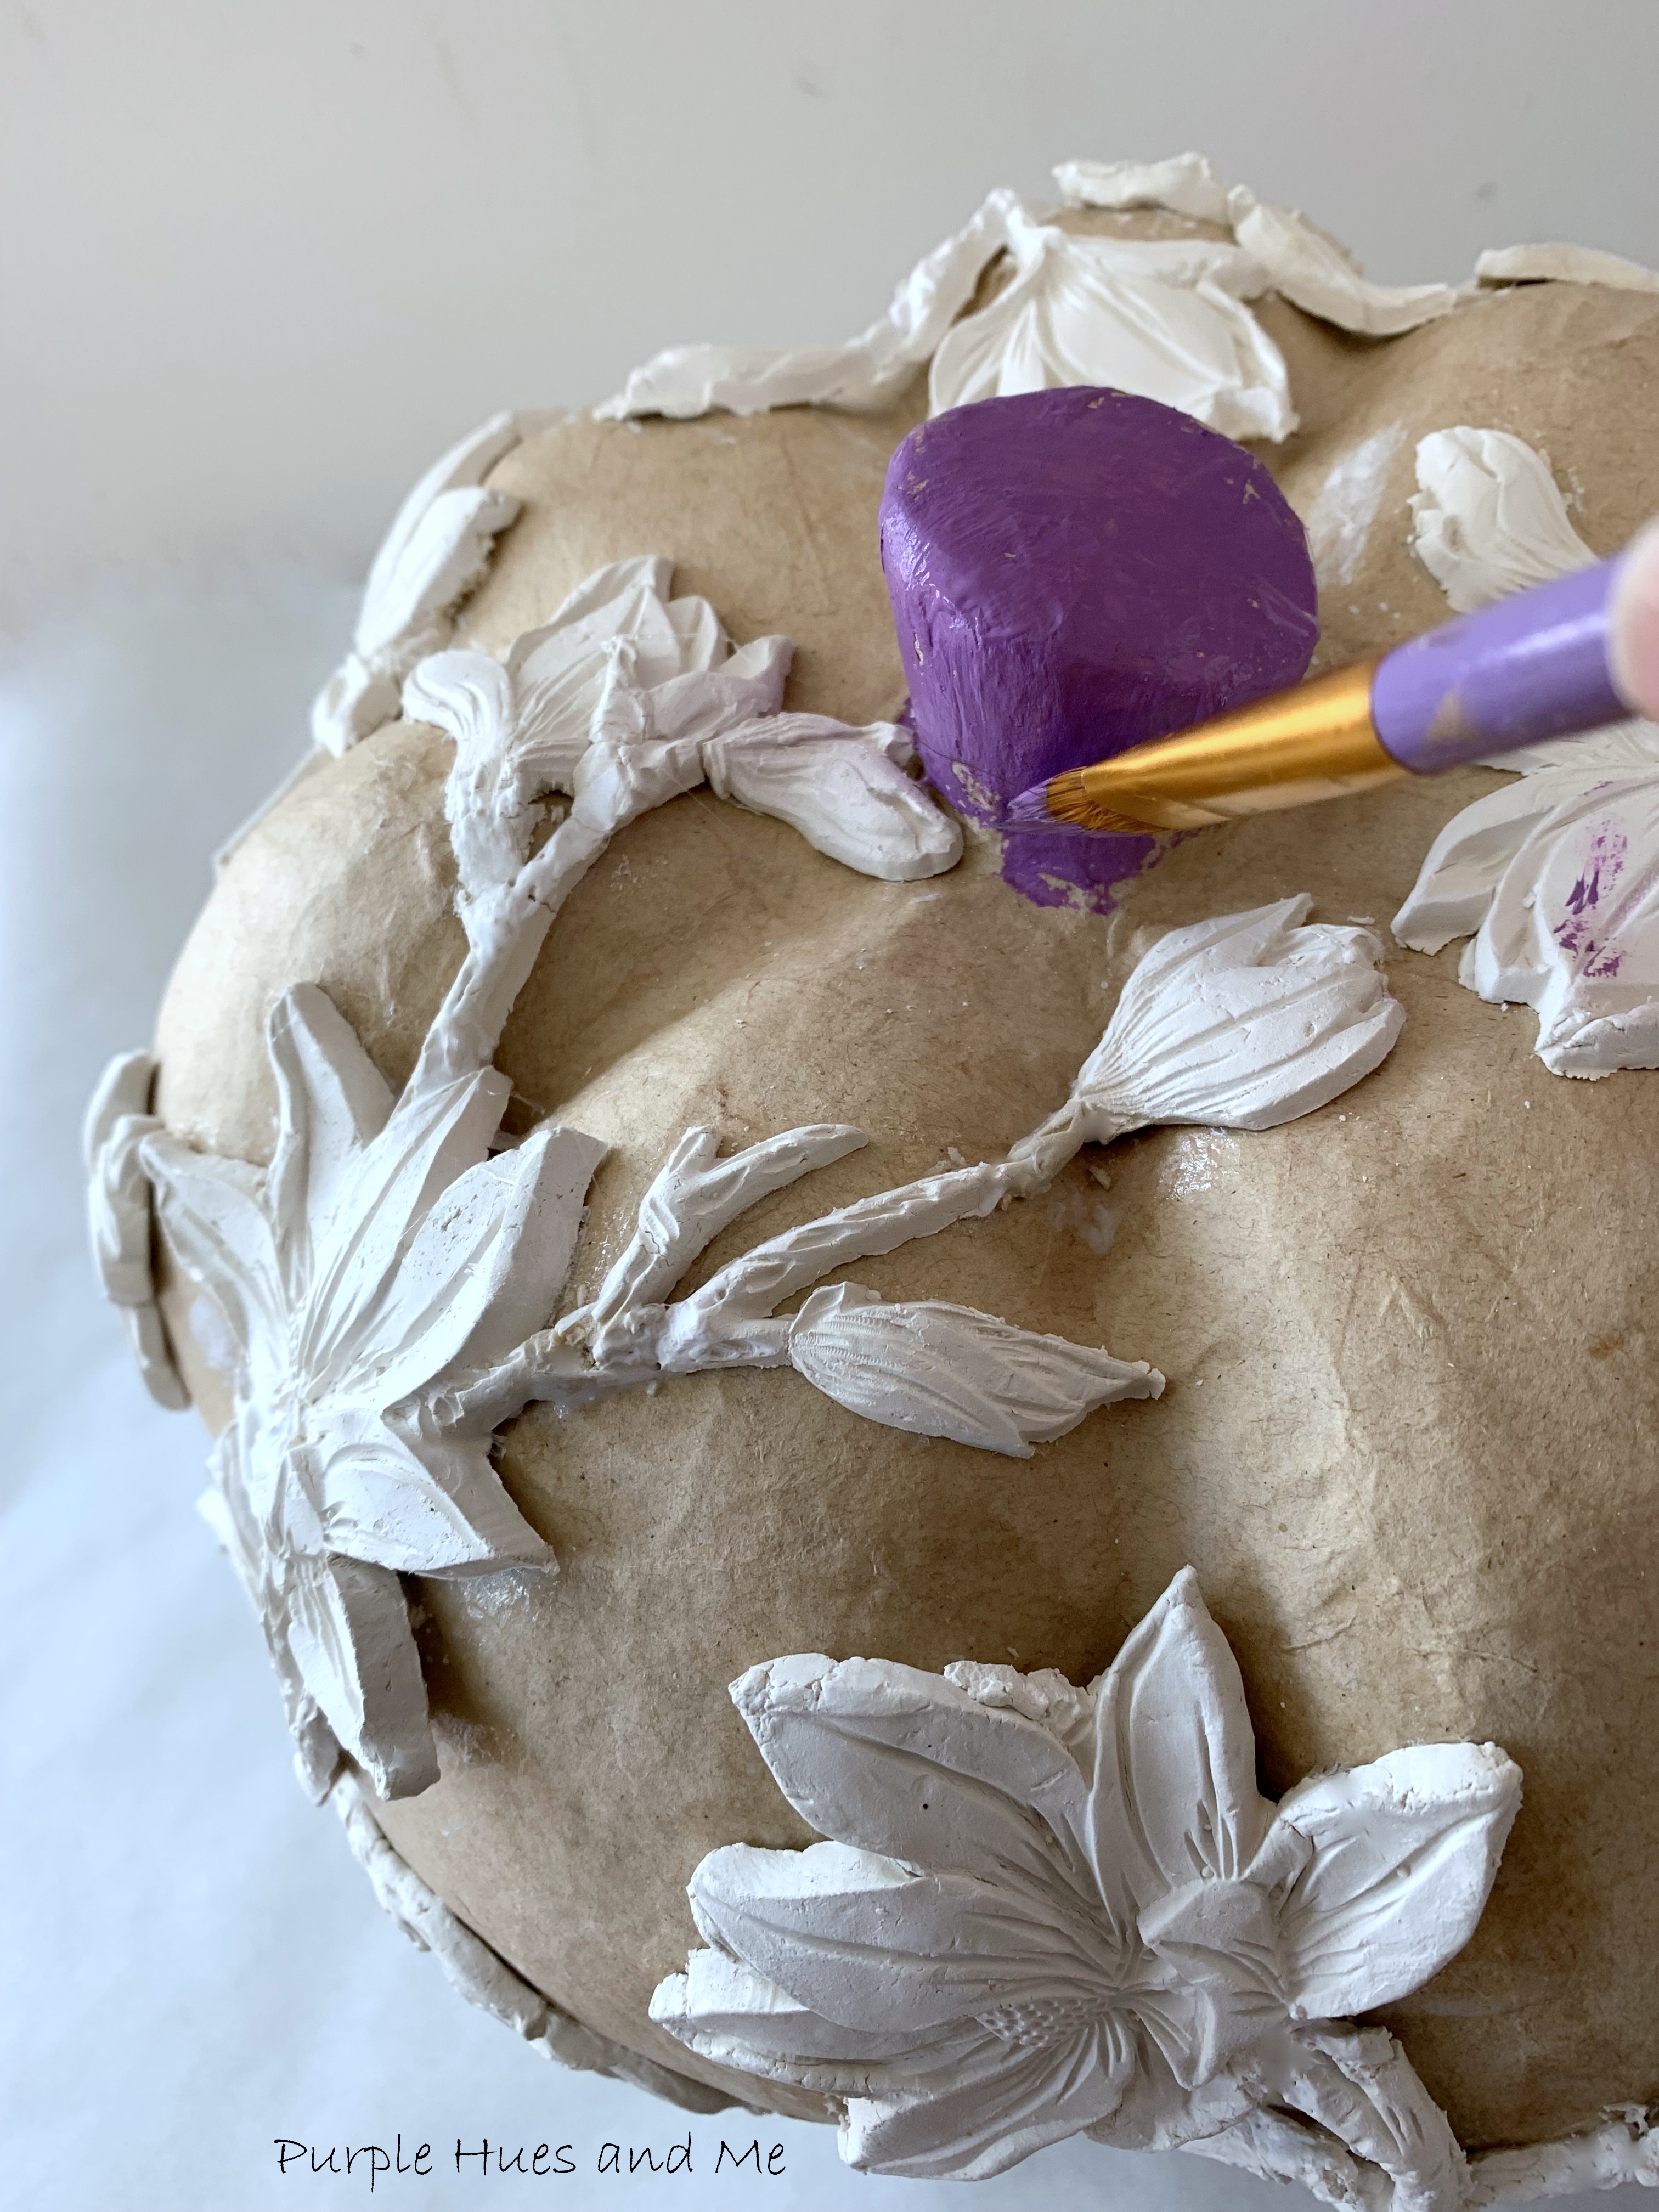
Next, I started painting the paper mache pumpkin in a purple shade called FolkArt Victorian Violet Matte which looked much darker than the bottle shade implied. In hindsight, I should have painted the paper mache pumpkin first before adding the clay flowers.
After most of the pumpkin was painted and dry .  .  .
I placed the pumpkin upside down in a plastic bowl to paint the bottom.
Doesn't this look awesome and I haven't finish it yet!
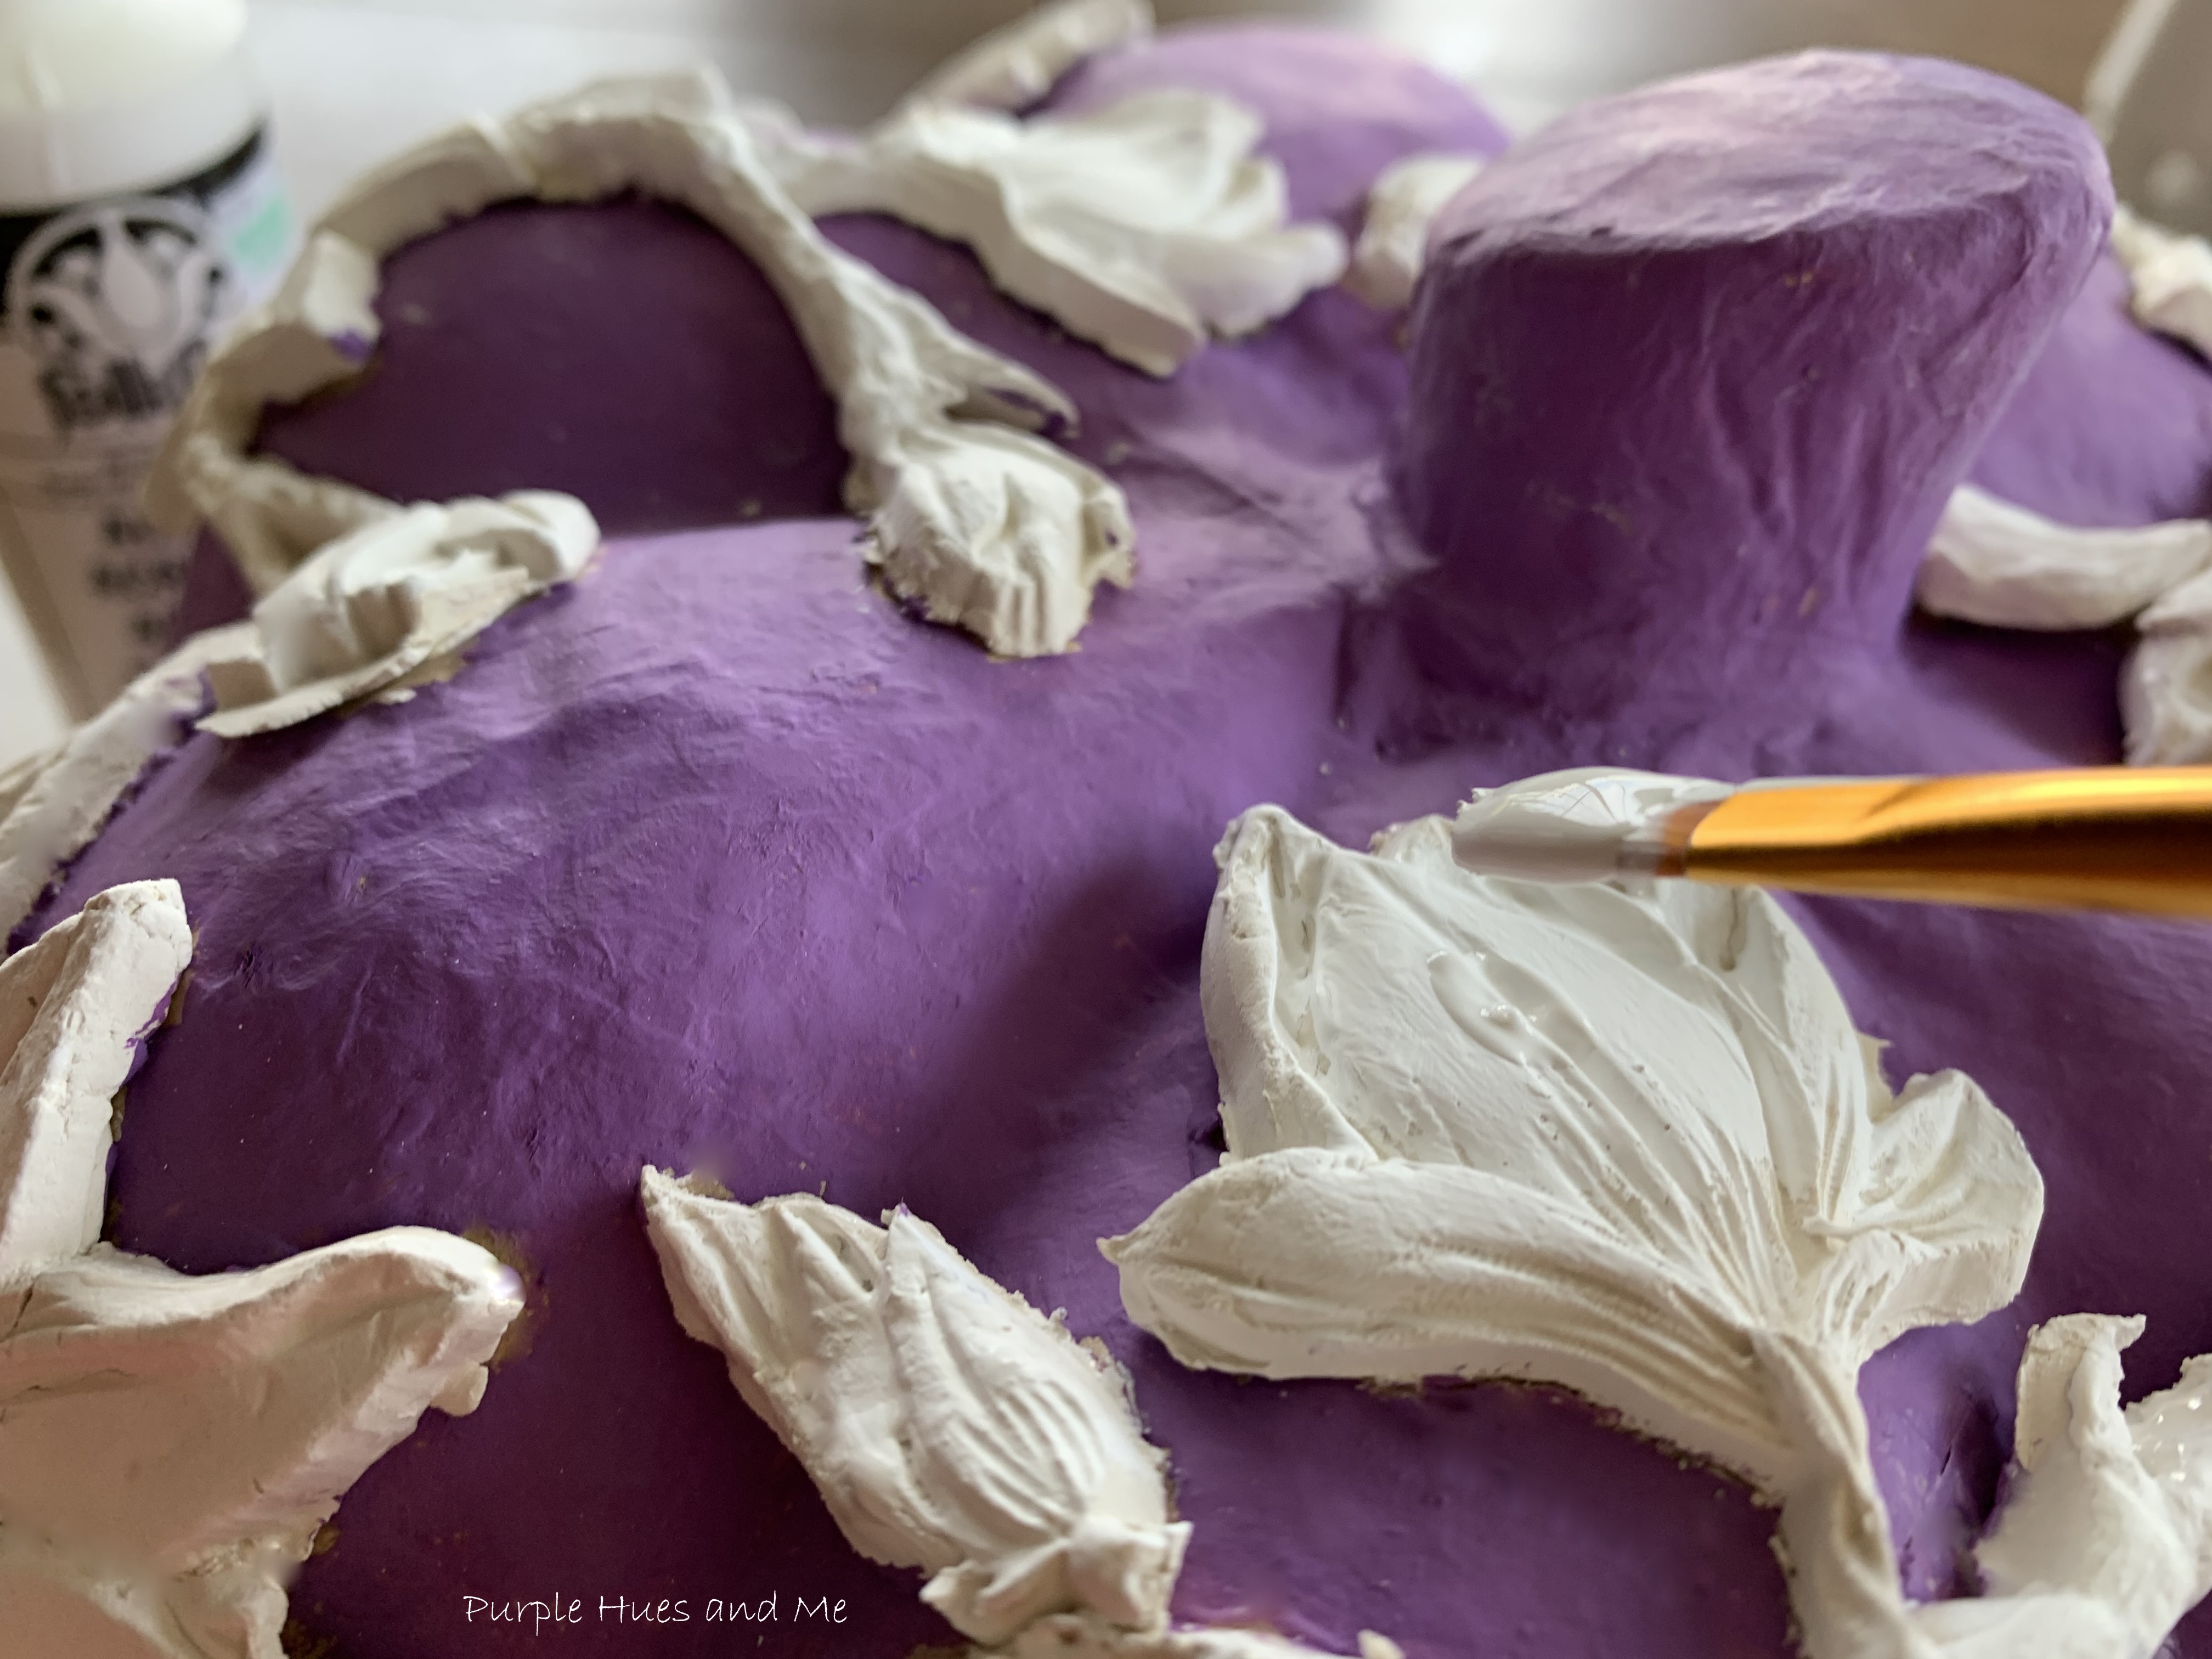
Next, painted the clay flowers using FolkArt Wicker White. Let dry
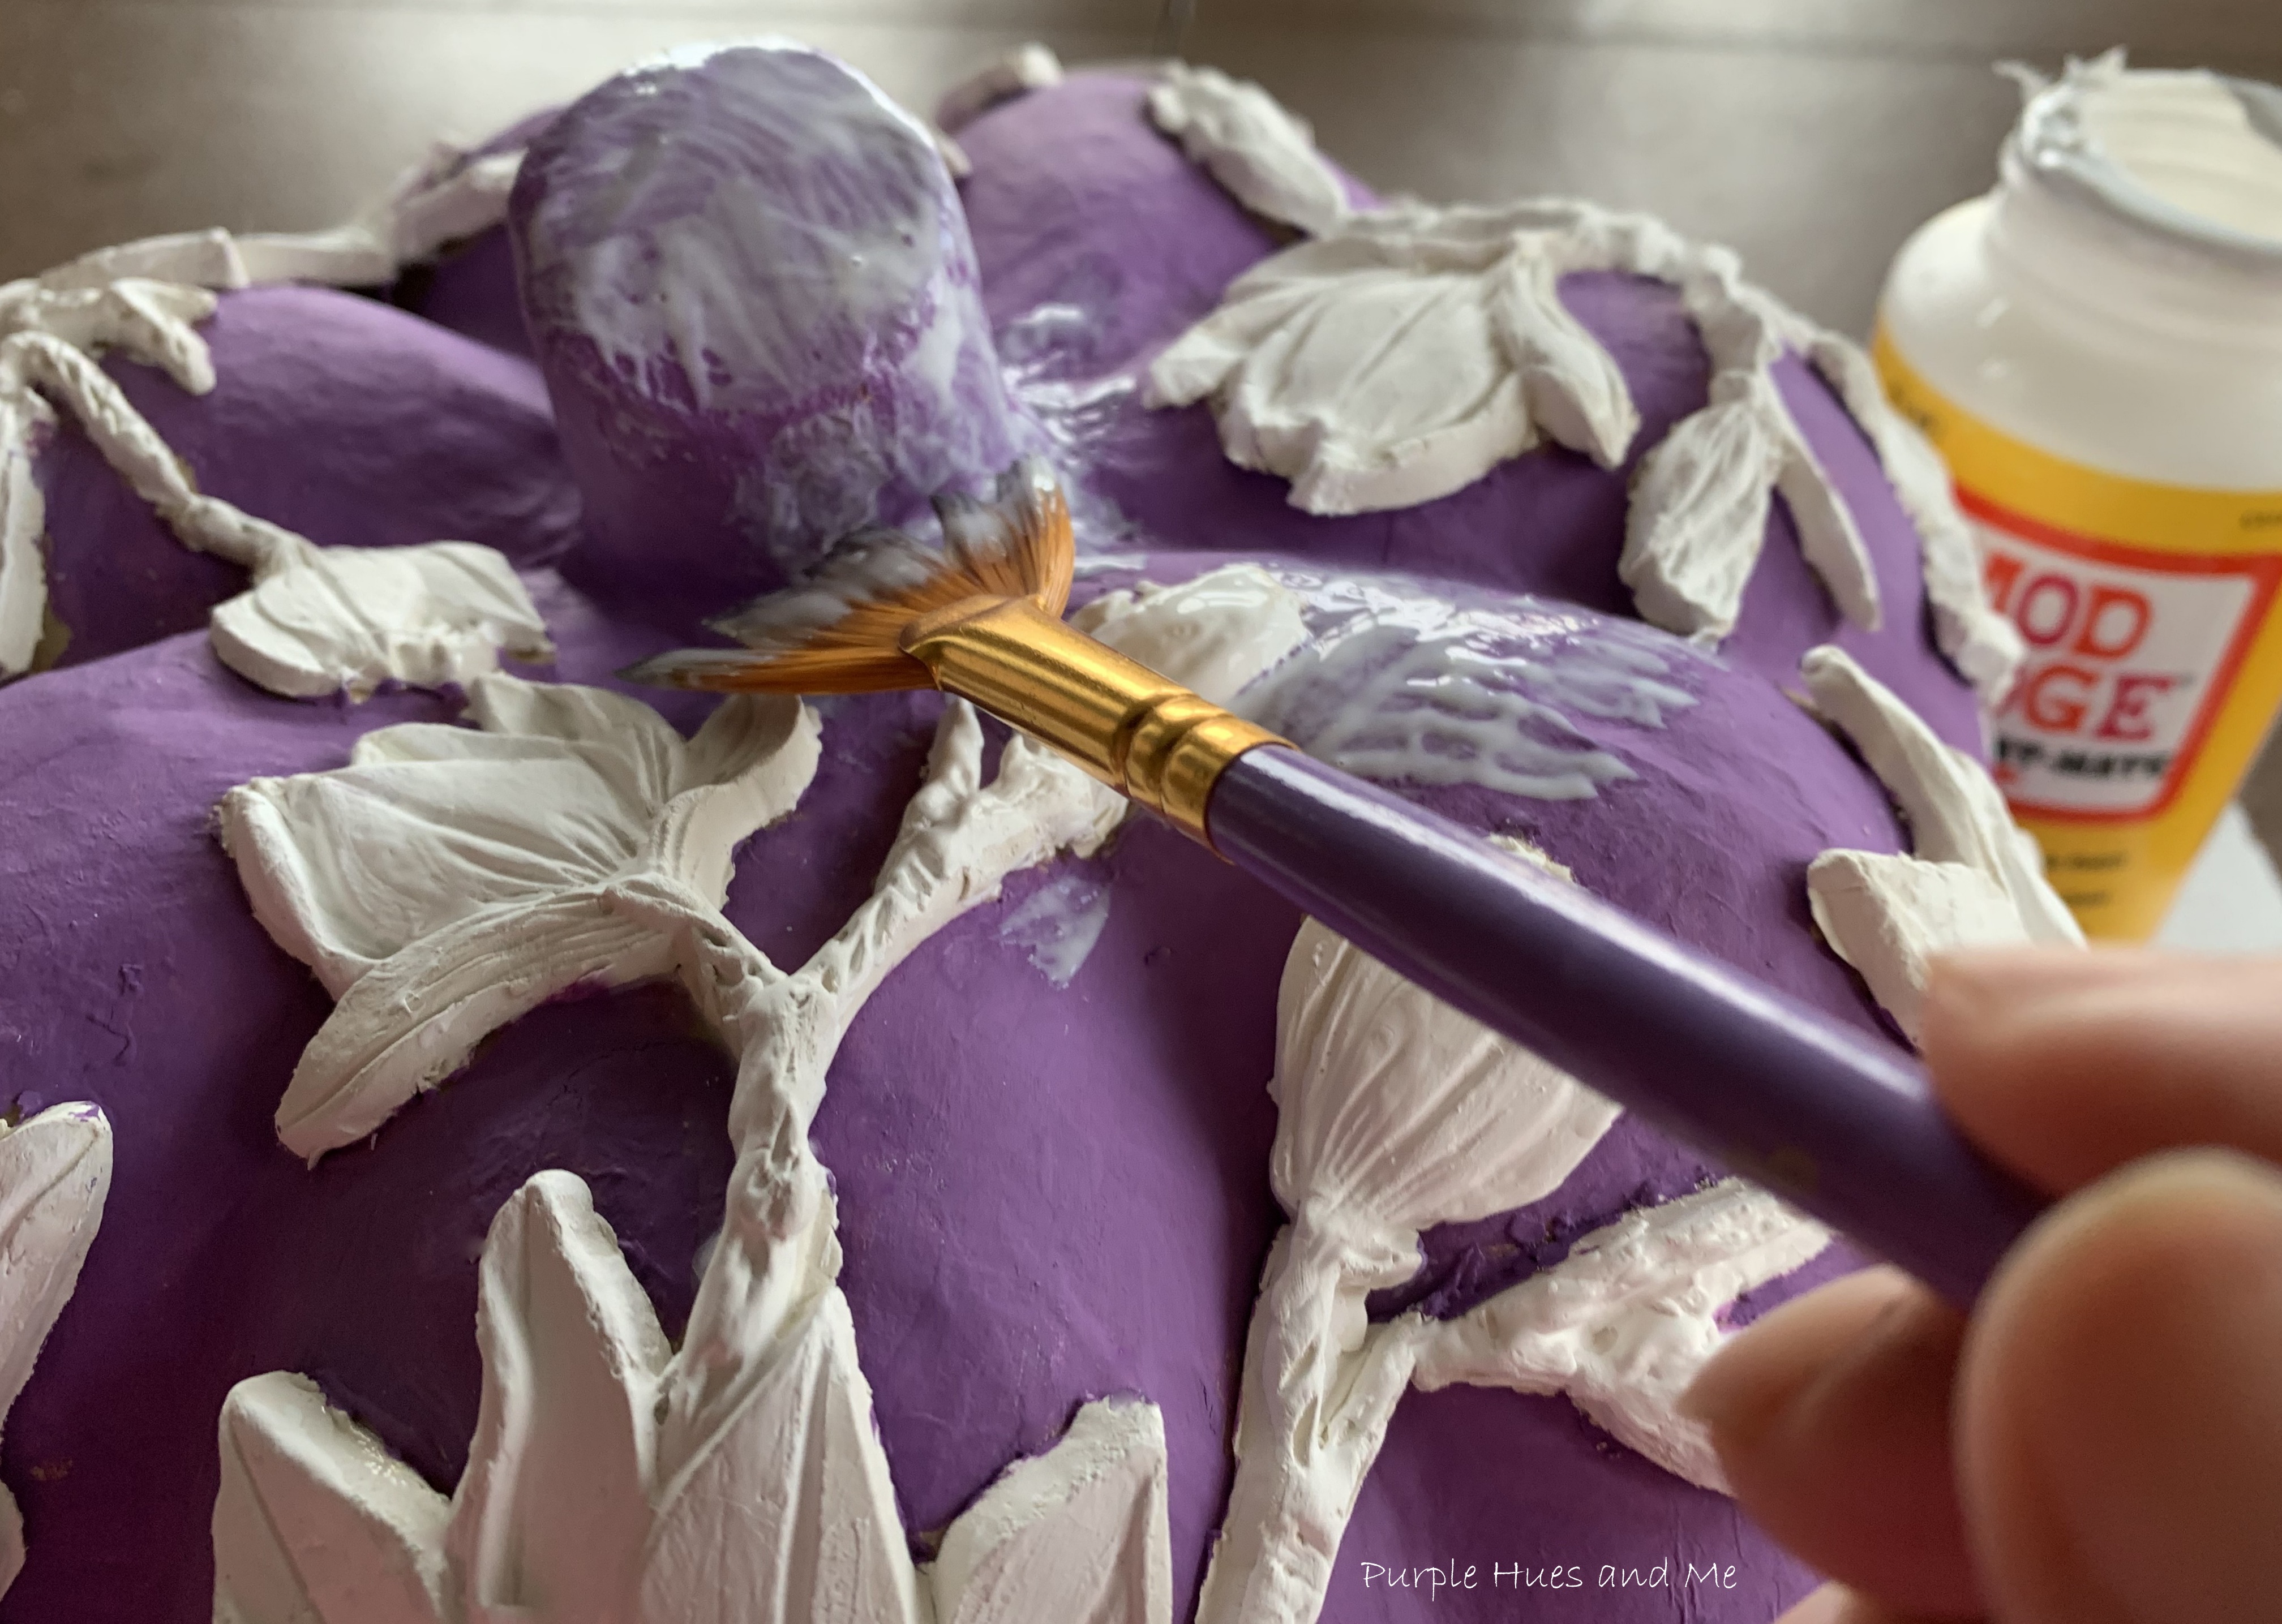
And finally, sealed it all using Mod Podge Matte.
Let the mod podge dry for several hours .  .  .
to a clear finish.
I can't wait to decorate for Fall with this lovely pumpkin!

I hope you enjoyed  how I embellish a pumpkin with clay flowers  and inspired you to make one, too! Up next is Ann @Apple Street Cottage sharing her beautiful Milkweed Pod WreathBe sure to stop by each and everyone in our creative group listed below to check out their exciting and inspiring projects! And don't forget to pin, too!

Pumpkin Soap Dispenser -Tammy @Patina and Paint

Embellish Pumpkin with Flower Molds  - Gail @Purple Hues and Me

5 Easy Steps for Making a Milkweed Pod Wreath  - Ann @Apple Street Cottage

Autumn Sunflower Free Printable Decor  - Allyson @Southern Sunflowers

DIY Fall Coasters 2 Ways - Niki @Life as a Leo Wife

September Pumpkin Jenna @ The Painted Apron


Simply Elegant Dried Flower Pumpkins - Cecilia @ My Thrift Store Addiction


Tuesday, August 1, 2023

Sun Painting Bandana DIY


Sun painting on fabric is a fun and easy way to capture the summer sunshine and the design of just about any type of flat objects or plants onto fabric. For this project, I'm using 100% cotton bandanas I had gotten from Hobby Lobby back at the beginning of the pandemic. They were a whopping 99 cents apiece and I'm putting them to good use for this month's Sustainable Craft Challenge Blog Hop hosted by Julie @ Sum of Their Stories


This challenge is all about sustainable crafting! Each month is themed and all projects must have some sort of a sustainable element to them. This could be an upcycling or recycling element, or something that reduces waste, uses leftovers, etc.  The theme for August is SUNSHINE!  And for this project, you'll need a SUNNY day with plenty of sunshine! LOL!

Other Supplies:
Disclosure I am a participant in the Amazon Services LLC Associates Program, an affiliate advertising program designed to provide a means for us to earn fees by linking to Amazon.com and affiliated sites, this post may contain links. I may receive a very small commission at no cost to you! The affiliate money I earn helps pay my crafting expenses. Thanks so much for your support!
First, get a sturdy board for the bandana to lay on. I am using a thick foam board that I had in my stash. Place the board inside a clear plastic trash bag. I don't want the paint to get on the board or anything else, for that matter. Make sure the bandana is clean and free of any stains or residue from chemicals. Iron out all of the wrinkles and lay flat on top of the plastic covered board.


Spray water all over the bandana making sure it's completely wet - but not dripping wet.
Apply paint randomly across the moistened cotton fabric. First one color, violet, and .  .  .

then the other color, claret. Spraying on more water will help lighten the paint - less, will darken it.
Make sure the fabric is completely covered with paint, leaving no white areas showing.
Most sun painting tutorial use leaves, flowers and natural items from the garden to sun paint. But I wanted to use a stencil and other objects from my stash to see how they would work with the sun.

So I'm placing a stencil on top of the wet fabric, pressing it into contact with the paint. Since the stencil only covered the center of the fabric, I'm also folding the fabric edges around the stencil .  .  .

to see what type of design in the fabric would appear from the sun.
Once everything is placed down on the fabric, take the board with the fabric and stencil outside to a sunny location for the sun to work it's magic!
It was a sunny 85 degrees outside the day I did this and it didn't take long - about 30 minutes - for the fabric to dry. Then take everything back inside to .  .  .
lift off the stencil and be amazed at the design created on the fabric from the sun!
 
Folding the fabric around the stencil also created a lovely, pleated-like boarder, too!
And finally, iron the bandana to heat set the paint and design!
To make a kerchief out of the newly sun painted bandana, take one corner  across to the next corner, creating a triangle. Tie it at the nape of your neck and you're done! Doesn't this look so cool! And the unusual design of the fabric is quite apparent and looks lovely!
For the second bandana, moisten the fabric by spraying on water, as before. This time, make circles all over the fabric using a paint brush dipped in fabric paint.
Use a sponge brush to cover center of circles.
Have fun blotting on the paint!
 Filling in the white portions of the fabric, covering all exposed areas.

Place cutout cardstock designs randomly over fabric, pressing down to make contact with paint. They should easily stick to the fabric.
Then take covered board outside, as before, and let dry in the sun. It was somewhat windy so I placed heavy objects on the sides of the board to keep it  down. Also, some of the edges of the cardstock designs lifted up so I use straight pins to tack them down. You couldn't see the pin holes once dry.
Check ever so often to see if the fabric is dry. After about 30 minutes, the fabric was dry. Here, I'm checking to see how the sun painted designs looked.
This sun painted design turned out very pretty. The paint colors really compliment each other!
To tie this bandana, take one corner across to the next corner, creating a triangle. Fold the two bottom points up about an inch, folding until you have a long narrow strip. To wear around neck or as a headband, place around neck or on head, tying the ends together.
With Sun Painting, your very own, one of a kind item is created! No two are ever alike! There are so many ways to use a sun painted bandana like the two I've shared! As a kerchief adding an interesting flair to an outfit! A neck scarf - tied in the front, or at the side or even tucked in! As a head scarf, tied around a ponytail or as a headband! You can also use it as a belt - threading it through pant loops or you can tie it around your wrist for a bracelet. You can also use it to decorate your handbag as an accessory! And finally, on a hot, sunny day, use it as a bralette, oh my, tied in the front to help keep you quite cool and fashionable, lol!

Be sure to check out all the SUNSHINE Sustainable Crafts projects listed below:

Julie @ Sum of Their Stories   -  Sunburst Greeting Card Idea Made with Old Magazines

Terri @ Our Good Life  – DIY Resin Suncatchers

Gail @Purple Hues and Me  – Sun Painting Bandana DIY

Mel @Decor Craft Design  -  DIY Summer Sunflower Sign  

Stephanie @Crazy Little LoveBirds  -  Creating Faux Stained Glass Using   Plastic Plates

Allyson @Southern Sunflowers  - Sunburst Artwork Using Paper DIY

Christine @Christine’s Crafts  -  Easy Button Flowers for Home Décor

Niki @Life as a Leo Wife  - Box Full of Sunshine Idea with Free Printables  

You are invited to the Inlinkz link party!

Click here to enter