Tuesday, October 19, 2021

DIY Knotted Rope Gift Basket


Welcome to October's Pinterest Challenge hosted by Alexandra @EyeLoveKnots. The purpose of this Pinterest Challenge is to motivate us to actually make something that we have pinned! This month's challenge topic is Gift in a Basket!

The holidays and gift giving season is almost here! Gift baskets - big or small - are quite appropriate for almost every occasion. When all else fails, give a gift basket! You can put together a gift basket so special and personal making it the perfect all time gift! 

So I'm going to start with the basket itself - it's the most important item in a gift basket. One of the best ways to ensure the present you give is unique is to make it yourself. Including the basket itself! Especially one that's distinctive like a beautiful intertwining of knots based on a nautical mat. A knotted rope gift basket! How cool is that! I was inspired by this basket I saw on Pinterest and really enjoyed watching the video. I never thought you could turn a mat into a basket!

And explaining how to make one maybe somewhat confusing or seem complicated. I have to warn you that this tutorial is rather lengthy! I'm so sorry. I don't want you to miss out in learning how to create a lovely basket like this one! Just take it slow - taking your time going over the steps and pictures and you will figure it out - just like I did. Although this is not the first nautical mat that I have made. You can check out my first one here.  

Disclosure I am a participant in the Amazon Services LLC Associates Program, an affiliate advertising program designed to provide a means for us to earn fees by linking to Amazon.com and affiliated sites, this post may contain links. I may receive a very small commission at no cost to you! The affiliate money I earn helps pay my crafting expenses. Thanks so much for your support!

Materials Needed:

  • Rope - 36ft. 10mm
  • Masking tape/cellophane tape
  • Scissors
  • Multi purpose glue
To start, I cut 36 feet of rope from a 50ft roll of 10mm twine rope.  At first, I thought I would use the entire roll to make a bigger basket, but when I tried folding the rope together to get the center, it look like it was way too much rope to pull through the loops to make it. Anyway, place the ends of the rope together to find the center loop.
Tape down the cord on the left - we will call that the standing cord - and make a loop crossing over the standing cord with the cord on the right. We will call that the working cord. And the loops will be the petals of the basket.
Then take the cord across the entire loop .  .  .
and make another loop on the left
While holding everything down with your left hand, tuck the working cord underneath the bottom loop cord
Then take the cord around to the left and up under the cord to the right where it's taped down, pulling the cord through.
Make sure to lay the cord right on top of the loop on the left and go up and under.
Then take the cord end and weave across - over and under, over under, over under .  .  .
and out the last loop on the left, creating five loops or petals.
Then, take the working cord end and follow the taped down cord, over, under, over around .  .  .
until creating a total of six loops or petals as you double the cord. Tighten (make smaller) the cord loops or petals as you follow the cord.
Un-tape the standing cord and take the end to follow the cord down .  .  .
and around .  .  .
for a third time.
Go through the entire knot to create four round .  .  .
then five until the cord ends. Tighten the mat by starting with the end cord, adjusting all around and moving on to the next cord to tighten. Be sure to tighten  one cord at a time as to move around .  .  .
until satisfied with the look.
Flip mat over and pull the end cords out - they should end up being near each other. Use cellophane tape to cut off excess cord to keep from raveling.
Front of mat

Shape mat into bowl by pulling up on the sides while pushing in the middle with hands.
Then starting with one of the end cords .  .  .
 and pull  to tighten around entire mat into a bowl shape. 
Try to close as many open areas as possible by tightening the cord.
To attach the handle, tape rope ends on a piece of rope so the ends won't fray at the 24" length mark and cut out. Insert one end through a hole where petals crisscross (as near to the top edge) and fold rope end up to press handle together. Then insert other cord end on the opposite side and fold end up against rope handle.
To secure handle ends, Unravel 18" of rope .  .  .
and remove two of the threads, separating them.
Fold thread in half and take the two ends through the loop around the handles - creating a slip knot - pulling tight to secure. Then wrap thread around handles ends several times and secure ends in place with glue.
I loved how the basket turned out! But I wished I had used a stiffer rope. The basket would have been much firmer and not as flexible as it turned out.

Decide on a gift theme -  mine is spa items - cause everyone likes to be pampered!
Are you a blogger interested in joining the #pinterestchallenge blog hop? Join the Pinterest Challenge Group on Facebook for all the details.

PLEASE VISIT ALL OF THE HOSTS TO SEE WHAT AWESOME INSPIRATIONS THEY CREATED!

You are invited to the Inlinkz link party!

Click here to enter

Monday, October 11, 2021

Easy Apple Raisin Fritters


Apple Raisin Fritters are luscious fried pastries filled with apples, raisins, and cinnamon, drizzled with a flavorful glaze. They're my hubby's favorite pastry! So naturally, you understand why I'm sharing this recipe for this month's Fall Recipes Blog Hop Challenge hosted by Beverly @Across the Blvd


These easy to make homemade apple fritters are packed full of fresh apples - perfect for the fall season - and raisins - along with a few other simple ingredients. Truly a quick and delicious recipe that's filled with fall flavors! And the best part, you can be tasting these warm apple fritters in less than forty minutes.

Let's start with peeling and dicing the apples into small chunks. Granny Smiths are the preferred apple for pastries, tarts and pies. They're incredibly crisp, firm, and juicy. Once diced, sprinkle a bit of lemon juice to prevent them from browning.
Next, blend in the dry ingredients in a large bowl - flour, sugar, baking powder, salt, cinnamon and a pinch of nutmeg.
In a separate bowl, beat the eggs with a folk, then add applesauce, and milk.  Add to the dry ingredients and stir together to combine. Then fold in the apples and raisins.

Heat a couple of inches of vegetable oil in a heavy skillet to 375 degrees. It's important that you maintain this temperature. Too hot and the fritters will burn. Not hot enough and they'll be soggy in the middle.
Drop about 1/4 cup of batter into hot oil .  .  .
and cook each side 2-3 minutes until golden brown.
Remove to paper towels to drain, then move to cooling rack to air dry and to drizzle the glaze on.
 
To make the glaze, whisk the powdered sugar, milk and vanilla extract together in a 2cup+ measuring cup until smooth. Use the cup to drizzle the glaze on top of the apple raisin fritters while cooling. 

 Easy Apple Raisin Fritters 
Ingredients                                                     Prep & Cook time: 40min approx.
  • 1 ½ c diced apples  

  • Lemon juice 

  • 1 ½ c all purpose flour 

  • 2 tsp baking powder 

  • ½ tsp salt  

  • ¼ c granulated sugar 

  • 2 tsp ground cinnamon 

  • pinch of nutmeg 

  • ½ c unsweetened applesauce 

  • ½ c whole milk 

  • 2 eggs 

  • ½ c raisins 

  • Vegetable oil for cooking

  •  

Directions 

  1. 1. Blend in the dry ingredients in a large bowl - flour, sugar, baking powder, salt, cinnamon and a pinch of nutmeg. 

  1. 2. In a separate bowl, beat the eggs with a folk, then add applesauce, and milk.  Add to the dry ingredients and stir together to combine. Then fold in apples and raisins. 

  1. 3. Heat a couple of inches of vegetable oil in a heavy skillet to 375 degrees. 

  1. 4. Drop about 1/4 cup of batter into hot oil, and cook each side 2-3 minutes until golden brown. 

  1. 5. Remove to paper towels to drain, then move to cooling rack to air dry and to drizzle the glaze on. 


To Make the Glaze: whisk 1¼ c powdered sugar, ¼ c milk and ½ tsp vanilla extract together in a 2cup+ measuring cup until smooth. Use the cup to drizzle the glaze on top of the apple raisin fritters while cooling.   

ENJOY!

Wednesday, October 6, 2021

Craft Wood Lantern DIY


Hello and Welcome! It's the first Wednesday and you know what that means - it's time for our monthly DIY Challenge hosted by Terrie @Decorate & More with Tip! In case you don't know about this DIY Challenge, on the 1st Wednesday of each month, a group of talented bloggers create something based on a theme or material that's selected by Terri, our fearless leader! This month's theme is Craft Wood Inspiration!

Disclosure I am a participant in the Amazon Services LLC Associates Program, an affiliate advertising program designed to provide a means for us to earn fees by linking to Amazon.com and affiliated sites, this post may contain links. I may receive a very small commission at no cost to you! The affiliate money I earn helps pay my crafting expenses. Thanks so much for your support!

I'm sure you know that lanterns delightfully elevate the mood of any home decor space with its' warmth and coziness. You see them just about anywhere - both indoors and out. And for the DIYers, it's really so simple to turn basic craft wood - including dowels and craft rings -  into a unique accent piece by creating a handcrafted lantern!   DIY lanterns can make a huge impact with very little effort and don't require much time or money to make! And the best part, you probably already have most of the materials in your stash or easily available in craft stores! 

 If you're coming over from Terri @Decorate & More with Tip, wasn't her wood craft amazing!  Follow along with my very easy tutorial on making a lantern using dowel rods and other craft wood. 

So lets get started with what you'll need to make a Craft Wood Lantern:

For my craft wood project, I was determined to make a lantern out of materials I had in my stash. I have a collection of odd dowel rods of various sizes - even a pack of ten from the Dollar Tree. But I needed at least 12 to have a decent showing. Luckily, after searching through lots of my craft containers, I was able to find 13 of the same size - twelve inches long. While searching, I also found craft rings and wood circles - all perfect to make a lantern!
Since I had twelve rods, I marked off a six inch craft ring into twelve equally spaced spots (clockwise) and hot glued them onto the craft ring.
This piece would be the beginning of the lantern base with the rods on the outside.
Then I hot glued another craft ring to the outside of the opposite end of the rods - for the top portion.

For the handle, I cut out a portion of an 8" craft ring .  .  .

sanding the cut edges to make them smooth .  .  .
and then placing the ends in a pot of boiling water to straighten the curves. 
After a few minutes in the boiling water, the ends were straight. 
While the wood ends were drying .  .  . two of the wood circles were glued together using DAP RapidFuse glue to make the lantern base stronger and .  .  .
were clamped together until dry.
Once dry, the wood base was glued to the inside of the bottom craft ring.
Next, match up the ends of the handle with the top craft ring and drill small holes into the handle.  
Since I didn't have any screws or brads thin enough to fit the width of the handle without splitting the wood, I improvised by making fasteners using floral stem wire. This was done by twirling the end of a two inch piece of floral wire using small floral needle nose pliers and .  .  . 
inserting the opposite end into the craft ring and handle. Then twirling the wire end around for a decorative effect and .  .  .
flattening both twirled wire against the wood craft ring and handle.
And finally,  attached an eight inch craft ring to the bottom exposed rods with hot glue for a matching bottom and top effect.
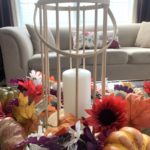
I decided to keep the wood natural. The lantern is so clean and chic looking! 
A nice touch for Fall or .  .  .
any colorful season!  Don't you just love the glow using a remote control 
illuminating light in the bottom of the lantern!   And doesn't the lantern look cool in purple!

Stick around and visit all the other fantastic craft wood projects shown below!


Decorate and More with Tip          Purple Hues and Me                     Pai
       Patina and Paint


  K's Olympic Nest                              Blessings by Me                       The House on Silverado 


        Junk to Gems                           Cloches and Lavender                       Bluesky at Home