Wednesday, March 11, 2015

Decoupaged Bread Basket A La Dollar Tree


I don't bake breads often but when I do I'm always searching for something to put them in at breakfast and dinner time.  I recently picked up some baskets and paper napkins, along with colorful deco mesh (for another project, here) from the Dollar Tree.  I have a couple of projects in mind, one of them to decoupage a basket for my breads using decorative napkins.  It's really a simple and easy project.


All you need is a basket, decorative napkins, white glue, water and sponge . .  . all available at the Dollar Tree.


Separate the white paper backing from the printed side of the napkin.


Lay the napkin printed side up on the basket.  Wet sponge with water and gently tap the napkin down following the layout.  Tear off any excess, and add napkin pieces to fill-in the basket area, one side at a time. It's easy to overlap using this method.


Allow to dry.  Trim off any excess napkin paper.


Once dry, mix one part white glue to 1/4 part water.  Apply mixture using sponge over entire napkin.


You can seal the basket on the outside with glossy varnish, if you want.  I don't know of a sealant that's food safe.


This method of using water and a sponge to apply the napkin is quick and easy. And I found wrinkles to be at a minimum. Once dry, the glue and water mixture as a decoupage, using a sponge to apply, goes on smoothly, too.   

Using this technique, there are so many possibilities to decoupage lots of dollar store baskets and decorative napkins for everyday home usage and for special occasions, inexpensively.


Take a little time to enjoy

and

Happy Crafting!


Tuesday, March 10, 2015

DollarTree Ruffled Decorative Mesh Easter Basket


I discovered colorful decorative mesh at the Dollar Tree.  Five yards for a dollar!  Yes!  Can you believe it?  But I'm tired of making the usual mesh wreaths and wall hangings.  Aren't you?  There are some beautiful creative mesh wreaths and unique wall hangings out there, but let's do something different with that fabric for a change.  Let's have another way to work that mesh.   How about dressing up a woven basket!  What's Easter without a frilly easter basket? 

You will need:
  • Dollar Tree Decorative Mesh (three rolls - 6 inches x 5 yards)
  • Heavy duty thread and needle
  • Scissors
  • Hot glue gun
  • DT basket w/handle
  • Skewer stick
                                        
To make:

Cut  mesh length about 3 1/2 - 4 times the width of the basket. Be generous.

Fold mesh in half, finished edges together. Loop the thread a couple of times into a knot around the end finished edge of mesh. Sew a running basting stitch, over and under, around the finish edges, pulling the thread to gather the mesh into a ruffle as you stitch.  You must use heavy duty thread because the friction of pulling the thread against the nylon mesh might cause the thread to break. Finish the end ruffle by double looping the threads into a knot.


Hot glue the end of the ruffle to the side bottom of the basket, making sure to hold the glued spot until cooled.  Continue gluing the ruffle around the basket, straightening the ruffle sewn edge as you go.

 
Glue on another ruffle as before.


Continue gluing on ruffles until the woven basket is covered depending on the size of the basket.


For the handle:
Cut an 18" length of mesh and using a skewer stick, roll the mesh, beginning at the corner edge, into a rod, lightly gluing the end.

 
Wrap the mesh rod around the handle, gluing the ends at the beginning and end.

Flowers:
Double together approximately 12 inches of mesh, first sewing a tight end rolled together, gathering the fray ends to sew and then loosening the roll as you sew the bottoms together into a swirl effect. You can cut off any loose fibers.  The key to making these flowers is to roll and sew the bottoms together as you roll keeping the flower portion together.  Glue flowers onto basket.

 
Now fill this lovely basket with your favorite Easter goodies!


How cute is this!


Take a little time to enjoy

and

Happy Crafting!



Linking to:  Something-to-talk-about-link-party-7/


Wednesday, March 4, 2015

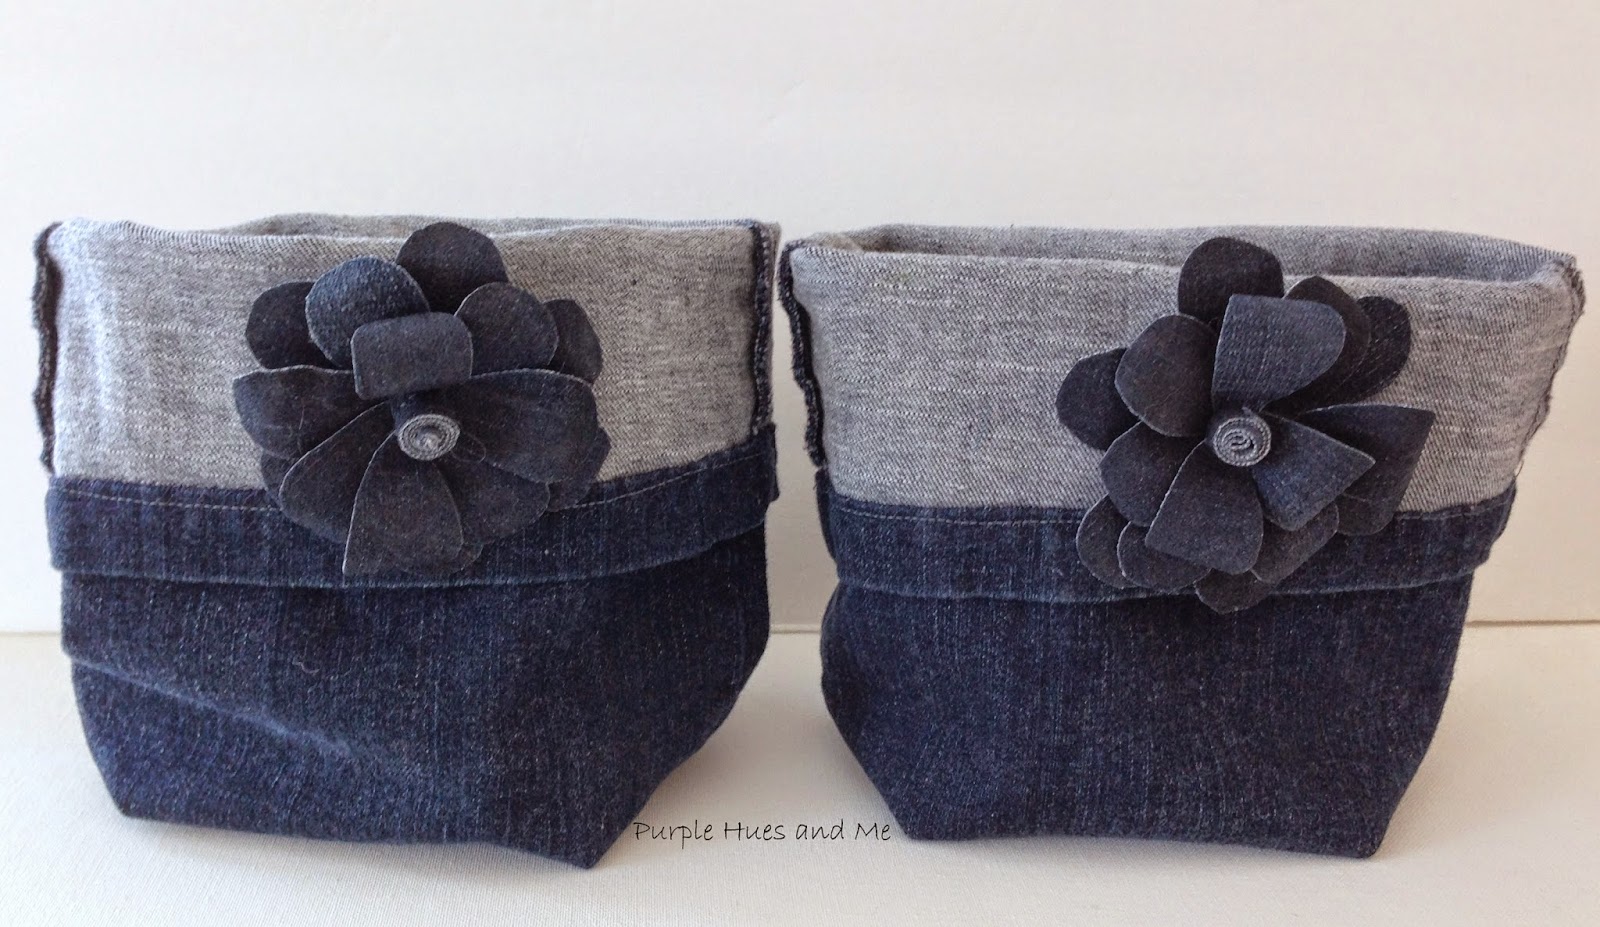
Quick and Easy Hand Sewn Upcycled Denim Storage Basket & Flowers


While getting a bag of old clothes together to donate,  I had an aha moment when I came across a pair of denim jeans and remembered a couple of projects I could make out of them.  I've been stuck in the house during this extremely cold, snowy and icy weather we're having looking for creative things to do.  It's always fun to recycle/upcycle things we have around the house instead of giving them away, don't you think!

First off is the quick and easy hand sewn denim storage baskets made with just three seams.

All you have to do is cut off about twelve inches of the bottom portion legs.
 Turn inside out.

 Then hand stitch a seam about half inch from cut off edge with needle and thread.


Once done, pull open leg and match center seams together, flatten, creating a triangular shape and hand stitch across about two inches from pointed end. Stitch opposite side, making sure the triangles are even.

There you have it .  .  . just three seams!


Turn right side out  .  .  .


and fold down outside hem.   Ta Da!


Add embellishments, if you want!


Here's how to make denim flowers: 


First, we need to make the denim stiff and fray free by brushing scraps with mod podge and allow to dry.

Next, cut out two circles and at least 32 free-hand petals to make two flowers.


Hot glue six petals onto denim circle.


Hot glue additional six petals on top between first layer and continue adding another layer of four petals.  Using a thin pen or stick, roll petals under while pushing up.  Cut a 1/4 inch wide strip about two inches long and roll up, gluing the ends.  Hot glue to center of flower.  Use your fingers to fluff up the petals.


Glue finished flower onto cuff of basket.


Now, enjoy using your denim storage baskets!


Take a little time to enjoy

and

Happy Crafting!


Thursday, February 26, 2015

2015 Year of the Sheep Craft


The Chinese New Year was celebrated last week and 2015 is the year of the sheep, goat and ram. The celebration started on the 19th and lasts for 15 days, ending with a Lantern Festival.  There are so many interesting facts about the year of the sheep.  People born under this Chinese zodiac sign are polite, shy, frank and honest, are highly creative focusing their energy on artistic hobbies.  Their lucky colors include purple, red and brown.  You might think that I am one of the sheep people, but I'm not.  I am a rooster. 

I love watching them. There's a farm a couple of miles from where we live and every time I drive pass it, I make a point of seeing if the sheep are out grazing.  They seem so cute, fluffy and cuddly! Watching them inspired me to make these adorable stuffed sheep.


Isn't she precious!
 
And putting this together was so easy to do!
 
Here's how:
 
Start by right-click copying the pattern for the sheep and paste to Word.  From there, you can adjust the size you want and trace the pieces onto faux fur and felt or fleece fabric.


1.  Cut out the six pieces - one top, two ears, two face, and one body. 
2. With right sides together hand or machine stitch around edge of face. 
3. Once stitched, separate the center fabric and make a slit opening in back and turn inside out.
4.  Stuff face with poly-fil.
5.  Hand-stitch opening close.


6.   Insert needle and embroidery thread from the back to make eyes, positioning thread into a slanted line as pictured.

7.    Move the thread into a v shape and push needle through to the back in the same area.

8.    Continue pushing the needle in the same area, under the fabric for the other eye and make the v shape as before.
 
9.    Move the needle from the back down to the cheek dimples and pull through to the front and back again.

10.  Fold the ears together and sew ends onto top of head.


11.  Gather the body by weaving the needle and thread over and under.

12.  Pull the threads and fabric together leaving an opening to insert the stuffing.

13.  Add stuffing half way to body leaving space.  

14.  Add decorative filler for weight (optional). add more stuffing for a round full look.

15.  Add more stuffing for a round full look and stitch opening close.


To complete the sheep:
        - Make running stitches in top to close and hot glue between ears.
        - Hot glue head to stitched area of body.
        - Use rouge or pink chalk dust to high-light dimples and inner ears.
        - Add bow embellishments.

    I dipped the beige faux fabric in diluted black acrylic paint to make the black sheep on the left.  The fabric became very rough with the watered down paint rubbings and dust smearing on my fingers and everywhere else for that matter.  I don't recommend doing this.  


The Year of the Sheep runs from February 19, 2015 to February 7, 2016.


Wouldn't this be a fun project to make with kids?  Imagine the possibilities!  Don’t ever be afraid to get creative or to try something new. From making simple birthday cards on Shutterfly, to sculpting clay from Michael’s, start small and work your way up if this is a new realm for you or your kids! You never know what idea will turn into a lasting keepsake for the house, or a nice gift for a loved one. These DIY sheep are easy enough that any of you can give it a try!


Take a little time to enjoy

and

Happy Crafting!