Showing posts with label creative craft blog hop. Show all posts

Tuesday, July 15, 2025

Handmade Nylon Iris Flowers


The Iris is one of my favorite flowers. In Greek mythology, Iris is the Goddess of the Rainbow. Iris, is from the Greek word for "rainbow' and is aptly named because of the variety of flower colors available. I love that it comes in a variety of colors including purple - my favorite color! Do you know that the color purple symbolizes royalty, nobility, dignity, wisdom, spirituality, imagination and creativity? Wow! Can you believe creativity is included? I've created lots of flowers out of paper, foam, burlap, ribbon, pinecones, plastic, clay, beads, wire, hot glue, floss, cork, and cans. So I decided to make my newest flower project out of nylon! You know the kind of nylon that stockings are made of! I haven't worn stockings in a very long, long time - but I digress, lol! 

Hello and Welcome to this month's version of our Creative Craft HopI'm so glad you're here! We have two wonderful hosts - Sara @Birdz of a Feather  and  Donna @Modern on Monticello  who take turns every other month! The talented and creative Sara is our host this month!  


If you're visiting from Donna @Modern on Monticello,  wasn't her Harry Potter Flying Key ornament adorable! At the end of my post, you'll be directed to the next Creative Crafter - Sara, sharing her cool Circle Earrings! And be sure to check out all the creative crafters for lots of fabulous ideas!

So let's begin with what you'll need to make a Nylon Iris Flower!

Supplies:
Disclosure I am a participant in the Amazon Services LLC Associates Program, an affiliate advertising program designed to provide a means for us to earn fees by linking to Amazon.com and affiliated sites, this post may contain links. I may receive a very small commission at no cost to you! The affiliate money I earn helps pay my crafting expenses. Thanks so much for your support!

How to:

The showy blooms of the iris are usually in three distinctive layers of three petals from small, medium to large. So start with the small petals first and use floral wire (24, 22, and 18 gauge - the smaller the gauge number, the thicker the wire) to make the petals.
 Use a small round object like a bottle or jar to wrap the wire around. Here, I'm using a jar with diameter of 6" for the small petals. Twist the wire a few times and cut the wire at the base using wire cutters. You will need wires for six upright petals - small (internal), medium - and three downward or drooping petals imitating the structure of a real iris flower.
 Make three petals for each layer. 
Medium - 8"

Large - 11"
Since the petals on the lower level are slightly elongated, I use a smaller jar inside the wire tip to pull on the wire to make it a bit of a pear shape.
Nine petal frames:
Nylons stocking material to wrap around the petal rings.

To cover the rings, take the ends of a nylon in the color you want, stretching the material over the wire frame, making sure the fabric is smooth and tightly stretched. It was easier for me to pull down the back first since that's where the excess fabric is and then pull the front down together. Secure the nylon tightly at the base of the petal with matching thread wrapping and knotting it several times to prevent it from coming loose.


Trim away excess nylon fabric using scissors.


Use green floral tape to cover the thread, fabric and wire.


First layer (small), called standards.
Second layer (medium) of standards - which actually surround the first layer.

Third layer of downward facing petals (falls) 
Repeat the same steps for making these as before.


Since the first set of small petals were white, I decided to add a bit of color to blend in with the shade of the larger petals using transparent glass paint. 
I thought it was a great match and blended in so well!

To assemble the iris flower:
Arrange the smaller petals .  .  .
securing them with floral tape.
Then arrange the medium size petals evenly around the first layer.

Once satisfied with the look, arrange the larger petals (third layer) bending them downward at the base of the flower. Use floral tape to secure all three layers together. Then use your fingers or small rod shapes to gently curve and shape the petals to resemble the natural form of the iris flower.
    

Add additional stem wires to lengthen the flower and wrap the entire stems with green floral tape - from the base of the flower down to the end.

                     
To make the petals, fold a stem wire into a petal shape and secure with wire. You can also squeeze the top of  large circular frame with your hands to mold it into an oval shape, mimicking a leaf.


Use green nylon stocking to stretch it over the oval wire frame and secure with wire or green thread.


To make a iris bud, take a tissue and .  .  .

fold several times to create a small bud. 
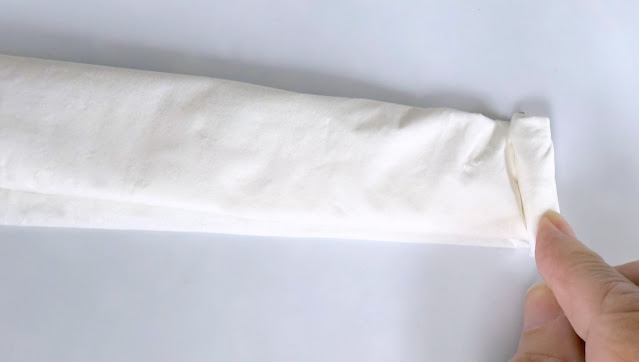
I used a small amount of water to shape the tissue into a bud and then inserted the stem wire. Let dry.

Once dry, cover the bud with a piece of nylon in the same color as the larger petals (falls) securing with thread and floral tape.

Assemble petals and bud with additional floral tape for a 
stunning iris flower look!


I hope you enjoyed how I made these colorful handmade nylon Iris flowers!
Up next is Sara @Birdz of a Feather, our awesome host for this month, sharing her gorgeous Circle Earrings!  Be sure to check Sara's post out and all the creative crafters' projects listed below:


Tuesday, January 14, 2025

Cord Wrapped Wire Basket

Hello and welcome to our first Creative Craft Hop of 2025!  We have two wonderful hosts - Donna @ Modern on Monticello and Sara @Birdz of a Feather who take turns every other month! The lovely and creative Sara is our host this month!  


I'm so glad you're here! If you're coming over from Cecilia @ My Thrift Store Addiction, wasn't her Winter Garden Sign adorable!  

Who doesn't love making handmade baskets for upcoming celebrations like Valentines' Day, Easter and Mother's Day - or just about any type of celebration!  You can rest assured that a handcrafted basket is the perfect all time unique gift! And the best part about making this one is that you will start by using a recycled plastic snack container! I love using recycled items! Don't you? Plus, all of the supplies used came from my stash! A win win all around! So let's get started!

You'll need: 

  • Plastic snack container
  • Hot glue/Fabri-Tac glue
  • 6mm decorative 2ply twist cord
  • 2mm 16" floral wire 
  • 3mm macrame cord
  • Ruler/scissors
  • Wire snips
  • Round shape container
  • Clamps
  • Wire - 28 gauge

Disclosure I am a participant in the Amazon Services LLC Associates Program, an affiliate advertising program designed to provide a means for us to earn fees by linking to Amazon.com and affiliated sites, this post may contain links. I may receive a very small commission at no cost to you! The affiliate money I earn helps pay my crafting expenses. Thanks so much for your support!

How To:

I started with a clean plastic snack container I found in my recycle bin. I have no idea what was in it - but, I think nuts. The container had a nice plastic clear top that I saved for another time. Next, I got out some of my heavy duty floral wire stems (16") and started measuring one to cut out at .  .  .

 six and a quarter inches. Once one stem was cut, I used that one to cut out the others instead of using a ruler to measure each one. It was easier for me that way.
Once all the wires were cut - I guessed how many I needed - I used a small round glass to give the wires a curvy shape.
Next, I added glue around the base of the container and began wrapping the fancy cord on top of the glue .  .  .
three times.
Then I started gluing on one end of the curved floral wire as close to the cord as possible, first using the clock positions of six and twelve. 
         
After those two wires were glued on, used a full 16" floral wire size to glue on the ends in the 3 and 9 positions for the handle. Clamped the wire in place until the glue dried completely. 
Once the glue was dry for the handle, using a wire cutter, snipped the handle in half at the top. Do this for weaving the cord  over and under around the container.  Begin gluing on the rest of the curvy wires (21 odd # total ) - adding glue to the container and pushing the ends of the wires under the cord in a uniform manner around the container. 

Cover those glued on wire ends with one more cord wrap around for a total of four rows. Then begin wrapping a decorative cord over and around one wire and over the next for a decorative wrap look three times around the container.
Once you've made three decorative cords around the wires of the container, begin adding the plain macrame cord - securing one end with glue and then going over and under the wires - once again, around the container.

Continue going over and under, pushing the cord down to close any gaps and to tighten and hide any floral wire that is showing until .  .  .

you've gone over and under around about thirteen times. Then begin adding a row of decorative cording, going over and under around the container .  .  .


three times.

Cutting off the decorative cord excess, adding glue to cord end and securing inside the basket.  


To make the decorative top, starting near the wire handle, begin pulling two wire cords out and two wire cords up. Continue alternating two wire cords out and two cords up around the entire container.
 Once that's done, add a bit of glue to one end of the decorative cord and insert down into the inside of wrapped cords until dry. Then begin going over and under the wire stems, pushing the cord down together to close any gaps as you wrap. Are noticing the decorative star design of the wrapped wire cords? So cool!
Once you've wrapped around enough wires, push the decorative cords down around the wire and add hot glue to secure the cording on the wire. Let dry before moving on to the next one.
Once the glue is completely dry, begin cutting off the excess wire leaving the . . .
wire handles.
To close the handle, use another piece of curvy wire and wrap ends together using 28 gauge wire. Add a bit of hot glue to the wire and handle to keep the handle from coming loose. 

Then begin wrapping the handle with macrame cord. First adding a bit of glue to secure the cord to the handle and . . .
wrapping the cord around and around . . .
the handle. Securing the end with glue.
I'm so loving this design!

These pictures cannot begin to show the amazing sparkling effect of the gold and lavender weaving technique! The finished piece is quite beautiful to see!


Perfect to hold my chocolate candy - or anything to your liking!

I hope you enjoyed my cord wrapped wire basket! Imagine making adorable baskets for any occasion with this cool technique! Give it a try!

Up next is Jenna @ The Painted Apron, sharing her lovely Valentine Tree you don't want to miss! Jenna is so talented with her creative artistry!

And be sure to check out all of the talented bloggers sharing their amazing creations listed below: