Don't you just love the look of fabulous beaded crystals in decor? Like special decorative items around your home enhanced with crystals and gems! I know I do! Who doesn't love a little sparkle, here and there! And it doesn't matter what your style is, either. Elegant, classic, rustic, modern, farmhouse, chic, or glamorous - it will surely fit in! Just imagine a wire clothes hanger turned into a pretty sparkling heart?
Besides, it's is a great upcycle craft using a wire coat hanger and lots of beads and crystals from my stash! And the best part, it's so easy to make!
Join us for our very first Do It Over Designers Blog Hop of 2022! 'Do It Over' Designers is a group of talented bloggers who love to recycle/upcycle/DIY, hosted by Anne @The Apple Street Cottage. It happens the 4th Saturday of every other month and it's all about taking something old and/or unused and 'doing it over' into something new. Anything from fabric, old dishes, and decor to dressers and hutches. Items found in closets, cabinets, barns, garages, yard sales, thrift stores, you name it!
You will need:
- Wire Clothes Hanger
- Wire Cutters (heavy duty)
- Assorted clear beads, crystal rocks and fillers
- Hot Glue Gun/glue sticks
- Parchment paper
- Plastic bowl
- Decorative ribbon for hanging
To make the wire clothes hanger into a heart . . .
start by pulling the middle of the bottom wire of the hanger straight down into a 'V' shape.Then take the top sides of the hanger and begin shaping into a round circle . . .
while bending the hanger hook portion down towards the center.Continue to bend and manipulate the wire into a heart shape using your fingers -
by straightening the top wire portions to form a circle . . .
curving the wire on each side . . .into half circle shapes . . .
then use heavy duty wire cutters to remove the wire hook.
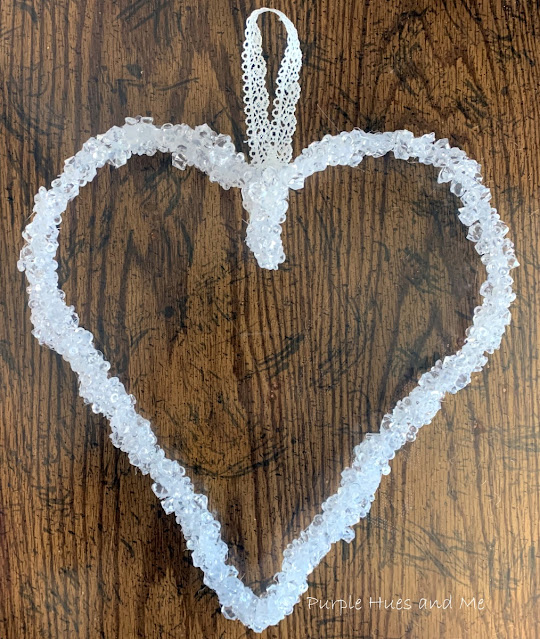
How cool does this handmade wire clothes hanger heart look!
Now it's time to decorate the wire heart by first mixing small crystal filler beads, small crystal rocks, seed bead rod crystals and tiny pearls together and . . .beginning at the center extended twisted wire, apply hot glue in increments of 1 to 2 inches along wire.
Quickly drop a mixture of crystals on top of glue and squeeze beads and wire together. Caution - the glue and beads together will be hot, hot, hot!
So use a piece of parchment paper to help hold the beads together on the wire until the hot glue cools off and dries.
Continue adding the hot glue in increments along the wire and adding the beads - holding in place around the wire with parchment paper.
I found it much easier to use a large bowl to catch the beads while using the parchment paper to squeeze the beads onto the wire. Otherwise, the beads were flying everywhere!
Continue moving around the heart shaped wire, adding glue, holding parchment paper under, dumping beads on the glue and squeezing it all together!
Once you've finished adding beads around the heart shaped wire, check any areas that may be missing beads and add more, especially on the backside.
Add a pretty fabric hanger by folding an 18" piece of decorative ribbon together, tying the ends in a knot. Apply glue to the center heart drop and press the knot onto the glue. Add more glue to the knot and secure with additional beads to cover the knot. Use parchment paper to press the beads and knot down to secure in place.
Have fun with this in your Valentine decor!
Be sure to check out all of the 'Do It Over Designers' listed below to see their lovely "do overs" too!


