Tuesday, December 21, 2021

How to Make a Decorative Ribbon Feather


Have you ever wondered what to do with all those ribbon scraps you've accumulated from wrapping presents and making bows? Have I got a pretty solution! Here's how to make a decorative ribbon feather using ribbon scraps! And you won't believe how pretty and luxurious they look and feel! Perfect to add as an accent on a bow in wrapping presents this holiday season!

Here's how to make ribbon feathers:

Materials:

  • Ribbon - 1.5 width
  • Double-sided tape
  • Ruler
  • Scissors
  • Large safety pin/seam ripper/small brush
  • Cutting board surface 
  • Floral stem wire (16-18 gauge) 

 Let's begin by cutting about 20 - 5" ribbon strips to make one feather. Next, add double sided tape to one of the short end edges. Do this for all the ribbon strips. Then cut the side edges, sometimes called the welting, off of the ribbon strips.

Now it time to start removing the fray threads from the end of the ribbon! 
                            
Use the tip of a large safety pin to scrape the fraying threads off to reveal soft silk-like fibers. I like using a small cutting board as a work surface to scrape the ribbon. It's nice and sturdy and seems to make it all work better.

Use a small brush to help remove the gathered loose threads that bunch up from scraping the ribbon .  .  . 
creating a nice smooth silky fringed piece.
To add the ribbon fringe to stem wire to create the feather, remove the backing from the double-sided tape and place the tip of the wire on the edge of the tape and begin rolling the ribbon fringe around the wire stem .  .  .                                           
until the ribbon fringe is secured around and onto the wire stem. Isn't this beginning to look fabulous!

Continue adding the ribbon fringes to the stem wire, staggering the tape slightly below the previous ribbon fringe. Adding each fringe on - one by one until you have a beautiful looking feather! Have fun making as many feathers as you like!

How cool does this look! Can you believe this is actually ribbon? Place several in a vase for a decorative look or for gift giving, place on a gift wrapped present!
To decorate a wrapped present, tie ribbon around four sides of the box and tie together in center. Dovetail the ends by folding the end ribbon together and cut at the fold on a 45 degree angle down to the ribbon edge. 
Place feathers across top and place bow on top tying around ribbon using the bow wire for a fabulous decorative look! 

Thanks for stopping by

and take a little time to enjoy,

Happy Crafting and Happy Holidays!


Monday, December 13, 2021

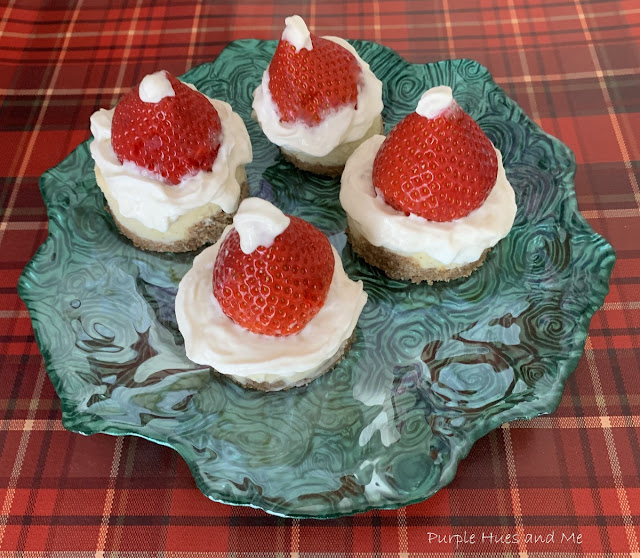
Cheesecake and Strawberry Santa Hats

Happy Holidays Y'all! 
I'm not much of a baker these days, especially since we are empty nesters and have to watch our sugar intake. One thing for sure, though, we all love Christmas treats - whether homemade or store bought! Nothing beats a delicious treat that is homemade! So for this month's Christmas Treats Challenge, hosted by Beverly @Across the Blvd, I decided to look around online for a quick and easy to make homemade treat! And I came across one on the popular Delish site that I loved. Santa Hat Cheesecake Bites! The recipe featured two of my favorite eats - cheesecake and strawberries!  So I have to share my thoughts on making these treats!

The directions said: 1. Make or buy a cheesecake. 2. Make it festive .  .  .
Add a strawberry and some whipped cream on top of cheesecake for the most festive (and adorable) bites ever. How easier can that get! So I bought an 8" cheesecake - I've made cheesecakes before and it can be quite time consuming, so I opted for a tasty store bought one and .  .  .
some luscious strawberries that I rinsed and sliced the tops off of.
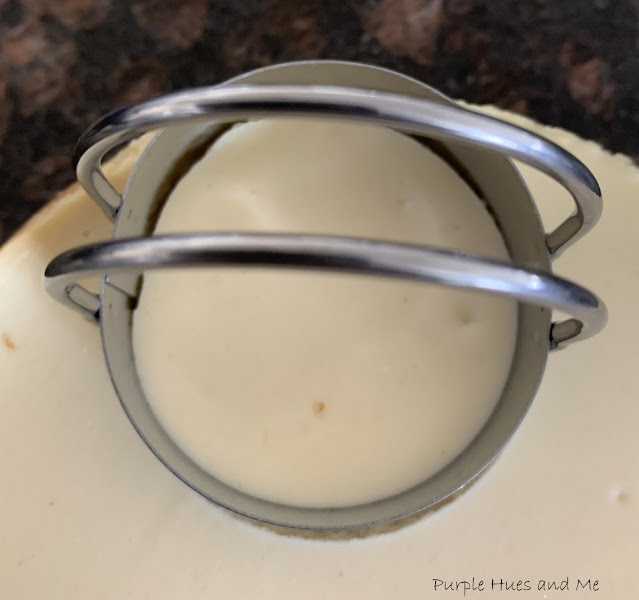
Then, using a small biscuit or round cookie cutter, punched out what I thought would be cute, smaller cheesecakes.
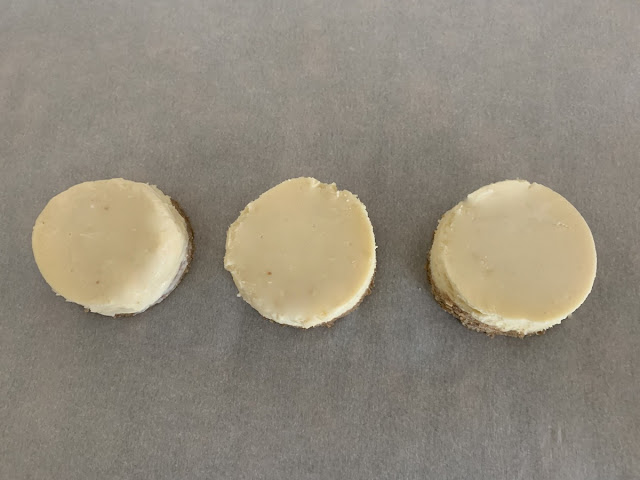
Hmmm .  .  . they didn't say how to get the whole cheesecake bites out of the cutter! I tried several ways- pushing, tapping, placing oil on the inside of cutter, and running a thin blade knife around the inside but never got a clean or smooth edge on any of them!  How disappointing! 
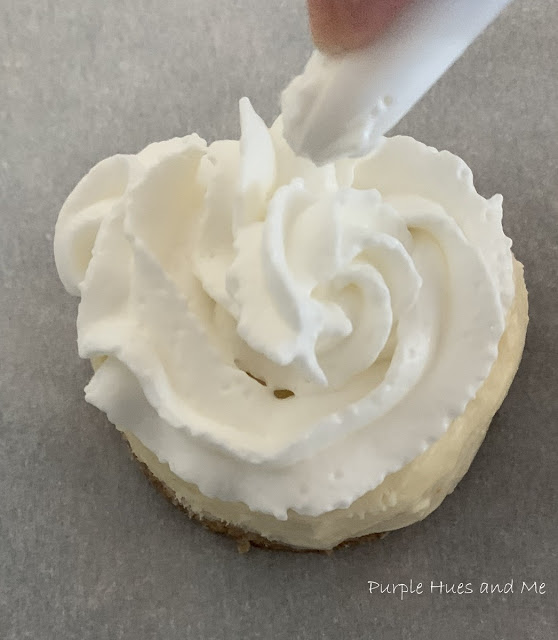
Next, the directions said to fill a piping bag with whipped cream and cover the surface of each cheesecake with a swirl. Oh, and then it said for an even easier way, a can of whipped cream should work just as well. I'm all about easy, so I tried using a can of whipped cream!
Big mistake! Now unless you're planning to eat or serve them right way - and I mean right away, don't use whipped cream in a can!
The whipped cream can swirls started to melt within a very short time. And nothing can stop that, including refrigeration! But I continued on, lol! 
Topped the whipped cream with a strawberry, sliced side down!
I must say, they're beginning to look real cute!

And finally, place a dollop of whipped cream on top of the strawberry and serve!
I showed the decorated cheesecakes to hubby without saying a word and he  immediately said they were Santa treats! Yippee! But the whipped cream swirls were melting! Yuck!
Despite having trouble getting the cheesecake out of the cutters, and the melting of the whipped cream, these treats look adorable - just like Santa hats and are quite delicious, too!  We ate and enjoyed them right away! They were delicious!

But for serving to company - here are my thoughts:  I would try a no-bake cheesecake recipe and use silicone cups to make easily removable pieces and of course, handmade whipped cream, too! It's all about presentation!
Quite tasty, nevertheless!

Each month, a group of creative bloggers co-host a themed blog hop challenge. This month, we’re sharing Christmas Treats. Be sure to click on the links below to check out more delicious treats!

Beverly | Across the Blvd   - Mini Cherry Cheesecake Cookie Cups
Gail | Purple Hues and Me - Cheesecake and Strawberry Santa Hats
Joanne | Slices of Life - Eggnog Snickerdoodle Cookies
Julie | Sum of Their Stories - No Fuss Coconut Ice
Terri | Christmas Tree Lane -  Easy Gingerbread Roll Out Cookies 

Friday, December 10, 2021

How To Make a Christmas Snowman Hat Centerpiece


This post first appeared on Bowdabrablog.com where I'm on the Design Team.

Create your own fun Christmas Snowman Hat by upcycling a coffee can and plastic plate - decorating it with a pretty Bowdabra bow and embellishments. Isn't it always enjoyable and fulfilling to use items from around the house that you might throw out and create beautiful holiday decor! And the plastic plate is available from Target for seventy-nine cents! What a bargain to make!

Materials needed:
   

Remove the paper wrapping from the coffee can and wash both the can and plate and dry thoroughly.
Paint the outer surface of the coffee can and .  .  .
plastic plate using a multi-surface acrylic paint in black. Let dry. 
Next, Turn the can upside down and run a bead of hot glue around the open edge of the coffee can and center it on the plate and let dry. Then glue on a strip of ribbon, starting and ending at the back seam of the can - which will be the back of the snowman hat. I also glued on a strip of snowflake trim to the center of the ribbon (not shown) for a decorative effect.
To make the bow:  Fold a 24" piece of Bowdabra bow wire in half and lay it in the Bowdabra, tucking ends under. Next, cut a 50" strip of 2.5" wide ribbon. I centered a strip of snowflake trim along the center of the ribbon and glued in place. Then measure 6"  for the tail and make a crease in the middle, twist and place the ribbon at the crease mark down into the center of the Bowdabra. 

To make a bow loop, fold over and make a crease into the ribbon creating a three inch loop, twisting and placing into the Bowdabra. 
Next, fold and twist the other side at the same width creating another loop. Then twist and make two more loops on either side for a total of four loops ending with a 6" tail. Scrunch the ribbon down with the Bowdabra wand.
While the bow is still in the Bowdabra, thread the two loose ends of the Bowdabra bow wire through the loop at the other end. Pull the Bowdabra bow wire tightly while the bow is still in the Bowdabra and gently pull the bow out of the Bowdabra.
Separate the loose wire ends and take them around to the back of the bow and tie in several knots to secure. Cut off excess wire. Dovetail the ribbon ends by folding the end ribbon together and cut at the fold on an angle down to the opposite ribbon edge.

Fluff and straighten the bow!

 Then glue the bow onto the center bottom side of the can and plate using hot glue.
Glue on additional embellishments to decorate the hat! And you're all set!
The perfect holiday decorative centerpiece!

Thanks for stopping by

and take a little time to enjoy,

Happy Holiday Crafting!


Wednesday, December 1, 2021

DIY Chunky Glitter Glue Ornaments

Hello and Welcome! It's the first Wednesday of December and you know what that means - it's time for our monthly DIY Challenge hosted by Terrie @Decorate & More with Tip! In case you don't know about this DIY Challenge, on the 1st Wednesday of each month, a group of talented bloggers create something based on a theme or material that's selected by Terri! This month's theme is a Christmas Challenge - make anything pertaining to Christmas! How easy is that!
I love making my own Christmas tree ornaments each year! To my excitement this year, I got a purple flocked tree! I'm loving this tree - although I wish it was taller. 

It's only 4.5 feet tall and needs to sit on a table.  I wanted to do something different from my usual purple decorated white trees that I've done in the past like here, here, and here.  So I came up with the color theme of using rich purple and lavender hues. But finding different or unique purple ornaments in stores was quite elusive this year. This is not the year for purple ornaments! So I decided to make my own. And you won't believe what I used to make lots of handcrafted ornaments! Super Chunky Glitter Glue!


It's called Fairy Princess and doesn't it look gorgeous! Look at all those purple glitter tones! I found it at Hobby Lobby and bought all that they had from two stores - six bottles! That was more than enough to decorate thirty clear plastic ornaments. That's it! Nothing else was needed! Of course you'll need bamboo sticks and styrofoam to hold them while they dry - but that's a given.
Here's how:
I started with six large 3.27" clear plastic ornaments I had in my stash to see how they would look.  I didn't bother to clean or wipe the ornaments down first. They looked clean to me, lol!  I just started adding about an inch or more of the glitter glue along the middle of the ornament all the way around. 
As I was applying the glue, I began adding 'rays' or extensions of glue along each side. 
All I can say is have fun creating the design along the middle! You can make it as thick as you want! It doesn't have to be perfect!
See how the chunky glitter adds dimension and texture to the surface of the ornament? It's really a cool look and feel once it's dry.  
If you're satisfied with the glitter glue design, hang the ornaments up to dry. I used a rod to hang these ornaments over an empty plastic container.
Once these were dry, I loved the look so much that I bought a box of 24 smaller ornaments to make more!
 

And when I finished decorating them, used bamboo sticks stuck in packing styrofoam to hold them up while drying.


It took a good 24 hours for the glitter glue to dry!

Don't they look pretty on my purple flocked tree!


Oh, and you can check out how I made these lovely velvet wrapped ornaments here!


Be sure to visit  all the creative bloggers listed below to see their wonderful Christmas creations, too:

Decorate and More with Tip

Patina and Paint

Blue Sky at Home

The House House

Blessings By Me

Purple Hues and Me

Sweet Southern Grace

LeCultivateur

Hootshack