Tuesday, December 5, 2023

Winter Mittens Door Hanger


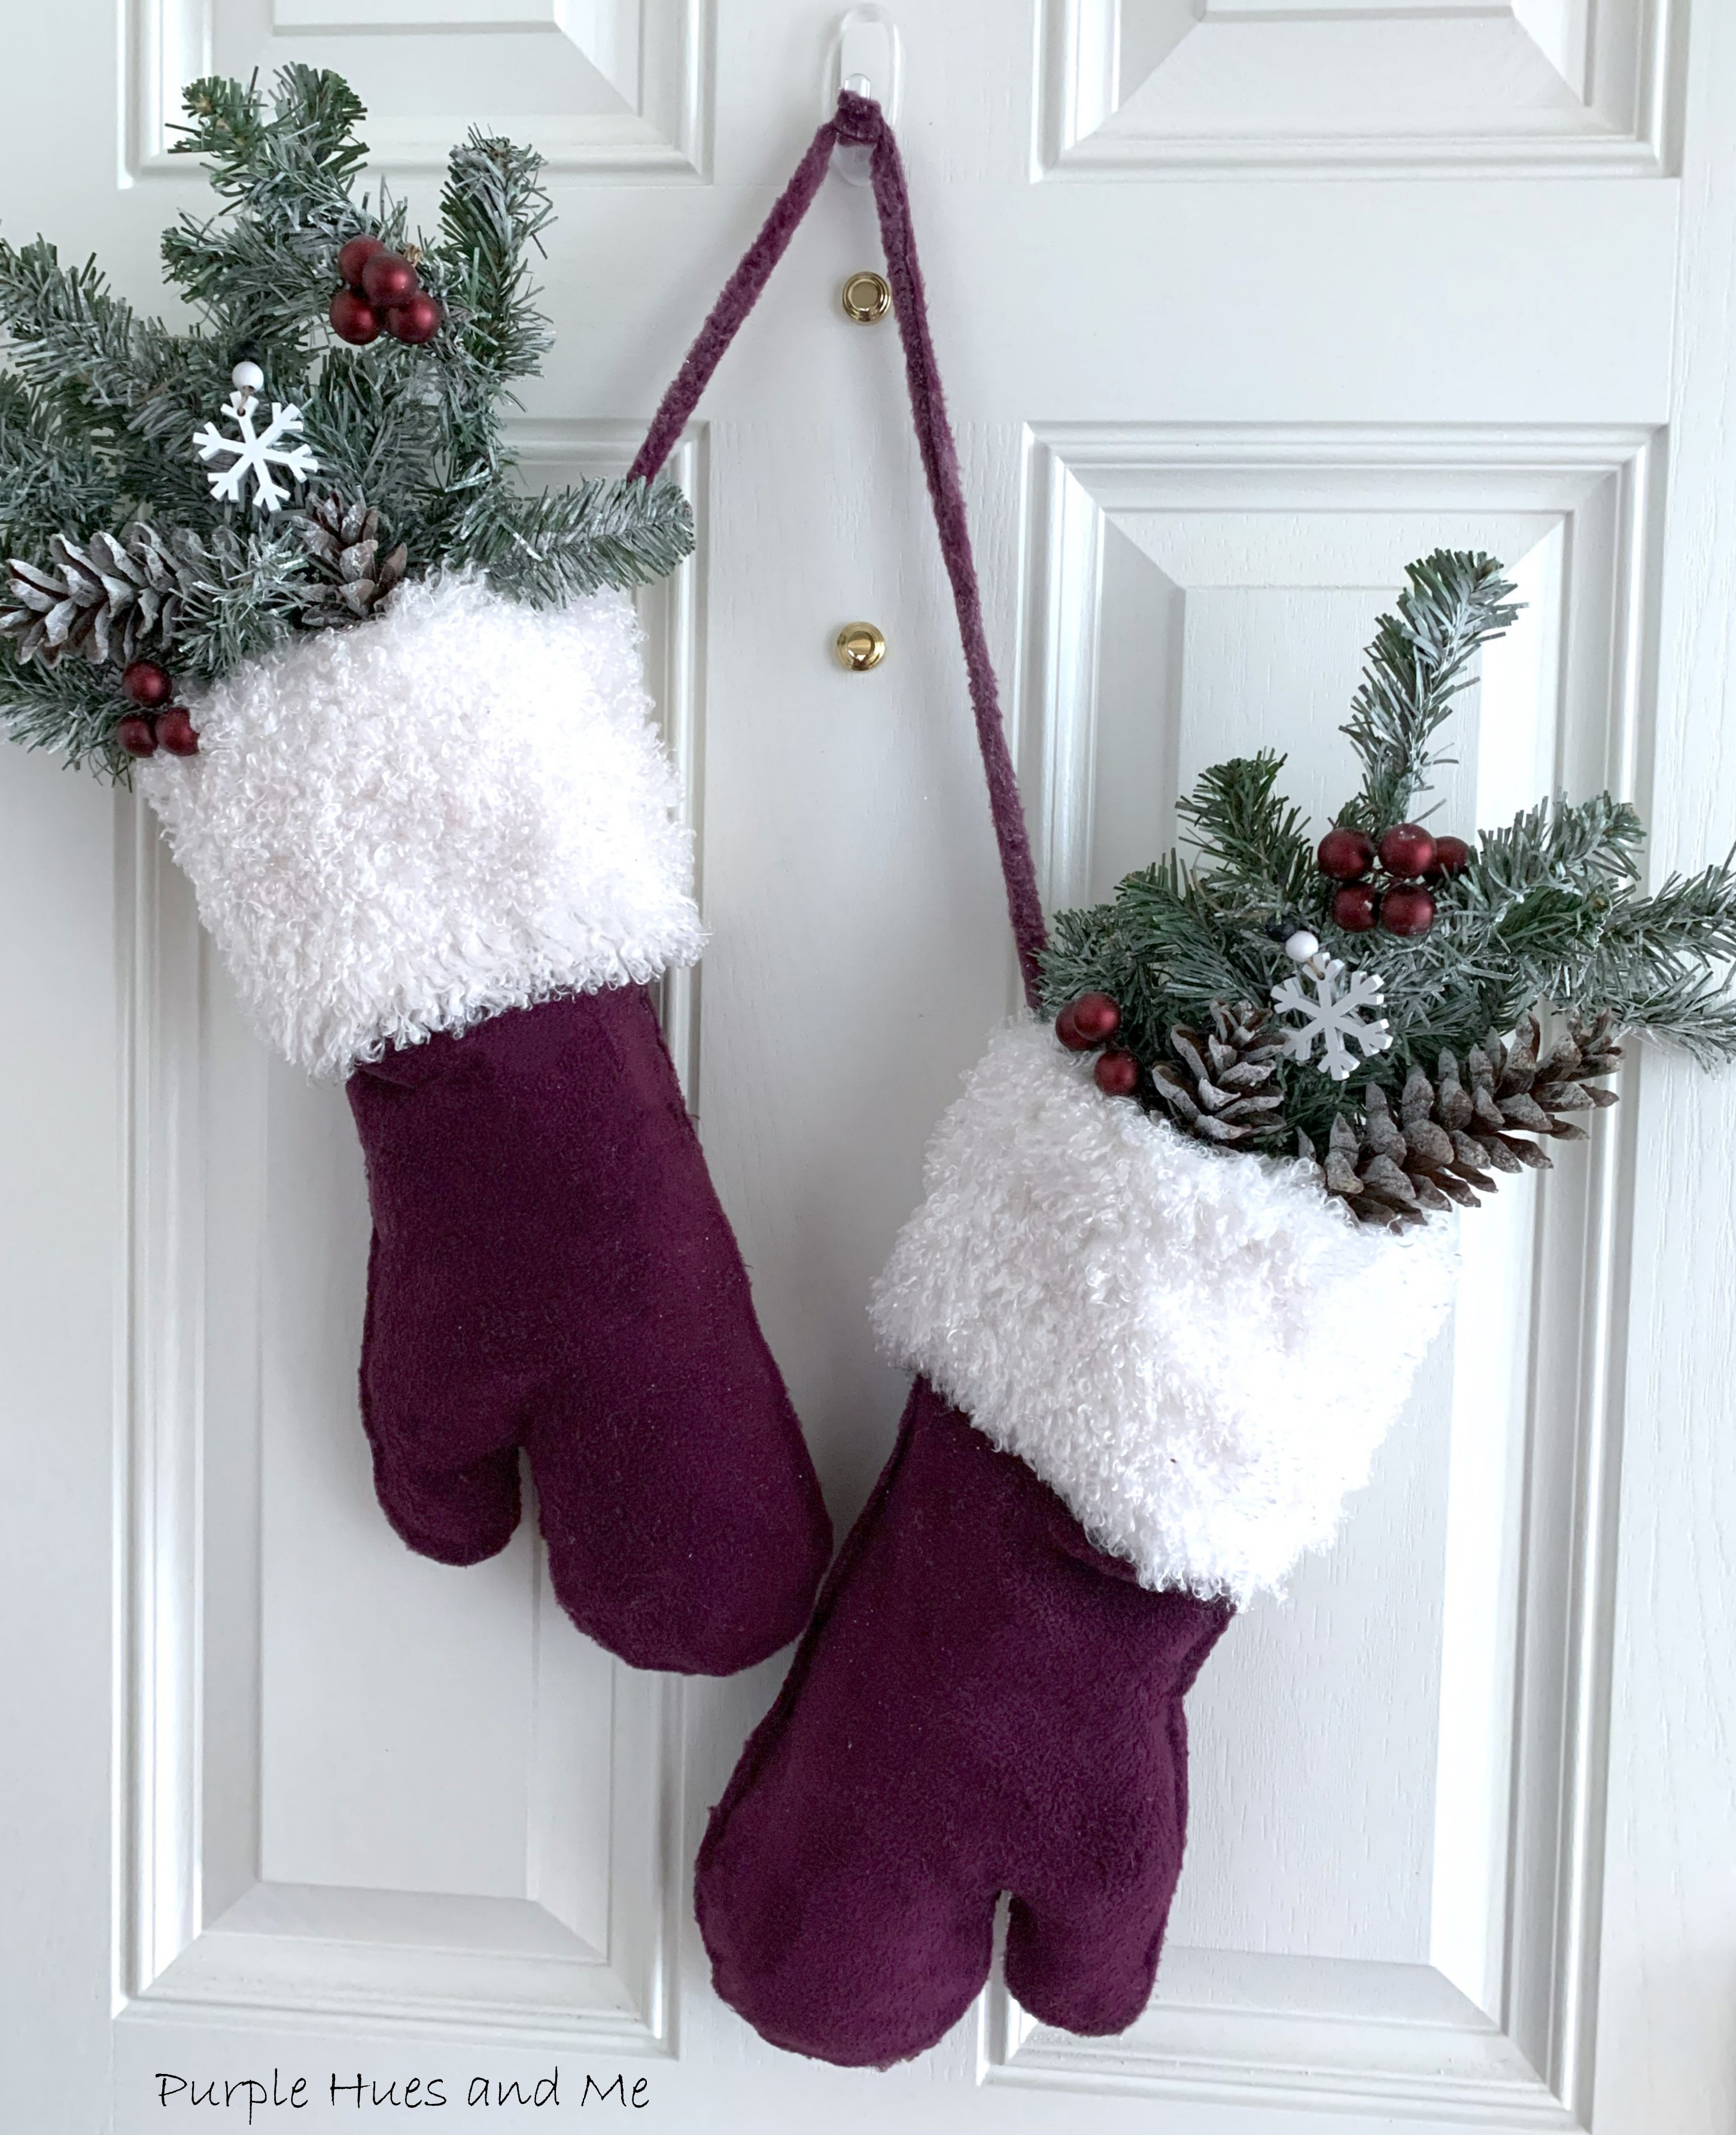
Nothing says winter more than cute fuzzy mittens! And to create an adorable wall hanger with mittens and winter florals is just the perfect way to welcome Winter! It's really a super easy winter fun craft to make using leftover scraps! A cute addition to winter seasonal decor!

Welcome to our monthly   Sustainable Craft Challenge hosted by Julie @Sum of their Stories!  This challenge is all about sustainable crafting! Each month is themed and all projects must have some sort of a sustainable element to them. This could be an upcycling or recycling element, or something that reduces waste, uses leftovers, etc. The theme for the month of December is Winter 


Materials Used:
  • Fleece fabric scraps
  • Kitchen oven mitt
  • Faux fur fabric scraps
  • Chalk pen
  • Fusible Interfacing (heavy weight)
  • Parchment paper
  • Fabri-Tac Fabric glue
  • Fiberfil 
  • Safety pins
  • Frosted pinecones, faux frosted evergreens, berries, snowflakes 


This adorable mittens door hanger was made using fleece scraps from a tree skirt I had started, but never completed. Maybe I will after making this. You know how that goes. lol! 


At first I thought I would draw a mitten using my hand as a guide but unfortunately, I can't draw a straight line, let alone a mitten pattern from my hand, so .  .

I cheated and used one of my kitchen oven mitts to draw a pattern using a chalk pen. This is one scrap piece. It looks really thick - and it is! I made three more - using four scrap pieces to .  .  .
create two mittens, front and back.
Then glued them together using Fabri-Tac fabric glue.


Once the glue was dry, I tried turning the mittens inside out, but they looked so much smaller than what I wanted so I turned them back to the original side.

For the cuffs, I'm also using a piece of faux fur scraps from a few years ago that was leftover from covering a stool - you can read about that here.
I wanted a 6" finished cuff - nice and deep, so I cut the faux fur fabric 12" in height. Then I measured around the width of the mitten, which was also 12" plus an inch for overlap and got 13 inches for the length of each cuff. Be sure to use short snips when cutting the faux fur to avoid cutting into the fur pile too much. You want a nice overhang of the faux fur at the edges.

Since the faux fur fabric was soft and flexible, I used fusible heavy weight interfacing to make the cuffs sturdier.  

I started by laying parchment paper on top of the interfacing and ironing the interfacing to the back of the faux fur fabric using a "hot" temperature setting to seal.
Once the interfacing is set, fold over the fur cuff, interfacing sides together. Then place the edge of the mitten about an inch from the end and edge of the fur. Apply fabric glue to both sides of the mitten being careful to not close the top of the mitten. You might want to insert cardboard into the top of the mitten to avoid closing it up. Then fold over the fur cuff onto the glued area of the mitten, smoothing it out. Overlap the faux fur edges and glue in place. Let dry. I laid down a heavy book on top to make sure all glued areas were sealed together. 
 Lightly stuff the mitten including the thumb area with poly-fil.
Repeat above steps for the second mitten.

. Each mitten is approximately 6.5" wide by 15" tall. This does not include the fleece selvage edge rope. 


I was able to cut off the selvage edge from the fleece to hang the mittens. I love that it's actually a self-finished edge that won't unravel and fray. Perfect to use for hanging.
Attach the fleece selvage ends to inside of each mittens using safety pins.

Then fill the mittens with frosted winter evergreens and pinecones plus berries, adding a couple of decorative snowflakes to the mix!


It truly is a wonderful Winter theme decoration for any home! 
Perfect to display during cold winter months!


Be sure to check out all the creative Winter Sustainable Crafts projects from my fellow crafters listed below:

Julie @Sum of Their Stories   Upcycled Block  Shelf Sitter

Terri @Our Good   Life  Plastic Bottle Snowman

Christine @Christine’s Crafts   DIY Waterless Snow Globes

Gail @Purple Hues and Me   Winter Mittens Door Hanger

Stephanie @Crazy Little Love Birds   Upcycling a Metal Can Into Winter Scenery

T’onna @Sew Crafty Crochet   Crochet Snowman Ornament

Marci @Old Rock Farmhouse   Friendsmas Fizzy Soaking Salt


Saturday, November 25, 2023

Woven Christmas Tree Shaped Basket


I stopped by the Goodwill this past summer and was pleasantly surprised to find a woven Christmas Tree shaped basket there. I had never seen anything like it before. It was four dollars, which I thought was a bargain so I immediately scooped it up. How often do you find something actually handcrafted! Although it did have a few flaws. The open woven wood vines design was done a bit uneven and then I discovered that the actual tree shape is wire and the vines were used in a somewhat decorative effect. The basket also had a fabric lining ( a bit cruddy) that was attached incorrectly (my thought) with the hem and seams on the outside that you can easily see. Plus the handle was attached to the outside of the basket with a rough, crooked look instead of being attached on the inside. It was as if the woven basket should have been turned inside out, lol! 


Nevertheless, I thought it was the perfect item to "do over" for this month's 'Do It Over' Designers project. Sadly, this will be our last hop for this year!

The "Do It Over Designers" is a group of creative bloggers who love to recycle/upcycle/ DIY, hosted by Anne @The Apple Street Cottage. It happens the 4th Saturday of every other month and it's all about taking something old and/or unused and 'doing it over' into something new. Anything from fabric, old dishes, and decor, to dressers and hutches. Items found in closets, cabinets, barns, garages, yard sales, thrift stores, you name it! Thanks Anne for hosting this wonderful blog hop!

The materials I used to do over this tree shaped basket include:
         Disclosure I am a participant in the Amazon Services LLC Associates Program, an affiliate advertising program designed to provide a means for us to earn fees by linking to Amazon.com and affiliated sites, this post may contain links. I may receive a very small commission at no cost to you! The affiliate money I earn helps pay my crafting expenses. Thanks so much for your support!

The first thing I did was to remove the lining of the basket. I thought I would make a pattern out of the pieces and create a new lining for the basket. But once the lining was out, I liked how the basket looked without it. Although I'm keeping the lining - I might want to use it as a pattern to add a new lining later. 


 Since there were too many wide openings on the bottom of the basket where small items could fall out I decided to make a cover for the inside base. I used a piece of cardboard from a Dell computer box (this type of box is much sturdier than an Amazon box) and drew around the base of the basket.

Then used a ruler to draw straight lines to cut out.
I had to bend the cardboard a bit to get it inside, but it was a perfect fit.

Next, I had some old plaid metallic taffeta fabric I had gotten a few years ago when plaid was ultra popular for the holidays that I used to cover the cardboard. I love the straight lines of the fabric - which is easy to follow in cutting out!
And easy to glue onto the cardboard, too!
I think I made a good choice in covering the bottom of the basket!
Don't you just love this red, green and gold trim to outline the shape of the basket! I followed the design sections of the wire, one area at a time to glue on the trim using Fabric-Tac fabric glue.


It was so easy to bend and glue on the trim around the corners.

Once one side of the basket was done, the other side was next. By the way, did you notice how straight the handle is now? All I had to do was move the handle in place. Silly me!

Once the trim was attached, I wanted to add decorative flowers to the top of the tree design using the fabric and chenille stems. To make two flowers, fold five chenille stems in half and cut at the middle.  

Fold each of the cut stems in half, twisting the bottom stems together. Push up the stem where connected to form a  flower shaped petal, pinching the fold at the tip. Then add glue around one side of the chenille petal. 
And press the chenille stem petal to fabric.
Use parchment paper to smooth the chenille stem petal down. The parchment paper helps in not getting too much glue on hands. Let dry.
        
Five chenille stem petals are used for one flower.
Once the glue is dry, cut out the chenille stem petals around the bottom of the stems.
Then shape each petals by bending slightly.

Use a small round object to cut out a small circle for the center of the flower. Then paint on glue to the fabric circle and edges to avoid fraying (not shown). Let dry. 
Once the fabric circle is dry, glue on the tips of each petal to the circle to .  .  .
form the flower.


Next, roll up a chenille stem tightly into a ball, adding glue to one side and place in the center of the flower. Add glue to the center back of the flower and attach to the center top of the basket, just under the handle. Hold in place (several seconds) until secure. Isn't this adorable!


I'm loving how this Woven Christmas Tree Shaped Basket "do over" turned out and hope you do, too!


Perfect to hold small Christmas presents or holiday what-nots!


Be sure to visit all of this month's creative Projects by the 

"Do It Over Designers" listed below:

Purple Hues & Me

Sum of Their Stories

Color Me Thrifty

The Apple Street Cottage

Pandora’s Box

Birdz of a Feather

Exquisitely Unremarkable

Little Vintage Cottage

Modern on Monticello


     Happy Holidays!

Thursday, November 16, 2023

DIY Sparkling Holly Tree Centerpiece


Capture the beauty of the holidays with this sparkling holly tree centerpiece! And the fun part about this adorable handcrafted see thru  holly tree is that it lights up to enhance the sparkly hollies! How cool does that sound!
Welcome to this months' Creative Craft Hop hosted by Sara @Birdz of a Feather!

If you're coming over from Donna's @Modern on Monticello, wasn't her beaded Christmas Tree Garland adorable!

You've heard the old Christmas saying - "deck the halls with boughs of holly." Holly leaves and berries at Christmas time has always created a festive touch to any decor! But like everything these days, variations are created. I've always loved the design of hollies and wanted to use it in my Creative Craft project for this month. I hope you enjoy how I made a sparkling holly tree centerpiece!

Materials:

  • Clear Plastic Cone Tree (15")
  • Holly templates/
  • Clear Stencil Sheets
  • Chipboard sheet
  • Rhinestone Mesh Ribbon
  • Fabri-Tac Fabric glue
  • Gorilla Super Glue with brush
  • Twinkle lights

I started with a simple dreamy look using a clear plastic cone tree. Something I've had in my stash since ACMoore closed several years ago. Back then, it was labeled a "doll body" I believe for fifty cents or a dollar. They seem to be hard to find now or available at a ridiculous high price!

Next, I found a holly leaf template online that I copied, pasted in Word and printed out - one 4" long and the other 3.5" long and slightly thinner for the top. Then I cut them out on chipboard (heavy duty cardboard) so that they would stay intact while cutting the hollies out on the transparent sheets. 


At first I thought it would be easier to draw the hollies on the plastic sheets and then cut them out, but after drawing them using a magic marker and then a chalk marker and making a mess on the plastic, I decided it would be much easier to cut the clear sheets in strips and place the template on top and cut them out. Things went much quicker doing it that way.

Once the hollies were cut out, it was time to add the faux rhinestone mesh. That is, after I cut the mesh in strips. Once the strips were cut out, the next step was to measure the strip along the edges of the holly and cut out. Then add glue to the back and apply it to the edge of the plastic leaf - holding in place for several seconds until set.
                                                                         
Continue measuring each holly edge shape with the rhinestone mesh strip, cutting it and  .  .  .    
gluing in place until  .  .  .
all edges are covered.
Then, glue on a rhinestone strip in the middle .  .  . 
leaving a space on the end as a decorative effect for the holly leaf.
Then make lots more. You can imagine that this is a very tedious project. I turned on my music and made nearly fifty hollies.
Starting at the bottom with a bit of overhang on the cone, I used brush-on Gorilla Super glue that's made for clear plastics and has a quick hold of around 45 seconds to attach the hollies. No way can you use a glue that takes time to set up and I was wary of hot glue melting the plastic. 
Gluing on ten hollies for the first row.
Beginning of the second row - overlapping where two hollies meet.
Gluing on ten hollies for the second row.


Adding the third row of 10 hollies.
Fourth row of six hollies.
Fifth row of four and  .   .   .


finally added four, 3.5" hollies to the top. One in front and one in back, and one on each side for a total of forty four hollies.
How cool is this to have the bottom hollies flair out. 
It really does make for a beautiful and unique centerpiece.
Since this creation is more wintry because of the sparking stone mesh edging on clear plastic hollies and not overly Christmasy, you can use it well beyond the holidays! It makes for a striking centerpiece in your decor!

And for a bit of extra sparkle at night, add LED twinkle lights!
I hope you enjoyed how I made this sparkling holly tree centerpiece. Up next is Cecilia @My Thrift Store Addiction sharing her fabulous Mini Wreaths Napkin Rings. 

Be sure to visit all of the wonderful projects listed below for more inspiration!