Saturday, July 23, 2022

DIY Boho Placemat Wall Decor


Boho wall designs are very trendy and popular especially on sites like Pottery Barn and Anthropologie. Most are handmade by talented weavers from Africa and Vietnam. I was looking at a few and noticed that some of the woven bases looked like placemats I have but no longer use. They had become a bit discolored and tattered in places. But not too bad to use for this month's Do It Over Designers upcycle project. DIY Boho Placemat Wall Decor

Thursday, July 21, 2022

Purple and White Checkered Ornaments

Christmas in July is one of my favorite times of the year - it's when I get to
create adorable Christmas ornaments free of any stress and hassles! You know I love purple, so most of the ornaments I create have some type of purple color
going on, lol! For this project, I pulled out my checkerboard stencil, wood rounds, silicone molds, and purple and white paints to create a simple but beautiful ornament to hang on my tree. And the best part - you can make some too using any paint color you like to go with your holiday decor, just like I have!

Monday, July 11, 2022

Tattoo Clear Ornaments DIY


It's Christmas in July and time to get an early start on making Christmas crafts! Have I got a fun way to decorate clear glass ornaments using temporary tattoos! And the best part, you won't believe how easy it is to make your very own tattoos in any design and color. All you need is a inkjet or laser printer and plain tattoo paper - and of course, clear glass ornaments! Does that sound cool to you? It does to me!

Wednesday, July 6, 2022

Tin Can Flowers Wreath Copycat


One of my favorite past-time is looking at upscale online stores to get inspiration and ideas on how to re-create an item for far less than what they're asking!
Who doesn't love saving money by making a good knock-off or copycat craft? Take a look at this group of iron roses wreaths I found on Anthropologie and its' sister off-shoot, Terrain:

Disclosure I am a participant in the Amazon Services LLC Associates Program, an affiliate advertising program designed to provide a means for us to earn fees by linking to Amazon.com and affiliated sites, this post may contain links. I may receive a very small commission at no cost to you! The affiliate money I earn helps pay my crafting expenses. Thanks so much for your support!

Right now, they're on sale for $28.50-$43.50, but were originally $38-$58.00. Sale or no sale, sorry, I would never buy a door wreath - especially one that cost this much! They're too easy to make! And having made lots of flowers from soda and beer cans like here, herehere, here, here, and here, re-creating one similar  is right on time for this month's theme of High End Dupes or Look for Less for our DIY Challenge hosted by Terrie @Decorate and More with Tip

In case you don't know about this DIY Challenge, on the 1st Wednesday of each month, a group of talented bloggers create something based on a theme or material that's selected by Terri!

Check out how I made my look for less:

Materials:
  • Clean Aluminum Soda Cans 
  • Utility knife/craft knife
  • Craft Scissors
  • Flower Petal 3" punch
  • Flower paper template
  • Ball stylus
  • Foam (thick)
  • White Chalk, lavender, yellow, orchid acrylic craft paint/brush
  • Quick Hold - all purpose quick dry adhesive
  • Wire floral hoops - 14" and 10"

 How to:

Begin by washing out the soda cans to remove any sticky residue and let dry. Using a craft or x-acto knife, make a slice near the edge of the can big enough for a scissor blade. *CAUTION:  Be very careful handling the sharp edges of cut cans.


Using craft or old scissors, cut around top or bottom to remove.


Then cut through the length of can to .  .  .
remove the remaining end. Finish sides by cutting off any slivers or jagged edges.
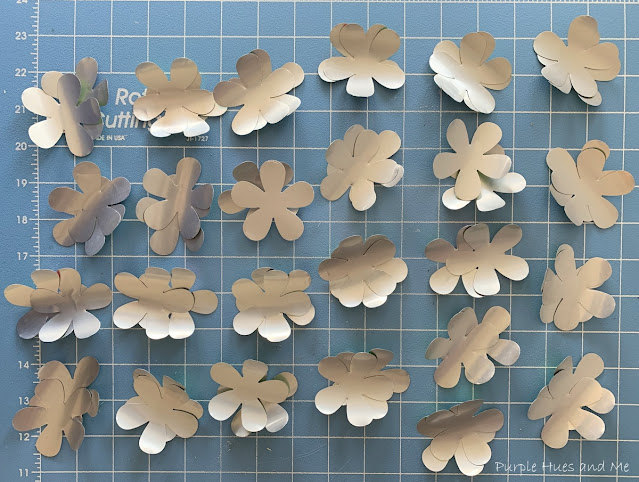
Next, insert the aluminum can piece into the flower puncher to punch-out one large flower with five petals!  
I was able to punch out four flower petals per can.

I think I used 15 empty soda cans (which I got from my son) for this project. But I lost count.


Since the base of the flowers were larger and had more petals, I had to make a paper template to manually cutout .  .  . 


enough larger flowers to fit around the wire wreaths.

Next, paint flower petals with white multi-surface acrylic paint first to cover lettering that's on the back and to help with adhesion of the acrylic paint colors. Let dry. The petals will take on a different feel and texture, almost leather-like, by painting them! 


Then, paint the flowers three different colors and let dry. The colors of the wreaths at Anthropologie were quite muted with what looked like blemishes throughout. But I wanted to have more vibrant shades for mine - so I used lavender, orchid and yellow!


Once dry, roll the top flower petals on thick foam  with a ball stylus to mimic the dimensional look of the top petals. You can also use the end of a cooking utensil or round handle if you don't have a ball stylus.

To assemble, start with the larger petal and then one of the smaller petals, gluing on top, straggling it in between petals.  Then glue on the curved shaped petal using Quick Hold contact adhesive from the makers of E6000.

I glued on this one on the wire floral hoop to see how it would work.


And then placed flowers around the hoop. But I didn't glued them down like this, but.  .  .

glued down each flower separately, petal tip to petal tip, alternating colors.


The wreaths at Anthropologie were pictured individually - a larger one, by itself and .  .  .


 then with a smaller wreath inside the larger one.


I love creating something for less money, and making these wreaths costs me the price of the floral hoops @$3.99 and $2.99 each. The empty soda cans were throw-a-ways from my son which were free!  Everything else, I considered free since I already had them on hand. Not bad - if I say so myself!


Be sure to check out all of the wonderful High End Dupes projects from the participants in this month DIY Challenge:


Tuesday, July 5, 2022

Reusable Cleaning Wipes DIY


Before paper towels, there were cleaning rags. A little history on how paper towels originated - paper towels were created by the Scott Paper Company which manufactured toilet tissues back in the 1930's. I won't go into the lengthy background details, but paper towels came about from an entire railroad car full of toilet tissues rolled too thick for toilet use. After some thought and research, Scott ordered the thick paper perforated into small towel-size sheets and sold them as disposable paper towels.

From that incident, it would take many years before paper towels replaced cloth towels for kitchen use, but they resulted in the creation of a large new grocery category. Given the convenience they brought to the average household, paper towels gained acceptance before replacing cloth towels." Today, it's hard to think of life without paper towels.