Monday, December 14, 2020

Two Ingredient Fudge With Nuts

Fudge is a must-have for the Christmas holidays! The original fudge recipe was found on the back of a can of Eagle Brand condensed milk many, many years ago and it included vanilla extract and a dash of salt for a total of four ingredients! But my dear friend, Sandra - may she continue to rest in heavenly peace -  made it for her yearly Christmas gathering we attended on Christmas day for over forty years using just two ingredients. In addition to a huge meal, she made lots of cakes and holiday treats and gave us "care" packages to take home, too. 

I loved Sandra's fudge but had never attempted to make it until now. She didn't put nuts in her fudge but I love, love, love nuts so I had to add them in my batch! But you can use this two ingredient fudge recipe as a base and put your own spin on it with your favorite nuts, candies or flavorings!

The two ingredient fudge recipe is as easy as 1-2-3-4!

1 - Melt

2 - Stir

3 - Spoon

4 - Cool

How easy is that! So let's get started!

                                Two Ingredient Fudge with Nuts

Ingredients

  • 1 bag of semi-sweet chocolate chips Ghirardelli 12oz
  • 1 can sweetened condensed milk 14oz.
  • 1 cup chopped pecans

Instructions
  • Place chocolate chips in microwave safe bowl. Pour sweetened condensed milk over the chocolate chips.
  • Microwave on high for 60 seconds. Stir well.
  • Microwave on high for 60 more seconds. Stir well again.
  • If the chocolate chips are not completely melted, continue to microwave at 30 seconds intervals until chocolate is completely melted.
  • Quickly add the chopped nuts and stir them in.
  • Spoon fudge into silicone molds and smooth out the top with a small spatula.
Refrigerate for a few hours or overnight until set and then remove.
Notes
I thought the fudge would look prettier using molds, but since it doesn't get really hard like a chocolate bar, the shapes were not as defined and came out a bit irregular.  So if you don't want to use molds, just spread evenly in an 8 or 9inch  parchment lined pan to chill.

But I do like that the fudge is in molded shaped pieces instead of a bark-like treat, making for special holiday treats to eat or give as gifts!


I tried a few larger snowflake molds with leftover fudge .  .  .
I would also add more nuts. My nut taste buds were not quite satisfied with just a cup!
Be sure to store the fudge in an airtight container. Place parchment paper between each layer so the fudge doesn't stick together. Enjoy!


This Two Ingredient Fudge with Nuts recipe is perfect for our December's Christmas Treats Recipe Challenge Blog Hop!

Be sure to check out more delicious Christmas treats from our Co-Hosts listed below:


You are invited to the Inlinkz link party!

Click here to enter

Wednesday, December 2, 2020

Seed Beads Design Ornament


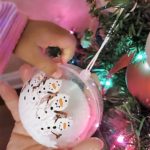
Welcome to my first DIY Challenge hosted by Terrie @Decorate and More with Tip! I'm so excited to be here! On the first Wednesday of the month, Terrie hosts a DIY Challenge with a group of talented bloggers who  love to create budget friendly décor for their homes.   For December's challenge we were tasked with turning a clear, plain ornament into something beautiful! If you're coming over from Decorate and More with Tip, isn't Terrie's keepsake snowmen ornament adorable? I'm sure her grandaughter will cherish it forever! 
Disclosure I am a participant in the Amazon Services LLC Associates Program, an affiliate advertising program designed to provide a means for us to earn fees by linking to Amazon.com and affiliated sites, this post may contain links. I may receive a very small commission at no cost to you! The affiliate money I earn helps pay my crafting expenses. Thanks so much for your support!

Embellishing plain, clear ornaments is a fun craft with unlimited decorative possibilities!  And  it's right up my alley, too! I love handcrafted ornaments and over the years I've decorated clear ornaments into some lovely pieces you can see here, here, and here

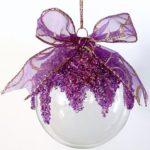
But this time I wanted to do something a bit more daring but easy, too! So I'm going to turn a clear plain ornament into a magical work of art using clear seed beads, alcohol ink and glue.  It's a great way to customize a clear ornament with my favorite color, purple! I think you will be amazed at the end results! It kooks quite stunning, I must say!

Materials Used:

Let's start with gathering some of those old glass seed beads from my stash! AC Moore was famous for bins of seed beads on sale! I loved shopping there and I miss the sixty percent coupons they were famous for, too! Next, on the list is the alcohol inks - of course in my favorite shades of purple. Plus a container to mix the beads and alcohol in, and something to stir with - like a skewer stick you can throw away afterwards!

Now let me show you how to make this adorable ornament! First, pour the seed beads into a clean jar - I used an empty yogurt jar that I cleaned with alcohol to remove any oils and residue. Then add a few drops of alcohol ink to the beads. Alcohol inks can be used to change the color on a variety of surfaces including plastics and glass. It's also fast drying and fade resistant! But you don't want to add too much at one time - a little bit goes a long way to color objects!
Once you've added a few drops, blend in the ink by stirring with a skewer stick to see how the color looks. Add more ink . .  .
if needed, stirring the ink and beads together.
Have fun adding different inks until .  .  .
you have the shade you like!
Then dump the dyed beads on a sheet of parchment paper to dry thoroughly. Remember that the alcohol ink will stain so be careful until the beads dry.
While the beads are drying, wipe the clear ornament with alcohol to remove any oils or residue and let dry.
Next, using the tip of the Quick Hold glue as an applicator, begin spreading the glue on the ornament in a decorative design from just below where the bottom of the cap is to midway.
I wanted the seed beads to look like they are dripping from a bead covered area on the ornament.
Once the glue is applied, generously sprinkle the beads on the glue while holding the ornament over a bowl to catch the loose ones.
Once you've sprinkle all the beads onto the glue,  pour the loose ones back into the jar to continue adding more beads to the design.
Use your fingers or the back of an old spoon to lightly push the beads down into the glue for extra adhesion and uniformity.
When finished adding the beads, sprinkle a bit of glitter on for added glitz! 
 Prop the ornament on top of a cup to dry. 
Once the glue is dry, seal the beads with a layer of Mod Podge and let dry. 
Replace the ornament cap - (I rubbed a bit of gold Rub n Buff on the cap to match the gold in the ribbon) then cut a piece of wire edge from a strip of ribbon to make a hanging loop and .  .  .
 small bow with tails to glue onto the top.
How pretty is this!

This challenge was so much fun! Next up is Cindy @ Cloches and Lavender sharing a fabulous way of using silver leaf on ornaments! 

 Be sure to click on each of the creative bloggers listed below to see how they transformed their clear ornaments for this challenge


Cloches and Lavender                Pallet and Pantry 

       
Patina and Paint                 Paula's Handmade Space 


The House House                         B4 and Afters


Saturday, November 28, 2020

Wood Sled Makeover

Decorative sleds are so Christmasy! Actually, they're not just for Christmas but the whole winter season! It's perfect as a accent piece for the front porch,  entryway, living room or den.  And it can be hung, leaned or used as a table centerpiece, too. 

I found an old wooden sled - not a real one - for decorative purposes only - at a moving sale several years ago. It looked like someone had tried to sand off whatever was on it!  I couldn't resist for just two dollars! After all, it was solid wood! Imagine what you can do with a piece like that!


But first it needed to be spruced up a bit - by sanding the wood until nice and smooth. And then putting my own touch on it by dry brushing the sled with a gray chalk paint. - no primer needed! 
It's looking better already! You know what they say about what a little paint will do!

Next, I needed to add some embellishments and got out my trusty Bowdabra to make a bow .  .  . first by adding 12" tails with dovetail ends .  .  .


and then the actual bow made with 4, four inch loops and 2, three inch loops!

Don't you just love the ribbon design? How cool is this look .  .  . 

with bows, berries and stems!
Decorating an old sled is lots of fun - the possibilities are almost unlimited. 

The finished piece adds a warm, charming and nostalgic atmosphere to any area and is a nice alternative to the usual Christmas decor!

Welcome back to the 'Do It Over' Designers, a group of talented bloggers who love to recycle/upcycle/DIY, hosted by Anne @The Apple Street Cottage. It's all about taking something old and/or unused and 'doing it over' into something new. Anything from fabric, old dishes, and decor to dressers and hutches. Items found in closets, barns, garages, yard sales, thrift stores, you name it! Sounds like fun, doesn't it!

Be sure to check out all the 'Do It Over Designers' listed below to see their lovely "do overs" too!  

Ann - The Apple Street Cottage - The Christmas Mermaid


Chas - Chas’ Crazy Creations - DIY Kids Advent Calendar

Cindy - Cloches & Lavender - Curbside Hutch

Donna - Modern on Monticello - DIY Festive Santa Painted Basket

Gail - Purple Hues & Me - Wood Sled Makeover

Kathleen - Our Hopeful Home - Farmhouse Corbel Shelf Refinish

Kim - Exquisitely Unremarkable - Fan Blade Junk Angel DIY

Naush - Doodle Buddies - DIY Faux Farmhouse Crate From a Carton

Patti - Pandora’s Box - Recycling Your Throw-aways!

Sara - Birdz of a Feather - Tiered Plant Stand DIY