Showing posts with label Ornaments. Show all posts

Saturday, March 25, 2023

Retro Candlestick Holder Using Ornaments


Hey everybody, it's that time again to share our "Do Over" projects! In case you didn't know, the "Do It Over Designers" is a group of talented bloggers who love to recycle/upcycle/DIY, hosted by Anne @The Apple Street Cottage. It happens the 4th Saturday of every other month and it's all about taking something old and/or unused and 'doing it over' into something new. Anything from fabric, old dishes, and decor, to dressers and hutches. Items found in closets, cabinets, barns, garages, yard sales, thrift stores, you name it!


For my "do over" project, I'm taking clear Christmas ornaments that I've had for awhile, unused, and turning them into retro candlestick holders! You've probably seen similar candlesticks with a unique retro look - a bubble glass or hand blown effect - like this clear ribbed one:

or in colors!

Imagine bringing a unique vintage look into your space with uniquely handmade candlestick holders using clear plastic ornaments! And you won't believe how easy they are to make, either!

Materials:
Clear plastic ornaments
Small plastic candleholders
Hot knife/tempered glass mat work surface
Parchment paper
Quick dry clear multi-purpose glue

Disclosure I am a participant in the Amazon Services LLC Associates Program, an affiliate advertising program designed to provide a means for us to earn fees by linking to Amazon.com and affiliated sites, this post may contain links. I may receive a very small commission at no cost to you! The affiliate money I earn helps pay my crafting expenses. Thanks so much for your support!

How to:
Let's begin by sorting out the clear plastic ornaments you want to use to make the candlesticks. I picked out several ribbed ones and a few plain round ones, too!

Don't you just love this ribbed onion shaped ornament!

But first, for safety, when working with a hot knife, it's recommended to use a tempered glass mat to ensure your work area will not be damaged from heat or cuts. I also like to use parchment paper, too! That being said, begin by removing the protruding section (where the ornament hanger attaches) of the ornament using the hot knife.

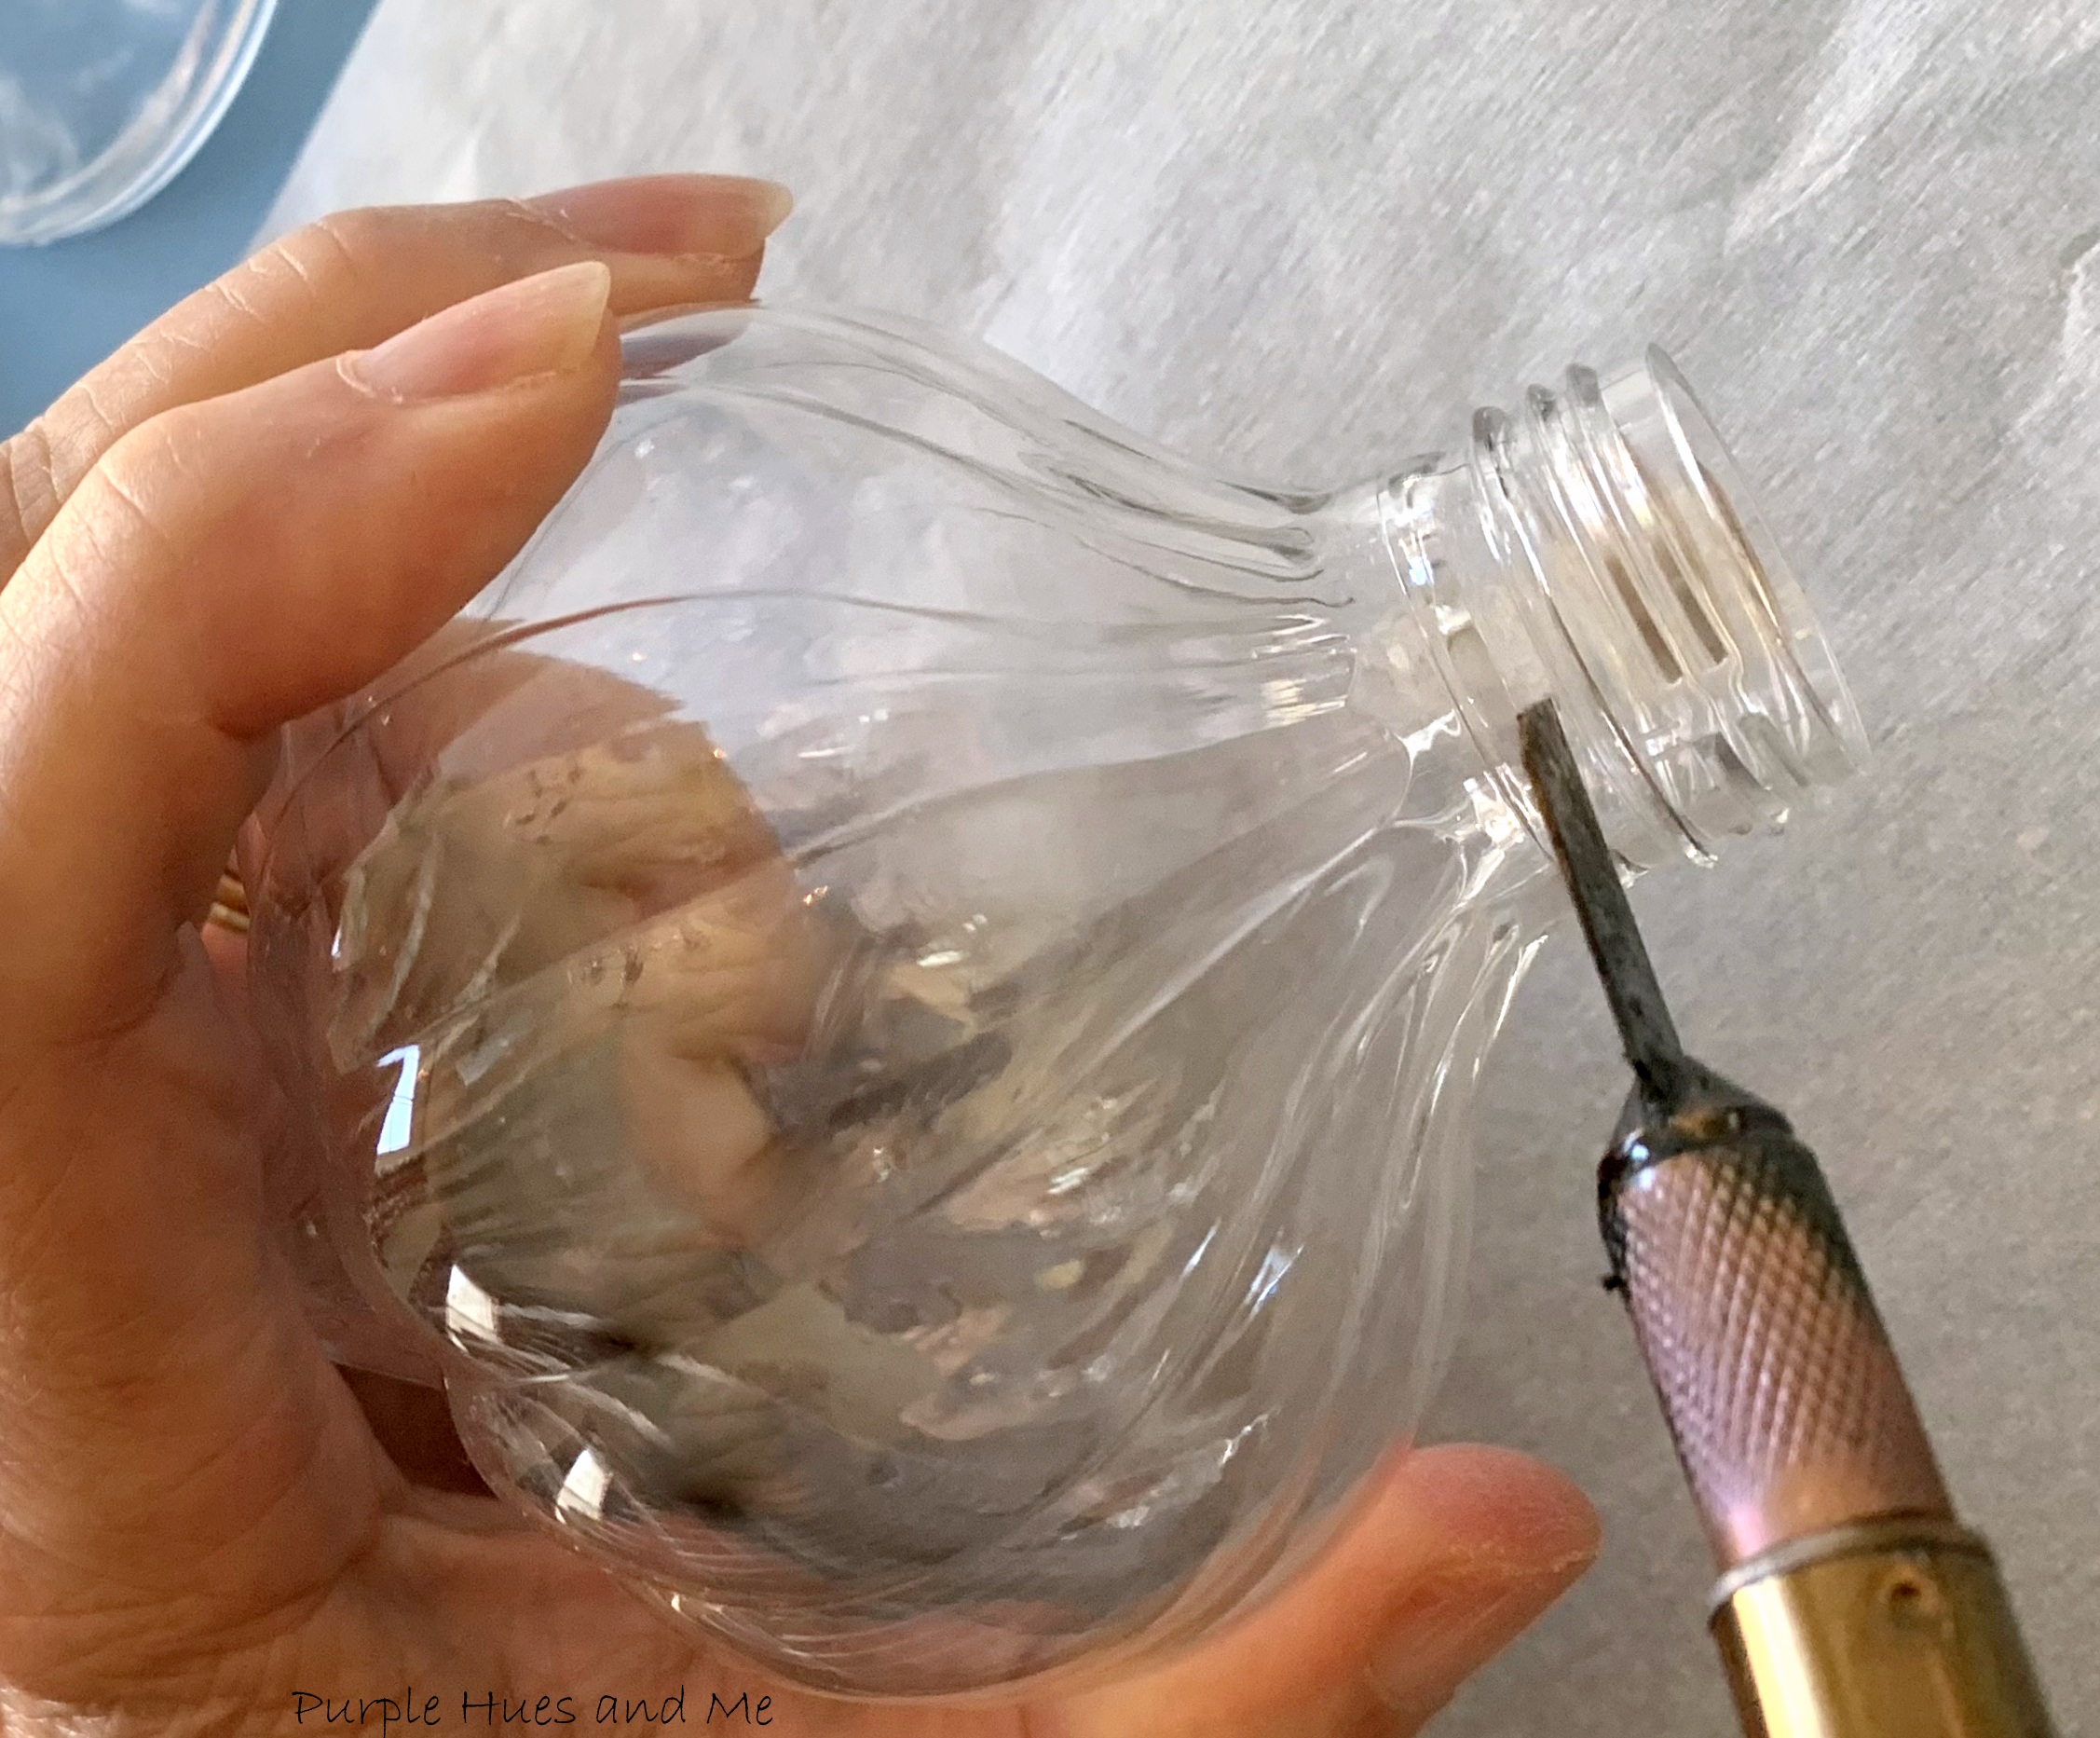
Cutting all the way .  .  .
through!
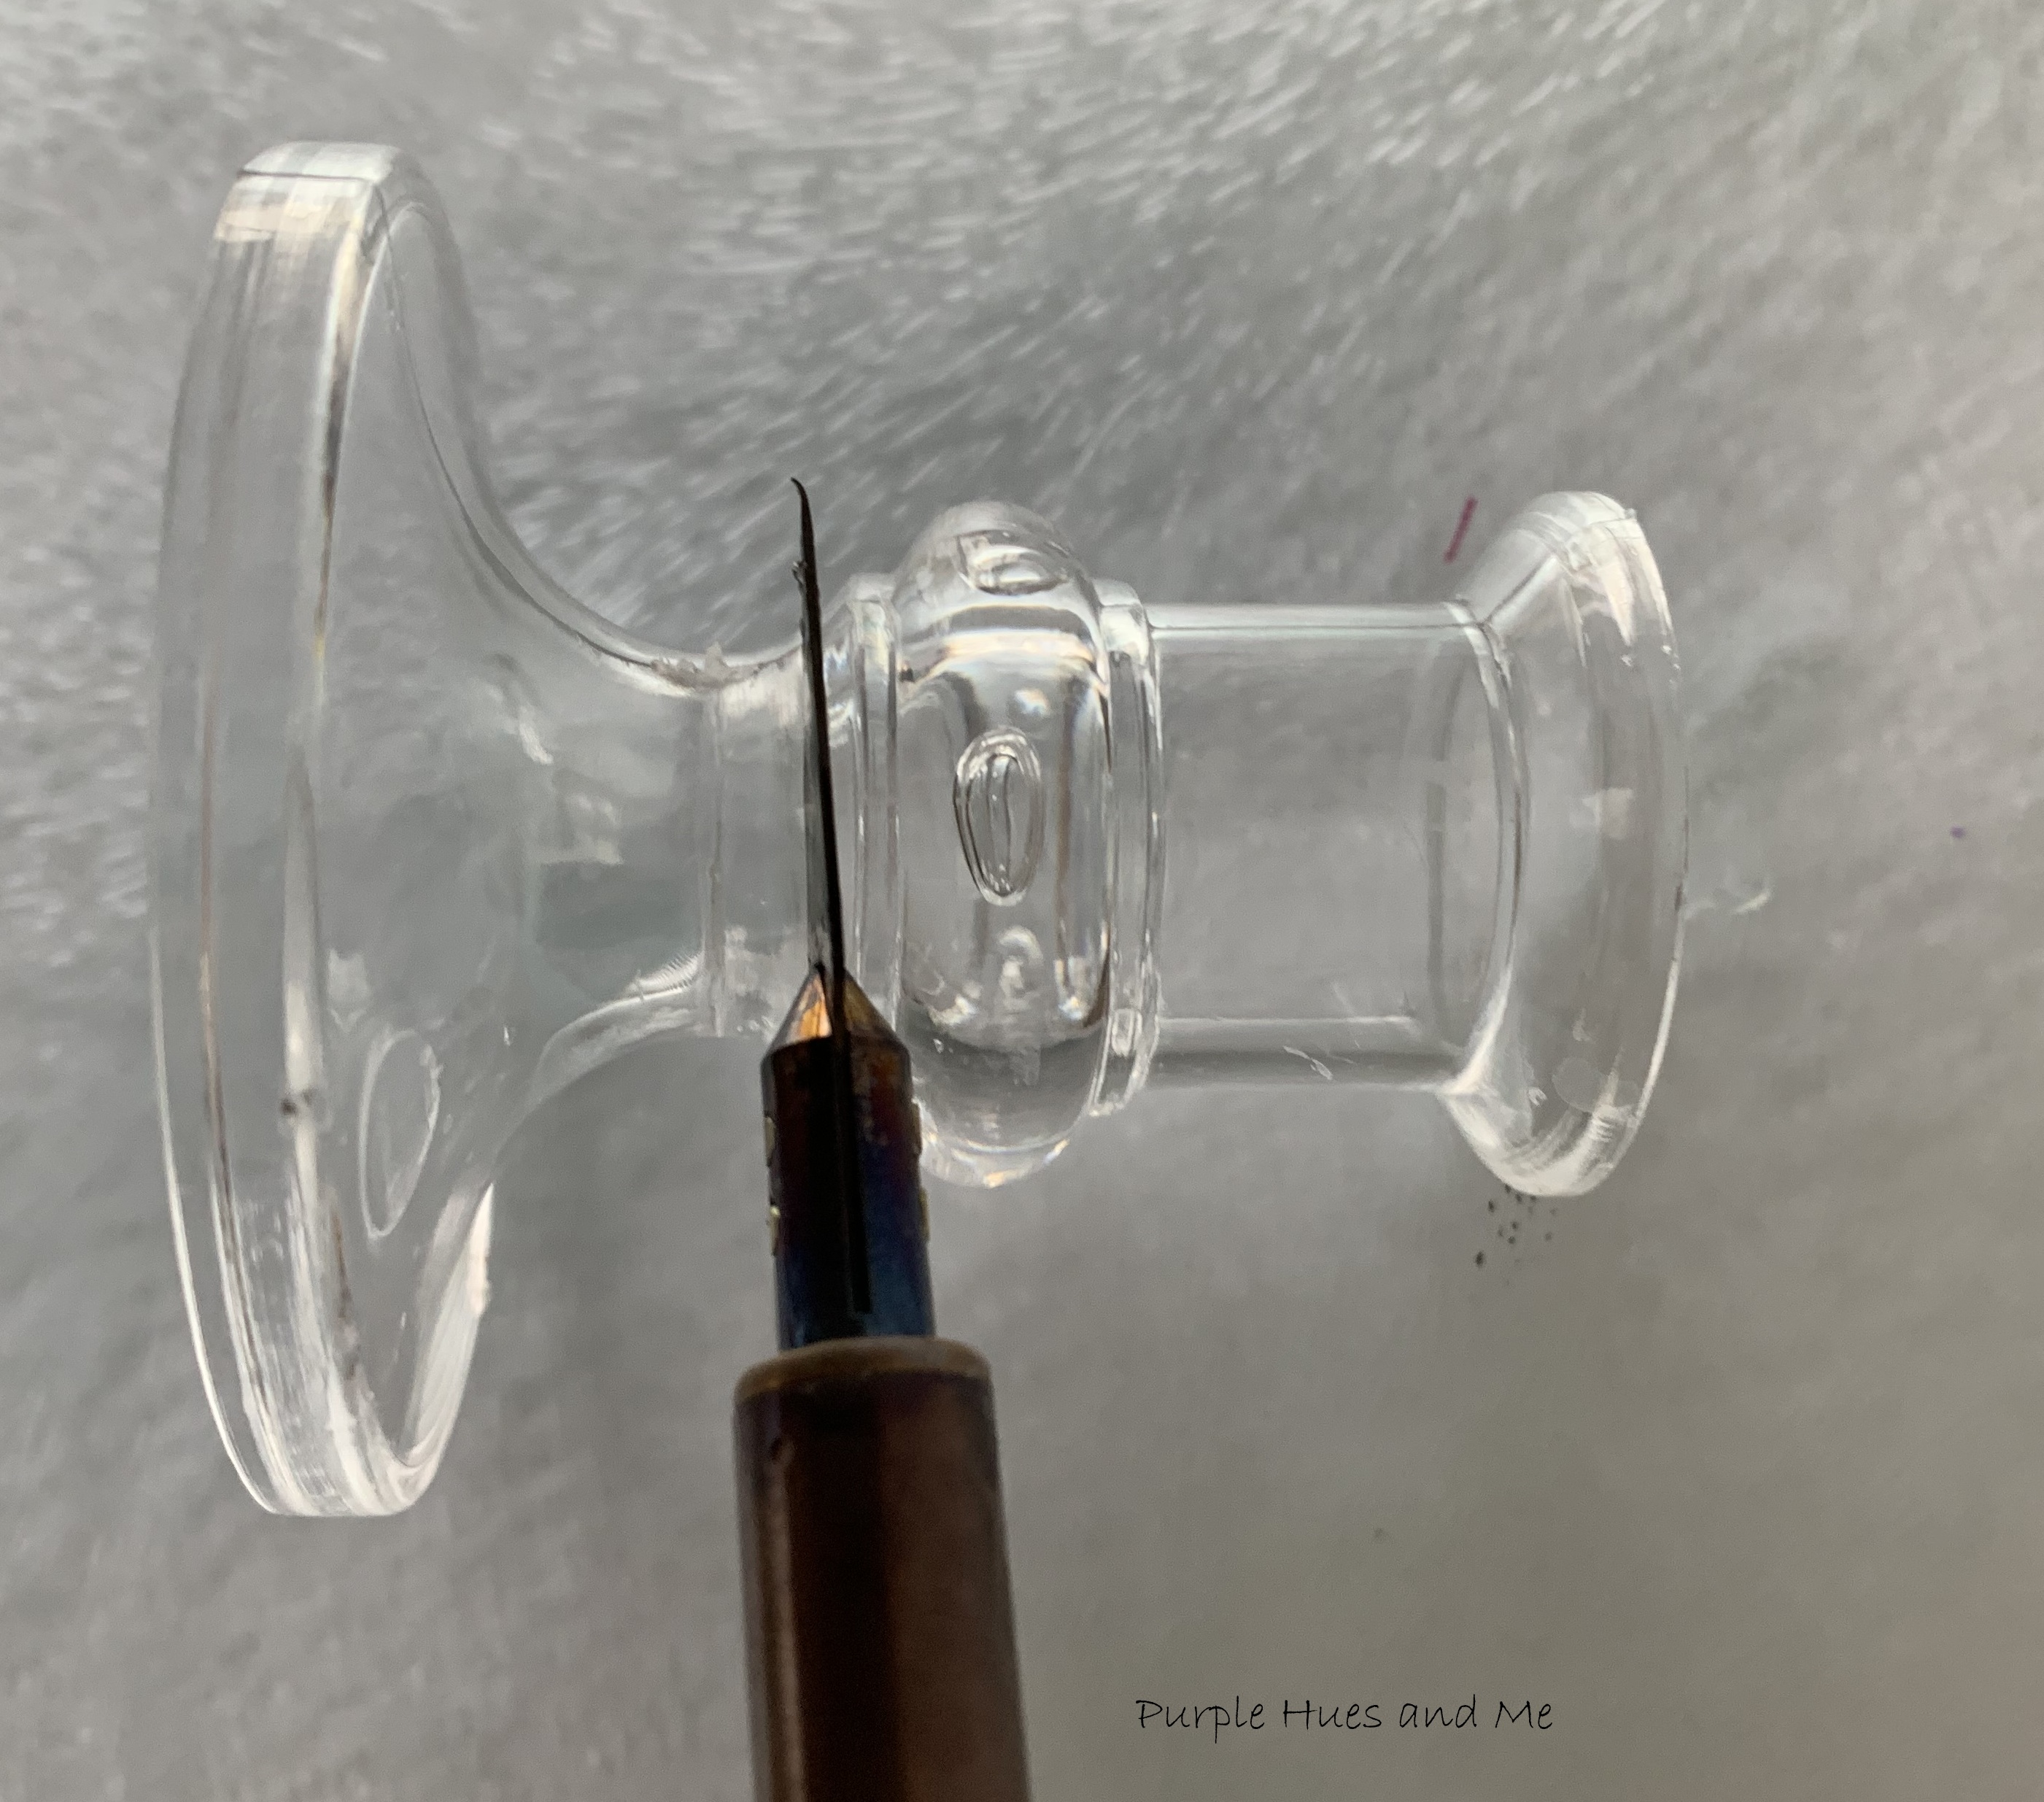
Once the hanger section has been removed begin building the candlestick starting with the candleholder and adding glue around the rim to insert a ribbed ornament.
Then glue on another ribbed ornament. 

Making sure the ornaments are straight and aligned.
At this point, you can add the candleholder to the top by removing the base of the candleholder using the hot knife and .  .  .

gluing it on top of the ribbed ornament for a group of two, or .  .  .
create another one with a group of three ribbed ornaments and candleholder.
But don't stop there! Why not create another candlestick holder, but this time use clear smooth onion shaped ornaments for a total of three bubble candlestick holders! They can be painted to match your decor, too! But I like them clear, for now!
How cool are these creating a stunning display with the set!
I hope you liked this playful and elegant design - a sleek modern take on classic candlesticks!  Be sure to visit all of this month's creative projects by the "Do It Over Designers" listed below:


Thursday, November 14, 2019

Gimp Braid Trim Snowflake Ornament


Gimp Braid Trim Snowflake Ornament
Do you have a thing for handcrafted ornaments? I know I do! I love making christmas ornaments! That's why I participate in the Ornament Exchange Link Party each year that's hosted by Erlene @MyPinterventures!  This year I'm stepping out of my comfort zone and making a snowflake that was inspired from one I saw on Etsy, for my ornament exchange partner, Jeanie @ Create and Babble  

Jeanie and I have similar likes for traditional decor when it comes to ornaments. I think everyone loves snowflakes of just about any type and I hope Jeanie likes this one, too!  I love how the trim and beads adds a touch of vintage charm!  

And the gimp braid trim makes it look far more complicated then it really is. But I can assure you that it's quite easy to make! Here's how!

Materials:
Gimp braid trim - 2+yds
10-12mm beads - 22
Decorative buttons or bling - 2
Hot glue, fabric glue
Parchment paper
Ruler, scissors
Hanger

Steps:

First, cut 6 or 7  ten inch strips of gimp braid. A typical snowflake has 6 arms or points, but when I glued the "arms" to the center, I thought there was too much space showing so I added an extra arm! Lol! They do say each snowflake is unique, don't they?


Next, seal ends to prevent raveling by adding a small dab of glue to the ends and pressing the ends down on parchment paper to seal. Make sure the glue is dry before proceeding.
Then fold the strip in half.
And then fold each side up like a "W"
The measurement using a ruler for the longer sides should be around 3" or a little less. 
Next, fold the sides down - at the 1 1/2 inch mark, making sure the bottom edges are even  .  .  .
and begin  adding a dab of glue in-between the trim sides near the bottom to close together.

making sure you get in be-tween all bottom trim openings. 

Once the bottom side trims are glue together, press down the top loops to open.
Then add a small dab of glue to the inside top middle loop and insert a bead, squeezing the braid together at the bottom of the bead. Do not add glue to the braid below the bead.
Repeat previous steps for adding beads to the right and left loops to form the "arm."
Continue gluing beads into the middle of all the loops in each arm.
Once all the beads are glued in, arrange the arms together for the snowflake to judge how much trim is needed to roll for the center.
To make the center, take a bead and the end of the trim, adding a dab of glue and begin rolling the braid around the bead, adding just a bit of glue as you roll.
Once you've reached the size of the center you need, cut off the excess trim, adding glue to the end to seal.
Begin gluing on the arms by adding glue to the arms' base and pressing firmly to the center. 
Don't you just love how this has taken shape!
Glue on a center bling or button to the front and back or leave as is!

Run  wire twine or ribbon through the middle of the center loop and tie in knot for hanging and it's done!

In addition, as a lovely ornament, this makes for a beautiful gift wrap topper or decorative winter theme accent, too!
Join us by linking up at our 2019 Ornament Exchange Link Party and be sure to check out all of the wonderful Christmas ornament tutorials, too!


Ornament Exchange Link Party

Welcome to the 2019 Ornament Exchange Link Party! It’s the fourth year of the blogger ornament exchange and you'll find hundreds of DIY ornament tutorials and inspiration. This link party runs from November 14th through December 14th, so make sure to come back to add as many handmade ornament tutorials before it closes! 

This year, we have 38 talented bloggers hosting the handmade ornament exchange link party! The rules of the challenge were simple: create a handmade ornament for $15 or under, create a tutorial (all tutorials are linked below), and ship the ornament off to a new home! Add your click to tweet if you have a plugin 2019 Ornament Exchange Long

ORNAMENT EXCHANGE LINK PARTY HOSTS


I made a gimp braid trim snowflake ornament for my exchange partner, Jeanie @Create and Babble this year and she sent me a group of lovely Christmas house ornaments which I truly love! Just click on the links for the complete tutorial!


2019 Ornament Exchange Link Party
Share your handmade ornament tutorial on the link party below ⇓⇓ Add as many ornament tutorials as you like until December 14th.

You are invited to the Inlinkz link party!
Click here to enter

Thursday, October 31, 2019

Buffalo Plaid Dollar Store Ornament DIY


The following is a re-post of an earlier tutorial which was quite popular because Buffalo plaid crafts continue to be quite trendy and faddish. The post was linked to Dollar Store crafts and Buffalo crafts should be highlighted, too!

It's amazing what can be created with items from the dollar store and especially Christmas crafts!  I'm transforming a plain dollar store ornament into a beautiful buffalo plaid trendy showpiece! You've seen those ornaments at the dollar store that have no character - a plain ornament that's quite large and painted in a dull gray color! One that blemishes quite easily! Yuck! 

 And, you won't believe that I'm using left over buffalo plaid fabric from an older dollar store Christmas craft challenge, too! I know, that's sounds a little weird! I didn't realize it at first! But believe me, it's a great way to use up leftover scraps and other dollar store items to make this beauty! 
Materials:
Large Ornament - $
Rubber Bands/Paper Towel/Pencil
Buffalo Plaid Fleece Fabric Scraps - $
Fabri-Tac Glue
Metallic Foil-edge Ribbon - $
Mod Podge
Epsom Salt - $
Glitter/Seed Beads
Hot Glue
Tiny straight pins
7/8" Ribbon - $
Embellishments

Let me start off by saying that it's a bit tricky to cover ornaments evenly and smooth using plaid fabric. I'm not talking about gathering the fabric and tying it together at the top or cutting strips and haphazardly gluing them on. I'm talking about trying to match the lines and pattern - so you'll have a more cohesive finished look.  I've tried it before with no success. Until now, I think! 

And the secret is .  .  . the type of fabric to use. Something that gives so you can stretch it a bit and make it lay flat around curves. 

So let's get started! First, use rubber bands to segment the ornament in order to make a pattern out of the fabric. You can adjust the bands to make the sections even all around.
Next, take a paper towel (it's flexible) and use a pencil lead tip to rub out the outline of one of the sections.
 I tweaked the drawing, making the ends into points and cut it out for a template.
Cut out one section of the fabric and match up the lines or pattern of each additional section with the first section pattern of the fabric. (sorry, I forgot to take a picture of that)
Next, position the first fabric section on the ornament and add fabric glue underneath, along the fabric edges - from one end to the other and smooth out the fabric on the ornament.
For the second section, run a bead of fabric glue along the edge of the first section and partially on the ornament. Take the second fabric piece and match up the pattern (stretching a bit to match) while gluing them together onto the ornament. 
Continue adding sections by running a bead of glue on the edge, 
matching patterns as before .  .  .
until the ornament is completely covered.
I know this isn't a perfect matching of the fabric but it does look cohesive and neat.  
To start embellishing the ornament, 
cut off the metallic flat side edges of dollar store ribbon -
 two to three inches (you judge how long you want them) .  .  .
and form a V shape with the ends, gluing the tip with a dab of hot glue.
Make seven of them!
Next, use tiny straight pins to hold the V shapes in place  .  .  .
while evenly spacing them around the top of the ornament.
This design looks so cool, don't you think!
Next, add a snowy look to the top by mixing Epsom salt, glitter, seed beads and mod podge together.  
Paint on a bit of mod podge to the fabric first before adding the snow
mixture to the top so it will adhere better.
This can get quite messy!
And let dry for a few hours.
Next, tie on a hanging wire loop to the center and glue down the tips of the "Vs" 

Glue on additional embellishments (added smaller V shapes) -  stems, berries, and bow ribbon 
 to complete the look!


Here's a pic of my 2017 Dollar Store Christmas Craft Challenge
 (Plaid Decoupage Candle Holder) on the left with this years'!