
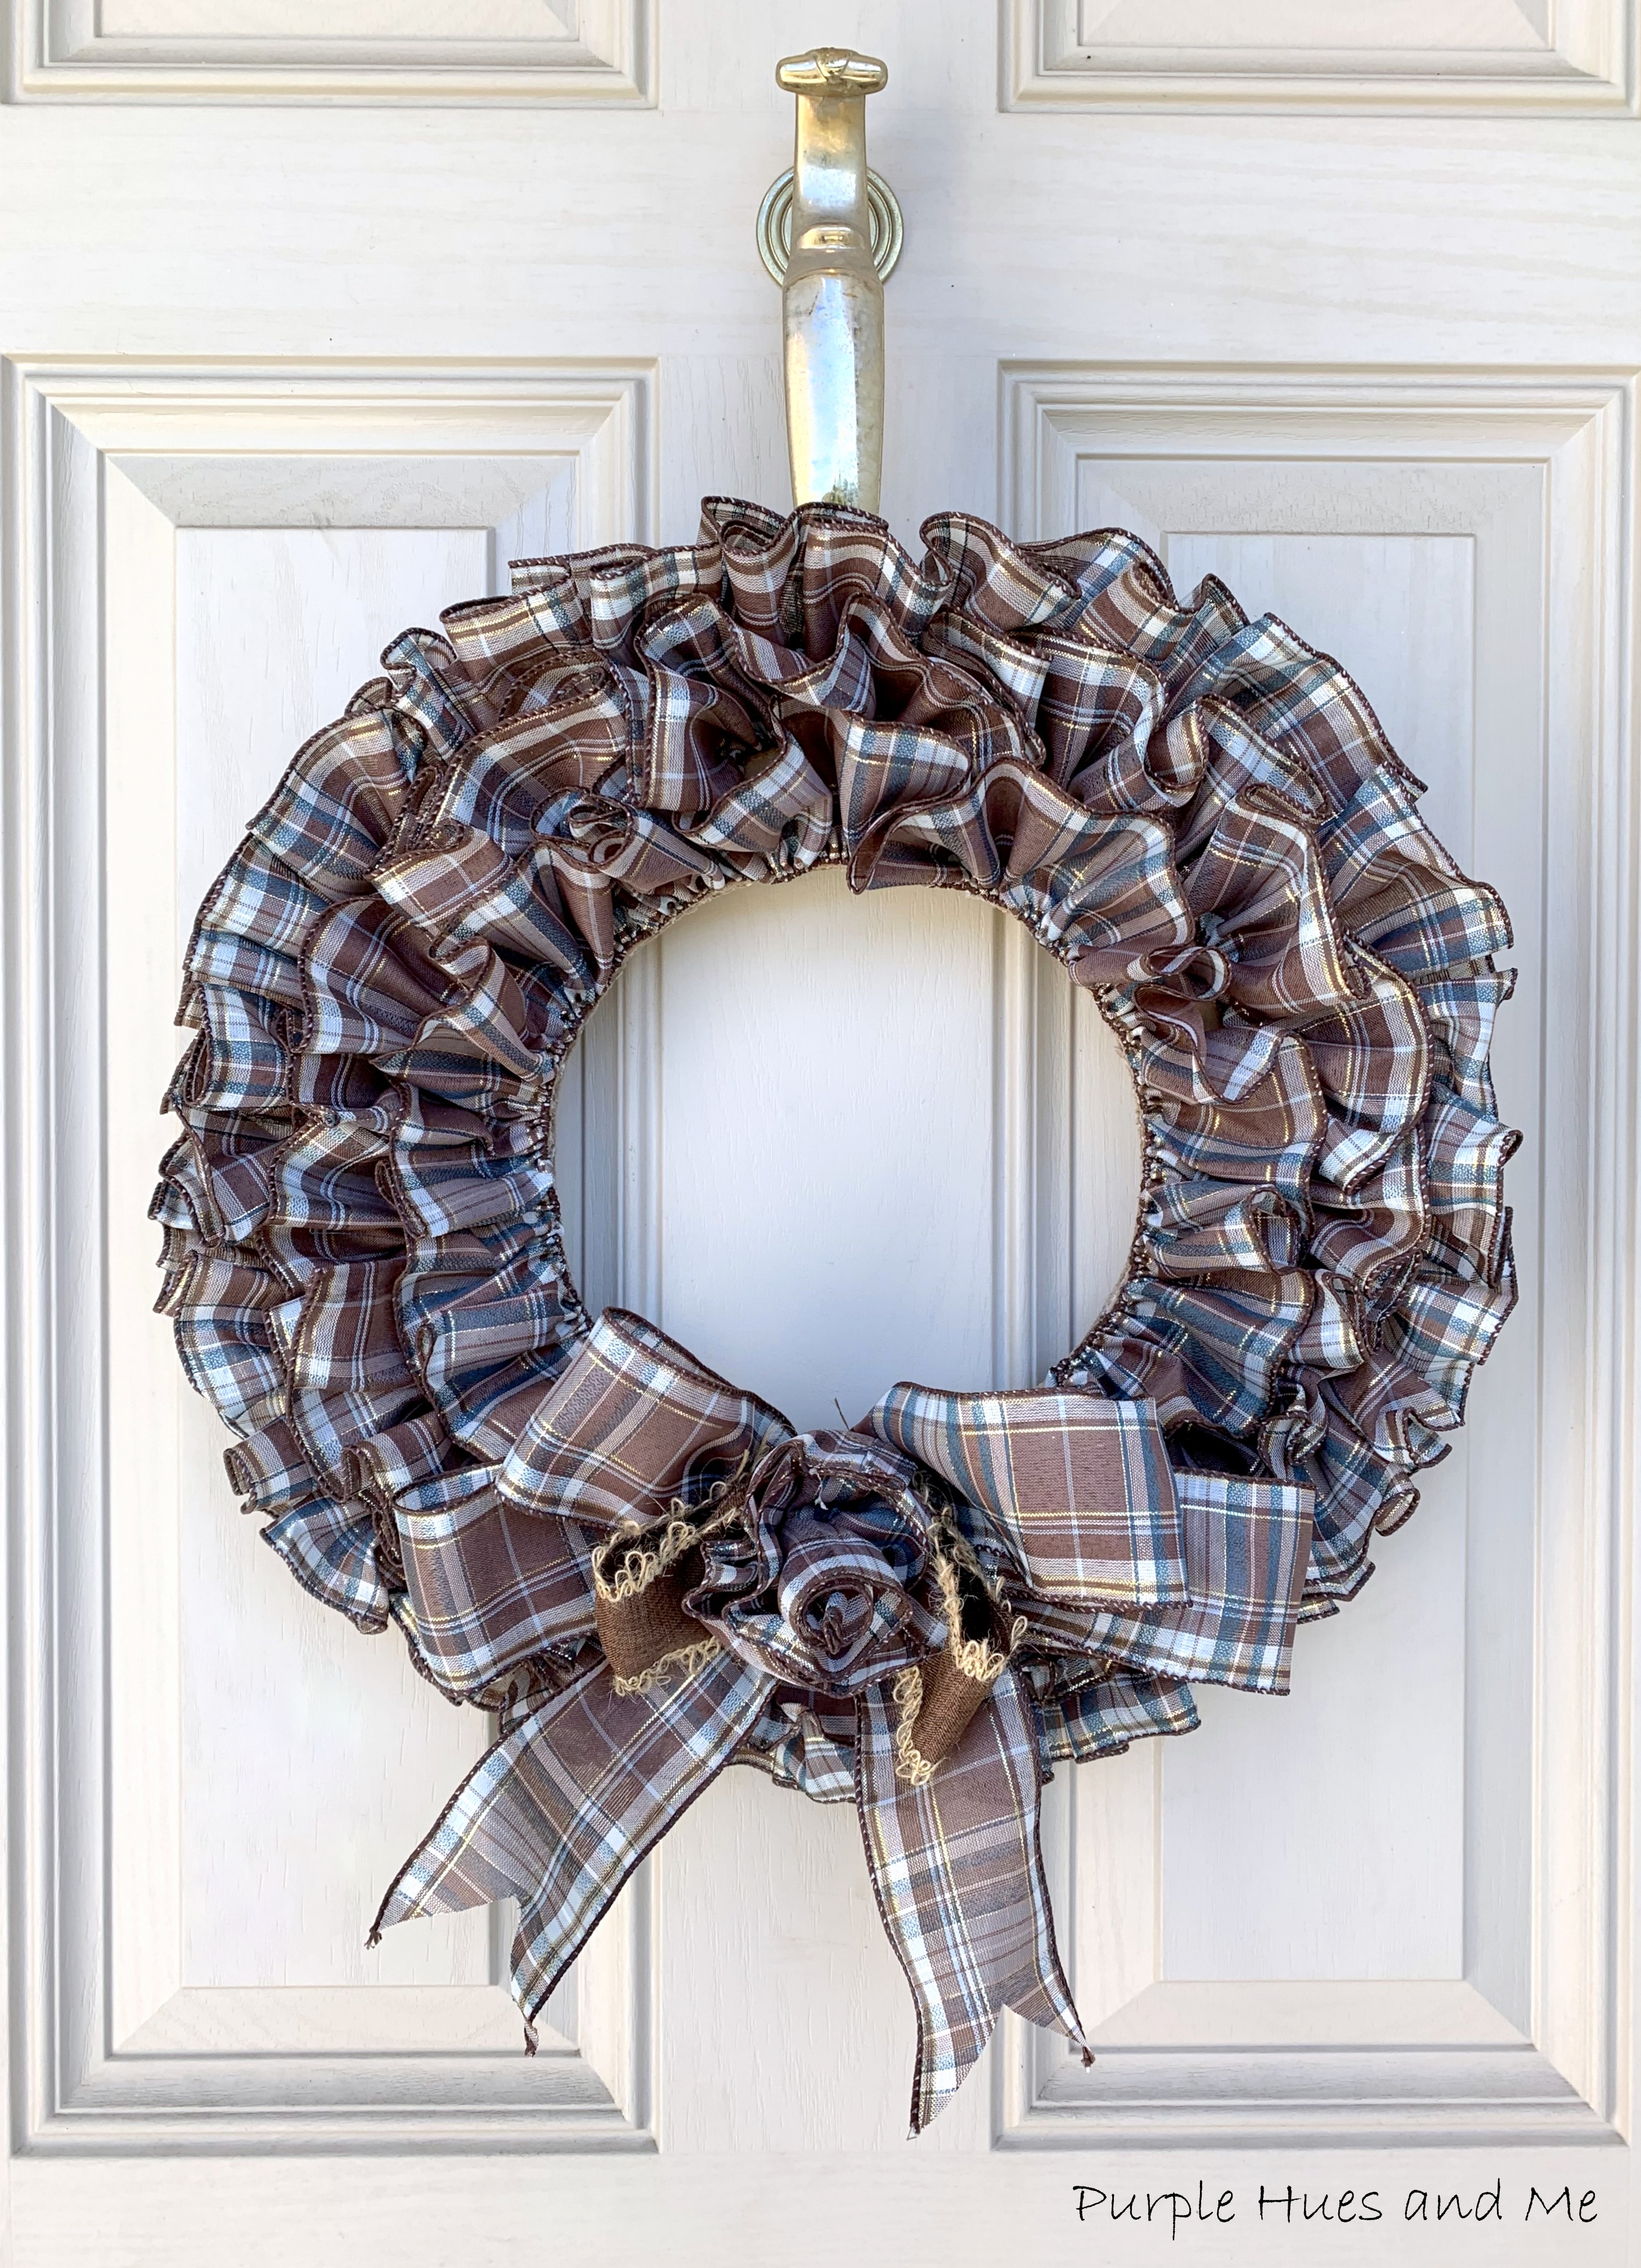
Here's an amazing DIY decorative wreath using ruffle wired ribbon on cardboard adorned with a Bowdabra bow that's topped with a ribbon rosette. How fabulous does that sound! Especially for Fall! This post first appeared on bowdabra.com where I'm on the design team.
To Make, you will need:
- 13" Wood Hoop or bowl
- Ruler
- Cardboard
- Craft Knife
- 2.5" wired ribbon (10+yds)
- Pencil or stick to wrap pulled wire
- Fabri-Tac fabric glue or hot glue gun
- Bowdabra and Bowdabra Wand
- Bowdabra Bow Wire
- 2.5" contrasting ribbon
Let's begin by drawing a 13" circle on cardboard using a 13" wood hoop or any round object such as a cookware top or bowl.

Cut the circle out using a craft knife.


you have the base of the wreath.

To make the first ruffle, leave the wired ribbon on the roll. For this project I had a 50yd roll of wired ribbon from Sam's Club. You need that much! Begin gently pulling out the wire on the top edge to create the ruffles. Use a pencil to wrap the wire around to keep it neatly together.


until the edge is completely covered with the ruffle.


Glue on a hanging loop at the top center back using Bowdabra wire secured with a strip of ribbon that's glued on.

Fold a 18″ length of bow wire in half and place in the Bowdabra, tucking ends under. Leaving the wired ribbon on the roll, pinch the ribbon in the center and twist down into the Bowdabra, leaving six inches for the tail. Create a 6.5" loop by folding over the ribbon, twisting the ribbon down into the Bowdabra smoothing the ribbon out.

On the opposite side, fold over the ribbon creating another loop, twisting the ribbon down into the Bowdabra. Match the size of the loops by holding up the loops along the tower of the Bowdabra.


Add contrasting ribbon loops by taking an 18" piece of 2.5" ribbon, pinching the end down into the Bowdabra. Make a 3.5" loop twisting down into the Bowdabra.

Then make a 3.5" loop on the opposite side, twisting down into the Bowdabra.

 While the bows are still in the Bowdabra, thread the two loose ends of the bow wire through the loop, pulling tightly, gently pulling it out.


And finally, glue on bow to the middle bottom of the ruffle ribbon wreath for a Fabulous Fall look!


What a cool idea!
ReplyDeleteThanks so much, Bindu!
DeleteHola, cuanto tiempo sin leerte. Me encanta volver a encontrarte. Tu corona es preciosa y como siempre un magnifico tutorial.
ReplyDeleteBesos
Hi Lola! Where have you been? I have been trying to get on your site many times but can't. I miss you, too! Thanks so much for your sweet comment and for stopping by!
DeleteThis DIY ruffle ribbon wreath is a beautiful and easy-to-follow project for fall decor. The step-by-step instructions are clear and easy to follow, making it a fun and rewarding project. Gathering all necessary supplies in advance ensures a smooth crafting process. If you have any questions or need suggestions for specific materials, feel free to ask. The detailed instructions make the process straightforward and enjoyable. The wreath will look fantastic as part of your fall decorations. If you need additional guidance or tips, don't hesitate to ask. The author is here to help and would love to hear about your experience making this beautiful fall wreath. divorce lawyers richmond va
ReplyDeleteThe best thing about pots and planters is how easy it is to update your greenery with the seasons. Just swap out the plants and refresh your setup.https://hibernateoutdoors.com.au/
ReplyDeleteWhat I love about landscaping fairfield gardens is how much greenery the suburb already has—good design just brings it all together. Native plants and soft paving work really well here.
ReplyDeleteCan anyone recommend a certified rtt therapist near me? I’d prefer someone experienced with stress and self-esteem issues.
ReplyDeleteParents also seem to appreciate how streamlined the process becomes. The preschool enrollment software makes enrolment feel modern and stress-free instead of requiring piles of forms and emails. https://www.enrolnow.com.au/
ReplyDeleteEvery stylist is talented and attentive. The highlights naples fl improved my hair’s texture, giving it a polished, glossy finish that looks and feels amazing.
ReplyDeleteI love how this tutorial breaks down the wreath-making process into simple, easy-to-follow steps while creating such a beautiful fall decoration. Creative projects like these can be a wonderful way to relax and spend meaningful time with loved ones. Strong connections matter, and relationship counseling cincinnati can help couples strengthen communication and build healthier relationships through every season of life.
ReplyDelete