It's that time again - The Thrift Store Upcycle Challenge on the fourth Thursday of the month, where a group of creative bloggers come together to share their lovely transformations of a thrift store item. Who doesn't love thrift store upcycle projects - whether it's actually creating one or admiring how an item from a thrift store was transformed!
This post contains links to products, if you purchase something after clicking on my link I may earn a small commission to help with my craft expenses (at no extra cost to you).Thank you!
The Rules:
- Upcycle an item(s) from a thrift store, resale store, or garage sale into a new piece of decor.
- There’s no monthly theme.
- There’s no budget to stick to.
Be sure to visit all of my co-hosts listed below to see what they transformed!
Gathered:
- Unfinished wood circle shape
- Unfinished wood pedestal stand
- Dap RapidFuse Multi Purpose Adhesive
- FolkArt HomeDecor Cottage White Chalk Paint
- Flower design (laser printed)
- Small detail scissors/paint brushes
- Mod Podge
- Varnish Sealer
Begin by wiping down the wooden bowl with a soap and water dampen cloth to remove any dirt and grim and let dry. You really don't need to sand the finish since I'm covering it with chalk paint.
Next, painted the entire pedestal bowl in a soft white chalk paint.
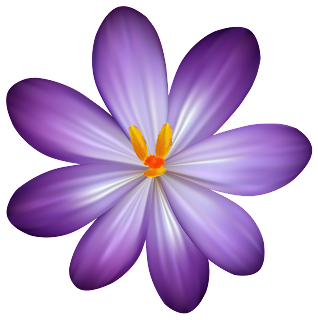
I love the look of hand painted motifs on bowls and trays so I found this free to download flower design online that appeared to be hand painted. While the painted pedestal bowl was drying, I re-sized the image into several different sizes - and printed them out using a laser printer. *Can't use a jet ink printer for this - the color will bleed!
After cutting the flowers out, I positioned them on the dry pedestal bowl starting at the base. Then, I painted Mod Podge on the flowers to make them pliable and easily movable, placing them in position and smoothing out any wrinkles . . .
while brushing on more Mod Podge - and adding flowers up and over the edge into the center bowl. Repeating the process of adding decoupage glue, smoothing out and letting it dry!
Once dry, applied additional coats of Mod Podge to the flowers and then let dry completely.
And finally, applied a varnish to seal it all!
What a wonderful way to re-style a thrift store wooden bowl!
It's definitely a winner!
Have fun in transforming your thrift store finds to fit your style and taste!
Meet the Co-Hosts
Angela | Simply Beautiful by Angela Jennifer | Cookies Coffee and Crafts
Gail | Purple Hues and Me Yami | The Latina Next Door
Amanda | Domestically Creative Ann | Duct Tape And Denim
Debra | Shoppe No. 5
Victoria | Dazzle While Frazzled Shirley | Intelligent Domestications
Chelc | Inside the Fox Den Habiba | Craftify My Love
Make sure you follow our board on Pinterest for more upcycled decor inspiration!


Beautiful! I love the purple flowers! What a great way to reuse the bowl.
ReplyDeleteOn first glance I thought, that you've Hand painted those Darling flowers. AFter reading your instructions I know you didn't and that gives me the believe that I can create a wonderful thing like that, too. Because no way could I recreate those wonderful purple flowers. Thank you for sharing your creative DIY.
ReplyDeleteGail this is so pretty!! I had no idea those flowers were decopauged on, they look like you painted them! Love this idea of adding a pedestal to a thrifted bowl, now you have a beautiful piece to decorate with.
ReplyDeleteWhat a pretty project! Like the other commenters above, I thought you had painted the flowers when I first saw the first picture (which I'm sure you could, you are so talented). Hey, I was looking at the site "Diply" yesterday and I saw they had featured you in a DIY roundup. They had your decopauged woven basket...so cute.
ReplyDeleteGail, I love this wooden bowl project that you done! How pretty! Hugs and blessings, Cindy
ReplyDeleteUn bonito y fantastico trabajo, realizado, como siempre, con gran maestría
ReplyDeleteBesos amiga
This is really cute Gail!! I am definitely going to try this!!
ReplyDeleteJenna
Gail, this turned out so beautifully! Those purple flowers are amazing and so easy to add!
ReplyDeleteI really love how you recreated this thrift store bowl. It is gorgeous.
ReplyDeleteNow I'm sad that I only have an inkjet printer. But I bet I can find some great paper napkins that would give me a similar result. Great project; great tutorial. P.S.: Purple is my favorite, too!
ReplyDeleteTotally impressive Gail. You have really transformed this bowl. It looks beautiful. You should have been on that new craft show with all of your talents.
ReplyDeleteI love the upcycle. The flowers look like they were hand painted. Love your creativity. Thanks for the inspiration, and sharing on Sunday's Best.
ReplyDeleteSo lovely Gail, it looks like a work of art
ReplyDeleteOh I love this, Gail, so pretty! The flowers look handpainted :) Pinned
ReplyDeleteHow did I miss this post? Your transformation is incredibly clever! I love the finished project! Well done! -Marci @ Stone Cottage Adventures
ReplyDeleteGreat Post! Thanks for your share! We are Wholesale Satin Ribbon Supplier that you can get ribbons with 196 colors and 19 sizes with the best deal from!
ReplyDeleteThis article was so practical, I’ll be using these tips right away.
ReplyDelete